Chromebook Basics
A Chromebook is a simple, affordable laptop that lives on the internet. Instead of programs you install, almost everything happens in the Chrome web browser — email, websites, video calls, photos, and documents. It turns on fast, updates itself, and is very hard to break. It is a wonderful choice if your computer life is email, the web, and video calls — and not the right choice if you need heavy programs like full desktop publishing or specialized software.
Your screen, in three parts
Everything on a Chromebook starts from the bar at the very bottom of the screen. It is called the shelf, and it has three parts:
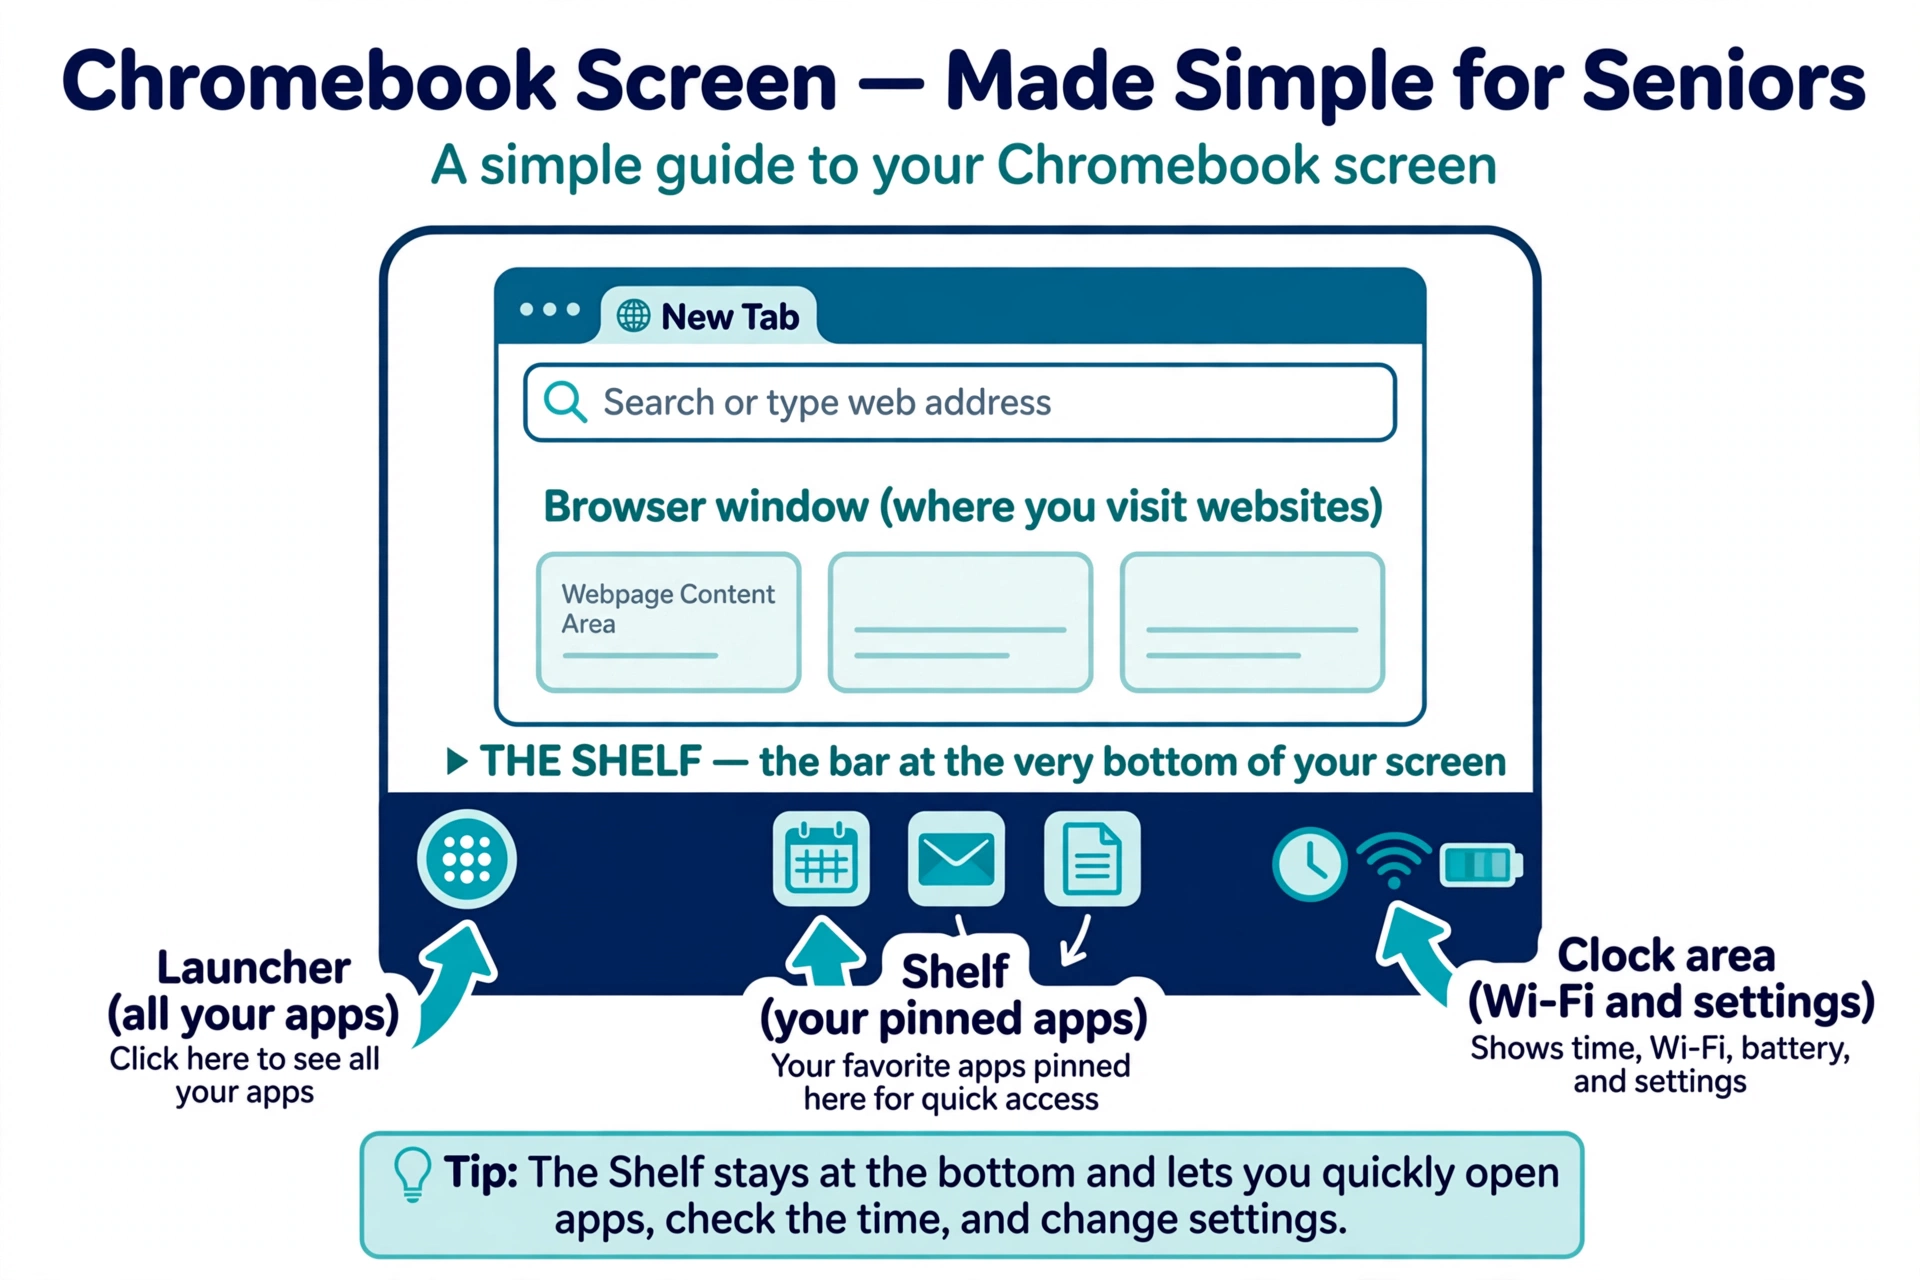
- The circle (bottom-left): this is the Launcher. Click or tap it to see every app on your Chromebook.
- The middle of the shelf: your pinned apps — the ones you use most. To add one, open the Launcher, right-click the app, and choose Pin to shelf. To remove one, right-click it on the shelf and choose Unpin.
- The clock area (bottom-right): this is Quick Settings. Click the time to see your Wi-Fi, battery, the Settings gear, and the power button.
Watch it happen: Chromebook video tutorials
Not everyone learns the same way — so here is the Chromebook in motion. Each narrated video below walks you through a real task happening on the screen, step by step. Press play and follow along, or drag the scrub bar to jump to any step and pause there as long as you like.
Video 1 — tour of your screen
Three parts, one bar along the bottom. Watch each part light up, then find it on your own Chromebook.
Written steps — tour of your screen
- Look at the bar along the very bottom of your Chromebook screen. It is called the shelf, and it never goes away.
- The circle on the left is the Launcher. Click it to see every app on your Chromebook.
- The middle of the shelf holds your pinned apps — the favorites you open with one click.
- The clock area on the right is Quick Settings. Click the time to reach Wi-Fi, battery, Settings, and the power button.
Video 2 — opening apps
The Launcher is your app drawer. Open it, find what you want, and pin your favorites so they are always one click away.
Written steps — opening apps
- Click the Launcher circle at the bottom-left of the screen. Every app on your Chromebook appears.
- Find your app two ways: type its name in the search bar at the top, or scroll the grid of icons.
- Click the app's icon to open it. It opens in its own window, like Gmail above.
- Close any window with the X in its top-right corner.
- Pin a favorite: open the Launcher, right-click the app (two-finger tap on the touchpad works too), and choose Pin to shelf. To remove one later, right-click it on the shelf and choose Unpin.
Video 3 — using the web
Chrome is your home base. The address bar takes you anywhere, and tabs let you keep several pages open at once.
Written steps — using the web
- Open Chrome: click the Chrome circle on the shelf. This is your web browser — your home base.
- Go anywhere: click the address bar at the top, type a web address like gmail.com, and press Enter. You can also just type words — it searches Google for you.
- Open a second tab: click the plus sign (+) next to your tab. Now two pages are open at once.
- Switch tabs by clicking the one you want at the top.
- Close a tab with the little x on that tab. Closing tabs does not close Chrome — the browser stays open until you close its window with the big X at the top-right.
Video 4 — Wi-Fi and settings
Everything behind the scenes lives behind the clock. Connect to Wi-Fi, open Settings, and shut down — all from one spot.
Written steps — Wi-Fi and settings
- Click the time in the bottom-right corner. The Quick Settings panel opens.
- Connect to Wi-Fi: click Wi-Fi, click your network's name, type the Wi-Fi password carefully, and click the button to join. You only do this once — it remembers.
- Brightness and volume have their own sliders right in the panel — drag the white dot.
- Open full Settings with the gear icon. To check for updates, go to About ChromeOS and click Check for updates.
- Shut down: click the time, click the power button, and choose Shut down. Most days you do not need this — closing the lid puts the Chromebook to sleep, and opening it wakes it right back up.
The Launcher: all your apps in one place
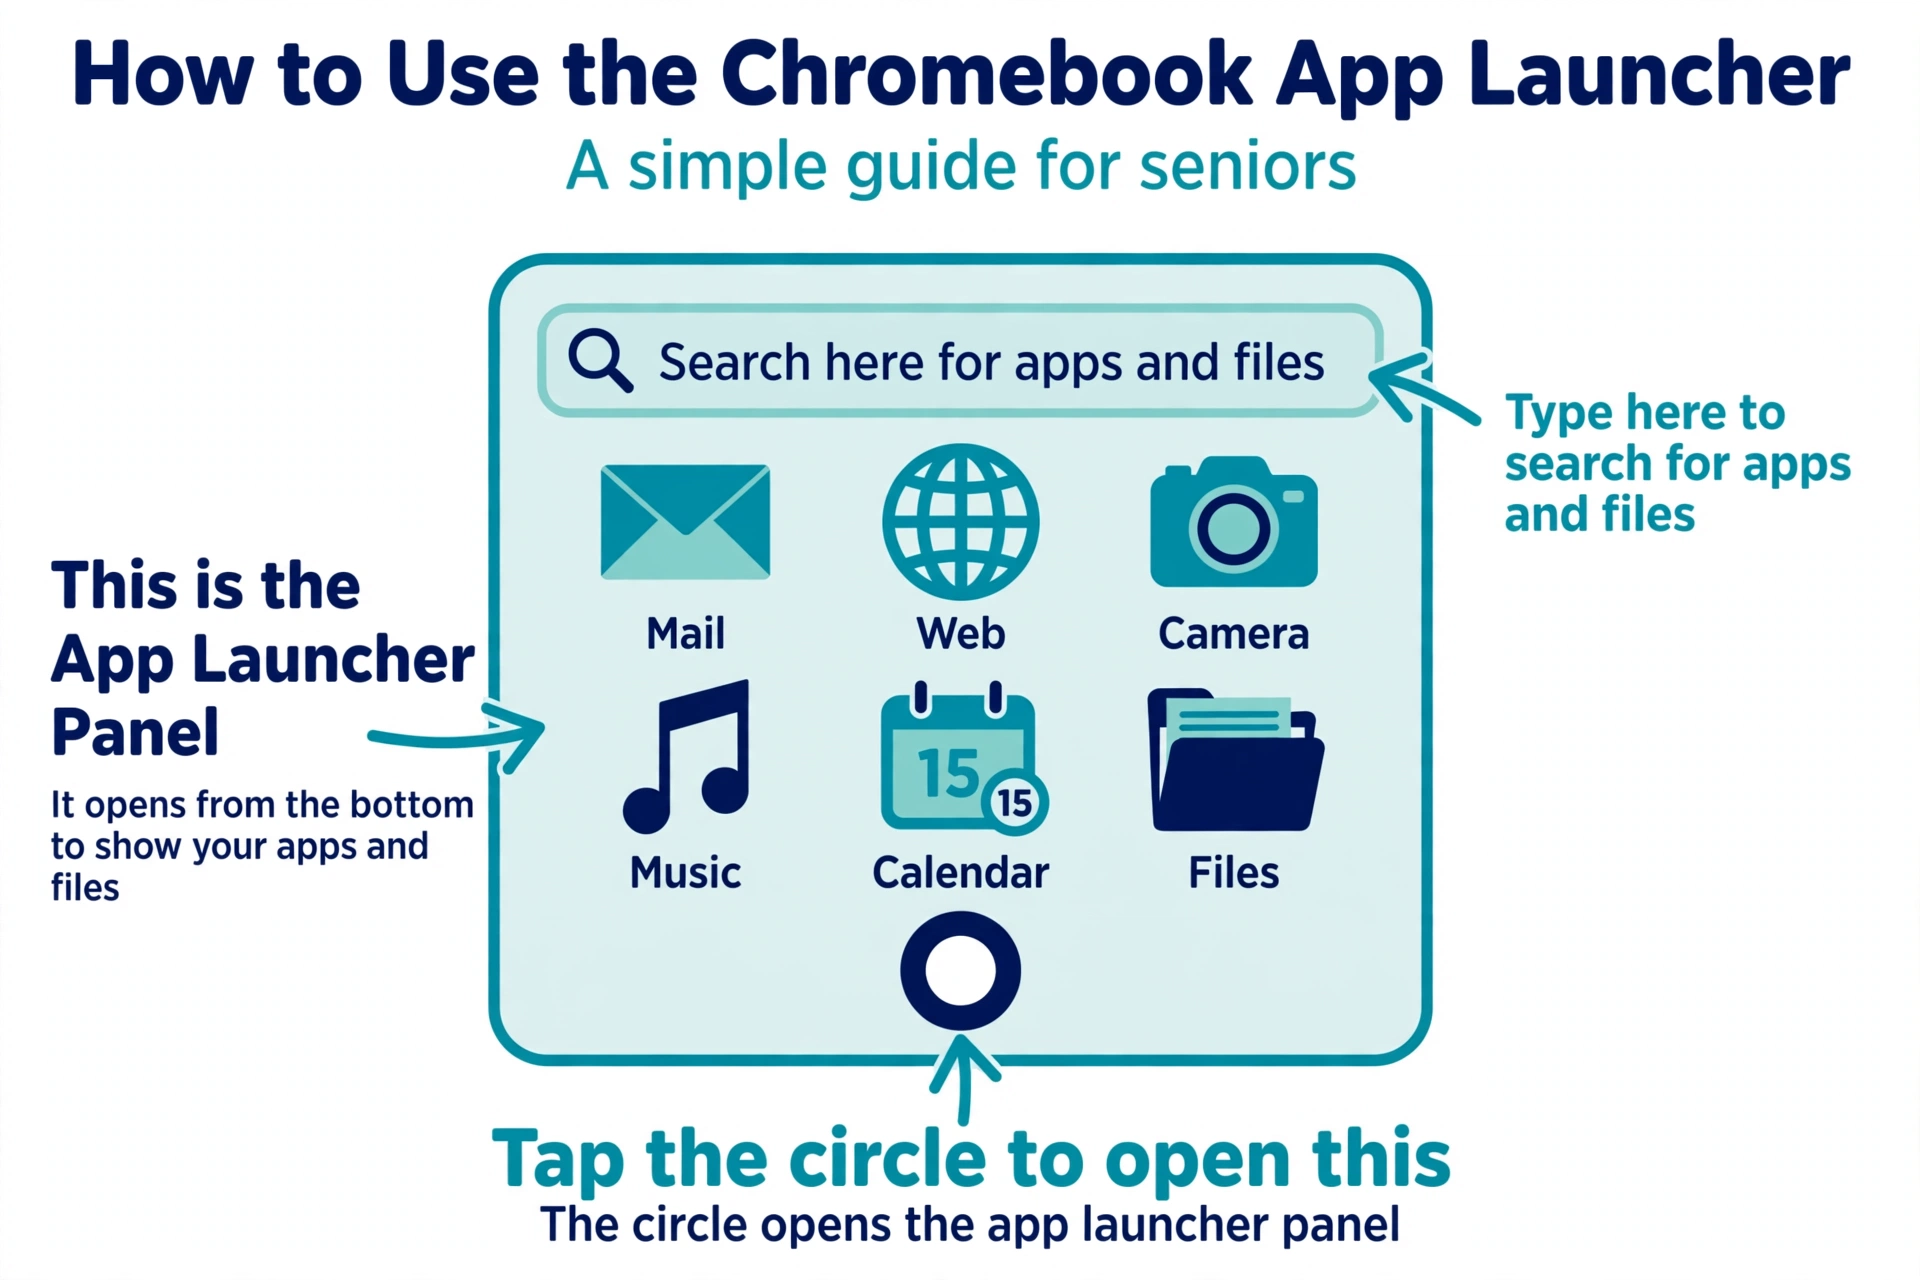
- Lost an app? Open the Launcher and type its name in the search bar at the top. It finds apps, files, and even websites.
- The Chrome browser is your home base. Almost everything on a Chromebook — Gmail, photos, documents, video calls — opens in Chrome, just like websites.
Everyday tasks
Connect to Wi-Fi: click the time in the bottom-right corner, click Wi-Fi, choose your network name, and type the password.
Open Gmail or a website: open Chrome from the shelf, type gmail.com (or any address) in the bar at the top, and press Enter.
Install an app: most modern Chromebooks include the Google Play Store — the same app store as Android phones. Open it from the Launcher, search for the app you want, and click Install. It will appear in your Launcher. Don’t see it? Open Settings → Apps and turn on the Google Play Store — then it appears in the Launcher.
Sleep or shut down: closing the lid puts it to sleep — that is all most people ever need. To fully shut down, click the time in the bottom-right corner, click the power symbol, and choose Shut down.
Updates take care of themselves: a Chromebook downloads and installs its own updates in the background. If you ever want to check, open Settings and go to About ChromeOS, then Check for updates.
The one date every Chromebook owner should know
Updates take care of themselves — but only until a fixed date. Every Chromebook has an update-expiry date (Google calls it the Auto Update Expiration, or AUE): after that date, Google stops sending updates, including security fixes. The Chromebook keeps working, but it slowly becomes less safe for banking and shopping, and some websites eventually stop working on it.
Check your date: open Settings → About ChromeOS → Additional details. The date is printed there in plain words. Newer Chromebooks are covered for up to ten years — counted from when the model first went on sale, not from the day you bought it.
Why this matters when buying: a very cheap or used Chromebook may have only a year or two of updates left — or none at all. Before buying any Chromebook, especially a bargain or second-hand one, look up that exact model’s expiry date (Google publishes the list; ask Sean and he can check it in a minute). A Chromebook whose updates have already ended is no bargain at any price.
Honest limits of a Chromebook
- It needs the internet for most things. A few apps can be set up to work offline, but a Chromebook is happiest on Wi-Fi.
- Printing works fine. Open Settings (click the time at the bottom-right corner, then the gear icon), then go to Device, then Printers and scanners — if your printer is on the same Wi-Fi, click Save next to it. Then press Ctrl + P anywhere to print.
- Not the right choice if you need heavy Windows or Mac programs, specialized work software, or serious gaming. For email, web, photos, and video calls, it is plenty.
When to call Sean instead
- Choosing between a Chromebook, a Windows laptop, or an iPad.
- Setting up a new Chromebook with your email and Wi-Fi.
- A printer that will not connect to the Chromebook.
- Moving your photos and files from an old computer.
Address bar Go anywhere: click the address bar at the top, type a web address like gmail.com, and press Enter.
Check for updates Check for updates keeps your Chromebook current and safe. Go to About ChromeOS and click Check for updates.
Right-click Pin a favorite: open the Launcher, right-click the app (two-finger tap on the touchpad works too), and choose Pin to shelf.
Shelf The shelf is the bar along the bottom of a Chromebook's screen — the circle on the left opens all your apps, the middle holds favorites, and the clock sits on the right.
Straight 2 Work Tech, LLC — patient, plain-words tech help.
(813) 770-6082