Here is the whole library. Every lesson is written in plain words. Tap any topic below, or scroll the page to browse them all.
Guides for sale — $2.99 each
Videos
Tech Basics
The everyday skills everyone needs: keyboard, search, text size, and files.
Turning on your devices
Every device wakes up the same way: find the power button, press it, and wait a moment. But that button lives in a different spot depending on your device — find yours below.
iPhone
The button is on the right edge — Apple calls it the Side button. (On very old iPhones, the 5s and earlier, it is on the top edge instead.) Press and hold it until the white Apple logo appears, then let go.
Android phone — Samsung, Pixel, Motorola
The power button is on the right edge, usually just above or below the volume buttons. Press and hold it until the screen lights up. On newer Samsung phones, holding the power button alone may wake the voice assistant instead — if that happens, hold the power and volume-down buttons together for the power menu.
Computer
On a desktop, the power button is on the front of the tall box (the tower). On a laptop, it is above the keyboard or on the side edge. Press it once and listen — the soft hum of the fan means it is waking up.
Television
Point the remote at the TV and press the power button at the top. You can also press the small button on the bottom edge of the TV itself.
The Side button. This is the button on the right edge of an iPhone — press and hold it to turn the phone on. (The longer button below it is Camera Control. It opens the camera; it does not turn the phone on.)
Charge it first. A dead battery is the most common reason a device will not turn on. Plug it in, wait ten minutes, then try again.
Android: hold the power button and the volume-down button together for at least 7 seconds, until the logo appears, then let go and wait. On a Google Pixel, hold the power button alone for about 30 seconds instead.
iPhone: press volume up, then volume down, then hold the Side button until the Apple logo appears. (Holding the Side button alone only calls up Siri.)
Pressing the power button is always safe to try.
The buttons on the side
Two or three small buttons do almost everything on a phone: power, volume up, and volume down. One rule covers them all — tap for now, hold for more. But what "hold" does depends on your phone — find yours below.
A quick press — every phone
A quick press of the power button turns the screen off or on. The phone keeps working underneath — calls still come in, alarms still ring. Think of it as closing your eyes, not going to sleep.
Press and hold — iPhone
Holding the Side button (right edge) calls up Siri, the voice helper. To turn the phone fully off or restart it, hold the Side button together with either volume button (left edge), then slide the on-screen switch to power off.
Press and hold — Android
Holding the power button (right edge) opens a menu with Power off and Restart. This is how you turn the phone fully off, or restart it when something acts up. On newer Samsung phones, if holding the power button wakes the voice assistant instead, hold power + volume down together for the same menu.
Volume up and down — every phone
These change whatever sound is playing right now — music, a video, a call. On the lock screen, with nothing playing, they change the ringer instead — the ringer is the sound your phone makes when someone calls.
Volume and Action buttons. Left edge of an iPhone: the small Action button on top, volume up and down below it. (iPhone 15 base model and older have a mute switch here instead.)
iPhone: the Side (power) button is on the right edge; the two volume buttons are on the left edge.
Android (Samsung, Pixel, Motorola): the power button and the volume buttons are all on the right edge, usually with volume above or below power. The exact order varies a little by brand — that is normal.
Pull down notifications and settings
Your phone hides its handiest screens at the top edge — your messages, and a panel of quick on/off buttons. iPhone and Android get there differently, so find your phone below.
iPhone — your messages
Swipe down from the top of the screen. (On iPhones with no Home button, start from the top-left or center — the top-right corner opens your quick buttons instead.) Your messages and alerts appear in a list. Tap one to open it. Swipe one sideways to clear it away.
iPhone — quick buttons
This panel is called Control Center. On iPhones with no Home button (iPhone X and newer): swipe down from the top-right corner. On iPhones with a Home button (iPhone 8 and older): swipe up from the bottom edge. You get buttons for Wi-Fi, Bluetooth, and the flashlight — tap one to turn it on or off.
Android — your messages
Put your finger at the very top of the screen and swipe down. Your messages and alerts appear in a list. Tap one to open it. Swipe one sideways to clear it away.
Android — quick buttons
Your quick buttons — Wi-Fi, Bluetooth, the flashlight — live one more swipe away. Swipe down from the top a second time and they appear as a grid of round buttons. Tap one to turn it on or off. (On newer Samsung phones, swiping down from the top-right corner jumps straight to the buttons.)
The Settings app — every phone
For everything else, open the Settings app — the gray gear icon on your home screen or app list. Every switch for your phone lives here: sound, display, Wi-Fi. Whenever you wonder "where do I change this?" — the answer is almost always Settings.
Quick settings. This is what the quick buttons look like on an Android phone — tap the Flashlight tile to turn the light on or off. Newer phones arrange the tiles a little differently, but they work the same way.
iPhone: open Control Center and tap the flashlight button — your light turns on. Tap it again to turn it off.
Android: swipe down from the top twice, tap the Flashlight tile, and watch your phone's light turn on. Tap it again to turn it off. That is the whole move — you just learned the shade.
It handles the work and affects how quickly everything responds.
Chip names, decoded:
Intel i3, i5, i7, i9 — the bigger the number, the faster.
Intel Core Ultra 5, 7, 9 — Intel’s new name for the same class of chips (2024 and newer); same idea, bigger number = faster.
Intel Celeron, Pentium — Intel retired these names in 2023; today's budget laptops are labeled "Intel Processor" instead. Either way they are cheaper and slower; will feel sluggish. Worth avoiding if you can.
AMD Ryzen 3, 5, 7, 9 — same idea as Intel’s i3, i5, i7, i9.
AMD Athlon — their budget line; same warning as Celeron.
Qualcomm Snapdragon X — in newer Windows laptops; fine for everyday use with great battery life. Uses ARM architecture, so a few older programs and accessories won’t run — check before you buy.
Apple M1, M2, M3, M4, M5 — higher number means newer and faster; any of them is plenty.
Rough speed comparison: how much faster each chip is than a basic budget chip. Longer bar = faster.
Celeron, Pentium, Athlon1x
Intel i3about 2x
Intel i5, i7about 2.5x
AMD Ryzen 5about 3x
Apple M1, M2about 3x
Intel Core Ultraabout 4.5x
AMD Ryzen 7about 4.5x
Apple M4about 4.5x
Snapdragon Xabout 4.5x
Intel i9about 5x
AMD Ryzen 9about 5.5x
Speeds are approximate, based on PassMark speed tests of typical laptop models. Your exact model and year will vary, but the order stays about the same.
For everyday use (email, photos, video calls, browsing), an i5, a Ryzen 5, or any Apple M chip is plenty.
Think of ports as the places where things plug in. Here are the ones on modern computers.
USB-C — the small rounded oval on newer devices. Plugs in either way, charges much faster, and moves photos and files much faster. One cable can often handle charging, accessories, and even a monitor.
USB-A — the classic flat rectangle. Still on most computers for flash drives, printers, and mice.
HDMI — the wide plug that connects a computer to a TV or monitor.
Thunderbolt — looks exactly like USB-C but faster. Common on Macs and nicer Windows laptops; great for docking stations.
Ethernet — the wide phone-jack-looking plug for wired internet. Faster and steadier than Wi-Fi when you can plug in.
Headphone jack — the small round hole for wired earbuds or speakers.
SD card slot — a thin slot on many laptops for camera memory cards; the easy way to move photos.
Think of it as a rechargeable flashlight. Every phone, tablet, and laptop runs on a lithium battery.
Two things to know:battery life is how long one charge lasts (aim for 10+ hours on a laptop); a battery cycle is one full 100% charge used up. Batteries wear a little with every cycle, and heat wears them fastest. If your old device dies at 40%, the battery is worn — a new battery is often cheaper than a new device.
Keep devices cool — heat is the #1 battery killer
Battery types
Two names you will see on the box. The good news first: they are both the same basic lithium technology, and both are good.
Lithium-ion
The classic rechargeable battery. It packs a lot of power for its size and cost, and it holds up well over hundreds of charges. The cells are usually stiff cylinders or flat rectangles in a hard case. You will find this kind in many laptops and power tools.
Lithium-polymer
The thin, light cousin. Same lithium chemistry, but wrapped in a soft pouch instead of a hard case. That pouch can be made paper-thin, which is why modern phones and tablets are so slim. Most phones and tablets today use this kind.
Everyday habits for a longer-lasting battery
Keep it cool. Heat wears batteries faster than anything else. Do not leave a phone or tablet on a sunny car dashboard or next to a heater.
Charge when it suits you. You do not need to drain the battery to zero first — that rule belonged to old battery types. Topping up during the day is perfectly fine.
Do not store it dead. Putting a tablet away for months? Leave it about half charged, not empty and not full.
Use the charger it came with, or a good-quality replacement from a brand you recognize.
Know the numbers. Apple designs iPhone 15 models to keep about 80% of their original charge after 1,000 full cycles; iPhone 14 and earlier models are rated for 500 cycles. Most laptops are built for several hundred up to 1,000 cycles. When a device dies quickly even after a full charge, the battery is simply worn — and swapping a worn battery is hands-on work best left to a repair shop.
Memory or RAM The workspace
Think of it as your desk. A larger desk gives you more room to keep several things open at once.
Why it matters to you: More memory helps when you use many programs or browser pages together.
Good target: 16GB on a computer · 8GB on a tablet
DDR4 vs DDR5: two generations of memory. DDR5 is newer and faster; DDR4 is older but still fine. They don’t mix — a DDR4 computer can’t use DDR5 memory.
Think of it as a filing cabinet. This is where your photos, documents, programs, and videos stay.
Types of storage drives:
Old hard drive (HDD) — has spinning disks inside. Pro: cheapest way to get lots of room. Con: slow, and easier to break if bumped or dropped.
Solid state drive (SSD) — no moving parts, like a giant USB stick. Pro: much faster — computer starts in seconds and programs open quickly; tougher, too. Con: costs more per gigabyte.
M.2 NVMe drive — a newer, smaller SSD that plugs straight into the board. Pro: the fastest kind in most new computers. Con: costs the most.
Bottom line: when you buy a computer today, get one with an SSD — a spinning hard drive will feel slow.
Think of it as the device’s way of working. It controls the menus, programs, and everyday feel.
WindowsRuns on most brands of computers — Dell, HP, Lenovo, Acer, Asus, and more. The widest choice of programs, and the most common system in homes and offices.
macOSRuns only on Apple Mac computers. Works closely with iPhone and iPad — your photos, messages, and calls flow between them.
iPadOS and iOSRun Apple’s iPads and iPhones. Simple, touch-friendly menus, and apps come only from Apple’s App Store, which keeps things safer.
AndroidRuns most non-Apple phones and tablets, including Samsung and Google Pixel. More choice of devices and prices; apps come from the Google Play Store.
LinuxA free system used mostly for servers and by techs — not something most people ever need.
ChromeOSRuns on Chromebooks — simple, affordable laptops where everything happens in the Chrome browser. A good fit if you do everything online.
Why it matters to you: The best choice is often the one that feels familiar and works well with the devices you already use.
The CPU is the brain of your computer. A faster CPU means programs open quicker and everything feels snappier. You will see names like Intel or AMD when you shop — either is fine for everyday use.
RAM (random access memory) is your computer's short-term memory. More RAM lets you keep more apps and browser tabs open at once without slowing down. Eight gigabytes is plenty for most people.
The motherboard is the big flat board inside your computer that everything plugs into. You never need to touch it — just know the name in case a repair person mentions it.
A disk drive is where your files live even when the power is off. Most new computers use a fast, silent kind called an SSD with no moving parts inside.
A byte is a tiny piece of computer storage. About a thousand bytes makes a megabyte (MB) — one photo is usually 2 to 5 megabytes. A thousand megabytes makes a gigabyte (GB).
Restarting Fixes More Than You'd Think
Turning a device fully off and back on again clears out the small glitches that build up while it runs, and it fixes a surprising number of everyday problems. It takes two minutes, it cannot hurt anything, and it is almost always worth trying before anything else. A proper restart means the device goes completely off — not just asleep — and then comes back on fresh.
Why it works
Think of your phone or computer like a desk where you work all day. Papers pile up, drawers get left open, and after a while you cannot find anything. While a device runs, it keeps dozens of little jobs going at once, and over days or weeks some of those jobs get tangled up with each other. The screen freezes. Sound stops. An app refuses to open.
Restarting is like clearing the desk completely and starting the morning fresh. Everything stops, the tangles are thrown away, and the device loads only what it needs. That is why the same device that was acting strange five minutes ago often works perfectly right after a restart.
Restarting does not delete your photos, your contacts, or anything you have saved. Those live in the device's storage, which stays put whether the power is on or off. All a restart clears is the temporary working mess.
The right way to restart a phone
Press and hold the power button until a menu or slider appears on the screen.
Choose "Power off" or slide the "slide to power off" bar. Wait for the screen to go fully black.
Wait a slow count of ten. This pause matters — it lets everything finish shutting down.
Press and hold the power button again until the logo appears, then let go and wait for it to finish starting up.
Do not just tap the power button once. That only puts the screen to sleep, and the tangle stays right where it was.
The right way to restart a computer
Save anything you are working on, if you can.
Click the Start button (the Windows flag in the corner, or the Apple in the top corner on a Mac).
Choose "Restart." If "Restart" is not offered, choose "Shut down," wait ten seconds after it goes dark, then press the power button to start it again.
Give it a few minutes to finish. Computers often do a little housekeeping right after a restart, so wait until it settles before judging whether it helped.
If the computer is completely frozen and will not respond at all, hold the power button down for a full ten seconds. That forces it off. Use this only when nothing else works — anything you had open and unsaved will be lost, though saved files stay safe.
The right way to restart a TV box or streaming stick
Cable boxes, Roku, Fire TV sticks, and similar boxes are small computers, and they get tangled the same way.
Unplug the power cord from the box (or from the wall).
Count to thirty slowly. These boxes hold a little charge, and the wait lets them fully let go.
Plug it back in and give it two or three minutes to start up. A row of lights or a logo on the TV means it is working on it.
When to try it first
Try a restart first whenever something was working and suddenly is not: a frozen screen, an app that will not open, sound with no picture or picture with no sound, a phone that will not connect to Wi-Fi, or anything that feels "stuck." It is also a good first step after an update finishes installing.
A restart is not the answer for a cracked screen, a battery that will not charge, or a problem that comes right back every single day. A problem that returns daily is telling you something deeper is wrong.
If you have restarted properly and the problem is still there, that is the point where hands-on help is the answer — call Sean at (813) 770-6082.
Words in this lesson
App — a program on your phone or tablet that does one job, like weather or photos.
Restart — turning a device fully off and then back on again.
Update — a fix or improvement the device's maker sends out and installs from time to time.
Wi-Fi — the wireless signal that connects your devices to the internet inside your home.
What Is an App? Programs, Apps, and Websites in Plain Words
An app is simply a program — a set of instructions that makes your device do one job, like showing the weather or keeping your photos. "App" is just the short, modern word for it. Some things live on your device itself, and some live out on the internet and only visit your screen — knowing which is which explains a lot of everyday puzzles.
One idea, three names
Over the years the same thing has been called by different names:
On a computer, it was called a program.
On a phone or tablet, it is called an app (short for "application").
They are the same idea: instructions that make the machine do something useful.
Microsoft Word is a program. The Weather Channel on your phone is an app. Both are software — software means the instructions, as opposed to the physical machine itself, which is called the hardware.
What lives on your device
When you install an app, a copy of it is stored on your phone or computer, in the device's storage (its built-in filing cabinet). It sits there whether or not you are connected to the internet. Your camera app, your flashlight, your calculator, and your photos app live on the device this way.
Because they live on the device, many of them work with no internet at all. Your camera takes pictures on an airplane. Your calculator never needs a signal.
The storage space on a device is limited, which is why a phone can eventually complain that it is "full." Every app you install, and every photo and video you keep, takes up some of that space.
What lives on the internet
Other things only look like they live on your device. A website is information stored on a computer somewhere else in the world. When you visit one, your device reaches out over the internet, asks for the page, and shows it to you — like making a phone call rather than opening a drawer. Nothing of the website itself is stored on your phone.
Email, Facebook, news sites, and your bank's site all work this way. That is why they stop working when the internet is down, while your camera keeps working fine.
The in-between kind
Many popular apps are a doorway: a small app stored on your phone that reaches out to the internet for its content. The Facebook app is on your phone, but the posts and photos it shows you come from Facebook's computers. The YouTube app is on your phone, but the videos live on YouTube's computers.
This explains a common confusion: deleting the Facebook app does not delete your Facebook account or your photos there. You removed the doorway, not the room behind it. Reinstall the app, sign back in, and everything is there — because it never lived on the phone in the first place.
A simple way to tell the difference
Ask one question: would this still work in airplane mode?
If yes — it lives on your device.
If no — it lives on the internet, and it needs a connection to reach it.
That one test sorts out most "is it me or is it broken?" moments. If the internet-only things all fail at once but the on-device things work, your device is fine and the connection is the problem.
Where apps come from
Apps for phones and tablets come from an official store built into the device: the App Store on Apple devices, or the Play Store on Android devices. Getting apps only from those stores is the safe habit — the stores check what they sell. An app offered through a text message or a random web page is not from a store, and it should not be trusted.
If you are ever unsure whether something on your phone is safe, or an app is asking you for money or information that feels wrong, stop before tapping anything else and call Sean at (813) 770-6082.
Words in this lesson
App — a program on a phone or tablet; "app" is short for "application."
Program — a set of instructions that makes a computer do a job; the older name for the same idea as an app.
Software — the instructions a device runs, as opposed to the physical machine (the hardware).
Storage — the built-in space inside a device where apps, photos, and files are kept.
Website — information stored on a computer elsewhere that your device shows you over the internet.
App Store / Play Store — the official store built into Apple / Android devices, where safe apps come from.
Accounts and Passwords: Why Everything Wants One
An account is simply your personal record with a company — your name, your information, and your stuff, kept under one name that only you can open with your password. Everything wants one because that is how the company knows the photos, emails, and purchases belong to you and not to a stranger. The trick to staying sane is a simple system: one main email address, and a written list of your accounts kept safe at home.
What an account actually is
When a company "creates an account" for you, it opens a file with your name on it in their records. Into that file goes everything connected to you: your email address, your photo library, your order history, your saved addresses.
Your part of the arrangement has two pieces:
A username — most often your email address. This is the name of your file.
A password — the key that proves the person opening the file is really you.
Signing in (also called logging in) means giving the username and the key so the company opens your file instead of someone else's. Without accounts, anyone who picked up your phone or visited the company's site could see your email and your photos. The account is the lock on the drawer.
Why it feels like everything wants one
Stores want an account so your orders and receipts are kept together. Banks need one so only you can see your money. Even your phone itself has an account — an Apple ID on an iPhone or a Google account on an Android phone — and that one is the most important of all, because it holds your photos, your contacts, and the ability to find the phone if it is lost.
You do not need a new account for every little thing. A fair rule: if a site is asking you to create an account just to read an article or look at a price, you can almost always say no and leave. Save accounts for services you will actually return to.
The system that stays manageable
Most password misery comes from having too many email addresses and no record of what was used where. A system that works:
One main email address. Use the same address as the username for nearly everything. When a company needs to reach you or verify you, everything lands in one mailbox you actually check.
A written list, kept at home. A notebook or a sheet of paper in a drawer, listing each service and the password for it, is a perfectly good system for most people. A thief would have to physically enter your home to get it — while passwords saved in a web browser can be exposed without anyone touching your house. Keep the list current: every time you change a password, cross out the old one and write the new one.
A different password for the important few. Your email, your bank, and your phone's main account (Apple ID or Google) should each have their own password, different from everything else. Email matters most: whoever controls your email can reset nearly every other password you own, because reset instructions are sent by email.
The code they text you
Many services now add a second step: after your password, they text a short code (usually six numbers) to your phone, and you type it in. This is called two-factor authentication, and it is a good thing, not a nuisance. It means a stranger who somehow learns your password still cannot get in, because they do not have your phone.
One rule to remember: a real company will never call you and ask you to read that code aloud. Anyone who calls asking for a code is trying to get into your account at that very moment. Hang up.
When you forget a password
Forgetting is normal, and there is a proper path: on the sign-in screen, choose "Forgot password." The company will email or text you a way to set a new one. Never pay a company or a pop-up message to "recover" a password for you — recovery through the sign-in screen is always free.
If your passwords have become a tangle of sticky notes and guesses, sorting them out is exactly the kind of patient, sit-down work Sean does — call Sean at (813) 770-6082.
Words in this lesson
Account — your personal record with a company, holding your information under your name.
Username — the name of your account, usually your email address.
Password — the secret key that proves the account is being opened by you.
Sign in / log in — giving your username and password so a service opens your account.
Apple ID / Google account — the main account built into an iPhone / Android phone, holding your photos, contacts, and apps.
Two-factor authentication — an extra safety step where a short code is texted to your phone after you enter your password.
Code — the short set of numbers (usually six) texted to your phone to confirm it is really you signing in.
The Internet vs. Wi-Fi: Two Different Things
The internet is the service that comes into your house from your provider, like water from the city main. Wi-Fi is just the last few feet of the trip — the wireless signal that carries that service from a box in your home to your phone, tablet, and TV. When something stops working, figuring out which of the two broke tells you whether the fix is a phone call to the provider or a simple restart of the box at home.
The plumbing picture
Picture your home's water. The city supplies water through a main line to your house. Inside the house, pipes carry it to each faucet. If no water reaches any faucet, the problem could be the city's supply — or it could be one pipe in your walls. Two different problems, two different fixes.
Internet service works the same way:
The internet service is what you pay a company like Spectrum or Frontier for each month. It arrives at your house through a cable or fiber line and ends at a box called a modem (the box that translates the signal coming in from the street into something your home can use).
Wi-Fi is the wireless signal put out by a second box called a router (the box that shares the connection with all your devices at once). The Wi-Fi signal travels through the air inside your home, usually a room or two in every direction. No cables touch your phone — Wi-Fi is the invisible part.
Often the modem and router are combined into one box from the provider. Either way, two separate jobs are being done.
Why the difference matters
People say "the Wi-Fi is down" for every failure, but the two failures behave differently:
If the internet service itself is out (the provider has a problem, or a line is damaged), nothing in the house can reach the internet — not the TV, not the phone, not the computer. Your devices may still show a Wi-Fi signal, because the router is still broadcasting. Your phone will sometimes say the words plainly: "Connected, no internet." That message is telling you Wi-Fi is working and the service behind it is not.
If only Wi-Fi is down (the router has glitched), the service is still arriving at the house. A computer plugged in with a cable would still work. Restarting the router usually brings the signal back.
The one restart that covers both
Because the two jobs are linked, there is a standard way to restart the pair so they come back in the right order:
Unplug the power cord from the modem/router box.
Count to thirty slowly.
Plug it back in.
Wait a full five minutes. The box has to find the service from the street first, then rebuild the Wi-Fi signal. Lights blinking during this time are normal.
Try your device again.
Order and patience are the whole secret. Plugging in and testing after thirty seconds fails simply because the box was not finished waking up.
Telling which one broke
Every device in the house is offline at once, and the box's lights look wrong (a red light, or lights out entirely): that points at the service or the box itself.
One device is offline while others work fine: the service and the Wi-Fi are both up — the problem lives in that one device. Restart the device, not the box.
Things work near the box but not in a far bedroom: Wi-Fi signals weaken through walls and distance. That is a signal-strength problem, not an outage.
If you have restarted the box properly, waited the full five minutes, and the service light still shows trouble, the problem is on the provider's side or in the box — and that is hands-on territory. Call Sean at (813) 770-6082.
Words in this lesson
Internet service — the connection you pay a provider for monthly, delivered to your home by cable or fiber line.
Modem — the box that receives the internet service from the street and translates it for your home.
Router — the box that shares the connection with all your devices at once, usually by Wi-Fi.
Wi-Fi — the wireless signal inside your home that connects your devices to the router without cables.
Provider — the company you pay for internet service, such as Spectrum or Frontier.
Outage — a period when the provider's service is down for an area, not just your home.
What Is "the Cloud"? Where Your Photos Actually Go
"The cloud" is not in the sky. It is other people's computers — large, guarded buildings full of them, run by companies like Apple, Google, and Microsoft. When a photo is "in the cloud," a copy of it sits on one of those computers, which is why you can see your photos on a new phone or a tablet without moving anything yourself.
The plain picture
Every company that offers cloud service owns big buildings — sometimes called data centers — filled with rows of computers whose only job is to store files and send them back when asked. When your phone says a photo is "backed up to the cloud," it means your phone sent a copy over the internet to one of those buildings.
Nothing floats anywhere. Your photo is always on a physical machine in a physical place. The word "cloud" is just a friendly name for "somebody else's computer, reached over the internet."
What the cloud does for you
A safety copy. If your phone is lost, dropped in a pool, or stops working, photos that reached the cloud are still there. Sign in on a new phone with the same account and they come back. This is the cloud's biggest gift, and for most people it alone is worth using.
The same things on every device. A photo taken on your phone appears on your tablet and computer because all of them ask the same cloud account for it. You are not copying anything — each device is looking at the same stored copy.
Room on your device. Some services can keep the full photo in the cloud and a smaller version on your phone, freeing up space. The full version downloads when you open it.
Whose cloud do you have?
It depends on your devices:
iPhone and iPad → iCloud, run by Apple.
Android phones → usually Google Photos or Google Drive, run by Google.
Windows computers → often OneDrive, run by Microsoft.
Each is tied to your main account — your Apple ID, your Google account, your Microsoft account. The photos follow the account, not the device. That is why the account password matters so much: it is the key to everything stored there.
The free part and the paid part
Most cloud services give a small amount of storage free and charge a monthly fee for more. Photos add up over the years, so many people eventually pay a few dollars a month. It is a legitimate service, not a trick — but it is worth knowing exactly what you are paying for and which company is being paid.
What happens if you stop paying
This is the part nobody explains:
Your files are not deleted the day you stop paying. Companies give a grace period — usually at least a month or two — where everything stays put.
During that time you can still view and download your photos. You generally cannot add new ones once you are over the free limit.
If a long time passes without payment, the company may eventually delete the stored copies to free up its space.
The safe way to leave a paid cloud plan is to first make sure a full copy of everything exists somewhere else — on your computer or your new service — and only then cancel. Doing it in the other order risks losing the only copy.
Also remember: a copy in the cloud only protects you if it is really there. A phone that has been out of storage space, or off Wi-Fi for weeks, may not have sent its newest photos yet.
If you are not sure where your photos actually live or whether they are safe, that is worth a careful sit-down look — call Sean at (813) 770-6082.
Words in this lesson
The cloud — a friendly name for storing your files on a company's computers, reached over the internet.
Data center — a large, guarded building full of computers that store files for cloud services.
Backup — an extra copy of something, kept so the original can be lost without losing the thing itself.
iCloud — Apple's cloud service, used by iPhones and iPads.
Google Photos / Google Drive — Google's cloud services for photos and files, used by most Android phones.
OneDrive — Microsoft's cloud service, built into Windows computers.
Storage — space for keeping files, whether inside your device or in the cloud.
Touchscreen Basics That Nobody Tells You
A touchscreen understands four basic touches: the tap, the press-and-hold, the swipe, and the pinch. Nearly everything you will ever do on a phone or tablet is one of those four, or a combination of them. None of them can break anything, and the worst that ever happens is you open the wrong screen and press Back.
The tap — the one you will use most
A tap is a single, quick touch with the pad of your fingertip — like pressing an elevator button once. Use the fleshy pad of your finger, not the nail; the screen senses the warmth and surface of your fingertip, and fingernails do not register well.
Taps open apps, choose things, press buttons, and type letters on the on-screen keyboard.
Two honest tips nobody mentions:
Tap once, then wait. Phones sometimes need a second to respond. Tapping again while it is thinking is how people end up two screens past where they meant to be. One tap, count "one-one-thousand," then decide.
A double-tap is a different instruction. Two quick taps in the same spot often zooms a photo or a map in closer. If a screen suddenly looks magnified, two quick taps again usually zooms it back out.
The press-and-hold — the hidden menu
A press-and-hold means touching a spot and keeping your finger there for about a second, until something changes. This is the least-taught and most useful touch there is.
On most phones, pressing and holding:
An app's picture — offers choices like removing the app or moving it.
A word in a message — offers to copy it.
A message in a conversation — offers reactions and options like deleting it.
Think of it as the touchscreen's right-click: whenever you wonder "is there more I can do with this?", press and hold on it and find out. Nothing you see in the small menu that appears is dangerous — and tapping anywhere else on the screen makes the menu go away without doing anything.
This is also how app pictures get moved: press and hold until they wiggle or lift, drag the picture to its new spot, and let go.
The swipe — moving through things
A swipe is sliding your finger across the screen in one smooth motion, like brushing crumbs off a table.
Swipe up or down to move through a long page, list, or photo collection. A gentle flick keeps the page gliding; a slow drag moves it exactly as far as your finger goes.
Swipe left or right to move between photos, or between screens of apps.
Swipe down from the very top edge of the screen to open your notifications (messages the phone has collected for you) and quick settings like brightness and Wi-Fi.
Swipe up from the very bottom edge on many phones to go back to the home screen.
Speed matters: a short, confident swipe works better than a slow, timid one.
The pinch — making things bigger and smaller
A pinch uses two fingers at once. Put your thumb and forefinger on the screen and spread them apart to make a photo or map bigger; bring them together to make it smaller. It behaves exactly like stretching or shrinking a photograph printed on rubber.
This works in photos, maps, and most web pages. Text in many apps can also be made permanently larger in the device's settings — you do not have to pinch your way through life.
The safety net underneath all of it
Here is the thing new touchscreen users most need to hear: touching things is safe. Taps and swipes do not delete, damage, or send anything. The only actions that ever ask real questions — sending, buying, deleting — put a clear button in front of you first, and usually a confirmation after it. If you ever land somewhere confusing, look for the Back arrow (usually bottom-left on Android, top-left on iPhone) or press the Home button and start over. You cannot get lost beyond repair.
A calm way to practice: open your Photos, tap one picture, swipe left and right through a few, pinch one bigger and smaller, then swipe from the top to peek at your notifications and tap anywhere to close it. Five minutes of that and the four touches will feel ordinary.
If your screen seems not to respond to touch at all — presses that never register, or taps landing in the wrong place — that can be a screen or settings problem rather than anything you are doing wrong. Call Sean at (813) 770-6082.
Words in this lesson
Tap — one quick touch with the pad of your fingertip; opens and chooses things.
Press-and-hold — touching a spot and keeping your finger there about a second, to reveal extra choices.
Swipe — sliding your finger across the screen in one smooth motion to move through pages and lists.
Pinch — using two fingers, spread apart to enlarge or brought together to shrink, a photo or map.
Notification — a message your phone collects for you (a text, a reminder, an app update), found by swiping down from the top.
Home screen — the main screen of apps you return to; the phone's front porch.
Small key combinations that save a hundred mouse trips a day. Every key is described by where it sits on the keyboard, so the list reads naturally aloud too.
Where your keys are
Ctrl is the key in the bottom-left corner of the keyboard.
Shift is the wide key on the left side, just above Ctrl, with an up arrow on it.
Alt is on the bottom row, between Ctrl and the spacebar.
Windows key is on the bottom row between Ctrl and Alt — it has a little window picture on it.
Esc is the key in the very top-left corner.
F1 through F12 are the small keys across the very top row.
Enter is the large key on the right edge of the letter keys.
Plus shares the equals key at the far right of the number row.
Fn (laptops only) is in the bottom-left corner, near Ctrl.
When you see two keys joined by a plus sign, hold the first key down, tap the second, then let go.
Hold Ctrl (bottom-left corner), then tap a letter:
Ctrl+CCopyCtrl+XCutCtrl+VPasteCtrl+ZUndoCtrl+ASelect all
Working with words
The five moves you will use every day. Learn these and the computer starts feeling easy.
Select the words first
Before you can copy or move words, you tell the computer which words you mean. Selected words turn blue — that means “these are the ones.”
Narrated tutorial: select the words first.
Drag across them: click and hold at the start of the words, slide across them, let go.
One word:double-click it.
A whole paragraph:triple-click anywhere inside it.
Everything: click inside the document first, then hold Ctrl and tap the letter A.
Mouse only — no keys needed
Good to know: If you drag but nothing stays blue, you let go of the mouse button too soon, or you clicked again (which cancels it). Just drag across the words again, slower.
Copy
Copying remembers the words without removing them. The words stay where they are, and a perfect duplicate waits invisibly until you paste it.
Narrated tutorial: copy.
Select the words first, until they turn blue.
Hold Ctrl and tap the letter C.
Nothing visible changes — that is normal.
Ctrl + C
Good to know: If pasting later produces nothing, the words were never selected. Go back and highlight them first.
Cut
Like copy, but the words are removed from where they were. Use it when you are moving text, not duplicating it.
Ctrl + X
Good to know: If you cut and then get distracted, the page has a hole in it — do not panic. Paste right away, or press Undo (below) to put the words back.
Paste
Places the words you copied or cut wherever your cursor is blinking.
Narrated tutorial: paste.
Click once exactly where you want the words (look for the blinking vertical line).
Hold Ctrl and tap the letter V.
Ctrl + V
Good to know: Pasting twice pastes a second copy — the computer keeps remembering until you copy something new. Unwanted duplicate? Press Undo once.
Undo — the oops key
Takes back your last action: typed the wrong thing, deleted by accident, pasted in the wrong spot. Press it more than once to step further back.
Ctrl + Z
Good to know:Redo is the “oops, I did not mean Undo” key: hold Ctrl and tap the letter Y. It puts back what Undo took away.
No keys at all: right-click
If holding two keys at once is fiddly, the mouse alone can do copy, cut, and paste.
Narrated tutorial: copy and paste with no keys — right-click on Windows.
Select the words.
Click the right mouse button on them — a small menu pops up.
Click Copy (or Cut).
Right-click where you want the words, then click Paste.
Mouse only — no keys needed
Browser essentials
The keys that make the web feel fast.
Open a new tab
Opens a fresh tab so you can start a new search without losing the page you are reading. A tab is a separate page open inside the same window — like several newspaper pages open at once.
Ctrl + T
Close the tab
Closes the tab you are looking at, tidying up without closing the whole browser.
Ctrl + W
Switch to the next tab
Jumps to the next tab along the top without clicking. Add Shift to go backward.
Ctrl + Tab
Good to know: Ctrl + Shift + Tab goes to the previous tab.
Reopen a closed tab
Brings back the last tab you closed — the “I just closed something!” rescue. Press again for the one before that.
Ctrl + Shift + T
Jump to the address bar
Puts your cursor straight into the top bar so you can type an address or a search without touching the mouse.
Ctrl + L
Go back a page
Back is the universal undo for where you just were. Clicked something, got lost, go back.
Alt + Left arrow
Good to know: Press and hold the Back arrow (or right-click it) to see a list of pages you visited in that tab — pick one to jump straight back.
Reload the page
Asks the website for a fresh copy of the page. Fixes pages that look broken, blank, or half-loaded — the fix that works nine times out of ten.
F5orCtrl + R
Good to know: On many laptops F5 needs the Fn key held too (Fn + F5) if the top row is set to volume and brightness. See the function-keys section below.
Hard refresh
Forces the page to load completely fresh, ignoring the saved copy on your computer. The real fix when a page still looks old or broken after a normal reload.
Ctrl + Shift + R
Good to know:Edge also accepts Shift + F5.
Find a word on the page
Pops open a little search box. Type a word and the browser jumps to and highlights every match — no more long-page scrolling hunts.
Ctrl + F
Good to know: Press Enter to jump to the next match.
Bookmark this page
Saves the page to a list you can reopen with one click — like a dog-eared page in a phone book.
Ctrl + D
Good to know: In Edge it is called a “favorite,” not a bookmark — same thing, different name. Show or hide the bookmarks bar with Ctrl + Shift + B.
Private window
A private window simply does not save history or typed searches on your computer. It does not make you anonymous — websites and your internet provider can still see what you do. Useful on a shared computer, or shopping for a surprise gift.
Ctrl + Shift + N
Good to know:Firefox is the odd one out: it uses Ctrl + Shift + P.
Stop a loading page
Tells the browser to give up on a page that is taking forever. Also closes pop-up boxes and small menus.
Esc
Print the page
Opens the print screen for the page you are looking at.
Ctrl + P
Windows system shortcuts
Keys that control the computer itself, in any program.
Magnifier on and off
Enlarges everything on screen — from a little bigger up to sixteen times — so small text and photos are easier to see.
Windows key + Pluson / Windows key + Escoff
Good to know: While it is on, Windows key + Plus zooms further in and Windows key + Minus zooms back out.
Open your files
Opens the window where your documents, pictures, and downloads live.
Windows key + E
Good to know: Once it is open, Ctrl + E jumps into its search box.
Show the desktop
Hides every open window so you can see your desktop. Press again to bring them all back.
Windows key + D
Lock the computer
Locks the screen so nobody can use your computer until you sign back in. Use it before you walk away.
Windows key + L
Open Accessibility settings
Opens the settings page with text size, magnifier, and other easy-reading options.
Windows key + U
Screenshot part of the screen
Dims the screen and lets you drag a box around whatever you want to capture — a copy goes to your clipboard. Click the small notification that appears to save it.
Windows key + Shift + S
Good to know: For the whole screen instead: Windows key + Print Screen saves the picture into Pictures, then Screenshots.
Switch between open programs
Hop from one open program to the next without the mouse.
Narrated tutorial: switch between open programs.
Hold Alt down.
Tap Tab once for each program.
Let go when the one you want is highlighted.
Alt + Tab
Rename a file / new folder
In your files window: click a file or folder once, then rename it — or create a fresh empty folder.
F2rename / Ctrl + Shift + Nnew folder
Good to know: After typing the new name, press Enter to save it. F2 may need Fn held on laptops.
Send an email
Sends the email you are writing without clicking the Send button. Works in Gmail and in Outlook on the web.
Ctrl + Enter
Function keys: F1 to F12
The small keys across the very top row. You only need six of them — the rest you can safely ignore.
F1 — Help
Opens the help page of the program you are using. (In Windows 11 it often opens a web support page instead.)
F1
F2 — Rename
Click a file or folder once, press F2, type the new name, press Enter.
F2
F5 — Refresh the page
Reloads the web page you are looking at.
F5
F6 — Jump to the address bar
In a browser, moves your cursor straight to the top bar.
F6
F11 — Full screen
The web page fills the whole screen. Press F11 again to bring the toolbars back — if your toolbars ever “vanish,” the answer is just press F11 again.
F11
Shift + F10 — Right-click
Works exactly like a right mouse click — handy if the mouse is not cooperating.
Shift + F10
The rest, briefly: F3 opens search. Alt + F4 closes the window you are looking at (the fastest way to shut a stuck program — do not use it with unsaved work). F7 in a browser asks about “caret browsing” — an accidental press is harmless, just click No. F8, F9, F10 alone, and F12 do nothing you need. Old guides mention F8 for Safe Mode — that trick no longer works on Windows 10 or 11.
On laptops: the Fn key
On most laptops the top row defaults to picture-actions (volume, brightness), so you hold Fn and press the key for the plain F1–F12 action — for example Fn + F5 to refresh. To flip it permanently, press Fn + Esc (the Esc key often has a little padlock picture); on some HP models it is Fn + Shift. Test it: press F5 in a browser. Page refreshes means direct. Volume changes means hold Fn, or toggle the lock. Desktop keyboards usually have no Fn key — F1–F12 just work.
What the little pictures mean
Screen dimmerMakes the screen darker.Screen brighterMakes the screen brighter.Keyboard lightLights up the keys (laptops).All windowsShows every open window (Mac).SearchOpens search (Mac: Spotlight).MuteSilences the sound; press again for sound.Volume downTurns the sound down.Volume upTurns the sound up.
Low vision helpers
Built-in tools that make everything easier to see. All free, all already on your computer.
Screen magnifier
Enlarges everything on screen so small text and photos are easier to see.
Windows key + Pluson / Windows key + Escoff
Good to know: Also at: Start, then Settings, then Accessibility, then Magnifier.
Make all text bigger
A system-wide text-size slider — drag it right and click Apply. Nothing else changes.
Start > Settings > Accessibility > Text size
Good to know: Its sibling, Settings, then System, then Display, then Scale, makes everything bigger, not just text.
Make just this web page bigger
Enlarges the current web page instantly, and the browser remembers it for that site.
The strongest option: full color schemes like yellow-on-black. Quick toggle included.
Settings > Accessibility > Contrast themes — pick one, then Apply. Quick toggle: hold left Alt and left Shift, then tap Print Screen.
Good to know: For something gentler, try dark mode: Settings, then Personalization, then Colors, then choose Dark.
Screen reader (Narrator)
Speaks everything on screen aloud, for people who cannot see it well. The same keys turn it off again — so nobody gets stuck with a talking computer they did not ask for.
Windows key + Ctrl + Enter
Good to know: Also at: Settings, then Accessibility, then Narrator.
Read a web page aloud (Edge)
Reads the page in a natural voice, highlighting each word as it goes.
Ctrl + Shift + U
Good to know: The same keys stop it. Or right-click the page and choose Read aloud.
Bigger mouse pointer
Makes the pointer larger and easier to find — up to fifteen times normal size.
Settings > Accessibility > Mouse pointer and touch — drag the Size slider. Shortcut to Accessibility: Windows key + U.
Good to know:Night light (Settings, then System, then Display) warms the screen color at night for less harsh glare.
Where your keys are
Command is on the bottom row, right next to the spacebar.
Shift is the wide key on the left side, with an up arrow on it.
Option is on the bottom row, between Command and Control.
Control is the key in the bottom-left corner.
Esc is the key in the very top-left corner.
F1 through F12 are the small keys across the very top row — on a Mac they show pictures, but hold Fn for the plain F-key action (covered below).
Delete is at the top-right of the letter area, above the Return key.
Fn (laptops) is in the bottom-left corner — on newer Macs it shows a little globe picture.
When you see two keys joined by a plus sign, hold the first key down, tap the second, then let go.
Hold Command (bottom-left corner), then tap a letter:
Command+CCopyCommand+XCutCommand+VPasteCommand+ZUndoCommand+ASelect all
Working with words
The five moves you will use every day. Learn these and the computer starts feeling easy.
Select the words first
Before you can copy or move words, you tell the computer which words you mean. Selected words turn blue — that means “these are the ones.”
Narrated tutorial: select the words first on a Mac.
Drag across them: click and hold at the start of the words, slide across them, let go.
One word:double-click it.
A whole paragraph:triple-click anywhere inside it.
Everything: click inside the document first, then hold Command and tap the letter A.
Mouse only — no keys needed
Good to know: If you drag but nothing stays blue, you let go of the mouse button too soon, or you clicked again (which cancels it). Just drag across the words again, slower.
Copy
Copying remembers the words without removing them. The words stay where they are, and a perfect duplicate waits invisibly until you paste it.
Narrated tutorial: copy on a Mac.
Select the words first, until they turn blue.
Hold Command and tap the letter C.
Nothing visible changes — that is normal.
Command + C
Good to know: If pasting later produces nothing, the words were never selected. Go back and highlight them first.
Cut
Like copy, but the words are removed from where they were. Use it when you are moving text, not duplicating it.
Command + X
Good to know: If you cut and then get distracted, the page has a hole in it — do not panic. Paste right away, or press Undo (below) to put the words back.
Paste
Places the words you copied or cut wherever your cursor is blinking.
Narrated tutorial: paste on a Mac.
Click once exactly where you want the words (look for the blinking vertical line).
Hold Command and tap the letter V.
Command + V
Good to know: Pasting twice pastes a second copy — the computer keeps remembering until you copy something new. Unwanted duplicate? Press Undo once.
Undo — the oops key
Takes back your last action: typed the wrong thing, deleted by accident, pasted in the wrong spot. Press it more than once to step further back.
Command + Z
Good to know:Redo is the “oops, I did not mean Undo” key: hold Command and Shift, tap the letter Z. It puts back what Undo took away.
No keys at all: two-finger tap
If holding keys at once is fiddly, the trackpad alone can do copy, cut, and paste.
Narrated tutorial: copy and paste with no keys — two-finger tap on a Mac.
Select the words.
Tap with two fingers on them (or hold Control and click) — a small menu pops up.
Click Copy (or Cut).
Two-finger tap where you want the words, then click Paste.
Trackpad only — no keys needed
Good to know: A plain single click will not open the menu on a Mac — you need the two-finger tap or Control-click.
Browser essentials
The keys that make the web feel fast.
Open a new tab
Opens a fresh tab so you can start a new search without losing the page you are reading. A tab is a separate page open inside the same window — like several newspaper pages open at once.
Command + T
Close the tab
Closes the tab you are looking at, tidying up without closing the whole browser.
Command + W
Good to know: If only one tab is open, Command + W closes the whole window. And Command + Q quits the entire program — a classic mix-up: W closes the window, Q quits the app.
Switch to the next tab
Jumps to the next tab along the top without clicking. Add Shift to go backward.
Control + Tab
Good to know: Works in Safari, Chrome, and Firefox.
Reopen a closed tab
Brings back the last tab you closed — the “I just closed something!” rescue. Press again for the one before that.
Command + Shift + T
Jump to the address bar
Puts your cursor straight into the top bar so you can type an address or a search without touching the mouse.
Command + L
Go back a page
Back is the universal undo for where you just were. Clicked something, got lost, go back. Hold Command and tap the left square-bracket key (the [ key, right of the letter P).
Command + [
Good to know: Command + ] goes forward. Press and hold the Back arrow (or right-click it) to see a list of pages you visited in that tab.
Reload the page
Asks the website for a fresh copy of the page. Fixes pages that look broken, blank, or half-loaded — the fix that works nine times out of ten.
Command + R
Hard refresh
Forces the page to load completely fresh, ignoring the saved copy on your computer. The real fix when a page still looks old or broken after a normal reload.
Command + Shift + Rin Chrome & Firefox / Command + Option + Rin Safari
Good to know:Important: in Safari, Command + Shift + R does not hard-refresh — it opens Reader, a plain-text view of the page. Safari hard refresh is Command + Option + R. Note that Command + Shift + R means three different things: Reader in Safari, hard refresh in Chrome, and Reply-All in Apple Mail.
Find a word on the page
Pops open a little search box. Type a word and the browser jumps to and highlights every match — no more long-page scrolling hunts.
Command + F
Good to know: Press Command + G to jump to the next match.
Bookmark this page
Saves the page to a list you can reopen with one click — like a dog-eared page in a phone book.
Command + D
Good to know: Show or hide the bookmarks bar with Command + Shift + B.
Private window
A private window simply does not save history or typed searches on your computer. It does not make you anonymous — websites and your internet provider can still see what you do. Useful on a shared computer, or shopping for a surprise gift.
Command + Shift + N
Good to know:Firefox is the odd one out: it uses Command + Shift + P.
Stop a loading page
Tells the browser to give up on a page that is taking forever. Also closes pop-up boxes and small menus.
Esc
Print the page
Opens the print screen for the page you are looking at.
Command + P
Mac system shortcuts
Keys that control the Mac itself, in any program.
Search the whole Mac
Opens a search box in the middle of the screen — type an app name, a file, even a math question, and it finds it. The fastest way to open any program.
Command + Spacebar
Switch between open apps
Shows a row of your open programs. Keep holding Command and tap Tab for each app; let go when the one you want is highlighted.
Command + Tab
Good to know: Add Shift to go backward.
Quit an app completely
Closes the program entirely — use it when an app is frozen or you are truly done.
Command + Q
Good to know: Command + W only closes the window; the app keeps running.
Take a picture of the screen
Saves a snapshot of your whole screen to the desktop — handy for sending me a picture of a problem.
Command + Shift + 3
Good to know: Command + Shift + 4 captures just a box you drag. Command + Shift + 5 opens a toolbar, with screen recording included.
Open the app's settings
Opens the settings window for whichever program you are using — no menu-digging. The comma key is at the bottom-right of the letter area.
Command + ,
Finder: new window, trash, preview
Three file essentials. First click the blue smiling-face Finder icon in the Dock.
Command + Nnew window / Command + Deletesend to Trash
Good to know:Trash is still recoverable until you empty it. And: select any file and press the Spacebar for an instant preview without opening anything — Spacebar or Esc closes it.
Good to know: Command + Shift + D sends immediately — double-check the recipient first. And remember: Command + Shift + R is Reply-All here, hard refresh in Chrome, and Reader in Safari.
Function keys: F1 to F12 on a Mac
The small keys across the very top row. On a Mac they show little pictures and work as control keys: screen dimmer and brighter, Mission Control (all open windows at once), Spotlight search, keyboard backlight, music controls, mute, and volume down and up. The plain F1–F12 actions are still hiding underneath — hold Fn (bottom-left corner; newer Macs show a little globe picture) and tap a top-row key. You only need a few of them — the rest you can safely ignore.
What the little pictures mean
Screen dimmerMakes the screen darker.Screen brighterMakes the screen brighter.Keyboard lightLights up the keys (laptops).All windowsShows every open window (Mac).SearchOpens search (Mac: Spotlight).MuteSilences the sound; press again for sound.Volume downTurns the sound down.Volume upTurns the sound up.
Fn + F1 — Help
Opens the help page of the program you are using, in programs that support it.
Fn + F1
Fn + F5 — Refresh the page
Reloads the web page you are looking at (works in Chrome).
Fn + F5
Fn + F6 — Toward the address bar
In Chrome, moves your focus up toward the top bar.
Fn + F6
Control + Command + F — Full screen
The web page fills the whole screen. Press the same keys again to bring the toolbars back — if your toolbars ever “vanish,” the answer is just press Control + Command + F again.
Control + Command + F
The rest, briefly: F3 shows all your open windows at once (Mission Control). On newer Macs (macOS Tahoe and later), the fourth key opens Spotlight search — Apple removed the old Launchpad, so older articles are out of date. F7, F8, and F9 are music controls (previous, play/pause, next). F10, F11, and F12 are mute, volume down, and volume up — these work without holding Fn. Command + Q quits the program you are looking at (the fastest way to shut a stuck program — do not use it with unsaved work).
Getting the plain F-keys back
Hold Fn (bottom-left corner; newer Macs show a little globe picture) with a top-row key for the plain function-key action. To flip it permanently: Apple menu, then System Settings, then Keyboard, then turn on “Use F1, F2, etc. keys as standard function keys.” On MacBook Pro models from 2016–2020 with a Touch Bar, there are no physical top-row keys — hold Fn to reveal F1–F12 on the touch strip.
Low vision helpers
Built-in tools that make everything easier to see. All free, all already on your Mac.
Screen zoom
Enlarges everything on screen so small text and photos are easier to see. Turn it on first, then the keys work.
First: Apple menu > System Settings > Accessibility > Zoom > turn on “Use keyboard shortcuts to zoom”
Good to know: Then: Option + Command + 8 toggles it, Option + Command + Plus zooms in, Option + Command + Minus zooms out.
Make all text bigger
A system-wide text-size slider — drag it right. The Default marker takes you back.
Apple menu > System Settings > Accessibility > Display > Text size
Good to know: On the same screen, Menu bar size from Default to Large makes the top menu text bigger (needs you to log out and back in).
Make just this web page bigger
Enlarges the current web page instantly, and the browser remembers it for that site.
Good to know: Safari bonus: Safari, then Settings, then Websites, then Page Zoom — set a default zoom (try 125%) so every site always opens larger.
Increase contrast & dark mode
Stronger separation between text and background, or an easier-on-the-eyes dark look.
System Settings > Accessibility > Display > turn on Increase contrast. For inverted colors, turn on Invert colors and choose Smart Invert so photos keep normal colors.
Good to know:Dark mode: System Settings, then Appearance, then Dark — or Auto, which switches at sunset.
Screen reader (VoiceOver)
The Mac's full screen reader — it speaks everything on screen aloud. The same keys turn it off again — so nobody gets stuck with a talking computer they did not ask for.
Command + F5
Good to know: Also at: System Settings, then Accessibility, then VoiceOver. On laptops, you may need to hold Fn with it.
Read selected text aloud
Highlights words and speaks them — the simplest read-aloud on a Mac.
First: System Settings > Accessibility > Spoken Content > turn on Speak selection
Good to know: Then highlight any text and press Option + Esc (press again to stop). Even simpler: select text, right-click it, then Speech, then Start Speaking.
Bigger mouse pointer
Makes the pointer larger and easier to find.
System Settings > Accessibility > Display > drag the Pointer size slider.
Good to know: Turn on “Shake mouse pointer to locate” — wiggling the mouse makes the pointer briefly grow huge so you can spot it.
One thing worth understanding
The address bar is the search box
In Chrome, Edge, Firefox, and Safari today, the long strip at the top of the browser is boththe address bar and the search box — one box does both jobs. There is no wrong place to type.
Typing a website address into search still takes you there — type s2wtech.com (no www or http needed) and the browser goes straight to it. A real web address is letters and dots, like www.s2wtech.com, usually with no spaces.
Copy and paste To copy text on a computer, highlight it by dragging across it with the mouse, then hold the Ctrl key and press C. Click where you want it to go, then hold Ctrl and press V to paste. On a Mac, use the Command key instead of Ctrl.
How you find things on the web. A search engine is what finds websites for you when you type a question into your browser. You type, it brings back the answers.
Google
The most used, by far. It has been organizing the web the longest, so its answers are usually the most accurate. The trade-off: Google remembers what you search so it can show you ads.
Bing
Microsoft's search engine. It comes built into the Edge browser. Solid answers, and Microsoft also uses your searches to personalize ads.
DuckDuckGo
The privacy-first option. It does not build a profile on you. The trade-off: its answers are not as accurate as Google's — and weaker answers can lead you to the wrong sites.
Our recommendation
Use Google for accuracy. Better answers mean fewer wrong clicks into bad sites. Real privacy comes from a browser that blocks trackers, and from safe habits — see the Security section.
A hyperlink is a word or picture on a page you can tap to jump somewhere else. Links are usually blue or underlined. The full address of a page is its URL — it starts with https and lives in the bar at the top of your browser.
A domain name is the main, memorable part of a website address, like s2wtech.com. Domain names are the names people remember instead of the numbers computers actually use — type one into the address bar and you reach the site.
HTML is the simple code that builds every web page. You never need to write it yourself — just know that each page you visit is made of it, and your browser turns it into the words and pictures you see.
A blog is a website where someone writes regular posts, like an online diary or advice column. The person who writes it is called a blogger. Many blogs are free to read.
A chatbot is a helper on a website that chats with you by typing. It can answer simple questions day or night. For anything complicated or personal, ask for a real person instead.
If you are squinting at your phone or computer, the device can fix that. Every modern device has a text-size setting — bigger letters, no new glasses required, and nothing else changes.
Narrated tutorial: open Settings, Appearance, Text Size — drag the slider.
iPhone
Open Settings, then Appearance, then Text Size — drag the slider until the sample text looks comfortable. Turn on Bold Text on the same screen for extra clarity. On older versions (iOS 26 or earlier), it is Settings → Display & Brightness → Text Size. For even bigger text, go to Settings → Accessibility → Display & Text Size → Larger Text and drag that slider too.
SamsungNarrated tutorial: open Settings, Display, Font size and style — drag the slider.
Open Settings, then Display, then Font size and style. The slider grows the text everywhere — messages, menus, and email. Turn on Bold font on the same screen for extra clarity.
Windows computerNarrated tutorial: open Settings, Accessibility, Text size — drag the slider, then Apply.
Open Settings, then Accessibility, then Text size. The slider previews as you drag, and Apply makes it stick.
Need even bigger, just for a moment?
Narrated tutorial: the magnification gesture — double-tap with three fingers to zoom.
Magnification gesture. On iPhone, double-tap with three fingers to zoom the screen (turn it on first under Settings → Accessibility → Zoom). On Samsung, the same lives under Settings → Accessibility → Visibility enhancements → Magnification.
Too big now? Just drag the same slider back down — it is only a display setting.
Taking screenshots
A screenshot is a picture of whatever is on your screen. Save a funny text, keep a recipe you spotted online, or capture an error message to show exactly what your screen said. Every phone and computer can take one — here is how, starting with phones.
On a cell phone
On an iPhone
1 Press two buttons at the same time. On an iPhone with no Home button (iPhone X and newer): squeeze the Side button on the right edge and the Volume Up button on the left edge together, then let go right away. A quick squeeze — do not hold them down.
2 The screen flashes white. A little thumbnail of your screenshot pops up in the bottom-left corner.
3Tap the thumbnail to draw on it, add words, or share it with family. A row of pens appears along the bottom — pick a color and write right on the picture.
4 Or just flick the thumbnail away — the screenshot saves itself in the Photos app, newest at the bottom. Older iPhone with a Home button? Press the Home button and the Side button together instead.
Watch it done: iPhone screenshot
On a Samsung phone
1 Press the Power button and the Volume Down button at the same time, then let go right away. On a Samsung both sit on the right edge, one above the other. Held too long? The power menu pops up — just tap outside it and try a quicker squeeze.
2 The screen flashes and a little toolbar appears along the bottom of the screen.
3 Tap the corner marks to trim the edges, the pencil to draw on it, or the share button to send it to family.
4No-button option: lay the edge of your hand on the screen and swipe it sideways across (palm swipe). If nothing happens, turn it on in Settings > Advanced features > Motions and gestures. Samsung screenshots live in the Gallery app, newest at the top.
Watch it done: Samsung screenshot
On a Windows computer
On Windows
1 Hold the Windows key (the one with the little window flag, bottom-left of the keyboard), then tap Shift and S.
2 The whole screen dims. Your mouse turns into a little cross. Click and drag a box around exactly what you want to capture.
3 Let go — the picture copies itself. A small notification slides in at the bottom-right. Click it to open your screenshot.
4 In the Snipping Tool window you can draw on it with the pen, then click Save and pick where it goes. The Snipping Tool is built into Windows — nothing to install. Open it any time from the Start menu for rectangle, single-window, or whole-screen modes.
5Whole screen the fast way:Windows key + Print Screen. It saves the picture by itself into Pictures, then Screenshots.
Watch it done: Windows screenshot
On a Mac
On a Mac
1Command + Shift + 3 takes a picture of the whole screen. It lands on your desktop as a file.
2Command + Shift + 4 turns your mouse into crosshairs. Drag a box around just the part you want, then let go.
3Command + Shift + 5 opens a little toolbar along the bottom with every choice: whole screen, one window, part of the screen — even screen recording. Press Esc to close it.
Watch it done: Mac screenshot
One habit worth building: when an error message pops up, take a screenshot of it before you call for help. It saves a lot of explaining — whoever helps you can see exactly what your screen said.
Screenshot on Windows On Windows, press the Print Screen key (it may say PrtScn) to copy a picture of your screen, then paste it where you want it. For just part of the screen, press the Windows key, Shift, and S together — the screen dims and you can drag a box around what you want. The picture gets copied so you can paste it into an email or document.
File Explorer is where all your files live. It is the folder icon on your taskbar, and it holds your documents, photos, and downloads. Windows 11 changed how it looks — the buttons turned into small pictures — but everything you used to do still works.
The new command bar: pictures instead of words
Across the top of every File Explorer window is a row of small icons. They do the same jobs the old labeled buttons did. Here is what each picture means, left to right:
Plus sign: New — make a new folder or file here. You will also see New in Word (a new document) and in your email (a new message).
Scissors: Cut — pick a file up to move it somewhere else. In Word or an email, Cut removes the highlighted words so you can move them.
Two overlapping pages: Copy — make a duplicate of the file. In Word or email, Copy duplicates highlighted words or a picture without removing them.
Clipboard: Paste — put down whatever you just cut or copied. Paste works everywhere — Word, email, even the web address bar at the top of your browser.
Pencil: Rename — change the file's name.
Share symbol: Share — send the file by email or another app. You will also see a Share button in your Photos app and in your web browser.
Trash can: Delete — move the file to the Recycle Bin. Your email has a Delete button too — it moves a message to the trash folder.
To the right of those you will also see Sort, View (how your files are displayed), and three dots for a few more choices.
Sort and View, explained
Sort changes the order of your files — by name (A to Z), by date (newest first), or by kind. You will also meet Sort in Excel (putting a list in order) and in your email (newest messages on top).
View changes how your files look — big pictures, a simple list, or a detailed list with dates and sizes. Word has a View menu too (it changes how the page looks on your screen), and your web browser can zoom the view bigger or smaller.
The search box sits at the top-right of every File Explorer window. Click it, type part of a file's name, and it finds the file — you do not have to remember which folder it is in.
The same pictures appear when you right-click
Right-click any file or folder and a row of icons appears at the top of the little menu — the same scissors, pages, clipboard, pencil, and trash can.
Prefer the old words? At the bottom of that menu, click Show more options and the classic menu comes back, with Cut, Copy, Paste, and the rest written out in full.
The keyboard shortcuts still work
If your hands already know these, nothing has changed. They work exactly as they always have:
Ctrl + C — Copy
Ctrl + X — Cut (move)
Ctrl + V — Paste
Ctrl + Z — Undo (take back your last step)
Copying files to a flash drive
A flash drive — the little stick you plug into a USB port — is the easiest way to carry files or keep a backup copy. Here is the whole process:
Narrated tutorial: copying files to a flash drive.
Plug the flash drive into a USB port. After a few seconds it appears in File Explorer under This PC, with its own letter like (E:) or (F:).
Select the files you want. Click one file, or hold Ctrl and click several.
Copy them: press Ctrl + C, or click the two-pages Copy icon at the top.
Open the flash drive under This PC, then paste: press Ctrl + V, or click the clipboard Paste icon.
Eject it safely — do not just pull it out. Look at the bottom-right corner of your screen, near the clock. Click the little up-arrow (^) if you need to, then click the Safely Remove Hardware icon — it looks like a USB plug with a checkmark. Click your drive's name, wait for the message “Safe to Remove Hardware,” and then unplug it.
Why ejecting matters
Pulling a drive out while Windows is still writing can corrupt your files.
Ejecting takes five seconds and keeps photos and documents safe.
You can also eject from inside File Explorer: right-click the drive under This PC and choose Eject.
External hard drives
An external hard drive plugs into the same USB port and works exactly like a flash drive, except it holds far more — thousands of photos or a full backup of your computer. Anything you can read from a flash drive, you can read from an external drive: plug it in, open it under This PC, and double-click files to open them.
Drive does not show up? Try a different USB port first. If it still does not appear, call me at (813) 770-6082 — do not keep unplugging and re-plugging it.
Everyday file skills, in brief
Make a new folder: open where you want it, press Ctrl + Shift + N, type a name, press Enter.
Rename: click the file once, press F2, type the new name.
Delete is not gone forever: deleted files go to the Recycle Bin on your desktop first, so a mistake can be undone.
Find a file: type its name in the search box at the top-right of any File Explorer window.
Quick Access: the folders you use most can be pinned to the top of the left sidebar — right-click any folder and choose 📌 Pin to Quick access.
Narrated tutorial: rename, new folder, and delete in File Explorer
When to call Sean instead
Setting up an external hard drive for automatic backups.
A drive that will not show up or keeps asking to be formatted.
Moving lots of photos or files and wanting it done right the first time.
Running out of space and not sure what is safe to delete.
A Zip file is a folder that has been squeezed smaller so it is easier to send or store. Your phone or computer can open it with a tap — no extra app needed. Inside you will find the original files.
Freeware is software that costs nothing, free forever. Shareware is free to try, then asks you to pay if you keep using it. Both are safe as long as you download them from the maker's own website.
Downloads folder Downloaded files go into a folder called Downloads. On Windows, click the folder icon on the taskbar (File Explorer) and click Downloads on the left side. On a Mac, click the smiling Finder face in the dock, then Downloads.
Save a file When you save, the program usually asks where — pick Documents so you always know where to look. Give the file a name you'll recognize, with words you'd search for later. To find it again, open File Explorer (the folder icon) on Windows or Finder (the smiling face) on Mac, and check Documents first.
File Explorer File Explorer is the program that shows all your files and folders — click the yellow folder icon on the taskbar to open it. Your documents, pictures, and downloads each have their own folder on the left side. Think of it as the filing cabinet for everything on your computer.
Creating a new folder Open the place where you want the folder, then right-click an empty spot and choose New, then Folder. Type a name and press Enter. Folders keep related files together — like one folder per trip for your photos.
Renaming a file or folder Right-click the file or folder and choose Rename, then type the new name and press Enter. Or click it once, wait a second, and click the name again — it becomes editable. Don't change the part after the dot (like .jpg), or the computer may not know how to open it.
Deleting files Click the file once to select it, then press the Delete key — it goes to the Recycle Bin, not gone forever. To delete it immediately without the safety net, hold Shift while pressing Delete. You can always fish it out of the Recycle Bin until you empty it.
Restoring from Recycle Bin Double-click the Recycle Bin on your desktop, find the file, then right-click it and choose Restore — it goes right back where it was. This only works if you haven't emptied the Recycle Bin since deleting it.
Emptying the Recycle Bin Right-click the Recycle Bin on your desktop and choose "Empty Recycle Bin" to permanently delete everything in it and free up space. Only do this when you're sure — once emptied, those files are very hard to get back.
Copying and moving files To copy, right-click the file and choose Copy, open the destination folder, right-click and choose Paste. To move instead, choose Cut instead of Copy. Or simply drag the file with your mouse from one folder window to another — holding Ctrl while you drag makes a copy instead of moving it.
File extensions A file extension is the short code after the dot in a file's name — .jpg means a photo, .pdf a document, .mp3 music. It tells Windows which program to open it with. To see them, open File Explorer, click View at the top, and check "File name extensions."
Selecting multiple files To grab a bunch of files at once, click the first one, hold Ctrl, and click each additional file. For a whole row of them, click the first, hold Shift, and click the last — everything between gets selected. Ctrl + A selects absolutely everything in the folder.
File properties Right-click any file and choose Properties to see its size, what type it is, and when it was created or last changed. This is handy when your disk is full — sort a folder by size to find the biggest space-hogs.
Sorting files In File Explorer, click the View menu at the top, then "Sort by" to arrange files by name, date, size, or type. Sorting by Date Modified puts your newest files at the top — the fastest way to find what you just saved.
Searching in File Explorer Open File Explorer and type what you remember into the search box at the top-right — even part of the file's name works. Windows searches that folder and everything inside it. If you're not sure where it is, search from "This PC" to check the whole computer.
Documents, Pictures, and other libraries Windows gives you ready-made folders: Documents for papers, Pictures for photos, Downloads for things from the internet, and Music and Videos for the rest. You'll find them on the left side of File Explorer. Saving each kind of file in its matching folder keeps things findable.
Address bar in File Explorer The address bar across the top of File Explorer shows exactly where you are, like "This PC > Documents > Taxes." Click any word in it to jump up to that folder. Click the empty space to the right of it and the full address appears, which you can copy and paste.
USB flash drive / thumb drive A USB drive is a tiny stick that holds files you can carry anywhere — plug it into any rectangular USB port on your computer and it appears in File Explorer. Drag files onto it to copy them. When you're done, click "Safely Remove Hardware" by the clock before pulling it out.
OneDrive (cloud storage on Windows) OneDrive is Microsoft's cloud storage — it keeps a copy of your files on the internet so they're safe if your computer dies. Files in your OneDrive folder sync automatically when you're online. The little cloud icon by the clock tells you the status: a checkmark means everything is backed up.
PDF files A PDF is a document that looks the same on every computer — forms, manuals, and statements usually come as PDFs. Double-clicking one opens it in your browser or a reader automatically. To fill in a PDF form, look for the highlighted boxes you can click and type in.
Word documents (.docx) A Word document (.docx) is the standard file for letters and papers. If you don't own Microsoft Word, the free LibreOffice opens them fine, and so does Google Docs in your browser. Double-clicking the file opens it in whatever writing program you have.
Excel spreadsheets (.xlsx) Excel files (.xlsx) are grids of rows and columns for numbers and lists — budgets, addresses, inventories. The free LibreOffice Calc opens them, as does Google Sheets in your browser. Each tab at the bottom is a separate page of the same file.
PowerPoint (.pptx) PowerPoint files (.pptx) are slideshows — one idea per slide, often shown on a projector. The free LibreOffice Impress opens them, as does Google Slides in your browser. Press F5 while viewing to start the full-screen show.
Photo formats (JPG vs PNG) JPG is the standard photo format — small files, great for sharing and emailing. PNG keeps sharper edges and handles transparency, so it's better for screenshots and logos, but the files are bigger. For everyday photos, JPG is the right choice.
Video and music files (MP4, MP3) MP4 is the standard video format — it plays on phones, computers, and TVs without fuss. MP3 is the standard music format, small enough to hold thousands of songs. If a video won't play, it's probably an unusual format; the free VLC player handles nearly all of them.
EXE files (programs) An .exe file is a Windows program — double-clicking it installs or runs software. Only run .exe files from places you trust, because viruses disguise themselves as .exe files in email attachments. If Windows warns you about an .exe, stop and think before clicking through.
What is a file vs a folder A file is one thing — a photo, a letter, a song. A folder is a container that holds files, like a filing cabinet drawer. Folders can hold other folders, so you can organize by topic: a "2026" folder holding a "Taxes" folder holding your tax files.
Download vs upload Downloading brings something from the internet to your computer — like saving a photo from email. Uploading sends something from your computer to the internet — like attaching that photo to an email. Downloads are usually much faster than uploads on home internet.
What is the cloud "The cloud" just means someone else's computers on the internet storing your stuff — your email, photos, and backups likely live there already. It's as safe as your password is strong. The big win: your files survive even if your computer dies.
Phones
Smartphones, flip phones, plans, apps, photos, and video calls.
Your phone does four jobs you will use every day: calls, texts, contacts, and photos. Everything else on it is extra. Learn these four and the phone starts feeling friendly.
Calls
iPhone
Samsung
iPhone: When the phone rings, tap the green Accept button — or slide the slider if the phone is locked. The red Decline button sends the call away. To make a call, open the Phone app, tap Recents or Contacts, and tap the person’s name.
Samsung: On the full-screen incoming-call display, drag the green phone icon toward the center to answer and drag the red icon toward the center to decline. If the call appears as a small banner, tap the answer or decline button. To call someone back, open the Phone app, tap Recents, and tap their name.
Texts
iPhone
Samsung
iPhone: Open Messages, tap the square-with-pencil icon at the top, type the person’s name, write your note, and tap the blue arrow to send. To attach a photo, tap the + next to the typing box and pick Photos.
Samsung: Open Messages, tap the round blue Start chat button, and pick the person. Type in the RCS message box — as you type, the round sound-wave button turns into a blue send arrow; tap it to send. For a photo, tap the + or the picture icon.
Contacts
iPhone
Samsung
iPhone: Open the Phone app, tap Contacts, then the + at the top. Type the name and number, tap Done. Save family first — those are the calls that matter.
Samsung: Open the Contacts app, tap the +, type the name and number, and tap Save. After that you tap the name instead of dialing digits.
Photos
iPhone
Samsung
iPhone: Tap the Camera icon, then tap the big round button. Your pictures wait in the Photos app — newest at the bottom.
Samsung: Tap the Camera icon, then tap the big circle. Your pictures wait in the Gallery app — newest at the top. Scroll up to see the ones you just took.
iPhone is Apple’s phone — one company makes it, so everything matches and updates arrive together.
Samsung phones run Android (Google’s system) — more models and prices, same four basic jobs, slightly different buttons.
Either one is fine. Pick the one your family uses — then they can help you, and video calls just work. Our buying guides compare them in plain language: iPhone guide and Android guide.
A SIM card is the tiny chip your phone company gives you. It tells the network who you are, so calls and texts reach your phone. If you switch companies, they give you a new one.
Phone storage is the space inside your phone for apps, photos, and videos. When it fills up, your phone slows down or stops taking pictures. Deleting old photos and unused apps frees it up.
Touch ID setup Touch ID is the fingerprint reader on iPhones that still have a Home button, like the iPhone SE. Open Settings, tap Touch ID & Passcode, type in your passcode, then tap Add Fingerprint and rest your finger on the Home button until it has read it a few times. After that you can unlock your phone and approve purchases with just your finger.
Cracked and black screen If the screen is black but the phone still rings or vibrates, the phone itself is alive — only the screen is broken. Try a force restart first (on iPhone, press volume-up, then volume-down, then hold the side button until the Apple logo shows). If the screen stays black, the display needs replacing — that's a repair-shop job, and it's worth doing before the cracks spread.
Phone keeps restarting A phone that restarts on its own is usually struggling with a bad app or a software problem. First, install any waiting software update — that fixes it more often than you'd think. If it keeps happening, think about which app you installed most recently and delete it.
Pop-up A "pop-up" is a small window that appears over what you're doing — many are ads, and some are scams pretending to be warnings. Never tap a pop-up that says your phone has a virus or that you've won something — just close it. If pop-ups appear even when you're not in your browser, an app you installed may be causing them, and deleting your most recent apps usually stops it.
Screen went black If the screen is black but the phone still makes sounds, the phone is on — only the display is stuck. Try a force restart: on iPhone press volume-up, then volume-down, then hold the side button until the Apple logo appears. On Android, hold the power button down for a full 30 seconds.
Ghost touch This is called "ghost touch" — the screen registers touches you didn't make. Take the phone out of its case and clean the screen with a soft dry cloth, since dirt or a bad screen protector can cause it. If it keeps happening with the case off, restart the phone.
Widget A widget is a little live window on your home screen that shows information without opening the app — like the weather, your calendar, or the time. To add one on iPhone, press and hold an empty spot on the home screen and tap the plus sign. On Android, press and hold an empty spot and tap Widgets.
Notification A notification is a short message from an app — a new text, an appointment reminder, or an update. They pile up on your lock screen and in the panel you get by swiping down from the top. If an app bothers you too much, you can turn off its notifications in Settings under Notifications.
Face ID Face ID is the iPhone's face scanner — it looks at your face to unlock the phone instead of a passcode. You set it up once and then just glance at your phone. It works with glasses and most sunglasses, but it needs to see your eyes, nose, and mouth, so it struggles with a face mask pulled all the way up. On iPhone 12 and newer, you can turn on "Face ID with a Mask" under Settings → Face ID & Passcode — it unlocks using the area around your eyes.
Fingerprint unlock Most Android phones unlock with your fingerprint — the sensor is usually under the screen or on the back of the phone. To set it up, open Settings and look for Security or Biometrics, then follow the steps to add your fingerprint. After that, just rest your finger on the sensor to unlock.
Screen Time Screen Time is your iPhone's report on how much you use your phone and which apps you use most. It can also set limits — for example, reminding you when you've been on Facebook for an hour. You'll find it in Settings under Screen Time.
Visual voicemail Visual voicemail shows your voicemails as a list you can tap and play in any order — no more dialing in and listening to them one by one. On iPhone it's the Voicemail tab in the Phone app. If it asks you to set it up, you'll create a voicemail password first.
Call waiting Call waiting is the beep you hear when someone else calls while you're already on a call. You can tap to put the first person on hold and answer the second, or ignore it and they'll go to voicemail. It's on by default with most carriers — you don't need to set anything up.
Caller ID Caller ID is what shows you who's calling before you answer — the name or number on your screen. If it says "Unknown" or "Private Number," the caller hid their number, which is common with spam calls. You can silence those with the Silence Unknown Callers setting on iPhone.
IMessage On iPhone, blue message bubbles are iMessages — they go over the internet between Apple devices and are free. Green bubbles are regular text messages, which go through your phone plan and work with any phone, including Android. If your bubbles turned green with someone who used to be blue, they may have switched to Android.
Text delivered On iPhone, the tiny word "Delivered" under your message means it reached their phone, and "Read" means they opened it. On Android, check marks do the same job — two check marks means delivered. If there's no status at all, the message may still be sending — give it a minute and check your signal.
Group text A group text is one conversation with several people in it — every reply goes to everyone. To leave one on iPhone, open the conversation, tap the group name or the people icons at the top, and choose Leave this Conversation. You can only leave if there are at least three other people and everyone has an iPhone.
Call forwarding Call forwarding sends your incoming calls to a different number automatically — handy if you want your cell calls to ring on your home phone. On iPhone, go to Settings, then Phone, then Call Forwarding, and type in the number. Remember to turn it off when you don't need it anymore, or you'll miss calls on your cell.
Account An "account" is your personal identity with a company or website — it's what remembers your stuff, like your photos in Google Photos or your orders on Amazon. Creating one usually means giving an email address and making a password. If a site says "sign in to your account," it just wants you to log in.
Close apps On iPhone, swipe up from the bottom and pause in the middle — you'll see all your open apps as cards. Swipe any card up and off the screen to close it. On Android, tap the square button at the bottom, then swipe apps away or tap Clear all.
Charge phone overnight Yes, it's fine to leave your phone plugged in overnight — modern phones stop charging when full and just sip power to stay topped up. What wears a battery out is heat, so don't charge it under a pillow or in a hot car. If your phone offers "optimized charging" in Settings under Battery, turn it on — it learns your routine and treats the battery gently.
Clean phone screen Use a soft, dry microfiber cloth — the kind that comes with glasses — and wipe gently in circles. For stubborn spots, dampen the cloth slightly with water, never spray liquid directly on the phone. Don't use window cleaner or paper towels; they're too harsh and can wear down the screen's coating.
Get directions Open the Maps app (Google Maps on Android, Apple Maps on iPhone), tap the search box, and type where you want to go. Tap Directions, then Start, and the phone will talk you through every turn. For driving, a cheap dashboard mount keeps the phone where you can glance at it safely.
Podcast A podcast is like a radio show you can play anytime — people talk about news, stories, hobbies, anything. On iPhone, open the Podcasts app that's already on your phone and search for a topic you like. On Android, use the YouTube app or Spotify and search there.
The mute switch (older iPhones) The mute switch is the tiny switch above the volume buttons on older iPhones. If you can see orange on it, your phone is silenced — calls and alerts won't make a sound. Flip it toward you so the orange hides, and your ringer comes back.
The notch and Dynamic Island The notch is the black cutout at the top of the iPhone screen that holds the front camera. On newer iPhones it's a smaller floating shape called the Dynamic Island, which also shows live updates — your timer, your music, your flight — right up there. It's normal and supposed to be there.
MagSafe charging MagSafe is Apple's magnetic charging — a round pad that snaps onto the back of your iPhone and charges it wirelessly. It also holds magnetic wallets and car mounts in place. Any iPhone 12 or newer works with it.
Wireless charging Wireless charging means laying your iPhone on a charging pad instead of plugging in a cable — it charges through the back of the phone. Any pad marked "Qi" works with iPhones from the iPhone 8 on. It's slower than a cable, but handy overnight.
ESIM (no physical SIM card) An eSIM is a SIM card built into the phone — there's nothing to pop in or out. Newer iPhones use only eSIM. When you switch carriers, they send your plan over the internet and it activates on the phone itself, usually by scanning a code they give you.
What iPhone do I have Open Settings, tap General, then tap About — the Model Name line tells you exactly which iPhone you have, like "iPhone 13" or "iPhone SE." That's the name to use whenever you're buying a case or asking for help. (The entry below, "About this iPhone," shows the same page's serial number — that's the number Sean asks for.)
IPhone SE explained The iPhone SE was Apple's budget iPhone (the one with the old-style Home button) — Apple discontinued it in 2025, but SEs still work and get updates. Apple's current budget iPhone is the iPhone 17e ($599) — no Home button (Face ID instead), a full-size screen, and it still runs everything and gets updates for years. It's the one Sean usually recommends for folks who want simple and affordable.
Check iPhone storage space Open Settings, tap General, then tap iPhone Storage — you'll see a bar showing what's eating your space, usually photos and apps. Tap any app in the list to offload it (removes the app but keeps your stuff) or delete it for good.
Battery Health on iPhone Open Settings, tap Battery, then tap Battery Health — the Maximum Capacity number tells you how worn your battery is. A new iPhone reads 100%; when it drops near 80%, Apple suggests a battery replacement. That's normal wear after a couple of years.
Force restart an iPhone Press the volume-up button once, then volume-down once, then hold the side button until the Apple logo appears — even if the screen was frozen. This doesn't delete anything; it just forces the phone to start fresh. Use it when a normal restart won't work.
"iPhone is disabled" message "iPhone is disabled" means too many wrong passcodes were typed, and the phone locked itself for safety. You'll need a computer to reset it — there's no way around the wait with buttons alone. If your photos were backed up to iCloud, you'll get them back after the reset.
Focus modes Focus modes are like Do Not Disturb with different rules — Sleep silences everything at bedtime, Driving quiets your phone in the car, Work lets only work people through. Find them by swiping down from the top-right and tapping Focus. Set each one up once, and it runs itself.
Sounds & Haptics / ringer volume Open Settings, tap Sounds & Haptics, and drag the Ringtone and Alerts slider up. That's the volume for incoming calls — separate from your music volume. While you're there, you can also pick a louder ringtone that's easier to hear.
App Library The App Library is the last page of your Home Screen — swipe left past all your pages and your apps are sorted into folders there. Every app on your phone lives here even if you removed its icon from the Home Screen. Pull down on it to search any app by name.
Notification Center Swipe down from the top of the screen (from the top-left on newer iPhones) to see all your recent notifications in one list — missed calls, texts, reminders. Swipe one to the left to clear it, or tap Clear to wipe them all.
Location Services Location Services lets apps see where you are — Maps needs it, most games don't. Open Settings, tap Privacy & Security, then tap Location Services to see every app's setting. Turn it off for apps that don't need it; leave it on for Maps and Find My.
Background App Refresh Background App Refresh lets apps check for new content when you're not using them — handy, but it uses battery. Open Settings, tap General, then Background App Refresh to turn it off for apps you rarely use. Your battery will thank you.
About this iPhone (General > About) Open Settings, tap General, then tap About — this page lists your phone's name, model, serial number, and how much storage it has. Sean may ask for the serial number if he's helping you — this is where it lives. Tap and hold it to copy.
VoiceOver (screen reader) VoiceOver is the iPhone's screen reader for blind and low-vision users — it speaks everything you touch. If it turned on by accident, triple-click the side button to toggle it. To set it up properly, go to Settings, then Accessibility, then VoiceOver.
Zoom (magnifier accessibility) The Zoom accessibility feature magnifies your whole screen — different from just bigger text. Turn it on in Settings, then Accessibility, then Zoom. Then double-tap with three fingers to zoom in, and drag with three fingers to move around.
Reduce Motion If the zooming animations make you queasy, open Settings, tap Accessibility, then Motion, and turn on Reduce Motion. Your phone stops the swooping effects and just fades between screens instead. Many folks find it calmer.
Emergency SOS settings (auto-call and contacts) Hold the side button and either volume button together — an Emergency SOS slider appears, and if you keep holding, it calls 911 by itself. Set it up in Settings under Emergency SOS. It can also text your emergency contacts your location automatically.
Handoff (start on one Apple device, finish on another) Handoff lets you start something on your iPhone — an email, a web page, a call — and pick it up on your Mac or iPad right where you left off. It works when both devices use the same Apple ID and sit near each other with Bluetooth on. Look for the little app icon at the edge of your Dock or app switcher.
Live Text (copy text from photos) Live Text lets you copy words right out of a photo — a sign, a menu, a document. Open the photo, press and hold the words, and Copy appears like normal text. It also works in the Camera app: point at text and tap the little scan icon.
NameDrop (share contact by touching phones) NameDrop shares your contact card by holding two iPhones near each other — your info pops up on their screen to accept. It also works for sharing photos the same way. If you'd rather it didn't happen by accident, you can turn it off in Settings under General, then AirDrop.
StandBy mode (iPhone as bedside clock) StandBy turns your charging iPhone into a bedside clock — lay it on its side while it charges and it shows the time, your photos, or widgets in big letters. It needs the phone tilted sideways on a charger. Handy on a nightstand.
Apple Support app The Apple Support app (free in the App Store) walks you through fixes and can start a chat or call with a real Apple advisor. It's the fastest way to reach Apple without hunting for phone numbers. Have your Apple ID handy when you contact them.
Genius Bar / Apple Store help The Genius Bar is the help desk inside every Apple Store — free advice, paid repairs. Book ahead in the Apple Support app so you're not waiting. Bring your charger and know your Apple ID password; back up first if you can.
IPhone water damage Don't charge it and don't use a hair dryer — tap it gently against your hand with the port facing down, then leave it upright in a dry spot for several hours. Modern iPhones survive splashes, but charging while wet is what kills them. If it was salt water, rinse lightly with fresh water first.
"Support.apple.com" (Apple's help site) Support.apple.com is Apple's own help site — official guides for every device, written plainly. It's trustworthy in a way random Google results aren't. Bookmark it; when in doubt, check what Apple itself says first.
Reset iPhone to factory settings Open Settings, tap General, then Transfer or Reset iPhone, then Erase All Content and Settings. This wipes everything — only do it with an iCloud backup done first, or after Sean says so. It's the last resort for a deeply misbehaving phone, and the right step before selling it.
"No Service" on iPhone "No Service" means your phone can't find your carrier's towers. First toggle Airplane Mode on and off — that re-registers you. If it persists in one spot, it's the coverage, not your phone.
IPhone overheating ("iPhone needs to cool down") If your iPhone flashes a temperature warning, move it somewhere cool and shady and stop using it — it'll recover on its own. Don't put it in the freezer; condensation hurts more than heat. Leaving it on a sunny car dashboard is the classic cause.
Forgot iPhone passcode There's no way to recover a forgotten iPhone passcode — Apple designed it that way so thieves can't either. The only fix is erasing the phone with a computer and restoring from your iCloud backup. Write your passcode down somewhere safe this time.
Change your voicemail greeting Open the Phone app, tap Voicemail at the bottom, then tap Greeting in the top corner. Tap Custom, tap Record, and say your greeting — something like "Hi, you've reached Mary, please leave a message." Tap Stop, tap Play to check it, then Save.
Dictation (talk instead of type) Tap the little microphone on your iPhone keyboard and just talk — your words appear as text. Say "period" or "question mark" for punctuation. It's far easier than pecking at tiny keys, and it works in texts, emails, and notes.
Back Tap (double-tap the back of your iPhone) Back Tap turns the back of your iPhone into a button — double or triple tap it to take a screenshot, open the camera, or turn on the flashlight. Set it up in Settings under Accessibility, then Touch, then Back Tap. It even works through most cases.
Shake to undo typing Made a typing mess? Give your iPhone a little shake — an Undo button pops up. Tap Undo and your last typing disappears; shake again for Redo.
Search inside Settings Can't find a setting? Open Settings and pull the screen down — a search bar appears at the top. Type what you're looking for, like "brightness" or "wifi," and it jumps you straight there.
Recover deleted photos (Recently Deleted) Deleted photos aren't gone right away — open Photos, tap Albums, scroll to Recently Deleted, and you'll find everything from the last 30 days. Tap Select, pick the ones you want back, and tap Recover. After 30 days they're gone for good.
Ping your iPhone from your Apple Watch Lost your phone in the couch? On your Apple Watch, open Control Center — press the side button on newer models (on older models, swipe up) — and tap the ringing-phone icon — your iPhone chimes even on silent. Hold the icon and it flashes its light too.
Answer calls on your Apple Watch When your iPhone rings, your watch rings too — tap the green button to answer and talk right into your wrist. It's a speakerphone, so it's best somewhere quiet. On a cellular watch you can even call out with the phone left at home.
Guided Access (lock the iPhone to one app) Guided Access locks your iPhone into a single app — perfect when grandkids borrow it. Turn it on in Settings under Accessibility, then Guided Access. Open the app, triple-click the side button, and tap Start.
Google Pixel phone Pixel is Google's own phone — Google makes both the Android system and the phone itself, so Pixels get updates first and have the cleanest, simplest version of Android. The camera is excellent and takes great photos by itself. If you want the simplest Android with no extra clutter, Pixel is the one to look at.
Android version / software update on Android To see your Android version, open Settings and tap About phone — it is listed there with a number like 14 or 15. To check for updates, open Settings, tap Software update (Samsung) or System then System update (Pixel), and tap Download and install. Updates keep your phone safe and fix problems, so install them when they appear.
Samsung account vs Google account Your Google account is the important one — it handles your email, contacts, photos backup, and the Play Store. A Samsung account is optional and only adds Samsung extras like their cloud backup and Find My Mobile. You can use a Samsung phone happily with just your Google account signed in.
Smart Switch (moving to a Samsung) Smart Switch is Samsung's free app for moving everything from your old phone to a new Samsung — photos, contacts, messages, even your apps. Put the phones near each other, open Smart Switch on both, and follow the steps; a cable between them is fastest. It works even if your old phone is an iPhone.
App drawer The app drawer is the full list of every app on your Android — swipe up from the bottom of the home screen and it opens. Your home screen only shows the apps you put there; everything else lives in the drawer. To add one to your home screen, press and hold its icon in the drawer and drag it out.
One UI (Samsung's look) One UI is Samsung's name for how Android looks on Galaxy phones — the style of the menus, icons, and settings. It is still Android underneath, just dressed in Samsung's clothes. When Samsung announces "One UI 8.5," that is their latest version of the look, usually arriving with an Android update.
Set up a new Android phone Turn it on and follow the steps — connect to Wi-Fi, sign in with your Google account (the same email as your old phone), and it will offer to copy everything over. Say yes to the copy step; it moves your photos, contacts, and apps by itself. The whole thing takes about 20 minutes, mostly waiting.
Samsung vs Pixel — which is simpler Pixel is the simplest Android — clean menus, no duplicate apps, updates straight from Google. Samsung gives you more features and fancier hardware, but there are two of some apps (Samsung's and Google's), which confuses some people. For a senior who wants the least fuss, Pixel is usually the easier pick.
Android Go (cheap phones) Android Go is a lighter version of Android for very cheap phones with little memory. It works, but those phones are slow and run out of space fast. If a phone costs under $150 new, check whether it runs Android Go — spending a little more for a full Android phone is usually worth it.
Motorola phone Motorola makes honest, affordable Android phones — clean software close to Pixel's, decent cameras, and prices well under Samsung's. The Moto G series is their popular budget line. They do not get updates as long as Pixel or Samsung, but for the price they are hard to beat.
Android tablet Samsung's Galaxy Tab is the main Android tablet — good screens, fair prices, and it runs the same apps as your Android phone. It will not run iPad apps, so if your family all uses iPads, an iPad keeps things simpler. For an Android household, the Galaxy Tab fits right in.
RCS messaging / chat features RCS is the newer kind of texting on Android — it adds read receipts, typing indicators, and big photo sharing, like iMessage on iPhone. In Google Messages, tap your profile picture, then Messages settings, then RCS chats, and turn it on. Both people need it on for the extras to work.
Dual SIM Android Many Android phones take two SIM cards (or one card plus an eSIM), so one phone can have two numbers — handy for a work line and a personal line. An eSIM is a digital SIM you set up by scanning a code from your carrier instead of inserting a card. Samsung and Pixel both support eSIM on recent models.
Samsung Internet browser Samsung Internet (the purple globe icon) is Samsung's own web browser — many Galaxy phones have both it and Chrome. It works fine, and some people like its bottom address bar. You can use either one; your bookmarks will not move between them unless you import them.
Samsung Messages vs Google Messages Samsung phones come with two texting apps: Samsung Messages (green bubble icon) and Google Messages (blue bubble icon). They do the same job — pick one and ignore the other so texts do not split between two places. Google Messages is the better pick going forward since it gets the newest features.
Samsung Gallery Gallery (the flower-like icon) is Samsung's photo app — it shows the pictures on your phone. Google Photos (the pinwheel) does the same but also backs them up online. Use Gallery to look at photos; make sure Google Photos backup is on so they are safe if the phone is lost.
Samsung Notes Samsung Notes (the yellow notepad icon) is Samsung's notes app — good for lists, sketches, and even handwriting with the S Pen on models that have one. Your notes sync to your Samsung account. If you prefer Google's world, Google Keep does the same job and syncs to Gmail.
Samsung Health Samsung Health (the heart icon) counts your steps, tracks walks and workouts, and can log sleep — all free, no watch needed. Open it and it starts counting steps by itself using the phone's sensors. Carry the phone in a pocket for the most accurate count.
Edge panel The Edge panel is the hidden strip on the side of Samsung's curved-screen phones — swipe in from the right edge and your favorite apps and contacts slide out. To turn it on or change what is in it, open Settings, tap Display, then Edge panels. If your phone has a flat screen, you may not have this feature.
Samsung Cloud backup Samsung Cloud backs up your Samsung phone's settings, messages, and home screen layout to your Samsung account. Turn it on in Settings under Accounts and backup, then Samsung Cloud. It works alongside Google's backup — between the two, a new Samsung restores almost everything by itself.
Samsung DeX DeX turns your Samsung phone into a desktop computer when you connect it to a monitor or TV — windows, taskbar, mouse support, the works. It is built into Galaxy S phones; just plug in a USB-C to HDMI cable (or connect wirelessly to a smart TV). Handy if your computer dies and you need a big screen in a pinch.
Samsung Knox (security) Knox is Samsung's built-in security system — it guards the phone from the chip up and is why Samsung phones are trusted for work email. You do not need to turn anything on; it runs quietly in the background. Just keep your software updates installed and Knox does the rest.
S Pen The S Pen is the little stylus that slides into Galaxy S Ultra and older Note phones — great for signing documents, jotting notes, and tapping tiny buttons. Pull it out and a menu of pen tools appears. If yours stops working, check Settings under Advanced features, then S Pen, and make sure it is turned on.
Samsung Wallet (was Samsung Pay) Samsung Wallet (formerly Samsung Pay) pays at store readers by tapping your Galaxy phone — it even worked on old swipe-only terminals, which was its famous trick. Open the app, add your card, and verify with your bank. Newer phones also use Google Wallet fine, so use whichever you set up first.
Samsung TV Plus Samsung TV Plus is free live TV built into Galaxy phones and Samsung TVs — news, movies, and shows with ads, no subscription. Look for the TV Plus app on your phone. It is a nice freebie, not a replacement for Netflix, but the price is right.
Wi-Fi on Android (Samsung vs Pixel) To connect to Wi-Fi: on Samsung, open Settings, tap Connections, then Wi-Fi, and pick your network. On Pixel, open Settings, tap Network & internet, then Internet, and pick your network. Type the password carefully — it is case-sensitive, and the sticker on the router has it.
Mobile data on/off Mobile data is your phone's internet when Wi-Fi is not around — it comes from your phone plan. To turn it off (to save data), open Settings, tap Connections (Samsung) or Network & internet (Pixel), then turn off Mobile data. To see what is using it, look for Data usage on the same screen.
Notifications settings Android To quiet a noisy app: open Settings, tap Notifications, then App notifications, and toggle off any app bothering you. For finer control, tap the app's name to choose which kinds of alerts it can send. Your important calls and texts are separate — this only affects app pings.
Display settings (brightness, timeout) Open Settings, then Display: brightness slider at the top, Screen timeout sets how fast the screen sleeps (30 seconds saves battery), and Adaptive brightness adjusts itself to the room. If the screen keeps going dark while you read, set the timeout to 2 minutes.
Sound settings Android Open Settings, then Sounds and vibration (Samsung) or Sound (Pixel) — you will see separate sliders for ringtone, media, notifications, and alarms. If your phone is silent, the ringtone slider is probably at zero. Also check the physical mute: Samsung has no mute switch, so look for a crossed-out speaker in the quick panel.
Battery settings Android Open Settings, then Battery to see what is draining your phone and turn on Power saving mode when you need to stretch it. To always see the percentage, tap the three dots or look for "Show battery percentage" on the same screen. AccuBattery-style worry is unnecessary — just charge when it is low.
Storage settings Android Open Settings, then Device care (Samsung) or Storage (Pixel) to see exactly what is filling your phone — apps, photos, and system, each with its size. Tap one to manage it. When space runs low, photos and old downloads are the usual culprits; the Files app helps clean them.
Location settings Android Open Settings, then Location, and make sure "Use location" is on — Maps and weather need it. Below that, App permissions shows which apps can see where you are; turn off any that do not need it. If Maps cannot find you, toggle location off and back on.
Security settings Android (lock screen) Open Settings, then Security and privacy (Samsung) or Security (Pixel), then Screen lock, to choose PIN, pattern, password, fingerprint, or face unlock. Fingerprint plus a PIN backup is the sweet spot — fast and safe. Write the PIN down somewhere safe; without it, a reset wipes the phone.
App settings (force stop, permissions) To manage an app, press and hold its icon and tap the little "i" (App info) — here you can Force stop a frozen app, check its Storage to clear a misbehaving cache, or tap Permissions to see what it can access. Force stop is safe; it just closes the app fully.
Default apps Android To pick which app opens links or texts by default: open Settings, tap Apps, then Choose default apps (Samsung) or Default apps (Pixel). Here you set your browser, texting app, and phone app. If links keep opening in the wrong app, this is where to fix it.
Auto-rotate screen Auto-rotate turns the screen sideways when you tilt the phone — great for videos and photos. Swipe down the quick panel and tap Auto-rotate (it may say Portrait when off). If it still will not turn, the app itself may not support sideways — try it in Photos or YouTube.
Font size on Android Open Settings, then Display, then Font size and style (Samsung) or Display size and text (Pixel) — drag the slider until text is comfortable. Display size makes everything bigger, not just text. These two together can make a phone genuinely easier to read.
Wallpaper on Android Press and hold an empty spot on the home screen, then tap Wallpaper (or Wallpapers) — pick a photo or one of the built-in designs, then choose Home screen, Lock screen, or both. Your own photos make the nicest wallpapers; the phone will let you crop them to fit.
Accessibility settings Android Open Settings, then Accessibility — this is Android's toolkit for easier seeing, hearing, and touching. Magnification zooms the screen with a triple-tap, TalkBack reads everything aloud, and there are options for bigger touch targets and flashing alerts. Worth exploring if the phone feels hard to use.
Accounts sync Android If contacts or email are not syncing, open Settings, tap Accounts and backup (Samsung) or Passwords & accounts (Pixel), tap your Google account, then Sync account, and make sure the switches are on. "Sync" just means the phone and Google keep matching copies — when it is off, changes on one side do not reach the other.
Date and time settings Your phone should set its own time: open Settings, tap General management (Samsung) or System (Pixel), then Date & time, and turn on Automatic date & time. If the clock is wrong, this switch is probably off — turn it on and it fixes itself from the network in seconds.
Screenshot on Samsung Press the Power and Volume Down buttons together briefly and let go — the screen flashes and the picture saves to your Gallery. Samsung also lets you swipe your palm across the screen (turn it on in Settings under Advanced features, then Motions and gestures). Find screenshots in the Gallery under Albums, then Screenshots.
Screen recording on Android Swipe down the quick panel twice and tap Screen record — if you do not see it, tap the pencil icon to add the button. Tap Start, and it counts down then records everything you do, with sound if you allow it. The video saves to your Gallery when you tap Stop.
Set a ringtone on Samsung Open Settings, then Sounds and vibration, then Ringtone, and pick one from the list — tap each to hear it first. To use your own song, tap the plus sign and choose a music file. For a special ringtone for one person, open their contact, tap Edit, and set their ringtone there.
Move and organize apps To move an app, press and hold its icon until it lifts, then drag it where you want. To make a folder, drag one app on top of another — a folder appears that you can name. Drag apps out of a folder to remove them.
Uninstall an app on Android Press and hold the app's icon and tap Uninstall, then confirm — the app and its data go away. If Uninstall does not appear, tap the "i" (App info) first, then Uninstall there. Built-in apps like Chrome may only offer Disable, which hides them without fully removing them.
Update apps on Android Open the Play Store, tap your profile picture, then Manage apps & device — tap Update all to update everything waiting. To make updates automatic, tap your profile picture, then Settings, then Network preferences, then Auto-update apps, and choose Over Wi-Fi only so it never eats your data.
Clear an app's cache When one app misbehaves, clearing its cache often fixes it without losing anything: press and hold the app icon, tap the "i" (App info), then Storage, then Clear cache. Do NOT tap Clear data unless someone you trust tells you to — that erases your logins and settings in the app.
Restart a Samsung phone Hold the Power and Volume Down buttons together for about 7 seconds — the phone restarts by itself. This fixes most glitches and is safe; nothing gets deleted. For a normal power-off, hold the same buttons briefly and tap Power off on the screen.
Restart a Pixel phone Hold the Power button for about 30 seconds — a Pixel takes longer than a Samsung, but it will restart. Nothing gets deleted; this just clears out whatever was stuck. For a normal shutdown, hold Power briefly and tap Power off.
Factory reset Android A factory reset erases EVERYTHING — only do this if you are giving the phone away or nothing else fixed it. First back up your photos (Google Photos backup on). Then: Settings, General management (Samsung) or System (Pixel), Reset, Factory data reset.
Back up an Android phone Your Google account backs up apps, settings, and call history automatically — check in Settings under Google, then Backup. Photos need Google Photos backup turned on separately (open Photos, tap your picture, then Backup). Samsung adds its own backup under Settings, then Accounts and backup.
Print from Android Most Wi-Fi printers work with Android directly: open what you want to print, tap Share or the three dots, then Print. If your printer is not listed, tap Add printer — the phone finds it on your Wi-Fi. Samsung phones also have extra printer plugins in the Galaxy Store if needed.
Split screen on Android To use two apps at once: open the first app, then tap the Recent apps button (the three lines), tap the app's icon at the top of its card, and choose Split screen — then pick the second app. Drag the divider to give one app more room. Great for watching a video while reading messages.
Do Not Disturb on Android Swipe down the quick panel and tap Do Not Disturb (the minus in a circle) — calls and pings go silent. Press and hold the button to set a schedule, like 10 PM to 7 AM, and to allow favorite contacts through for emergencies. Alarms still sound — it will not make you oversleep.
Set an alarm on Android Open the Clock app (it is on every Android), tap the plus sign, set the time, and tap OK — make sure the days you want are highlighted. If the alarm does not ring, check two things: Do Not Disturb allows alarms (it does by default), and the alarm volume slider in Settings under Sound is turned up.
Copy and paste on Android Press and hold the text you want until handles appear, drag them to cover what you need, then tap Copy. Tap where you want it to go, press and hold again, and tap Paste. Gboard keeps a clipboard history — tap the clipboard icon above the keyboard to see recent copies.
Share photos from Android Open the photo in Gallery or Google Photos, tap the Share icon (three dots connected by lines), and pick how to send it — text message, email, or WhatsApp. To share with a nearby Android, pick Quick Share or Nearby Share from the same menu. You can select several photos first and share them all at once.
Scan a QR code on Android Open your camera and point it at the QR code — most Android phones recognize it automatically and show a link to tap. If nothing happens, swipe down the quick panel and look for a "Scan QR code" button, or open Google Lens from the Google app and point it at the code.
Samsung is slow First restart it (hold Power + Volume Down for 7 seconds) — that alone fixes most slowness. If it is still slow, check storage: Settings, then Device care, then Storage — if it is nearly full, delete old photos and unused apps. A software update also helps; check under Settings, then Software update.
App keeps crashing on Android When one app keeps crashing: press and hold its icon, tap the "i" (App info), then Storage, then Clear cache. If it still crashes, go back and tap Clear data (you will have to log in again), or uninstall and reinstall it from the Play Store. If EVERY app crashes, restart the phone.
Bluetooth won't pair on Android Put the earbuds or speaker in pairing mode first (usually hold its button until it blinks blue) — the phone cannot find it otherwise. Then on the phone: Settings, Connections (Samsung) or Connected devices (Pixel), Bluetooth, and tap the device name. If it paired before and stopped, tap the gear next to its name and choose Unpair, then pair fresh.
Android phone overheating A warm phone during charging or video calls is normal; hot enough to be uncomfortable is not. Take it out of its case, close heavy apps, and move it out of the sun. If it stays hot doing nothing, an app may be stuck — restart the phone.
Battery draining fast on Android Open Settings, then Battery, to see which app is eating the most — an app stuck in the background is the usual suspect. Turn on Power saving mode from the same screen to stretch what is left. Screen brightness is the other big drain; turn on Adaptive brightness under Display and let the phone manage it.
Storage full on Android Open the Files app and tap Clean — it finds junk, duplicates, and old downloads to delete safely. Photos are usually the biggest chunk: make sure Google Photos backup is on, then use its "Free up space" option to remove photos already backed up. WhatsApp videos are another silent space-eater.
Android phone won't charge Try a different cable and a different wall outlet first — cables wear out inside where you cannot see. Check the charging port for packed-in lint and pick it out gently with a toothpick. A wall outlet charges much faster than a computer.
No sound on Android Press the volume-up button while a video is playing — Android has separate volumes, and the media one may be down while the ringer is fine. Check Do Not Disturb is off (swipe down the quick panel). If calls are quiet but videos are fine, the earpiece may be clogged — a soft dry brush usually clears it.
Screen unresponsive on Android Hold Power + Volume Down for 7 seconds (Samsung) or Power for 30 seconds (Pixel) to force a restart — a frozen screen cannot hurt anything by restarting. If the screen works after but keeps freezing, remove the case and screen protector; a bad protector causes "ghost touch" and dead spots. Persistent freezing means the screen may need repair.
Forgot pattern / PIN on Android After several wrong tries, the phone may offer "Forgot pattern" and let you unlock with your Google account — use that if it appears. Samsung's Find My Mobile website can also unlock a Samsung remotely. If neither works, a factory reset is the only way in, and it erases everything — this is why writing down your PIN matters.
Google account locked / verification If Google asks to "verify it's you," it is protecting your account — follow the steps with your recovery phone number or email. This often happens after a reset or a new phone. If you cannot get past it, use a computer to go to google.com and sign in there first; the phone usually follows once the computer works.
APK An APK is an Android app's installer file — like a ".exe" on Windows. You normally never touch them because the Play Store handles installation. Be careful with APKs from websites: unlike the Play Store, nobody checked them for safety.
Navigation buttons vs gestures Android lets you choose: three buttons at the bottom (Back, Home, Recent apps) or swipe gestures (swipe up for home, swipe from the side for back). Change it in Settings under Display, then Navigation bar (Samsung) or System, then Gestures (Pixel). If the back button vanished, someone switched you to gestures.
Status bar The status bar is the thin strip across the very top — it shows the time, battery, signal, Wi-Fi, and tiny icons for active notifications. Swipe down from it to open the notification shade and quick settings. If an icon puzzles you, swipe down — the shade labels what each one means.
Always On Display Always On Display keeps the time, date, and notification icons faintly visible when the phone is asleep — no need to wake it to check the time. Turn it on in Settings under Lock screen (Samsung) or Display (Pixel). It uses a little extra battery, so turn it off if battery life matters more.
NFC NFC is the short-range wireless that lets you tap-to-pay at stores — it only works within an inch or two, which is why it is safe. It is on by default on most phones; check in Settings under Connections (Samsung) or Connected devices (Pixel). No NFC means no tap-to-pay, so very cheap phones sometimes leave it out.
SD card / expandable storage Many Samsung phones (not Pixels) take a microSD card for extra photo and file storage — a 128 GB card costs under $20. Slide it into the SIM tray slot. Note: apps must stay on the phone itself; the card is for photos, videos, and files.
RAM vs storage Storage is the filing cabinet — where photos and apps live (64, 128, 256 GB). RAM is the desk — workspace the phone uses right now (4, 8, 12 GB); more RAM means smoother switching between apps. When a phone is "full," it is storage that is full — delete photos and apps, not RAM.
5G on Android 5G is the newest cell signal — faster than 4G in good coverage, about the same elsewhere. You do not need to turn anything on; the phone picks the best signal itself. Do not buy a new phone just for 5G — a good 4G phone on sale is often the smarter buy for basic use.
Notification shade Swipe down from the top of the screen and your notifications appear — texts, appointment reminders, app alerts, all in one list. Swipe one sideways to dismiss it; tap one to open it. Swipe down again for the Quick Settings buttons.
Recent apps button The Recent apps button (three vertical lines, or swipe up and hold with gestures) shows every app currently open as a stack of cards. Tap one to jump to it, or swipe a card away to close that app. You do not need to close apps to save battery — Android manages that itself.
Google Play Protect Play Protect is Google's built-in virus scanner — it checks every app you install and scans the phone daily, quietly. You do not need a separate antivirus app; in fact, most "antivirus" apps in the Play Store are junk themselves. Check it in the Play Store: tap your profile picture, then Play Protect.
Dark theme on Android Dark theme turns menus dark with light text — easier on the eyes at night and saves battery on most Samsung and Pixel screens. Turn it on in Settings under Display, then Dark (Samsung) or Dark theme (Pixel). You can schedule it to switch on automatically at sunset.
Android launcher The launcher is the app that draws your home screen and app drawer — Samsung's One UI Home and Pixel's Pixel Launcher are the built-in ones. You can install a different launcher from the Play Store to change how the home screen looks and works. If the home screen ever looks strange, someone may have changed the launcher.
Simple phones with big buttons and loud speakers — made for talking and texting, without the fuss of a full smartphone. If a regular smartphone feels overwhelming, one of these may be exactly right.
The two big names in simple phones are Jitterbug (by Lively) and TracFone flip phones. Here is what each one offers.
Jitterbug: Lively keeps it simple on purpose
Lively sells only two phones — there is no long confusing lineup to pick through. Both run on Verizon's network, both have an Urgent Response button, and there are no long-term contracts.
1. Jitterbug Flip2 — the classic flip phone. Lively calls it their easiest phone ever. Big buttons, a large screen, a simple list-style menu, and a powerful speaker. It has a camera, a magnifier, a flashlight, one-touch speed dialing, and even Amazon Alexa built in. It is made for calls and texts only — there is no data plan for this one, which keeps the monthly bill low and the phone blissfully simple. About $79.99 for the phone.
2. Jitterbug Smart4 — the simplest smartphone. For the person who wants a little more: a big 6.7-inch screen, an easy menu, loud dual speakers, voice typing (talk instead of typing), video chat with family, and call captioning that turns speech into text in real time — wonderful for hard-of-hearing ears. About $119.99 for the phone.
3. Lively Mobile2 — not a phone at all. This one comes up a lot, so it is worth knowing: a small portable device you carry that connects you to Lively's help team anywhere. It pairs with Lively's health and safety plans, like the Urgent Response service below.
The Urgent Response button
Every Jitterbug phone has a dedicated button that connects you to Lively's help team, 24 hours a day — for emergencies big and small, from a fall to a flat tire. It works through Lively's health and safety plans (a monthly add-on). Think of it as a help button built into your phone: press it, and a real person answers and gets you help.
TracFone flip phones
TracFone is one of the biggest no-contract carriers in the country. Their flip phones are locked to TracFone service, and plans are prepaid — monthly plans with unlimited talk and text start around $20 a month, or you can buy airtime cards that cover up to a full year. Good current picks:
TCL Flip 3 — dual screens (see who is calling without opening it), noise-canceling microphones for clear calls, and a long-lasting battery.
Nokia 2760 Flip — a familiar Nokia name with a 5MP camera, 4G, and weeks of standby time between charges.
TCL Flip 2 — big buttons with large legible numbers, a powerful speaker, Wi-Fi and Bluetooth, and a 2MP camera.
Which one is right for you?
Get a flip phone (Jitterbug Flip2 or a TracFone flip) if you mainly call and text, want the biggest buttons and simplest menus, or find smartphones genuinely overwhelming. For many people over 80, this is the safer bet — you can always step up later.
Get the Jitterbug Smart4 if you want video calls with the grandkids, photos, and a little internet, but still want everything simplified.
Get the Urgent Response add-on if living alone worries you or your family — the help button brings real peace of mind.
When to call Sean instead
You are not sure which phone or plan fits your life — I will talk it through with you.
You bought a phone and want help setting it up: contacts, speed dial, voicemail.
Your bill looks wrong or a plan changed without warning.
You want the Urgent Response button tested so you know it works.
Your device has a store built in. That is where apps come from — new ones you want, and updates for the ones you have. Find your device below — each card walks you through it, step by step.
Finding and installing an app
iPhone — Apple App Store
Video with voice — press play and follow along.
Open the App Store and tap Search at the bottom of the screen. Type the app's name, tap GET next to it, then confirm the way your phone asks — usually by double-clicking the side button.
Android — Google Play Store
Video with voice — press play and follow along.
Open the Play Store and tap the search bar at the top of the screen. Type the app's name, tap the app in the results, then tap Install. When it finishes, tap Open.
Samsung — Galaxy Store
Video with voice — press play and follow along.
Open the Galaxy Store and tap Search at the top right. Type the app's name, tap the app, then tap Install. When it finishes, tap Open.
Kindle Fire — Amazon Appstore
Video with voice — press play and follow along.
On your Kindle Fire, open the Appstore — the little shopping-bag icon. Search for the app, tap it, then tap Get or Download. Tap Open when it finishes.
Windows 11 — Microsoft Store
Video with voice — press play and follow along.
On your Windows 11 computer, open the Microsoft Store from the taskbar at the bottom of the screen. Search at the top, click the app, then click Get or Install. Click Open when it finishes.
Updating your apps
Updates fix problems and close security holes. A quick check now and then keeps your phone healthy.
iPhone
Narrated video. Press play, pause on any step.
Open the App Store and tap your profile picture at the top right. Tap Update All — or Update next to just one app.
To let the phone do it by itself: Settings → App Store → turn on App Updates.
Android
Open the Play Store and tap your profile icon at the top right. Tap Manage apps & device, then See details under “Updates available” and tap Update all.
To let the phone do it by itself: Play Store → profile icon → Settings → Network preferences → Auto-update apps → Over Wi-Fi only.
Deleting apps you do not want
iPhone
Narrated video. Press play, pause on any step.
Press and hold the app's icon until a menu appears. Tap Remove App, then Delete App, then Delete to confirm.
“Remove from Home Screen” only hides the icon — the app is still on your phone. Pick Delete App to truly remove it.
Android
Press and hold the app's icon, then tap Uninstall and confirm.
Staying safe in the store
Most apps are fine. A few are not. Two minutes of checking before you install saves real trouble.
Before you tap Install
Read the reviews, not just the stars. Some reviews are fake — beware of apps with hundreds of identical five-star reviews, or no reviews at all.
Check the developer name. The real app comes from the real company. Fakes often misspell the name by a letter or two.
Watch what it asks for. A flashlight app has no business reading your contacts. If the permissions do not match what the app does, skip it.
Compare download counts. The real version of a popular app has millions of downloads. A copy with only a few thousand is suspicious.
Subscriptions: the charge that repeats
Many “free” apps invite you to start a free trial — then charge your card every month. Deleting the app does not stop the charges. You have to cancel the subscription itself. Here is where they hide:
iPhone
Settings → tap your name at the top → Subscriptions. Tap the subscription, then Cancel Subscription.
On older iPhones, the auto-update switch lives under Settings → iTunes & App Store instead.
Android
Play Store → profile icon → Payments & subscriptions → Subscriptions. Tap the subscription, then Cancel subscription.
When to call Sean instead
You see a charge you do not recognize — sort it out before disputing anything.
An app you never installed keeps appearing on your phone.
Cancel Subscription Tap the subscription, then Cancel Subscription.
The Phone app basics The green Phone icon is where calls live. Tap it, then tap Keypad to dial a number, or tap Contacts to call someone saved. The Recents tab shows who called you — tap the little "i" next to a number to call back or block them.
Using Safari on iPhone (tabs and address bar) The compass icon is Safari — Apple's web browser, the program you open to visit websites. Tap the address bar at the bottom, type what you're looking for, and tap Go. The tabs button (two squares) shows every page you have open.
The Camera app Tap the Camera icon — or swipe left on the Lock Screen to open it fast. Tap the big white button to take a photo. Swipe the mode names above the button for Video, Portrait (blurry background), or Pano (wide shots).
The Photos app The colorful flower icon is Photos — every picture and video on your iPhone lives here, newest first. Tap Search at the bottom to find things by what's in them, like "dog" or "beach." The Albums tab sorts them for you automatically.
The Notes app The yellow notepad icon is Notes — tap it, then the pencil-and-paper icon to start writing. It saves automatically. You can make checklists, add photos, and it syncs to your other Apple devices through iCloud.
The Reminders app The Reminders app is your to-do list — tap New Reminder, type what you need to do, and tap the little "i" to add a date and time so your phone nags you. It's simpler than a calendar for "pick up milk" kinds of jobs.
The Calendar app The Calendar icon (it shows today's date) is where appointments live. Tap the plus sign, type what and when, and tap Add. Turn on alerts so your phone reminds you before it starts.
The Wallet app & Apple Pay The Wallet app holds your credit cards for tap-to-pay. Open it, tap the plus sign, and follow the steps to add your card — your bank verifies it once. Then just hold your phone near the store's reader and glance at it to pay.
The Health app The Health app (white icon with a pink heart) counts your steps automatically whenever you carry your phone. Open it to see walking distance, sleep if you wear a watch to bed, and trends over time. This is also where your Medical ID lives.
The Files app The blue folder icon is Files — it's where downloads, documents, and anything you save ends up. Tap Browse at the bottom, then "On My iPhone" or iCloud Drive. If you downloaded something from Safari and can't find it, look in Downloads here.
Voice Memos The Voice Memos app (sound-wave icon) records audio through the microphone — handy for remembering what the doctor said or capturing an idea. Tap the red button to start, tap it again to stop. It cannot record your phone calls directly: on iPhones with iOS 18.1 or later, call recording is built into the Phone app during the call, the recording saves to Notes, and everyone on the call is told it is being recorded. In many states you must tell the other person you're recording — check first.
Find My app The Find My app shows your iPhone, iPad, watch, and AirPods on a map — from your phone or at iCloud.com on any computer. It can also play a loud sound on a lost device, even on silent. Turn it on in Settings under your name, then Find My.
The Translate app The Translate app (blue icon with speech bubbles) turns speech or text into another language. Pick the two languages, tap the microphone, and speak — it talks back the translation. Download a language first if you'll be without internet.
Deleting apps on iPhone Press and hold the app's icon until a menu pops up, then tap Remove App, then Delete App. That frees its space for good. If you only want it off your Home Screen but keep it, choose Remove from Home Screen instead — it stays in your App Library.
Offloading unused apps Offloading removes an app but keeps its data — the icon stays with a little cloud, and tapping it re-downloads the app with everything intact. Turn it on in Settings under App Store, at the bottom. It's the gentlest way to free space.
Cancel a subscription (stop a recurring charge) Open Settings, tap your name at the top, then tap Subscriptions — every recurring charge through Apple is listed there. Tap one to change or cancel it; canceling stops the next charge but keeps it until the paid period ends. Check this list twice a year.
In-app purchases An in-app purchase is buying something inside a free app — extra game levels, a subscription, or unlocked features. The App Store always asks you to confirm with Face ID before charging. If grandkids play on your phone, turn on Ask to Buy so nothing buys itself.
Ask to Buy (kids' purchases) Ask to Buy makes your iPhone ask your permission before a child buys or downloads anything — the request pops up on your phone to approve or decline. Turn it on in Settings under your name, then Family Sharing, then the child's name. It works for free downloads too.
Apple Music Apple Music is Apple's Spotify rival — millions of songs on demand for a monthly fee, no ads. Ask Siri to play anything ("play Frank Sinatra") and it just plays.
AppleCare AppleCare+ is Apple's extended warranty — it covers accidental damage like a cracked screen for a service fee, far cheaper than paying full repair price. You can add it within 60 days of buying the device. For folks prone to drops, it usually pays for itself.
Free apps vs paid apps In the App Store, "GET" means free to download (though it may sell things inside), and a price means you pay once up front. Free apps with in-app purchases are the most common — the download costs nothing, extras cost money. Your card is only charged after Face ID confirms.
Gmail app on Android The Gmail app is on every Android phone and handles Gmail addresses best — it is the envelope icon, usually on the home screen. You can add other email addresses (Yahoo, Outlook) inside it too: tap your profile picture, then Add another account. If mail stops arriving, check that sync is on: open the app, tap the menu, then Settings, then your address, and make sure Sync Gmail is checked.
Google Maps on Android Google Maps is the blue map pin icon — type where you want to go, tap Directions, and choose the car, walking, or bus icon. Tap Start and it talks you through every turn. If it goes silent, the volume may be down or muted: during navigation, tap the speaker icon and pick Louder or unmute it.
Download offline maps You can save a map area to your phone so Maps works without signal — great for trips through dead zones. In Google Maps, tap your profile picture, then Offline maps, then Select your own map, and drag the box over the area. It downloads over Wi-Fi and stays for a year.
Google Drive on Android Google Drive is your free online filing cabinet from Google — 15 gigabytes free, shared with Gmail and Photos. The triangle-shaped app is on your phone; anything you save there is backed up and reachable from any device. To save a file to it, tap Share on the file and pick Drive.
Google Calendar app Google Calendar (the blue square with "31") keeps your appointments and reminds you before them. Tap the plus sign to add one — type what it is, pick the day and time, and tap Save. It syncs with your Google account, so appointments show up on your computer too.
Google Contacts app Google Contacts (the blue person icon) holds all your phone numbers and addresses, synced to your Google account so they survive a lost phone. Tap the plus to add someone new. If contacts vanished, check you are signed into the right Google account — that fixes it most of the time.
Google Messages app Google Messages (the speech-bubble icon) is the texting app on most Android phones. If texts will not send, check you have signal or Wi-Fi, then restart the phone — that fixes it nine times out of ten. The search bar at the top finds any old message in seconds.
Google Wallet / Google Pay Google Wallet (the wallet icon) lets you pay by tapping your phone on the store reader — no card needed. Open it, tap Add to Wallet, then Payment card, and follow the steps to add your debit or credit card. Your bank may text you a code to approve it.
Google Lens Google Lens is Google's camera that understands what it sees — point it at a plant, a product, or a sign in another language and it tells you what it is. Open the Google app and tap the little camera icon in the search bar. It is surprisingly good at identifying flowers, dog breeds, and landmarks.
Google Translate Google Translate (the blue "G" with a character icon) turns words and whole conversations between languages. Type or speak what you want translated, pick the languages at the top, and it shows and speaks the result. Point your camera at a sign for instant translation of the text it sees — great for travel.
Google Keep (notes) Google Keep (the lightbulb icon) is Google's simple notes app — perfect for shopping lists and reminders. Tap the plus to start a note, and tap the checkbox icon to make it a to-do list you can check off. Everything syncs to your Google account, so lists appear on your computer too.
Gboard (Google keyboard) Gboard is Google's keyboard on Android — the one that pops up when you tap a text box. You can slide your finger across the letters to type (glide typing), or tap the microphone to dictate instead. To change keyboard settings, open Settings, tap General management (Samsung) or System (Pixel), then Keyboard, then Gboard.
YouTube app on Android The YouTube app (the red play button) is on every Android phone — search for anything and tap to watch. Turn the phone sideways for a bigger picture. If videos will not play, check your Wi-Fi or data, then close and reopen the app; an update in the Play Store fixes most other problems.
Google News Google News (the colorful "N" icon) gathers the day's stories in one place and learns what topics you like. Open it and scroll — tap any story to read the full article. The "For you" tab is personalized; the "Headlines" tab shows the big stories everyone is reading.
Find My Device (Google) Google's Find My Device can ring, lock, or locate a lost Android from any browser — go to android.com/find and sign in with your Google account. It shows the phone on a map and can make it ring even on silent. Set it up before you need it: it works best when location is turned on.
Google One (storage backup) Google One is Google's paid storage plan — when the free 15 gigabytes fill up with photos and email, One adds more (usually 100 GB for a couple dollars a month). It also backs up your whole phone automatically. If your phone warns that storage is full, this is the simplest fix.
Play Store won't download apps When the Play Store will not download, first check you are on Wi-Fi and have storage space — those stop downloads silently. Then try this: open Settings, tap Apps, find Google Play Store, tap Storage, then Clear cache (not Clear data). Reopen the Store and try again — this fixes it most of the time.
T-Mobile, Verizon, AT&T, Spectrum, Consumer Cellular, and TracFone — compared in plain words. What each costs, who has a senior plan, and the truth about “free phone” deals.
The two kinds of plans
Postpaid (T-Mobile, Verizon, AT&T): you use the service first, then get a bill. Costs more, but you get stores to walk into, phone financing, and your data gets first pick of the tower's speed.
Prepaid (TracFone, Consumer Cellular, Spectrum Mobile, and the prepaid brands): you pay first. No contract. Usually cheaper. The trade-off: in busy times your data can slow down before postpaid customers' data does. The towers are often the same ones.
T-Mobile
Senior plan for 55 and up, available nationwide. Essentials Choice 55: about $45 to $50 a month for one line, about $60 a month for two lines, with autopay. Unlimited talk, text, and data.
Only the account holder has to be 55. The second line can be anyone.
Higher tiers add perks like streaming services, and cost more. Prices change — check T-Mobile's current page before you switch.
Verizon
Senior discount for 55 and up — Florida residents only. It takes $20 a month off one line or $30 a month off two lines on the Unlimited Welcome plan: about $45 a month for one line, $80 for two, with autopay and paperless billing.
You need a Florida billing address, which covers folks here in Sun City Center.
No contract and no early-termination fee. Device payments are separate — see the “free phone” box below.
Senior plan for 55 and up, available nationwide. $40 a month for one line, $35 per line for two lines ($70 total), with autopay from a bank account or debit card and paperless billing.
Only the account holder has to be 55. Each line gets 10 GB of hotspot data. Unlimited talk, text, and data in the U.S., Canada, and Mexico.
Only for Spectrum Internet customers. If you drop your home internet, mobile costs $10 more per line each month.
Unlimited: $30 a month per line. Unlimited Plus: $40. Plus Premium: $50. Speeds slow after 30 GB of data (50 GB on Plus). Taxes and fees are included in the price.
Runs on Verizon's network.
Made with older adults in mind. $20 a month for unlimited talk and text with 1 GB of data. $25 for 5 GB. Unlimited data for $35 a month if you are 50 or older.
AARP members: two unlimited lines for $55 a month total.
No contract, U.S.-based customer support, and you can bring your own phone. Runs on AT&T's and T-Mobile's networks.
TracFone
Owned by Verizon. Prepaid, no contract, sold at Walmart and Target.
Light users: TracFone yearly plans start under $200 a year — you pay once, no monthly bill.
Heavier users: the Freedom plan at $45 a month for unlimited talk and text. Prices change, so check tracfone.com before you buy.
You can bring your own phone.
Senior and 55+ plans at a glance
T-Mobile 55+: nationwide, about $45 to $50 a month for one line.
Verizon 55+: Florida only, about $45 a month for one line.
AT&T 55+: nationwide, $40 a month for one line.
Consumer Cellular: unlimited for $35 a month at 50+, or two lines for $55 a month with AARP.
Carriers change these offers. Confirm the current price before you sign up.
The “free phone” trap — read this first
The phone is not free. You finance it over 24 to 36 months. The carrier adds a monthly bill credit that cancels out the monthly phone payment, so your bill shows $0 for the phone.
If you leave, switch carriers, or change to a plan that does not qualify: the credits stop, and you owe the rest of the phone's price right away.
You still pay tax on the full phone price up front, plus an activation or upgrade fee of about $30 to $40 (some carriers have dropped the fee for loyalty-program members).
The credits take a month or two to start. Your first bills may look wrong. That is normal — keep your paperwork.
Buying your phone outright and pairing it with a cheap prepaid plan is often cheaper in the end.
What prepaid gives up — and what it gains
Same towers: TracFone uses Verizon's network. Consumer Cellular uses AT&T's and T-Mobile's. Check any carrier's coverage map with your home address before switching, and ask neighbors what works on your street.
What you give up: priority (your data slows first in busy times), phone financing deals, and walk-in stores.
What you gain: lower bills, no contracts, and no “free phone” traps.
When to call Sean instead
You are not sure which plan fits how you use your phone.
You want help switching without losing your phone number.
A bill looks wrong and you want a second pair of eyes.
You would rather buy a phone outright than finance one.
An ISP (internet service provider) is the company you pay for internet — like Xfinity, Spectrum, or AT&T. Your cell phone company is also an ISP for your mobile data.
An IP address is a set of numbers that identifies your device on the internet. IP addresses work like street addresses for your phone or computer — you never need to memorize them; your devices handle it automatically.
Phone bills look confusing on purpose — but they are only three things. Once you know the three, you can read any bill from any company.
The three parts of every bill
The plan. This is your monthly service — talk, text, and data. It is the same amount every month. If you see a senior plan or autopay discount, it shows up here as a subtraction.
The phone payment. If you bought the phone on monthly installments ("$25 a month for 24 months"), it appears as its own line. Once it is paid off, this line should disappear — if it does not, call the company.
Taxes and fees. Every carrier adds these. They are usually $5 to $15 per line. They are annoying, but they are normal.
Words the bill uses
Data — internet on your phone when Wi-Fi is off. Most plans now include unlimited data, so this line rarely costs extra.
Roaming — using another company's towers, usually when traveling. Inside the US this is almost always free now. Outside the US it can be expensive — ask before a trip.
Premium texts or third-party charges — this is the one to watch. These are charges from outside companies that somehow landed on your phone bill: horoscopes, games, "services" you never asked for. If you see any charge you do not recognize, call your carrier and say "I did not agree to this charge — remove it and block third-party billing." They have heard it before.
Three bill habits that save money
Turn on autopay. Almost every carrier knocks $5 to $10 off per line for automatic payments. It is the easiest discount in the business.
Check once that the phone is paid off. Many people keep paying the phone installment for months after it ended because nobody told them. One call fixes it.
Ask about the senior plan once a year. Companies change their plans. A five-minute call — "Do you have a plan for people 55 and over?" — has saved my clients real money.
When to call Sean instead
A charge on the bill makes no sense and the carrier will not explain it plainly.
You are thinking of switching carriers and want to know the real total cost first.
Someone signed you up for something at a store and you are not sure what it costs.
Getting a new phone: moving everything over
A new phone does not mean starting over. Your photos, contacts, apps, and messages can all move to the new phone — the phone does most of the work itself. The golden rule: do not erase, trade in, or give away the old phone until the new one is fully working.
Step 1: back up the old phone
iPhone: open Settings, tap your name at the top, then iCloud, then iCloud Backup, then Back Up Now. Wait until it says the backup just finished.
Samsung: open Settings, then Accounts and backup, then Back up data. Or just use Smart Switch in the next step — it moves everything directly.
Other Android: open Settings, then Google, then Backup, then Back up now.
iPhone to iPhone: the easy way
Plug both phones into power and connect them to Wi-Fi. Turn on the new iPhone and place it right next to the old one.
The old iPhone asks “Set Up New iPhone?” — tap Continue, then use the old phone to scan the swirly pattern on the new one.
Choose Transfer from iPhone and keep the phones close together until it finishes. Your apps, photos, and settings all come along.
Samsung to Samsung: Smart Switch
During setup the new Samsung offers to transfer — say yes. (You can also open the Smart Switch app on both phones anytime.)
A cable between the phones is fastest; wireless works too. Pick what to move — photos, messages, apps, settings — and let it run.
Any Android to Android
On the new phone, sign in with the same Google account you used on the old one.
When setup asks, choose to restore from your backup. Your apps, contacts, and photos download over the next hour or so.
Before you wipe the old phone: make a test call, send a text, and open your photos on the NEW phone. If anything is missing — or you are not sure — call Sean at (813) 770-6082 before you erase anything. Once the old phone is wiped, what was only on it is gone.
Buying a Computer: What the Numbers on the Box Actually Mean
A computer box throws three big numbers at you: the processor, the memory, and the storage. For everyday use — email, the web, photos, video calls, documents — you do not need the biggest of any of them. A mid-range processor, 16 gigabytes of memory, and 512 gigabytes of storage will keep most people happy for years.
The three numbers that matter
The processor (often shortened to CPU — the part that does the computer's thinking) is the brain. A faster brain opens programs quicker and handles several things at once without stalling. Processors come in families, from budget to powerful. For everyday use, a middle family is plenty. The top families are for video editing, serious games, and engineering work — real needs, but not most people's needs.
The memory (called RAM, short for random access memory — the computer's short-term workspace, where it holds whatever it is working on right now) is like the size of your desk. A small desk forces you to put things away before you can spread out something new. A bigger desk lets you keep email, the browser, and a photo open all at once. Memory is measured in gigabytes, written GB. Today, 8 GB is the bare minimum, 16 GB is the comfortable choice, and 32 GB is more than most people will ever use.
The storage is the filing cabinet — where your photos, documents, and programs live for good. It is also measured in GB, and sometimes in terabytes (1 TB is about 1,000 GB). Most people do fine with 256 GB, and 512 GB gives breathing room for years of photos. Storage comes in two kinds: an SSD (solid-state drive — storage with no moving parts, much faster than the old spinning kind) and the older hard drive. Always choose the SSD. It is the single biggest reason a new computer feels fast.
A fair question: laptop or desktop?
A laptop is one piece — screen, keyboard, and battery built in — so you can carry it from room to room or on a trip. A desktop sits in one place, usually costs less for the same power, and can use a big separate screen that's easier on the eyes. If the computer will live on one desk, a desktop is often the better value. If it will ever leave that desk, it's a laptop.
What a normal person actually needs
For email, web browsing, banking, photos, video calls with family, and writing documents:
Processor: a mid-range family — the salesperson can point to it; you don't need the top line
Memory: 16 GB
Storage: 512 GB SSD (256 GB works if your photos mostly live on your phone or in the cloud — "the cloud" just means storage on the internet instead of inside your machine)
That combination typically runs about $500 to $800 for a laptop, and a decent one lasts five to seven years.
Sales talk to smile at
"You need the fastest processor." Only if you edit video or play demanding games. For everyday tasks you will never feel the difference.
Huge storage numbers. A 2 TB drive sounds generous, but most people never fill 512 GB. Don't pay extra for a filing cabinet you'll never fill.
Thin and light as the headline. Lovely to carry — but ask whether the screen and keyboard are comfortable for your eyes and hands. Comfort beats thin.
Before you pay
Sit down with it if you can. Read a paragraph on the screen. Type a sentence. Your eyes and hands are the judges that matter.
Ask what it costs to add memory later. On many laptops the answer is "it can't be added" — another reason to get 16 GB now.
Ask about the return window. A good store gives you at least two weeks to live with it at home.
If you'd like a second set of eyes before you buy — or help choosing between two machines — call Sean at (813) 770-6082.
Words in this lesson
Processor (CPU): the computer's brain; it does the thinking and the math.
Memory (RAM): the computer's short-term workspace; more of it means more things open at once without slowing down.
Gigabyte (GB): a unit for measuring memory and storage size; bigger numbers hold more.
Terabyte (TB): about 1,000 gigabytes.
Storage: where files and programs live permanently, like a filing cabinet.
SSD (solid-state drive): modern storage with no moving parts; much faster than an old-style hard drive.
The cloud: storage kept on the internet instead of inside your computer.
Buying a TV: Size, Picture Types, and Which Labels Matter
Bigger is usually better than fancier. Pick the largest screen that fits your room and your budget, from a brand you recognize. The picture-type labels (LED, QLED, OLED) describe real differences, but for most living rooms a good mid-priced LED or QLED looks wonderful — and the labels stores shout about loudest, like refresh rate, often matter least.
How big?
TV size is measured corner to corner, diagonally. A simple guide: measure the distance from your couch to the TV in inches, then divide by about 1.5 to 2. Sit 8 feet away (96 inches)? A screen around 55 to 65 inches will feel right — big enough to enjoy, not so big you turn your head like you're at a tennis match.
One honest warning: TVs look smaller in the store than in your home. The store is a warehouse; your living room is not. The size that looked modest under those lights will look large on your wall.
The picture types, in plain words
Every modern TV lights up its picture one of three ways:
LED — the standard kind, and the least expensive. A panel of tiny lights sits behind the screen and shines through it. Good ones look bright and clear. This is what most homes have, and most homes are happy.
QLED — a step up from LED (the name is mostly Samsung's, but other brands have their own versions). It adds a layer that makes colors richer and the picture brighter — nice in a sunny room. Same basic idea, better color.
OLED — each dot of the picture makes its own light and can turn completely off. That means true black: night scenes look deep instead of gray, and the picture has a richness the others can't quite match. It's the most expensive kind, and it truly is the best picture. It can be a little dimmer in a very bright room, and it costs noticeably more.
The honest trade-off: OLED is better, QLED and good LED are very good. If you watch mostly news, shows, and ballgames, the difference may not be worth several hundred dollars to you. If movies in a dark room are your joy, OLED earns its price.
The labels, graded
4K — describes how many tiny dots make up the picture; more dots, sharper picture. Nearly every TV sold today is 4K. It's standard now, not an upgrade — don't pay extra for the words.
HDR (high dynamic range — a way of showing brighter brights and darker darks in the same scene). Real and worthwhile; most mid-priced TVs include a decent version.
Refresh rate — how many times per second the picture redraws, measured in hertz (Hz). Sets advertise 120Hz, 240Hz, and beyond. Here's the plain truth: most shows and movies are made at 24 to 60 frames per second, so beyond a true 120Hz there is little left to gain, and some advertised numbers are inflated by tricks. Sports fans may enjoy a genuine 120Hz set. For everyone else, this number is mostly sales talk.
Smart TV — simply means the TV connects to the internet and runs apps like Netflix or YouTube itself, no extra box needed. Nearly all TVs are smart TVs now.
Sound: the quiet catch
Thin TVs have thin speakers, and modern shows mix voices low. If you find yourself straining to hear dialogue or living on the volume button, a soundbar — a slim speaker bar that sits under the TV — fixes it for about $100 to $200 and is often a better buy than paying up for a fancier TV.
What a decent one runs
A good 55-inch LED or QLED from a known brand runs about $400 to $700. A 65-inch OLED runs about $1,300 and up. Prices swing a lot with sales — the same TV can differ by hundreds between months.
Before you pay
Look at the picture with the store's demo loop off, if they'll let you — demo loops are made to flatter.
Check the remote. Big buttons you'll actually use beat a tiny wand full of mysteries.
Count the plugs (called HDMI ports — the sockets that streaming boxes, cable boxes, and game players plug into). Three or more keeps you out of adapter trouble.
If you'd like help picking a size for your room, or making sense of two models, call Sean at (813) 770-6082.
Words in this lesson
LED: the standard TV picture type; lights behind the screen shine through it.
QLED: an LED TV with an added layer for richer color and brightness.
OLED: a TV where each dot of the picture makes its own light; the best blacks and the highest price.
4K: a very sharp picture standard; nearly universal on new TVs today.
HDR: shows brighter brights and darker darks in the same scene for a more lifelike picture.
Refresh rate (Hz): how many times per second the picture redraws; beyond a true 120Hz, gains are small.
Smart TV: a TV that connects to the internet and runs streaming apps by itself.
Soundbar: a slim separate speaker that sits under the TV and makes voices clearer.
HDMI port: the socket on the TV where cable boxes, streaming sticks, and players plug in.
Buying a Phone: What Matters and What Is Sales Talk
Four things decide whether you'll love a phone: a screen your eyes are comfortable with, enough storage for your photos, a battery that gets through your day, and buttons and menus that make sense to you. Camera numbers and processor speeds get the advertising, but they are the least useful way to choose. And how you pay — all at once or monthly — changes the true price more than most people realize.
Screen size: your eyes decide
Screens are measured corner to corner. Small phones (around 6.1 inches) fit one hand and a pocket. Large phones (6.7 inches and up) show bigger text and bigger photos — kinder to eyes, heavier in a purse or pocket, and harder to use one-handed. There is no right answer, only your answer. Hold both sizes in the store and read a text message on each.
A useful trick: every phone lets you enlarge the text in its settings. A slightly smaller phone with the text turned up can read just as easily as a big phone at standard size.
Storage: the number that sneaks up on you
Storage is the phone's filing cabinet, measured in gigabytes (GB). Photos and videos fill it — a grandchild's birthday video takes real space. The honest guide:
128 GB — fine if you take a normal number of photos and let the phone back them up to the cloud (storage kept on the internet) as it goes.
256 GB — the comfortable choice if you take lots of photos and videos, or want years of headroom.
512 GB and up — for people who film constantly. Most people never need it.
Most phones cannot add storage later, so when in doubt, take the step up. A "storage full" warning two years in is a miserable surprise.
Battery: look past the hours claimed
Ads promise hours of video or days of life, measured under gentle conditions that don't match a real day of calls, photos, maps, and a grandchild's game streamed from the bleachers. A better guide: bigger phones carry bigger batteries, and reviews that test phones with mixed everyday use are worth more than the number on the box. Whatever you buy, expect to charge nightly — that is normal for every modern phone.
Cameras: the most exaggerated spec in the store
Cameras advertise megapixels — the count of tiny dots in a photo. More dots stopped meaning better photos years ago; what matters now is the phone's software (the programs inside it) and the size of its sensor (the part that gathers light). Every major phone today takes lovely photos in daylight. The differences show up in dim restaurants and evening porches. Ask to take a photo inside the store, then look at it. Your eyes are a better test than any number.
Features like 100x zoom are party tricks. A clear 5x or 10x zoom you use at a recital is worth more.
Outright or monthly? Do the full math
A phone advertised as "free" or "$10 a month" is spread over 24 or 36 monthly payments — and you owe the rest if you leave the carrier (the company that provides your phone service) early. Before signing, ask two questions:
What is the total over the full term? Multiply the monthly payment by the number of months and add any down payment.
What does the same phone cost bought outright? Buying it outright — all at once, from the maker or a store — often costs the same or less, and the phone is yours from day one, free to take to any carrier.
A decent new phone runs about $300 to $500 bought outright; the flagship models (the top-of-the-line ones) run $800 to $1,200. Last year's model, still sold new, is one of the smartest buys in the store — nearly the same phone for hundreds less.
Before you pay
Make a call in the store. Speaker loud enough? Earpiece clear?
Open the camera, take a photo, then find it again. If the menus confuse you in the store, they'll confuse you at home.
Ask what the case and screen protector cost. A $40 case is cheap insurance for an $800 phone.
If you'd like an unbiased opinion before you sign a payment plan — Sean doesn't sell phones, so he has no dog in the fight — call Sean at (813) 770-6082.
Words in this lesson
Gigabyte (GB): a unit of storage size; more gigabytes hold more photos, videos, and apps.
The cloud: storage kept on the internet instead of only inside your phone.
Megapixel: one million tiny dots in a photo; past a point, more dots do not mean better photos.
Sensor: the part of the camera that gathers light; bigger sensors take better low-light photos.
Carrier: the company that provides your phone service, like Verizon, AT&T, or T-Mobile.
Flagship: a maker's top-of-the-line model for the year.
Software: the programs inside a device that make it work and give it its features.
Buying a Printer: Ink Tanks vs Cartridges and the True Cost of Ink
The printer itself is the cheap part. The ink is where the money goes — over three years, ink can cost several times the price of the machine. Printers with refillable ink tanks cost more up front and far less to feed. Printers that take cartridges cost little up front and a lot to feed. Which one wins depends on how much you print.
The two kinds of ink
Cartridge printers are the ones most people know. The ink comes in small plastic cartridges you snap in and replace. The printer itself often sells for $60 to $100 — sometimes it seems nearly free. The catch: a set of cartridges runs $40 to $80, and a set may last only a few hundred pages. The maker earns its money on the refills, a little like selling the razor cheap and the blades dear.
Tank printers (sold under names like EcoTank and MegaTank) hold their ink in clear tanks you refill from bottles. The printer costs more — about $200 to $300 — but a bottle of ink costs about $15 to $20 and prints thousands of pages. Many tank printers even come with enough ink in the box for a year or two of ordinary printing.
The three-year math, honestly
Say you print about 100 pages a month — letters, forms, boarding passes, a recipe now and then. That's 3,600 pages in three years.
Cartridge printer: $80 for the printer, plus roughly $50 in cartridges every few months. Three-year total: easily $500 to $700.
Tank printer: $250 for the printer, which may include the first year or two of ink, plus one or two bottles after. Three-year total: roughly $280 to $320.
Now say you print lightly — maybe 15 pages a month, a form here and a return label there.
Cartridge printer: $80, plus a cartridge set once or twice a year. Three-year total: about $250 to $350.
Tank printer: $250 up front. Three-year total: about $250 to $270.
The verdict: heavy printers save real money with a tank. Light printers come out about even — and for them, the cartridge printer's low shelf price is a fair deal. There's a second catch for very light use, below.
The drying-out problem (matters if you print rarely)
Ink is liquid, and liquid dries. If a printer sits unused for weeks — any ink printer, cartridge or tank — the ink can clog the print head (the part that sprays ink onto the page), and prints come out streaky or missing colors. If you print only a few times a year, print one small page every couple of weeks to keep things flowing, or consider whether the library's printer covers your rare needs. People who print photos or documents every week rarely meet this problem.
What else to ask about
Two-sided printing (the printer flips the page itself) saves paper and is worth having.
A scanner on top (it copies and digitizes documents — turning paper into a file on your computer) comes with most home printers now and is genuinely handy for forms and old photos.
Connecting by Wi-Fi (the wireless network in your home) means the printer can sit anywhere and everyone in the house can use it. Every decent home printer offers it.
Paper jams and daily patience. Read a few owner reviews and look for the words "easy to set up." The cheapest printer on the shelf is often cheap in ways you'll feel every week.
What a decent one runs
Cartridge models: about $60 to $120. Tank models: about $200 to $300. Both kinds go on sale often, and last year's model is usually the same machine for less.
If you'd like help weighing two printers — or working out which kind fits how your household actually prints — call Sean at (813) 770-6082.
Words in this lesson
Cartridge: a small replaceable container of ink that snaps into a printer.
Ink tank: a refillable reservoir inside the printer, filled from bottles of ink.
Print head: the part of the printer that sprays ink onto the paper in tiny dots.
Scanner: a flat glass bed that copies a document or photo and turns it into a file on your computer.
Wi-Fi: the wireless network in your home that connects devices to the internet and each other.
Two-sided printing (duplex): the printer prints on both sides of the page by itself.
Tablet, E-Reader, or Just Your Phone? Picking the Right Screen
These three devices overlap more than the ads admit. A tablet is a big, friendly all-rounder — video calls, reading, games, the web. An e-reader does one thing, books, and does it beautifully, especially outdoors and at bedtime. A large phone may already cover your needs, in which case the best purchase is no purchase. The right choice depends on the one job you care about most.
Meet the three
A tablet is a touch screen about the size of a magazine (screens run roughly 8 to 13 inches, measured corner to corner). It runs apps — the same kind of small programs your phone runs — for video calls, email, news, games, photos, and reading. It needs Wi-Fi (your home's wireless internet) for most things. A decent one runs about $150 to $350; premium models cost more.
An e-reader (like a Kindle Paperwhite or a Kobo) is a book-sized device made only for reading. Its screen is different from every other screen you own: it's called e-ink, a display that looks like printed paper — no glare in sunlight, easy on the eyes at night, nothing glowing at you. It holds thousands of books, weighs less than a paperback, and its battery lasts weeks, not days. A good one runs about $120 to $180.
A big phone you may already own. A modern large phone reads articles, joins video calls, and shows photos respectably. Its limits are size and battery: fine for a chapter or a call, tiring for a whole novel or a long Sunday with the grandkids on screen.
Who each one suits
Choose a tablet if:
Video calls with family are the main event — the big screen makes faces feel present
You read the news, browse, and play games in one chair, on one device
You want to show photos to friends without passing your phone around
You travel and want movies on a screen bigger than your phone, in a bag lighter than a laptop
Choose an e-reader if:
Reading books is the main event — an hour or more a day
You read outside, at the pool, or in bright sun, where phone and tablet screens wash out
You read in bed and want no glow, no notifications, no "one more video"
Your eyes tire on regular screens; e-ink reads like paper because it nearly is
You borrow library books — e-readers work with the library's free lending apps, so most reading costs nothing
Stay with your phone if:
Your reading is articles and messages, not books
Calls are short and the phone screen doesn't strain you
You'd rather carry one thing, not two
The honest trade-offs
A tablet tries to do everything and is outshone at each single job: a laptop writes long documents better, an e-reader reads books better, a phone is always in your pocket. Its strength is being good enough at everything in one light slab — for many people, that's exactly right.
An e-reader's strength is its limit. It cannot tempt you with email or news alerts mid-chapter because it can barely do anything else. Many devoted readers say that's the whole point.
One practical note on books: e-reader brands have their own bookstores, and books bought in one store generally can't move to a rival's device. Pick the brand whose store and library app you like, and you needn't think about it again.
Before you pay
Hold it one-handed for two full minutes in the store. Weight matters at page 200.
Read a paragraph under the store lights, then near a window. Glare tells the truth fast.
For a tablet, ask how many years of software updates (improvements and security fixes the maker sends to the device) it will get. Three or more years is a fair ask.
If you'd like to talk through which of the three fits your days — no store has ever paid Sean to say any of this — call Sean at (813) 770-6082.
Words in this lesson
Tablet: a magazine-sized touch screen that runs apps for calls, reading, games, and the web.
E-reader: a book-sized device made only for reading, with a paper-like screen.
E-ink: a screen technology that looks like printed paper — no glare, very easy on the eyes.
App: a small program on a phone or tablet that does one job, like video calls or weather.
Wi-Fi: your home's wireless internet connection.
Software update: an improvement or security fix the maker sends to your device over the internet.
Replace or Repair? How to Decide When an Old Device Is Done
A device is usually done when it can no longer get security updates, when it can't run what you need, or when a repair costs more than half the price of a replacement. But slow and annoying is not the same as finished — many "dying" devices are just full, cluttered, or carrying a worn-out battery. Check the simple causes before you spend on either a repair or a replacement.
The honest signs a device is truly done
It no longer receives security updates. Every phone, tablet, and computer gets years of updates (fixes the maker sends over the internet that patch holes bad actors could climb through). When the maker stops sending them, the device slowly becomes unsafe for banking and email, and no repair can fix that. This is the strongest reason to replace.
Apps you need refuse to run. When your bank's app or your video-call app says it needs a newer system than your device can take, the device is done for that job, however healthy it feels.
It fails at random. Shutting off without warning, freezing solid, losing files — hardware (the physical parts inside) wearing out shows up as unreliability, and unreliable gets worse, never better.
The battery is gone and irreplaceable. A battery that lasts an hour off the charger, on a device where the battery can't reasonably be changed, means living tethered to a wall.
Not done yet — the reversible causes of "old and slow"
Before concluding anything, rule these out. They cause most "my device is dying" complaints:
Storage is nearly full. A phone or computer with a stuffed filing cabinet slows to a crawl. Deleting old videos, unused apps, and duplicate photos can bring it back to life. (Back up first — keep a copy of anything precious somewhere else before deleting.)
One bad app. A single misbehaving app can drain the battery and hog the machine. If the trouble started around when you installed something, that something is the suspect.
A worn battery alone. On many devices the battery is the only worn part. A battery swap costs a fraction of a new device and can add two or three good years.
It just needs a restart and its updates. Devices left on for months, or behind on updates, often perk up after both. Embarrassing, common, and free.
The repair-cost rule of thumb
Get the repair priced, then compare it to a sensible replacement — not the fanciest model, the one you'd actually buy:
Repair costs under a third of replacement: repair it, if the device is still getting updates.
Between a third and a half: judgment call. Repair if the device suits you and has update years left; replace if it's already near the end of updates.
Over half: replace. You're paying most of a new device's price to keep an old one with old parts still aging inside it.
One more factor: a repair buys time, not youth. A fixed five-year-old phone is a five-year-old phone — ask how much longer its updates will last before choosing.
Before you spend anything, check
Is it still receiving security updates? (This one answer decides most cases.)
How full is the storage? Under a tenth free is a red flag you can fix yourself.
Did the trouble start with a new app or a recent update?
What exactly would the repair cost, in writing — and what would the replacement you'd truly buy cost?
Whatever you decide, your photos, contacts, and documents should be backed up (copied somewhere safe) before the device goes to a shop or a trade-in counter. That habit matters more than the decision itself.
If you'd like an honest second opinion — Sean repairs devices, so he'll tell you plainly when a repair isn't worth paying him or anyone for — call Sean at (813) 770-6082.
Words in this lesson
Security update: a fix the maker sends over the internet to patch holes that could let bad actors in.
Hardware: the physical parts of a device, as opposed to the programs it runs.
Storage: where your files live inside the device; when it's nearly full, everything slows down.
Backup: a copy of your important files kept somewhere safe, separate from the device itself.
App: a program on a phone, tablet, or computer that does a particular job.
Your photos are the most precious thing on your phone. Four small skills cover everything: taking them, finding them later, sharing them with family, and keeping a copy somewhere safe.
Take
iPhone: Open the Camera app and tap the big round button at the bottom. For a selfie, tap the two curved arrows 🔄 first — that switches to the front (selfie) camera, the one facing you.
Samsung: Open the Camera app and tap the big circle at the bottom. The two curved arrows 🔄 switch between the front (selfie) camera — the one facing you — and the back camera — the one facing everything else.
If pictures look hazy, wipe the little lens on the back with a soft cloth — a smudged lens is the cause nine times out of ten.
Find
iPhone: Open Photos — the newest pictures sit at the bottom. Tap the magnifying glass and type a word like “beach” or “dog”; the phone finds matching pictures by itself.
Samsung: Open Gallery — newest pictures at the top. Tap the search bar at the top and type a word like “beach”; it finds them the same way.
Share
iPhone
Narrated tutorial: Open the Photos app. It is the white icon with the colorful pinwheel.; Tap the photo you want to send. It opens full-screen.; Tap the Share button at the bottom. It looks like a square with an arrow pointing up.
1Open the Photos app. It is the white icon with the colorful pinwheel.
2Tap the photo you want to send. It opens full-screen.
3Tap the Share button at the bottom. It looks like a square with an arrow pointing up.
4A panel slides up. Tap Messages — the green speech-bubble icon.
5Type the person's name in the To field, then tap their name when it appears below.
6Your photo is attached above the message box. Tap the blue arrow button to send it.
7Sent! The photo appears in the conversation, and it says Delivered underneath.
Samsung
Narrated tutorial: Open the Gallery app. It is the white icon with the colorful flower swirl.; Tap the photo you want to send. It opens full-screen.; Tap the Share icon at the bottom. It looks like three dots connected by lines.
1Open the Gallery app. It is the white icon with the colorful flower swirl.
2Tap the photo you want to send. It opens full-screen.
3Tap the Share icon at the bottom. It looks like three dots connected by lines.
4A sharing panel appears. Tap Messages.
5Pick who gets the photo. Tap Mom in the list.
6Your photo is attached. Tap the blue Send button.
7Sent! The photo appears in the chat with two blue checkmarks.
Another way: start inside Messages instead. Open the conversation with the person, tap the + (iPhone) or the photo / gallery icon (Samsung) next to the message box, tap the photo you want, then tap Send.
Back up
iPhone: Open Settings, tap your name at the top, tap iCloud, then Photos, and turn on the photo-sync switch (labeled Sync this iPhone on recent versions). Your pictures copy themselves while you sleep.
Samsung: Open the Google Photos app, tap your picture at the top, tap Photos settings, then Backup, and turn it on. Your pictures copy to your Google account the same way.
Turn it on once and forget about it — phones get lost and screens break, but the backup keeps your memories.
iPhone
Samsung
The simple rule
Every photo worth keeping should exist in two places — on your phone and in the backup. Then no single accident can take your memories.
A phone call is nice. Seeing their face is better.Video calling puts your kids and grandkids right in front of you, no matter how far away they live. If you can answer a phone, you can do this.
iPhoneFaceTime → New FaceTime → tap Mom
SamsungMeet → New meeting → tap Mom
FaceTime — iPhone to iPhoneNarrated tutorial: open the contact and tap the video camera.
To call: Open the contact and tap the little video camera. Nothing to install — it is already on every iPhone, and it is free over Wi-Fi.
To answer: When the phone rings with a video call, tap the green Accept button. If the phone is locked, slide to answer.
During the call: Tap the screen to show the buttons. The microphone icon mutes you (they cannot hear you). The camera icon with arrows switches between the front camera (your face) and the back camera (what you are looking at). The red button hangs up.
Google Meet — Samsung and AndroidNarrated tutorial: open Meet, tap New, enter the name, then tap Call.
To call: Open the Meet app, tap New (or Search contacts), enter the person’s name, choose the contact, then tap Call. It is free, and it is already on most Samsung phones.
To answer: on the incoming call screen, swipe to answer or look for Join.
During the call: Tap the screen to show the buttons. The microphone icon mutes you. The camera icon with arrows switches between your face and what is in front of you. The red phone button hangs up.
WhatsApp video — any phone to any phoneNarrated tutorial: open a chat and tap the video camera.
WhatsApp is a free app that video-calls between iPhone and Samsung alike — perfect when the family has a mix. Open a chat, tap the video camera at the top, and you are face to face. The same microphone, camera-flip, and red hang-up buttons work here too.
Signal video — any phone to any phone, private by designNarrated tutorial: open the chat and tap the video camera.
Signal works a lot like WhatsApp — a free app that video-calls between iPhone and Samsung alike. Open a chat, tap the video camera at the top, and you are face to face. Its difference: every call is scrambled end to end, so nobody but the two of you can listen in — not even Signal itself. Install it free from the App Store (iPhone) or the Play Store (Samsung).
Which one should you use? FaceTime — already on every iPhone, nothing to install. Downside: iPhone to iPhone only. Google Meet — already on most Samsung phones and free. Downside: everyone needs a Google account. WhatsApp — free, iPhone to Samsung, and most families already have it. Downside: everyone must install it. Signal — free, iPhone to Samsung, and the most private: calls are scrambled so only the two of you can hear. Downside: fewer people have it yet. Simple rule: if everyone has iPhones, use FaceTime. For a mixed family, WhatsApp or Signal — pick Signal if privacy matters most.
What you need
Wi-Fi (or a good signal), and the small front camera — the one above your screen — pointed at you. Prop the phone against something so your arm does not get tired, and sit facing a window or lamp so they can see you clearly.
Tips for a good call
Use Wi-Fi when you can. Video uses a lot of data — on Wi-Fi it costs nothing extra and looks sharper.
Microsoft Teams is an app for video meetings and chat, often used for work or clubs. It works like Zoom — someone sends you a link, you tap it, and you join the call.
TeamViewer is an app that lets a trusted helper see your screen from far away to fix a problem. Only ever use it with someone you know and trust — never with a stranger who calls you.
VoIP means phone calls that travel over the internet instead of old phone lines. WhatsApp calls, FaceTime audio, and Zoom calls are all VoIP — and they do not use your calling minutes.
Your phone is a great alarm clock and a great kitchen timer. Both live in the Clock app that came on your phone. An alarm goes off at a set time (wake up, take medicine). A timer counts down (eggs done in ten minutes). Here is how to set each one.
Set an alarm
Open the Clock app and tap Alarm at the bottom.
Tap the + (plus) to add a new alarm.
Pick the time. Scroll the hours and minutes, then check AM or PM — this is the number-one alarm mistake.
Tap Label and give it a name like “Take morning pills” or “Call the doctor” so you know what it is for.
Tap Repeat and pick days if you want it every day, or skip this for a one-time alarm.
Tap Save. The alarm goes off even if the phone is silent — that is what snooze is for when you want nine more minutes.
Set a timer
Open the Clock app and tap Timer at the bottom.
Set the minutes (and hours, if you need them).
Tap Start. The phone counts down and rings when time is up — even with the screen locked.
You can add minutes while it runs, or tap Cancel to stop it.
Alarm not going off? Check these
AM vs PM. A 7:00 PM alarm will never wake you at 7 in the morning. Double-check when you set it.
Is the alarm switched on? Open the Clock app — every alarm has a little switch next to it. Green (or slid right) means on.
The volume. Alarm volume follows your ringer volume on most phones. Turn the ringer up before bed if you sleep deeply.
Do Not Disturb. Alarms still ring through Do Not Disturb, and iPhone Sleep Focus alarms ring too — but a scheduled bedtime mode can silence them on some Android phones — check the alarm's switch the first night you rely on it.
When to call Sean instead
An alarm you need (like medicine) refuses to ring and you have checked AM/PM and the switch.
You want alarms to ring on a speaker or a smart speaker too.
The phone's sound is too quiet even at full volume.
Change your ringtone
Your ringtone is the sound your phone makes when someone calls. You can pick a different one any time — no app or purchase needed.
On iPhone
Open Settings, then tap Sounds & Haptics.
Tap Ringtone.
Tap any name to hear it. A checkmark shows your current one — tap a new one to switch.
On Samsung / Android
Open Settings, then tap Sounds and vibration.
Tap Ringtone (or Phone ringtone).
Tap any sound to preview it, then tap it again to select it.
The same screen lets you change the notification sound (texts and alerts) separately from the ringtone.
Change your wallpaper
Your wallpaper is the picture behind everything on your phone — the background you see on the lock screen and home screen. Use one of your own photos or pick from the ones built in.
On iPhone
Open Settings, then tap Wallpaper.
Tap Add New Wallpaper, then choose Photos to use one of your pictures, or pick a built-in design.
Tap Add, then choose Set as Wallpaper Pair (same picture on both screens) or set the lock screen and home screen separately.
On Samsung / Android
Press and hold an empty spot on your home screen until a menu appears.
Tap Wallpaper and style (or just Wallpapers).
Tap My photos / Gallery for your own pictures, or browse the built-in ones. Tap a picture, then tap Set as wallpaper.
Computers have wallpapers too — right-click the desktop and look for Personalize (Windows) or open System Settings > Wallpaper (Mac).
Listening to music: Spotify and Pandora
Spotify and Pandora are apps that play almost any song you can think of — free with ads, or paid without. You pick a song, artist, or mood, and the music plays through your phone speaker, earbuds, or Bluetooth speaker.
Spotify vs Pandora — simply put
Spotify: you pick exactly what plays — search for a song, album, or artist and tap play. Also has podcasts. The free version shuffles songs with ads; the paid version ($12.99/month) plays anything on demand with no ads.
Pandora: you pick a starting point (a song or artist) and it builds a station of similar music for you — like a personal radio station. The free version has ads; the paid versions ($4.99/month for Plus, $10.99/month for Premium) remove them.
Both are free to try — install the app, make a free account with your email, and start listening. No credit card needed for the free version.
Getting started (works the same for both)
Install Spotify or Pandora from your phone's app store.
Open it and tap Sign up — use your email address.
Spotify: tap Search at the bottom, type a song or singer, tap it, then tap Play. Pandora: tap Search, type an artist or song, then tap Start Station.
Use the thumbs up / thumbs down buttons to teach it what you like — it gets better at picking music for you.
When to call Sean instead
Music will not play through your Bluetooth speaker or hearing aids.
You are being charged for a subscription you did not mean to start.
You want your music on an Alexa or Google speaker too.
Voicemail: listening to your messages
When you miss a call, the caller can leave you a spoken message. Listening to it is easy — and you do not need to call your own number anymore. Modern phones show your messages in a list, like texts you listen to.
Listen to a message
iPhone: open the Phone app and tap Voicemail at the bottom right. Samsung: open the Phone app and tap Voicemail (or hold down the 1 key on the dial pad).
Tap a message in the list to hear it. Tap the play triangle. You can pause, replay, and delete right there.
To call the person back, tap their name or number in the message — no need to write it down first.
Record your greeting
In the voicemail screen, tap Greeting (iPhone, top left) or Settings (Samsung).
Tap Record, say your name and something simple like “Sorry I missed your call — please leave a message,” then tap Stop and Save.
Tip: the first time you open voicemail, the phone may ask you to create a voicemail password. Pick something you will remember — you only type it once in a while. The full step-by-step setup for each phone is in our Voicemail Setup Guide ($2.99).
Keeping your apps updated
Apps get free updates that fix problems and add features. Most phones install them on their own overnight. If an app is acting strange, checking for an update is a good first step — it fixes the problem more often than you would expect.
Update your apps by hand
iPhone: open the App Store, tap your picture at the top right, then tap Update All. Samsung: open the Play Store, tap your picture at the top right, tap Manage apps & device, then Update all.
Wait for the downloads to finish. Stay on Wi-Fi — updates can be large and you do not want to use up your mobile data.
Turn on automatic updates
iPhone: open Settings, tap App Store, and switch on App Updates. Samsung: in the Play Store, tap your picture, then Settings, then Network preferences, then Auto-update apps, and pick Over Wi-Fi only.
Good to know:updates are always free. If anything ever asks you to pay for an “update,” it is a scam — close it and ask someone you trust.
Java is a building block that some programs need to run. If you see a message offering a Java update, it is safe to install it — it keeps those programs working properly.
Notifications & quiet time
Notifications are the little pop-ups and sounds apps use to get your attention. Some are useful (a text from family). Most are noise (a game begging you to come back). You are in charge — here is how to turn down the noise and enjoy real quiet when you want it.
Quiet one noisy app
iPhone: open Settings, tap Notifications, pick the app, and switch off Allow Notifications. Samsung: open Settings, tap Notifications, tap App notifications, and switch the noisy app off.
The app still works fine — it just stops interrupting you.
Do Not Disturb for sleep and rest
iPhone: open Settings, tap Focus, tap Do Not Disturb, and set a schedule (for example 10 PM to 7 AM). Samsung: open Settings, tap Modes and Routines (or Do not disturb), and set your quiet hours.
Calls from your favorites still come through in an emergency — add family to your Favorites or starred contacts so they can always reach you.
Tip: start with one noisy app — the game or store that pings you most. Quieting just that one usually makes the phone feel calmer right away.
Your contacts are your address book. Once a person is saved, you tap their name to call or text — no more typing the number every time. Saving a new person takes less than a minute.
Add a contact
iPhone: open the Contacts app (or the Phone app, then tap Contacts), tap the + at the top. Samsung: open the Contacts app and tap the +.
Type the first and last name. Use the name you actually call them — “Dr. Patel” works fine if that is how you know them.
Tap “add phone” (iPhone) and type the number. Pick the label — mobile, home, or work.
Tap Done (iPhone) or Save (Samsung). That is it — the person is saved.
Shortcut: after a call with someone new, tap Recents in the Phone app, tap the i or number, then Create New Contact — the number fills itself in.
Find and fix a contact
Find someone: open Contacts and type the first few letters of the name in the search box at the top. Tapping is slower — searching is faster.
Fix a wrong number: tap the person's name, tap Edit, fix the number, tap Done or Save.
Add a photo: tap the name, tap Edit, tap the photo circle, and pick a picture. A face on the card makes the right name easy to spot when it rings.
Star your favorites: in the Phone app, tap the person's name and tap the star (Samsung) or Add to Favorites (iPhone). Your most-called people land at the top, one tap away.
Delete a duplicate: tap the name, tap Edit, scroll all the way down, and tap Delete Contact. If a name appears twice, delete the one with the wrong number.
When to call Sean instead
Your contacts disappeared after a phone switch or update.
You see the same name many times and want them merged and cleaned up.
You want your contacts shared between your phone, tablet, and computer.
Add a contact iPhone: Contacts, tap +, fill in the name and number, tap Done. Samsung: Contacts app, tap +, tap Save.
Edit contact Find the person in Contacts, tap them, tap Edit, fix what is wrong, tap Done.
Favorites Your most-called people, one tap away — star them in the Phone app.
Many newer hearing aids talk straight to your phone. Calls, music, and videos can play directly into your hearing aids — no holding the phone to your ear. Whether yours can depends on the hearing aid model, so check with your audiologist first.
Pair your hearing aids with your phone
iPhone: open Settings → Accessibility → Hearing Devices. Android: open Settings → Connected devices, and pair them like any Bluetooth gadget (some Android phones also list them under Settings → Accessibility → Hearing devices).
Put your hearing aids in pairing mode. On most models, open and close the battery doors; on rechargeable ones, turn them off and back on (or lift them out of the charger).
Keep them close to the phone while it searches. Tap their name when it appears, and tap Pair. You may get one request per ear — confirm both.
Give it up to a minute. You only pair once; after that they reconnect on their own whenever they are on.
Streaming calls and music straight to hearing aids needs a phone and hearing aids that support it (Apple calls it Made for iPhone; Android calls it ASHA). Older hearing aids can still pair for volume and settings, but the sound itself may still come from the phone speaker — your audiologist can tell you what yours supports.
Helpful hearing tools already on your phone
Live Captions: spoken words appear as text on your screen — handy for video calls and videos. iPhone: Settings → Accessibility → Live Captions. Samsung: Settings → Accessibility → Hearing enhancements → Live Caption.
Live Listen (iPhone): turns your iPhone into a microphone that sends sound to your hearing aids — useful across a noisy dinner table.
Louder ringing: if you miss calls, open Settings → Sound and turn the ringer up, and turn on vibration so you feel it too.
When to call Sean instead
Your hearing aids will not pair, or they paired once and keep dropping.
Calls go to the phone speaker instead of your hearing aids.
You are shopping for a new phone and want one that works well with your hearing aids.
Anything about the hearing aids themselves (fit, feedback, whistling) — that is your audiologist's job, not mine.
If you ever need help and cannot dial, your phone can call for you.Emergency SOS calls 911 by itself and then texts your emergency contacts with your location. It works even from the lock screen — no passcode needed. Set it up once, and hope you never need it.
In an emergency, right now
iPhone: press and hold the side button and a volume button together until a countdown finishes — the phone calls 911 by itself. (You can also slide the red SOS slider if you can see the screen.)
Samsung: if you set it up below, press the side button quickly five times — the phone sounds an alarm, counts down, then calls 911 and texts your emergency contacts your location.
Locked phone, any iPhone: on the passcode screen tap Emergency, dial 911, and tap the call button.
Set it up now, while you are calm
Add emergency contacts. These are the people your phone texts after an SOS call. iPhone: open the Health app, tap your picture, tap Medical ID, tap Edit, and add contacts under Emergency Contacts. Samsung: open Settings → Safety and emergency → Emergency SOS and add your contacts there.
iPhone extras: open Settings → Emergency SOS. You can turn on Call with 5 Presses (press the side button five times quickly to start the call) — pick whichever is easier for your hands.
Samsung extras: in the same Emergency SOS screen you can turn on sending a short audio recording and photos with the SOS text — helpful if you cannot type.
Fill in your Medical ID (iPhone Health app, same screen as step 1): allergies, conditions, and medicines. First responders can read it from your lock screen even if you cannot speak.
A note about accidents
Practicing the button presses is smart, but be careful: finishing the countdown or the five presses places a real 911 call. If you ever trigger one by mistake, stay on the line and tell the dispatcher it was an accident — hanging up sends help to check on you. Practicing setting up the contacts and Medical ID is completely safe; that sends nothing.
When to call Sean instead
You want me to set up your emergency contacts and Medical ID with you.
Your phone keeps triggering SOS by accident (a loose pocket or a case can do it).
You are not sure whose numbers to list as emergency contacts.
911 From any iPhone lock screen: tap Emergency on the passcode screen and dial 911.
Computers
Windows, Mac, Chromebook, office programs, printers, and storage.
Windows 11 is the system that runs your computer. It opens your programs, connects to your Wi-Fi, and keeps everything organized. If you used Windows 10, the biggest visible change is small: the Start button moved from the bottom-left corner to the center of the taskbar. Everything else will feel familiar once you know where to look.
Your taskbar, labeled. This strip is always at the bottom of your screen.
The Start menu, up close
Click the Start button — the blue four-pane window icon in the center of the taskbar — and the Start menu opens. Here is what is inside:
Search box (top): type anything here — an app name, a file, a setting — and Windows finds it.
Pinned apps: your favorites, one click away.
Recommended: files you opened recently, so you can jump right back in.
Power button (bottom right): this is where you shut down, sleep, or restart.
Your account (bottom left): your name and sign-in options.
The Start menu, labeled. Search at the top, your apps in the middle, the power button at the bottom right.
The taskbar: your always-there strip
The taskbar is the strip across the bottom of the screen. It never goes away, so it is the handiest place on your computer.
Start button — opens the Start menu (center of the strip).
Pinned apps — the programs you use most, one click to open.
Wi-Fi, sound, and battery icons (near the clock) — click these to open Quick Settings: turn Wi-Fi on or off, change the volume, check the battery.
Time and date — always visible at the far right.
Miss the old left-corner Start button?
You can move it back: open Settings, go to Personalization, then Taskbar, then Taskbar behaviors, and change Taskbar alignment to Left.
Settings is where the controls live
Almost everything you will ever adjust — Wi-Fi, text size, updates, sound — lives in the Settings app. It is the gear icon, usually pinned in your Start menu. (The older Control Panel still exists, but you can safely ignore it — Settings is the modern one.)
Connecting to Wi-Fi
Narrated tutorial: connecting to Wi-Fi.
Click the Wi-Fi, sound, and battery icons near the clock at the bottom right. A small panel opens.
Click the arrow next to Wi-Fi to see the list of nearby networks.
Click your network's name, then click Connect.
Type the Wi-Fi password and click Next. You are online.
Making text bigger
If words on the screen feel too small, you do not need new glasses — just bigger text:
Narrated tutorial: making text bigger.
Open Start, then Settings.
On the left, click Accessibility, then Text size.
Drag the slider until the sample sentence looks comfortable, then click Apply.
To make everythingbigger — icons and apps too — go to Settings, then System, then Display, and raise the Scale setting. For more on reading comfortably, see our Bigger Text guide.
Opening apps and pinning favorites
Open an app: click Start and click the app — or just start typing its name in the search box.
Keep it handy: right-click any app and choose Pin to taskbar to keep it on the bottom strip, or Pin to Start to keep it in the Start menu.
Shutting down: sleep vs shut down vs restart
Click Start, then the power button at the bottom right of the menu. You get three choices:
Sleep — a quick nap. The computer wakes up in seconds. Fine to use every night.
Shut down — fully off. Use it when you will not touch the computer for a few days.
Restart — turns off and comes right back on. This fixes most little glitches — try a restart first whenever something acts strange.
Windows Update: do not fear the update
Every so often Windows installs updates — fixes that keep your computer safe and running well. Your files stay exactly where they are.
Narrated tutorial: checking for Windows updates.
Open Start, then Settings.
Click Windows Update (near the bottom of the left sidebar).
Click Check for updates and install whatever it offers. If it asks to restart, let it — that is normal.
For working with your files — copying, folders, and flash drives — see our File Explorer guide.
When to call Sean instead
Wi-Fi that will not connect no matter what you try.
An update that fails, loops, or leaves the computer stuck.
The screen looks wrong after changing text size or display settings.
Anything asking for a password or permission you do not understand.
An OS (operating system) is the main software on your device. Windows is the OS on most PCs, macOS on a Mac, and Android or iOS on phones. It is the boss that runs everything else.
To boot up means to start your computer from fully off. It takes a minute or two while everything loads — that waiting is normal, not a problem.
A glitch is a small, temporary hiccup — the screen freezes for a second or a button does not respond. Do not worry: closing the app and opening it again, or restarting the device, clears most glitches.
Start menu The Start menu is how you find everything on a Windows computer — click the Windows icon at the bottom-left (or bottom-center on Windows 11) and a menu pops up with your apps. You can also just start typing the name of what you want, like "printer," and Windows will find it for you.
Right-click on Windows Right-clicking means clicking the right-hand mouse button — it opens a little menu of extra choices for whatever you clicked on. If your mouse has only one button or you're on a laptop touchpad, tap with two fingers at once to right-click. Try it on a file: right-click it and you'll see Copy, Delete, and Rename.
Screensaver A screensaver is the moving picture show your computer plays when you haven't touched it for a while — flying photos, patterns, that sort of thing. Years ago they protected old screens; today they're mostly just for fun. Your computer will fall asleep on its own timer whether you use one or not.
Personalization You can move it back: open Settings, go to Personalization, then Taskbar, then Taskbar behaviors, and change Taskbar alignment to Left.
Pin to Start Keep it handy: right-click any app and choose Pin to taskbar to keep it on the bottom strip, or Pin to Start to keep it in the Start menu.
Pin to taskbar Keep it handy: right-click any app and choose Pin to taskbar to keep it on the bottom strip, or Pin to Start to keep it in the Start menu.
Sleep Sleep is a quick nap for your computer — the screen goes dark and it wakes up in seconds. Fine to use every night. (Shut down turns it fully off.)
Windows Update Windows Update keeps your computer safe with fixes from Microsoft. Your computer usually installs them on its own — you can also check by opening Settings, then Windows Update.
System tray (notification area) The system tray is the cluster of small icons at the bottom-right of your screen, next to the clock. It shows programs running quietly in the background, like your antivirus or cloud backup. Click the little up-arrow to see the ones that are hidden.
Volume icon / adjusting sound Click the little speaker icon at the bottom-right of your screen, by the clock, and drag the slider up. If there's an X on the speaker, click it to unmute. If you still hear nothing, right-click the speaker and choose "Open volume mixer" to check each program's volume.
Wi-Fi icon on PC Click the Wi-Fi symbol at the bottom-right of your screen, next to the clock — it looks like a little fan. A list of nearby networks appears; click yours and type the password. Once it says "Connected," you're online.
Calendar and clock The clock at the bottom-right of your screen always shows the time and date. Click it once and a little calendar pops up. If the time is wrong, right-click the clock, choose "Adjust date and time," and turn on "Set time automatically."
Show desktop button To jump straight to your desktop, click the thin strip at the very bottom-right corner of your screen, past the clock — every open window minimizes at once. Click it again and your windows come back. The keyboard shortcut is the Windows key + D.
Virtual desktops Virtual desktops give you extra screens to spread your work across — email on one, a web page on another. Press the Windows key + Tab to see Task View, then click "New desktop" at the top. Switch between them anytime with Windows key + Ctrl + the left or right arrow.
Snap windows side by side To put two windows side by side, drag one window's title bar all the way to the left edge of the screen until it snaps into half the screen, then do the same on the right with the other window. Or click a window and press the Windows key + the left or right arrow.
Widgets panel (Windows 11) The Widgets panel is the little weather box on the left side of the Windows 11 taskbar — click it and a panel slides out with weather, news, and calendar. If it annoys you, right-click the taskbar, choose "Taskbar settings," and turn Widgets off.
Search on the taskbar The search box on the taskbar is the fastest way to find anything — click it (or just press the Windows key) and start typing the program's name. Windows searches your programs, files, and settings all at once. Press Enter to open the top result.
Battery icon (laptop) The battery icon at the bottom-right of a laptop screen shows how much charge is left — hover over it with your mouse to see the percentage. If it says "plugged in" you're charging; unplug and the percentage will start dropping as you use it.
Action Center / Quick Settings Quick Settings is the little panel you get by clicking the Wi-Fi, speaker, or battery icons at the bottom-right. It holds on/off switches for Wi-Fi, Bluetooth, airplane mode, and brightness. Your app notifications pile up in the panel you get by clicking the date and time.
Lock screen vs desktop The lock screen is the pretty picture Windows shows when you first turn the computer on or wake it up — press any key or click, then type your password or PIN to reach your desktop. Your computer locks itself after a while to keep others out; that's normal and safe.
User account / switching users Each person can have their own account on one computer, with their own desktop and files. Click the Start button, then click your little profile picture at the bottom-left, and choose "Switch user" to let someone else log in without closing your stuff.
Opening Settings Click the Start button, then click the little gear icon just above it — that's Settings. Or press the Windows key + I on your keyboard, which works from anywhere. Settings is where you change just about everything on your computer.
Changing the wallpaper Right-click an empty spot on your desktop and choose Personalize, then click Background. Pick one of Windows' pictures or click "Browse photos" to use one of your own. Your own photos make the nicest backgrounds.
Display settings and text size Right-click the desktop and choose "Display settings." To make everything bigger, raise the "Scale" percentage — 125% is comfortable for most eyes. The "Display resolution" should stay at the recommended setting; changing it usually makes things blurry, not bigger.
Night light on PC Night light warms your screen's colors in the evening so it's easier on your eyes. Open Settings, go to System, then Display, and turn on Night light. Click its settings to have it turn on automatically at sunset.
Uninstalling programs Open Settings, go to Apps, then "Installed apps." Click the three dots next to the program you don't want and choose Uninstall. Never uninstall something unless you know what it is — when in doubt, ask Sean first.
Bluetooth on PC Open Settings, go to Bluetooth & devices, and make sure Bluetooth is turned on. Click "Add device," put your speaker or headphones in pairing mode (usually holding its power button), and click it when its name appears. It should connect within a few seconds.
Printers in Settings Open Settings, go to Bluetooth & devices, then "Printers & scanners." Click "Add device" and Windows will look for printers nearby — click yours when it appears. If it doesn't appear, make sure the printer is on and connected to the same Wi-Fi as your computer.
Sound settings on PC Right-click the speaker icon by the clock and choose "Sound settings" to pick which speakers and microphone Windows uses. If your sound comes from the wrong place — like the monitor instead of your speakers — this is where you fix it. Test each device with the Test button.
Date, time, and language Open Settings, go to "Time & language." Under "Date & time," turn on "Set time automatically" and pick your time zone. Under "Language," you can add another keyboard language — handy if you sometimes type in Spanish.
Accounts and sign-in options Open Settings, go to Accounts, then "Sign-in options." A PIN is the simplest way to log in — four digits instead of a long password. If your computer has a fingerprint reader or camera, you can set up Windows Hello here too, so you just touch or glance to sign in.
Recovery and reset If your computer is truly beyond fixing, Settings has a fresh start: go to System, then Recovery, and choose "Reset this PC." Pick "Keep my files" to save your documents, or "Remove everything" for a completely clean slate.
Notepad Notepad is Windows' simplest writing program — plain text, no formatting, no fuss. Press the Windows key, type "notepad," and press Enter. It's perfect for quick notes, lists, or jotting down a password hint (not the password itself).
Paint Paint is Windows' simple drawing program — press the Windows key, type "paint," and press Enter. You can sketch, crop photos, and add text to pictures. It's basic, but for quick edits it's faster than anything fancy.
Calculator Press the Windows key, type "calculator," and press Enter — it even has a scientific mode under its menu for trickier math. You can also pin it to the taskbar if you use it a lot: right-click its icon and choose "Pin to taskbar."
Sticky Notes Sticky Notes are little yellow notes that live on your desktop — press the Windows key, type "sticky notes," and press Enter. Type anything and it saves automatically, even if you close it. Great for phone numbers and reminders you need at a glance.
Voice Recorder / Sound Recorder Press the Windows key, type "sound recorder," and press Enter, then click the big microphone button to start recording. Click stop when you're done and the recording saves automatically. Handy for recording a reminder to yourself or a phone call's details.
Media Player / playing videos Double-clicking a video or music file usually opens Windows' Media Player automatically. If a video won't play, it's often in an unusual format — the free VLC program from videolan.org plays just about everything. (Only download it from that official site.)
Photos app on Windows Double-click any photo and Windows' Photos app opens it. Use the arrow keys to flip through a folder of pictures, and the pencil icon to crop or rotate. Your pictures live in the Pictures folder, which you'll find on the left side of File Explorer.
Clock, alarms, and timers Press the Windows key, type "clock," and press Enter — the Clock app has alarms, timers, and a stopwatch. Set an alarm the night before and your computer will chime even with the lid closed (as long as it's plugged in and not fully shut down).
Uninstalling a Store app Click Start, find the app in the list, right-click it, and choose Uninstall. That's all there is to it — Store apps come off cleanly without leaving junk behind. If Uninstall is grayed out, it's a built-in Windows piece you shouldn't remove.
Computer is slow First restart it — a computer that's been on for weeks gets sluggish. Then check storage: open Settings, System, Storage, and see if the drive is nearly full. Too many programs starting with Windows also slow things down — that's the next entry.
Programs starting with Windows (startup apps) Too many programs launching at startup makes everything slow. Press Ctrl + Shift + Esc to open Task Manager, click the "Startup apps" tab, and turn off anything you don't need immediately — your programs still work fine when you open them yourself.
Program not responding / frozen "Not responding" means a program got stuck — give it a minute, since it sometimes recovers. If it doesn't, press Ctrl + Shift + Esc, find the program in Task Manager, click it, and choose "End task." You'll lose unsaved work in that program, but the rest of your computer is fine.
Task Manager Task Manager shows every program running on your computer and lets you close the stuck ones — press Ctrl + Shift + Esc to open it. The Processes tab lists what's running; if something is frozen, click it and choose "End task." The Performance tab shows if your computer is working too hard.
Restarting vs shutting down vs sleep Restart closes everything and starts fresh — do this when things act up; it fixes most glitches. Shut down turns the computer fully off for the night. Sleep just naps it with everything still open, ready in seconds.
Blue screen of death A blue screen means Windows hit a serious error and restarted itself to stay safe — scary, but usually not fatal. If it happens once, carry on; if it keeps happening, note what you were doing each time and call Sean. Never call a phone number shown on a blue screen — real Windows never shows one.
Computer won't turn on Check the power cord is firmly plugged in at both ends — wall and computer. On a laptop, try a different outlet and look for the charging light. Hold the power button down for a full 15 seconds, release, then press it once normally.
Loud fan / computer hot A loud fan usually means the computer is hot or dusty. Make sure the vents aren't blocked — lift a laptop off blankets and pillows. Shut it down, let it cool, and blow dust out of the vents with short bursts of canned air.
Disk Cleanup Press the Windows key, type "disk cleanup," and press Enter. Check the boxes for Temporary files, Recycle Bin, and Thumbnails, then click OK — Windows safely deletes gigabytes of junk it collected. Do this every few months to keep things tidy.
Computer beeps on startup Beeps during startup are the computer's way of reporting a hardware problem — count them, because the pattern means something (three beeps often means memory trouble).
Screen is black but computer is on If you hear the computer but see nothing, check the monitor's power light and cable first — it may just be off or unplugged. Press the Windows key + Ctrl + Shift + B to restart the graphics; the screen blinks when it works. If that fails, try a different cable or monitor before assuming the worst.
Mouse or keyboard stopped working For a wireless mouse or keyboard, check the batteries first — dead batteries are the cause nine times out of ten. Then unplug the little USB receiver, wait five seconds, and plug it back into a different port. For a wired one, just try a different USB port.
A Mac is the computer made by Apple — a MacBook if it is a laptop, an iMac or Mac mini if it sits on a desk. The system that runs it is called macOS. The newest version (fall 2026) is macOS 27, nicknamed Golden Gate; many Macs still run the previous version, macOS 26 Tahoe, and that is perfectly fine — the basics below work the same on both.
The three places everything happens
The menu bar — the thin strip across the very top. The Apple menu (top-left corner) is home base: About This Mac, System Settings, Sleep, Restart, and Shut Down all live there. The words next to it change with whichever app you are using.
The Dock — the row of app icons along the bottom. Click an icon to open that app. A small dot under an icon means the app is already running.
The desktop — the screen behind everything, like the top of a real desk.
Finder: where your files live
Look for the smiling face — that is Finder, the Mac's version of File Explorer. Open it and you get your files and folders, a sidebar with quick places (Desktop, Documents, Downloads), back-and-forward arrows, and a search box in the top-right corner that finds any file in seconds.
Opening apps: three easy ways
Narrated tutorial: Click the app in the Dock. If it is there, this is the fastest way.; Press Command + Space, then type the app's name.; This is called Spotlight, and it is the Mac's fastest trick — type a few letters, press Enter, and the app opens. It finds files and emails too.
Click the app in the Dock. If it is there, this is the fastest way.
Press Command + Space, then type the app's name. This is called Spotlight, and it is the Mac's fastest trick — type a few letters, press Enter, and the app opens. It finds files and emails too.
Open Finder and click Applications in the sidebar — every app on your Mac is listed there.
Heads-up: the old Launchpad grid of apps is gone in the new macOS versions. Spotlight's Apps view (press Command + Space, then Command + 1) is its replacement.
Everyday tasks
Connect to Wi-Fi: click the Wi-Fi symbol in the top-right corner of the menu bar and pick your network. Or go the long way: Apple menu → System Settings → Wi-Fi.
Make text bigger: Apple menu → System Settings → Accessibility → Display → Text size, then drag the slider. This enlarges text in Finder, Mail, Messages, Notes, and Calendar.
Sleep, restart, or shut down: click the Apple menu (top-left). Sleep is a light nap — everything stays exactly as you left it. Restart fixes a surprising number of glitches. Shut Down turns the Mac fully off.
Get apps: the App Store (the “A” icon in the Dock) is where you find new apps — search, click Get, done. Your app updates live here too.
Switching from Windows? Here is what is called what
Finder = File Explorer
Dock = the taskbar
System Settings = Settings (older Macs call it System Preferences)
Trash (in the Dock) = the Recycle Bin
Safari = the built-in web browser, like Edge or Chrome
The Command (⌘) key does what Control does on Windows — Command-C to copy, Command-V to paste.
One big difference: closing a window (the red button) does not always quit the app. To truly quit, click the app's name in the menu bar and choose Quit, or press Command-Q.
Which version do I have — and do I need the newest one?
Click the Apple menu and choose About This Mac — it shows your version. There is no rush to update: the previous version still works fine and keeps getting security fixes. And if your Mac has an older Intel chip inside, it simply cannot run the very newest macOS — that is okay, it will keep working as it always has.
When to call Sean instead
Your Mac offered an update and you are not sure whether to say yes.
Wi-Fi will not connect no matter what you try.
An app keeps crashing or a window will not close.
You are thinking about switching from Windows to Mac (or the other way) and want honest advice first.
Spotlight If it is there, this is the fastest way.; Press Command + Space, then type the app's name.; This is called Spotlight, and it is the Mac's fastest trick — type a few letters, press Enter, and the app opens.
The menu bar The three places everything happens The menu bar — the thin strip across the very top.
System Settings on Mac Click the Apple menu (top-left corner), then System Settings — that's the Mac's control panel for Wi-Fi, sound, display, and everything else. Older Macs called it System Preferences; same idea, newer name. The search box at the top finds any setting fast.
Installing apps on Mac The safest way is the App Store (blue icon with the "A") — find the app and click Get. Some programs come from the maker's website as a download you drag into your Applications folder. If your Mac warns about an unknown developer, that's it protecting you.
Time Machine backup Time Machine is the Mac's built-in backup — plug in an external drive, and it asks if you want to use it for backup. After that it saves everything automatically every hour. If anything ever goes wrong, you can rewind your whole Mac to yesterday.
Mac running slow First restart it — that clears most sluggishness. Then check storage: click the Apple menu, About This Mac, then the Storage tab; if it's nearly full, that's your culprit. Too many apps opening at login also slows things — trim them in System Settings under General.
Mac won't turn on Hold the power button (or Touch ID button) for 10 seconds, release, then press it once normally — that resets the power state. Check the charger is firmly plugged in at both ends.
Safari on Mac Safari (the compass icon in your Dock) is the Mac's web browser. The address bar is at the top — type a website address or a search there. Your iPhone's open tabs and bookmarks sync over through iCloud, so the web follows you.
Mac vs PC (what's the difference) A Mac is Apple's computer — it runs macOS and works seamlessly with your iPhone and iPad. A PC usually runs Windows and comes in far more shapes and prices. Macs cost more up front but tend to last longer and need less fuss; pick the one your family can help you with.
Copy and paste on Mac On a Mac it's Command+C to copy and Command+V to paste — the Command key is the one with the ⌘ symbol, next to the spacebar. Highlight text, press Command+C, click where it should go, press Command+V. Works for files in Finder too.
On Windows, the right mouse button opens a menu of extra choices. A Mac has that same menu — Apple just calls it a secondary click. Once you know the finger move, you will use it every day.
Three ways to right-click
Tap with two fingers. Tap the trackpad with two fingertips at the same time. This is the easiest way — and it is on by default on most Macs, so it usually just works.
Hold Control and click. Hold the Control (Ctrl) key on the keyboard and click the trackpad or mouse normally. This works everywhere — no setup, no settings to change.
On a mouse, click the right side. A regular two-button mouse right-clicks like it always has. On Apple's Magic Mouse, click the right half of the mouse — there is no visible button, but it is there.
When to use it
On a file or photo: rename it, copy it, or move it to the Trash.
On a link in Safari: open it in a new tab, or save the picture it points to.
On the desktop: change the background picture or tidy up the icons.
The menu changes depending on what you clicked — that is the whole point. It shows the choices that make sense for that one thing.
If two-finger tap does nothing
Go to the Apple menu → System Settings → Trackpad → Point & Click, and turn on Secondary click. You can also pick which gesture it answers to there — “Click or tap with two fingers” is the friendliest one.
When to call Sean instead
You want right-click to work like your old Windows computer (a corner of the trackpad, for example) and want it set up for you.
The menu shows choices you don't understand and you are afraid of picking the wrong one.
A mouse you plugged in will not right-click at all.
Control-click Hold the Control key on the keyboard and click the trackpad or mouse normally. It works exactly like a Windows right-click, with no setup needed.
Two-finger tap Tap the trackpad with two fingertips at the same time to right-click. To change it: Apple menu > System Settings > Trackpad > Point & Click > Secondary click.
The trackpad is the big flat square below the keyboard — it is your Mac's mouse. You barely have to press it at all: a few light finger moves do almost everything.
The three moves that matter
Tap with one finger to click. A light tap is all it takes — no pressing down. If tapping does nothing on your Mac, turn it on: Apple menu → System Settings → Trackpad → Point & Click → turn on Tap to click.
Slide two fingers up or down to scroll. Put two fingertips on the trackpad and glide them — the page follows. This is how you move through long pages and emails.
Pinch two fingers to zoom in or out. Spread your fingers apart to zoom in, pinch them together to zoom back out — just like on an iPhone. Bonus: double-tap with two fingers smart-zooms a webpage or document so it fills the screen.
If scrolling feels backwards
Apple's default way is this: slide your fingers up and the page moves up, like pushing a real piece of paper. If that feels wrong to your brain, you can flip it: Apple menu → System Settings → Trackpad → Scroll & Zoom, and turn off “Scroll direction: natural”. Some people love Apple's way, some prefer the old way — there is no wrong answer.
When to call Sean instead
Tap-to-click still will not work after you turned it on.
The trackpad feels dead, jumps around, or clicks on things by itself.
You would rather use a regular mouse and want help picking one.
Pinch to zoom Put two fingers on the trackpad and spread them apart to zoom in, pinch them together to zoom out — just like on an iPhone.
Smart zoom Double-tap the trackpad with two fingers to zoom a webpage or document so it fills the screen. Tap once with two fingers to zoom back out.
Tap to click Tap the trackpad lightly with one finger instead of pressing it down. If tapping does nothing, turn it on at Apple menu > System Settings > Trackpad > Point & Click.
Two-finger scroll Put two fingertips on the trackpad and slide them up or down — the page scrolls with them.
A screenshot is a photo of what is on your screen. It is the fastest way to show someone what you see — including Sean, if something on your Mac looks wrong. Learn two shortcuts and you are set.
The two shortcuts you will actually use
Shift-Command-3 — press Shift, Command, and 3 together. It photographs the whole screen in one go.
Shift-Command-4 — press Shift, Command, and 4 together, then drag a box around just the part you want. Let go to take it; press Esc if you change your mind.
Just one window
Press Shift-Command-4, then tap the Space bar. The pointer turns into a little camera — now click the window you want, and it photographs just that window, nothing else. Perfect for capturing an error message without your whole desktop.
Shift-Command-5 opens the full toolbox
Press Shift-Command-5 and a little toolbar appears at the bottom: capture the whole screen, one window, or a selection — even record a short video of your screen. The Options button lets you set a timer or change where your pictures are saved.
Where your screenshots go
They land on your desktop by default. A tiny preview appears in the corner — click it to edit or write on it, drag it somewhere else to move it, or just wait a few seconds and it saves itself.
When to call Sean instead
You took a screenshot but cannot find it.
The screenshot shortcuts do nothing at all.
You want to record a video of your screen and need a walkthrough.
Screenshot app Press Shift, Command, and 5 for the full toolbox: capture the screen, a window, or a selection, record a short video, set a timer, or change where pictures are saved.
Updates keep your Mac safe and fix small bugs. The newest version is macOS 27 Golden Gate (fall 2026) — but if yours runs an older version, that is fine. The steps below are the same either way.
How to check for updates
Click the Apple menu in the top-left corner, then System Settings.
Click General in the sidebar, then Software Update on the right.
It checks by itself. If an update is waiting, click Update Now (small fixes) or Upgrade Now (a whole new version).
Plug in the charger first. It takes a while — the Mac restarts on its own when it is done. Leave it alone until it finishes.
Older Macs
If you see System Preferences instead of System Settings, the path is Apple menu → System Preferences → Software Update. On very old Macs, updates are checked in the App Store app, under the Updates tab.
Let the Mac handle it by itself
On the Software Update screen you can turn on automatic updates — the Mac then installs small fixes overnight while you sleep. Big new versions still wait for your okay first, so nothing scary happens without you.
When to call Sean instead
Your Mac offered an update and you are not sure whether to say yes.
An update got stuck halfway or the Mac will not start after one.
After updating, something that worked before does not work now.
Update my Mac Apple menu > System Settings > General > Software Update. Let it check, click Update Now, and leave the Mac alone until it restarts and finishes.
Remember the lesson from Mac Basics — closing a window (the red button) does not quit an app. Here is its twin: dragging an app off the Dock does not delete it.Deleting takes two steps, and they are easy.
The two steps
Open Finder (the smiling face), click Applications in the sidebar, find the app, and drag it to the Trash at the end of the Dock. Or right-click the app and choose Move to Trash. If Apple asks for your Mac password, that is normal — type it in.
Empty the Trash. Click the Finder menu at the very top of the screen and choose Empty Trash. That is what actually frees the space — until you do, the app is still sitting there.
Some apps have their own uninstaller
Big apps — antivirus, VPNs, some office software — often include an “Uninstaller” app in their own folder inside Applications. If yours has one, use it instead of the Trash — it cleans up more thoroughly than dragging alone.
Two things deleting cannot do
It will not cancel a subscription you bought through the app — cancel that separately, or the bills keep coming.
You cannot delete Apple's built-in apps (Mail, Safari, Music, and friends). They are part of the Mac.
When to call Sean instead
Your storage is full and you do not know what is safe to delete.
An app refuses to go in the Trash or says it is “in use.”
You deleted something and wish you had not — check the Trash first. Until you empty it, you can drag the app right back out.
Empty Trash Click the Finder menu at the very top of the screen and choose Empty Trash. Until you do, deleted apps still take up space.
Every app locks up once in a while. The spinning rainbow ball appears, nothing answers, and clicking harder does not help. Do not unplug the Mac — there is a proper way to end it.
Step one — try quitting nicely
Press Command-Q, or click the app's name in the menu bar and choose Quit. Give it a minute — it may finish what it was doing and close on its own.
Step two — Force Quit
Press Option, Command, and Esc together. A small window lists your running apps. Click the frozen one, then click Force Quit. (You can also get there from the Apple menu → Force Quit.) One heads-up: anything you had not saved in that app is lost — which is exactly why the gentle quit comes first.
If the whole Mac is frozen
Try the Apple menu → Restart. If even the menu will not open, hold the power button for up to 10 seconds until the Mac turns off, then press it once to start back up. This is the last resort, not the first move.
When to call Sean instead
The same app freezes every day — that is a pattern worth fixing.
The whole Mac freezes several times a week.
After a force quit, your files look wrong or missing.
Force Quit Press Option, Command, and Esc together, click the frozen app, and click Force Quit. Try a normal quit (Command-Q) first — anything unsaved is lost when you force it.
A backup is a spare copy of everything on your Mac — your photos, documents, emails, and settings. If the Mac ever breaks or gets stolen, the backup brings it all back. Apple built the backup tool right in. It is called Time Machine, and it does the work by itself once you set it up.
What you need: an external drive
Time Machine saves your backup onto a separate external hard drive — a little box that plugs into your Mac with a cable. It should hold at least twice as much as your Mac does. A 1-terabyte drive is plenty for most people and costs around fifty dollars. Ask at any electronics store for a "Mac-compatible external hard drive," or call Sean and he will point you to the right one.
Setting it up (one time)
Plug the external drive into your Mac. Use the cable that came with it.
The Mac may ask: "Do you want to use this drive with Time Machine?" Click Use as Backup Disk. That is the whole setup.
If it does not ask, open the Apple menu → System Settings → General → Time Machine, click Add Backup Disk, and pick your drive.
The first backup takes a while — sometimes hours. Leave the Mac plugged in and let it finish. Every backup after that is quick, because Time Machine only copies what changed.
Then forget about it
Time Machine backs up automatically every hour while the drive is plugged in. You do not have to remember anything. The best habit: leave the drive plugged in whenever you are at your desk. If you unplug it to travel, plug it back in when you return — Time Machine catches up on its own.
Getting a file back
Deleted something by accident? Open Finder, then click the Time Machine icon in the menu bar (it looks like a clock with an arrow) and choose Enter Time Machine. You travel back in time through your files — find the file, click Restore, and it comes back.
When to call Sean instead
You are not sure which external drive to buy.
Time Machine says the backup failed, or the drive is full.
You need to restore the whole Mac, not just one file.
You want your photos backed up to the cloud too, as a second safety net.
Most printers work with a Mac the moment you plug them in or join the same Wi-Fi. Apple keeps a huge list of printers built into the Mac — no disks, no downloads, usually no fuss at all.
Adding your printer
Wi-Fi printer: make sure the printer is on and connected to your home Wi-Fi (the printer's screen walks you through this the first time). Then on the Mac, open the Apple menu → System Settings → Printers & Scanners. Your printer should already be listed — that is it.
USB printer: plug the printer's cable into the Mac. It appears in Printers & Scanners by itself.
If the printer is not listed, click Add Printer in that same screen and pick it from the list.
Printing anything
In any app — Safari, Mail, Photos, Pages — press Command-P, or click File in the menu bar and choose Print. A small window appears:
Printer: make sure yours is selected at the top.
Copies: how many you want.
Pages: leave on All unless you only want certain pages.
Click Print. That is the whole job.
If it will not print
Check the printer's screen for messages — "out of paper" and "low ink" are the usual culprits.
Make sure the printer and Mac are on the same Wi-Fi. If the printer joined the guest network and the Mac is on the main one, they cannot see each other.
Turn the printer off and back on. This fixes more printing problems than anything else.
When to call Sean instead
The printer will not appear no matter what you try.
Printouts come out blank, streaky, or the wrong colors.
You are buying a new printer and want one that plays nicely with a Mac.
Leave your computer alone for a few minutes and the screen fills with moving pictures. That is the screen saver. Years ago it protected the screen from damage. Today it is mostly decoration — and a little privacy, because nobody can read your screen while the pictures dance.
If your screen went black, read this first
The screen saver is not what makes the screen go fully black — that is the computer falling asleep to save power. Either way, the fix is the same and nothing is broken: move the mouse or tap any key (the spacebar is a good one). The screen wakes right back up, exactly where you left it.
Choosing your screen saver
On Windows: open Settings → Personalization → Lock screen, then scroll down and click Screen saver settings. Pick one you like from the list — your own photos make a lovely one — and set how many minutes of sitting still before it starts.
On a Mac: open the Apple menu → System Settings, then click Screen Saver on the left. Pick a design and choose when it kicks in.
Turn it off if it annoys you
You do not have to have one at all. In that same screen saver screen, choose None (Windows) or set it to Never (Mac). The computer will simply go to sleep when idle, which is perfectly fine.
When to call Sean instead
The screen goes black after only a minute or two and it drives you crazy — the timing is adjustable.
You want your own photos as the screen saver and cannot get them to show.
The computer asks for a password every time it wakes up and you want that changed.
A Chromebook is a simple, affordable laptop that lives on the internet. Instead of programs you install, almost everything happens in the Chrome web browser — email, websites, video calls, photos, and documents. It turns on fast, updates itself, and is very hard to break. It is a wonderful choice if your computer life is email, the web, and video calls — and not the right choice if you need heavy programs like full desktop publishing or specialized software.
Your screen, in three parts
Everything on a Chromebook starts from the bar at the very bottom of the screen. It is called the shelf, and it has three parts:
The shelf — the bar at the bottom. The circle on the left opens all your apps, the middle holds your favorites, and the clock area on the right holds Wi-Fi and settings.
The circle (bottom-left): this is the Launcher. Click or tap it to see every app on your Chromebook.
The middle of the shelf: your pinned apps — the ones you use most. To add one, open the Launcher, right-click the app, and choose Pin to shelf. To remove one, right-click it on the shelf and choose Unpin.
The clock area (bottom-right): this is Quick Settings. Click the time to see your Wi-Fi, battery, the Settings gear, and the power button.
Watch it happen: Chromebook video tutorials
Not everyone learns the same way — so here is the Chromebook in motion. Each narrated video below walks you through a real task happening on the screen, step by step. Press play and follow along, or drag the scrub bar to jump to any step and pause there as long as you like.
Video 1 — tour of your screen
Three parts, one bar along the bottom. Watch each part light up, then find it on your own Chromebook.
Written steps — tour of your screen
Look at the bar along the very bottom of your Chromebook screen. It is called the shelf, and it never goes away.
The circle on the left is the Launcher. Click it to see every app on your Chromebook.
The middle of the shelf holds your pinned apps — the favorites you open with one click.
The clock area on the right is Quick Settings. Click the time to reach Wi-Fi, battery, Settings, and the power button.
Video 2 — opening apps
The Launcher is your app drawer. Open it, find what you want, and pin your favorites so they are always one click away.
Written steps — opening apps
Click the Launcher circle at the bottom-left of the screen. Every app on your Chromebook appears.
Find your app two ways: type its name in the search bar at the top, or scroll the grid of icons.
Click the app's icon to open it. It opens in its own window, like Gmail above.
Close any window with the X in its top-right corner.
Pin a favorite: open the Launcher, right-click the app (two-finger tap on the touchpad works too), and choose Pin to shelf. To remove one later, right-click it on the shelf and choose Unpin.
Video 3 — using the web
Chrome is your home base. The address bar takes you anywhere, and tabs let you keep several pages open at once.
Written steps — using the web
Open Chrome: click the Chrome circle on the shelf. This is your web browser — your home base.
Go anywhere: click the address bar at the top, type a web address like gmail.com, and press Enter. You can also just type words — it searches Google for you.
Open a second tab: click the plus sign (+) next to your tab. Now two pages are open at once.
Switch tabs by clicking the one you want at the top.
Close a tab with the little x on that tab. Closing tabs does not close Chrome — the browser stays open until you close its window with the big X at the top-right.
Video 4 — Wi-Fi and settings
Everything behind the scenes lives behind the clock. Connect to Wi-Fi, open Settings, and shut down — all from one spot.
Written steps — Wi-Fi and settings
Click the time in the bottom-right corner. The Quick Settings panel opens.
Connect to Wi-Fi: click Wi-Fi, click your network's name, type the Wi-Fi password carefully, and click the button to join. You only do this once — it remembers.
Brightness and volume have their own sliders right in the panel — drag the white dot.
Open full Settings with the gear icon. To check for updates, go to About ChromeOS and click Check for updates.
Shut down: click the time, click the power button, and choose Shut down. Most days you do not need this — closing the lid puts the Chromebook to sleep, and opening it wakes it right back up.
The Launcher: all your apps in one place
The Launcher panel — tap the circle and it slides up. Type in the search bar to find anything, or tap an icon to open it.
Lost an app? Open the Launcher and type its name in the search bar at the top. It finds apps, files, and even websites.
The Chrome browser is your home base. Almost everything on a Chromebook — Gmail, photos, documents, video calls — opens in Chrome, just like websites.
Everyday tasks
Connect to Wi-Fi: click the time in the bottom-right corner, click Wi-Fi, choose your network name, and type the password.
Open Gmail or a website: open Chrome from the shelf, type gmail.com (or any address) in the bar at the top, and press Enter.
Install an app: most modern Chromebooks include the Google Play Store — the same app store as Android phones. Open it from the Launcher, search for the app you want, and click Install. It will appear in your Launcher. Don’t see it? Open Settings → Apps and turn on the Google Play Store — then it appears in the Launcher.
Sleep or shut down: closing the lid puts it to sleep — that is all most people ever need. To fully shut down, click the time in the bottom-right corner, click the power symbol, and choose Shut down.
Updates take care of themselves: a Chromebook downloads and installs its own updates in the background. If you ever want to check, open Settings and go to About ChromeOS, then Check for updates.
Honest limits of a Chromebook
It needs the internet for most things. A few apps can be set up to work offline, but a Chromebook is happiest on Wi-Fi.
Printing works fine. Open Settings (click the time at the bottom-right corner, then the gear icon), then go to Device, then Printers and scanners — if your printer is on the same Wi-Fi, click Save next to it. Then press Ctrl + P anywhere to print.
Not the right choice if you need heavy Windows or Mac programs, specialized work software, or serious gaming. For email, web, photos, and video calls, it is plenty.
When to call Sean instead
Choosing between a Chromebook, a Windows laptop, or an iPad.
Setting up a new Chromebook with your email and Wi-Fi.
A printer that will not connect to the Chromebook.
Moving your photos and files from an old computer.
Address bar Go anywhere: click the address bar at the top, type a web address like gmail.com, and press Enter.
Check for updates Check for updates keeps your Chromebook current and safe. Go to About ChromeOS and click Check for updates.
Right-click Pin a favorite: open the Launcher, right-click the app (two-finger tap on the touchpad works too), and choose Pin to shelf.
Shelf The shelf is the bar along the bottom of a Chromebook's screen — the circle on the left opens all your apps, the middle holds favorites, and the clock sits on the right.
Two ways to get the programs for writing letters, making lists, and doing budgets. One costs a yearly fee. The other is free. Both get the job done — here is how to pick.
Microsoft 365, in plain words
Word — for writing letters and documents. Excel — for lists and budgets. PowerPoint — for slideshows. Outlook — for email and your calendar.
It is a subscription. Personal costs about $100 a year for one person. Family costs about $130 a year and covers up to six people. You can also pay by the month, which costs more over time.
OneDrive is included — that is 1 TB of online storage per person. Your files are saved to the internet automatically, so you can open them from your computer, tablet, or phone.
Copilot AI is included now. That is a built-in helper that can draft text and answer questions inside the apps.
Works everywhere: Windows computers, Macs, iPhones, iPads, and Android phones.
One-time option:Office Home 2024 costs about $150 once, with no yearly bill. But it has no OneDrive storage, no Copilot, and no new features over time.
LibreOffice, in plain words
Free forever. No subscription, no account, no bill. It is made by volunteers and a nonprofit.
Writer is the Word equivalent, Calc is the Excel equivalent, and Impress is the PowerPoint equivalent. It also includes drawing and database programs.
It opens Word, Excel, and PowerPoint files, and it can save back into those formats. So a file someone emails you will open fine.
The honest catch: a very complicated file with fancy formatting can look slightly different than it does in Word. For everyday letters, lists, and budgets, it works just fine.
No cloud storage built in — your files save to your own computer. No AI helper — by design, nothing ever leaves your computer.
Prices change
Microsoft raised its prices in 2025 when it added Copilot to the plans. Check the current price before you buy. LibreOffice is free and always will be.
Which one should you pick?
Pay for Microsoft 365 if: you trade files back and forth with family or an office that uses Word and Excel, you want your files backed up online automatically, or you like the idea of the AI helper.
Choose free LibreOffice if: you mostly write letters and keep simple lists on one computer, and you do not want a yearly bill.
You can have both. Many people keep LibreOffice for everyday work and let a family member's Microsoft 365 handle shared files.
When to call Sean instead
You are not sure which one fits how you work.
You want help installing either program.
A file someone sent you will not open.
You want your files reachable from more than one device.
A wireless keyboard and mouse free you from cords. Type from the couch, click from across the room — they work with computers, tablets, and many smart TVs. No cables to trip over, no tangled mess behind the desk.
Why Logitech is the name to know
Plenty of companies make wireless keyboards and mice — Microsoft and Dell make fine ones, and Apple makes a beautiful one for Macs. But for most people, Logitech wins, and here is why.
Batteries last months — sometimes years. Logitech rates the K380 keyboard at 2 years on two AAA batteries, the M720 mouse at 24 months, and the MK540 keyboard at up to 36 months. You change batteries so rarely you forget when you last did.
The tiny USB receiver just works. Plug the little receiver into a USB port and the keyboard or mouse connects instantly — no pairing, no settings, no fuss. Newer models use the Logi Bolt receiver (look for the lightning-bolt icon); older ones use Unifying (orange star icon). The two receivers do not mix, but Bluetooth works with everything.
One keyboard for several devices. Many Logitech models pair with three devices at once — your computer, your tablet, your phone — and switch between them with one keypress. Type an email on the computer, tap a button, reply to a text on the phone.
There is one for every hand and budget. Simple, ergonomic, compact, full-size with a number pad, quiet keys for shared rooms — Logitech makes them all, and reviewers keep ranking their models at the top year after year.
The top picks
Logitech K380 — simplest keyboard
Small, quiet, and friendly. Pairs with three devices (computer, tablet, phone) and the batteries last about 2 years. The round keys take a day to get used to, then most people love it. Best if: you want one simple keyboard for everything.
Logitech Ergo K860 — easiest on wrists
A curved, split keyboard with a soft wrist rest. Your hands sit in a natural position instead of twisting flat, which helps if typing makes your wrists ache. Full-size with a number pad, about 2 years of battery. Best if: your hands or wrists hurt after typing.
Logitech M720 Triathlon — best mouse
A comfortable full-size mouse that also switches between three devices, with a battery rated at 24 months. Big enough to rest your whole hand on, with extra buttons you can ignore or customize. Best if: you want one mouse that does it all.
Logitech MK540 — best keyboard-and-mouse set
A familiar full-size keyboard with number pad, palm rest, and volume keys, plus a comfortable mouse — one receiver runs both. The keyboard battery is rated up to 36 months. Best if: you want the classic desktop setup with zero fuss.
Setting one up, in plain words
Narrated tutorial: setting up a keyboard and mouse.
Receiver models: plug the tiny USB receiver into the computer’s wide, flat USB-A port. That is the whole setup — start typing. Only small oval USB-C ports on your computer? The receiver won’t fit — connect by Bluetooth instead (step 2 above), or use a small USB-C to USB-A adapter.
Bluetooth models: turn the keyboard or mouse on, hold its pairing button until the light blinks, then pick it from the Bluetooth list on your computer, tablet, or phone.
Batteries: most Logitech models use AA or AAA batteries that last a year or more. When the pointer gets jumpy or keys start missing, change the batteries — do not buy a new mouse.
Rechargeable models: a few premium models recharge with a cable instead of using batteries. Plug them in overnight every few months.
How to choose
One computer, keep it simple: the MK540 combo — familiar and dependable.
Computer plus tablet: the K380 keyboard and M720 mouse — both switch devices with one press.
Sore wrists: the Ergo K860 — the split curve really does help.
Small hands or a small desk: the compact K380 over a full-size board.
Card note: if you already own an older Logitech with the orange-star Unifying receiver, new Logi Bolt devices will not pair to that receiver — use Bluetooth instead, or keep the new device's own receiver plugged in.
When to call Sean instead
Pairing a keyboard or mouse over Bluetooth when it will not show up.
Choosing between models before you buy — hand size and wrist comfort matter.
Setting up one keyboard to switch between a computer and a tablet.
A wireless mouse that keeps freezing or disconnecting.
Alt+Tab (switch programs) Hold Alt and tap Tab to jump between your open programs without touching the mouse. Keep holding Alt and tap Tab again to cycle through them; let go when the one you want is highlighted. It's the fastest way to flip between email and a web page.
Caps Lock and Num Lock Caps Lock makes everything type in CAPITAL LETTERS — tap it once to turn it off if your password keeps failing, since passwords care about capitals. Num Lock turns the number pad on the right side of big keyboards on and off; if those numbers don't work, tap Num Lock once.
Double-click vs single-click vs right-click Single-click selects something; double-click (two quick clicks) opens it — files, folders, and programs all open on double-click. Right-click opens a menu of extra choices for whatever you clicked. If double-clicking is hard, you can slow it down in Settings under Bluetooth & devices, then Mouse.
Scroll wheel and touchpad scrolling Roll the little wheel in the middle of your mouse to move up and down a page. On a laptop touchpad, slide two fingers up or down together to scroll. If scrolling goes the "wrong" way for you, flip it in Settings under Bluetooth & devices, then Touchpad.
Escape key The Esc key (top-left of your keyboard) is the universal "get me out of here" — it closes menus, exits full-screen videos, and cancels dialogs. When something takes over your screen and you want out, Esc is always worth trying first.
Delete vs Backspace Backspace erases the letter to the left of your cursor; Delete erases the letter to the right. In File Explorer, both keys send a selected file to the Recycle Bin. Laptops often only have Backspace — hold Fn with it to get Delete's job.
Changing mouse pointer speed and size Open Settings, go to Bluetooth & devices, then Mouse, and drag the "Mouse pointer speed" slider until it feels right. To make the pointer itself bigger and easier to see, go to Accessibility, then "Mouse pointer and touch."
Keyboard language / typing in another language Open Settings, go to "Time & language," then "Language," and add the language you want — Windows downloads its keyboard. Switch between keyboards anytime with Windows key + Spacebar. For a single accent mark, holding the letter often shows options in many programs.
Printers jam, go offline, and hang onto old print jobs. Almost all of it is fixable in a few minutes. One rule covers all of it: never force anything. Gentle fixes work; forcing breaks printers.
What kind of printer do you have?
Two kinds live in most homes. Knowing which one you have makes everything below easier.
Inkjet
Prints with liquid ink in little cartridges. Best for photos and color pages. If you print only once in a while, the nozzles can clog — most printers can run a cleaning cycle from their own menu or settings screen to clear it.
Laser
Prints with toner, a fine powder in a cartridge. Best for black-and-white documents. Toner never dries out, so a laser printer can sit unused for months and still print.
Clearing a paper jam
Paper threads through tight spaces inside the printer, so jams happen to every printer sooner or later. Slow down and work gently.
Narrated tutorial: Turn the printer off first, so nothing moves while your hands are inside.; If it is a laser printer, unplug it and wait a few minutes — the inside gets very hot.; Spot 1 — the paper tray: slide it out, take out any crumpled sheets, and straighten the stack before sliding it back in.
Turn the printer off first, so nothing moves while your hands are inside. If it is a laser printer, unplug it and wait a few minutes — the inside gets very hot.
Spot 1 — the paper tray: slide it out, take out any crumpled sheets, and straighten the stack before sliding it back in.
Spot 2 — inside the printer: open the cover and lift out the cartridge. Pull jammed paper gently, in the direction it was traveling — the way pages normally move, never backward. Both hands, slow and steady.
Spot 3 — the back: open the rear door and ease out any paper you find there.
Hunt for torn scraps. Even a stamp-sized piece left behind causes the next jam. A flashlight helps you see inside; tweezers work well for tiny pieces. If paper will not come out with a gentle pull, stop — don't force it.
Close every door and tray, turn the printer back on, and print a test page. Then clear any stuck job from the print queue — see “A print job is stuck” below.
Fewer jams next time
One kind of paper at a time in the tray — do not mix types or sizes.
Do not overfill the tray. Leave some room at the top.
Fan the stack before loading it: hold the paper loosely and fan the edges like a deck of cards, then tap the stack square on the table.
Slide the paper guides in the tray until they just touch the paper — snug, not squeezing.
A print job is stuck
Sometimes a document gets stuck in the line of jobs waiting to print, and nothing behind it will print either. Cancel the stuck job and the rest flow through.
Windows 11
Open Settings, then Bluetooth & devices, then Printers & scanners. Click your printer, then Open print queue. Right-click the stuck job and choose Cancel. To clear everything at once, open the three-dot menu and choose Cancel all.
On Windows 10, the same screen lives under Settings → Devices → Printers & scanners.
Mac
Click the Apple menu, then System Settings, then Printers & Scanners. Click your printer, then Open Print Queue. Click the X next to the stuck job to cancel it.
On older Macs, the same screen is under Apple menu → System Preferences → Printers & Scanners.
If a job refuses to cancel, restart the computer — that clears the line for most people. If it is still stuck after a restart, call me.
Printer says “offline” or nothing prints
Work through these in order — the fix is usually in the first three.
Narrated tutorial: Is the printer on? Look for lights or a screen. Printers fall asleep — press the power button to wake it.; Are you printing to the right printer? In the print window, check the printer name at the top.; Computers collect old printers, PDF printers, and fax entries — your job may be going to the wrong one.
Is the printer on? Look for lights or a screen. Printers fall asleep — press the power button to wake it.
Are you printing to the right printer? In the print window, check the printer name at the top. Computers collect old printers, PDF printers, and fax entries — your job may be going to the wrong one.
Check the cables. If it plugs into the computer with a USB cable, push the cable in firmly at both ends — the computer end and the printer end.
Same Wi-Fi network. If the printer is wireless, the printer and the computer must be on the same Wi-Fi network name. Check the printer's Wi-Fi light or its little screen.
Read the printer's own screen. Many printers say exactly what is wrong — out of paper, low ink, or a jam. Fix what it says first.
On Windows, check the offline switch: Settings → Bluetooth & devices → Printers & scanners → your printer → Open print queue. Click Printer at the top of that window — if Use Printer Offline has a checkmark, click it to turn it off.
Remove the printer and add it back. Still offline? Go to Settings → Bluetooth & devices → Printers & scanners, click your printer, choose Remove, then Yes. Then click Add device and let Windows find the printer again. This fixes most stubborn cases.
Restart the printer: turn it fully off, wait 30 seconds, turn it back on. Then try printing again.
Windows 11 also has a built-in fixer: Settings → System → Troubleshoot → Other troubleshooters → Printer → Run. It finds and fixes common problems by itself.
Print a test page
A test page tells you in seconds whether the printer itself is healthy. If the test page prints fine, the problem is in the computer — not the printer.
Windows 11
Open Settings, then Bluetooth & devices, then Printers & scanners. Click your printer, then Printer properties, then Print Test Page.
On Windows 10: Settings → Devices → Printers & scanners → your printer → Manage → Printer properties → Print Test Page.
Mac
Just print any page — it tells you the same thing. Open anything printable and press Command + P.
Getting the printer onto your Wi-Fi
If the printer has never been on your Wi-Fi, the easiest method uses the WPS button — no password typing.
Narrated tutorial: Find the WPS button on your internet router (often on the back or side) and press it once.; Within two minutes, press the WPS or wireless button on the printer —; or on the printer's screen choose Wi-Fi Protected Setup, then Push Button.
Find the WPS button on your internet router (often on the back or side) and press it once.
Within two minutes, press the WPS or wireless button on the printer — or on the printer's screen choose Wi-Fi Protected Setup, then Push Button.
Wait about a minute. The printer's Wi-Fi light should stop blinking and stay solid.
If it does not connect after two tries, some routers handle this differently — call me and I will get it on.
“Low ink” is a warning, not an emergency
Printers warn you early — sometimes very early. Here is how to read the warnings.
“Low ink” means start thinking about a replacement — you can keep printing. The printer stops only when a cartridge is truly empty. Keep a spare cartridge on hand so you are never stuck mid-job.
“Toner low” means the same thing: keep printing while the pages look good, and have a spare ready. “Replace toner” is the later, firmer warning — finish what you are printing, then swap the cartridge.
Printing from your phone or tablet
iPhone or iPad
Your phone and the printer must be on the same Wi-Fi network. Open the photo, document, email, or web page. Tap the Share button (the square with an arrow pointing up), then Print. Choose your printer, adjust the copies if you like, and tap Print. Most modern printers work with no app and no setup — this is called AirPrint.
Samsung phone
Open Settings, then Connections, then More connection settings, then Printing, and make sure Default Print Service is turned on. Then open the photo or document, tap Share, tap Print, and choose your printer.
On non-Samsung Android phones the path is Settings → Connected devices → Connection preferences → Printing.
If your printer does not appear in the list, check the same-Wi-Fi rule first — that is the cause almost every time.
When to call Sean instead
Anything smells like burning, or the printer starts making loud grinding or strange new noises — turn it off and call.
Paper will not come out with a gentle pull. Forcing it breaks printers, and a service visit costs less than a new printer.
Ink or toner spilled inside the printer. Toner powder spreads everywhere and stains — best handled, not wiped.
The same jam keeps coming back after you cleared it carefully — something inside needs attention.
The printer still says offline after you worked through the steps above.
An ink-jet printer sprays tiny drops of ink onto paper. It is the most common home printer and prints nice photos, but replacement ink costs add up — a laser printer is cheaper per page for plain documents.
Photocopy a document "Xerox" is a brand name that people use to mean "make a copy." Lift the lid of your printer, lay the page face-down on the glass, close the lid, and press the button labeled Copy. The printer will print you a duplicate of the page.
“Replace toner” “Replace toner” is the later, firmer warning — finish what you are printing, then swap the cartridge.
“Toner low” “Toner low” means the same thing: keep printing while the pages look good, and have a spare ready.
Printing a document Open what you want to print and press Ctrl + P — a preview appears showing exactly what will come out. Check the printer name at the top, set how many copies you want, and click Print. If nothing happens, check the printer is on and has paper.
Print preview Print preview shows you on screen exactly what the paper will look like — press Ctrl + P and the preview is right there. If a web page preview shows five pages when you expected one, look for a "simplified" or "reader-friendly" option, or just print pages 1–2.
Choosing color or black-and-white In the print window (Ctrl + P), look for "Color" options — choosing "Black & white" or "Grayscale" saves your expensive color ink for when it matters. For everyday documents, black-and-white is sharper and far cheaper.
Double-sided printing In the print window, look for "Print on both sides" or "Duplex" — check that box and the printer flips the paper itself. If your printer can't do it automatically, print the odd pages first, flip the stack, then print the even pages.
Printer says offline First check the printer is actually on and has paper — half of all "offline" problems end there. Then restart both the printer and your computer; that reconnects them most of the time. If it's a Wi-Fi printer, make sure it's on the same Wi-Fi network name as your computer.
Canceling a print job Click the little printer icon by the clock to open the print queue, right-click the stuck job, and choose Cancel. If the printer keeps going, turn it off, wait ten seconds, and turn it back on — that clears its memory.
Scanning a document to PC Lay the page face-down on the printer's glass, then on your computer press the Windows key, type "scan," and open "Windows Scan." Click Scan and the image lands in your Pictures folder. Choose PDF if it's a document you'll email, JPG if it's a photo.
Paper jam Turn the printer off first, then gently pull the stuck paper out in the direction it was going — never yank it backward. Check for tiny torn bits left inside, since one scrap can keep jamming it. Fan the paper stack before reloading so the sheets don't stick together.
Memory Cards & USB Sticks
Flash media is storage with no moving parts. A memory card or USB stick holds your photos, videos, and files on tiny chips. There are only three shapes you need to know.
True relative size — real photos, all three at the same scale
microSD — 15 × 11 mm, fingernail-size.
SD (full-size) — 32 × 24 mm, what most cameras take.
USB stick — the thumb drive. Plugs straight into a computer.
All three hold the same kind of files — only the shape and the slot are different.
The three you will meet
microSD — the tiny one. Goes in phones, tablets, cameras, dash cams, and game consoles. A microSD also fits a full-size SD slot with a cheap adapter, so one card can do both jobs. Note: many newer phones no longer have a card slot at all — check yours before buying.
SD — the camera-size one. This is what most cameras take. Buying a microSD with an included adapter is often the smarter move: use it tiny in a phone or dash cam, or slide it into the adapter for a camera.
USB stick — the thumb drive. Plugs straight into a computer to move files or carry them with you. Check the end before you buy: USB-A is the old flat rectangle, USB-C is the small oval that fits either way up.
Look at the end before you buy
USB-A — the old flat rectangle.
USB-C — the small oval that fits either way up.
Reading the tiny letters on a memory card
A memory card's face is covered in little symbols. Only four matter:
What the markings mean
128GB — how much it holds. Photos, videos, files. Bigger number, more room.
U3 + V30 — fast enough for 4K. For smooth 4K video, look for U3 or V30 on the card.
A1 / A2 — good in phones. Means apps run well from the card. Nice to have, not vital.
microSDXC — the current kind. 64GB to 2TB. Fits anything made in roughly the last 10 years.
Simple rule: for a camera or 4K video, buy a card marked U3 or V30. For a phone, A1 or A2 is a plus.
What size should you buy?
128GB is the sweet spot for most people — thousands of photos and hours of video.
256GB if you shoot a lot of 4K video or fill cards fast.
Don't bother with anything under 64GB today — bigger cards cost barely more.
SanDisk: the brand to buy
SanDisk is the brand I recommend. Their cards are reliable, fast, and widely available — it's what's in my own cameras.
Buy from a real store.Counterfeit cards are everywhere online. A fake card lies about its size and can swallow your photos. Buy at Best Buy, Target, Costco, or SanDisk's own site — if the price looks too good to be true, it is.
Dash cam? Get a card labeled “High Endurance” — it's built to be written over again and again, and a regular card will wear out fast in a dash cam.
Three rules so you never lose anything
Never pull a card or stick out while it's saving. Wait until the blinking stops, then use “Eject” or “Safely remove” on a computer.
Format a new card in the device that will use it. A camera formats a card for a camera — that avoids strange errors later.
Cards can die without warning. Keep a second copy of the photos that matter — that's what the cloud backup section is for.
When to call Sean instead
You're not sure which card or size your camera, phone, or dash cam takes.
A card says it's full, corrupted, or your photos vanished.
You want your photos moved onto a computer or a real backup set up.
“High Endurance” Get a card labeled “High Endurance” — it's built to be written over again and again, and a regular card will wear out fast in a dash cam.
Internet
Wi-Fi, Bluetooth, email, and getting online at home and on the go.
The wireless connection. Think of it as an invisible cord to the internet. It connects your device without a cable.
Watch: joining Wi-Fi on iPhone
Narrated video. Use the play bar to pause on any step.
Open the Settings app (the gray gear icon) on your Home screen.
Tap Wi-Fi near the top of the list.
Make sure Wi-Fi is turned on — the switch should be green.
Under Choose a Network, tap your network’s name. A little lock means it needs a password.
Type the Wi-Fi password, then tap Join in the top-right corner.
A checkmark appears next to the network name — you are connected. You will also see the Wi-Fi fan icon at the top of your screen.
Watch: joining Wi-Fi on Samsung
Narrated video. Use the play bar to pause on any step.
Open Settings (the gray gear icon).
Tap Connections at the top of the list.
Tap Wi-Fi. Make sure the switch at the top is turned on (blue).
Tap your network’s name in the list. A lock means it needs a password.
Type the Wi-Fi password in the box.
Tap Connect in the bottom-right corner of the box.
The word Connected appears under your network’s name — you are on Wi-Fi.
Watch: joining Wi-Fi on Windows 11
Narrated video. Use the play bar to pause on any step.
Click the Wi-Fi, sound, and battery icons together in the bottom-right corner of the taskbar, by the clock.
Click the small arrow (›) next to Wi-Fi.
Click your network’s name in the list.
Check the Connect automatically box so it joins on its own next time.
Click Connect.
Type the network security key (your Wi-Fi password), then click Next.
It will say Connected, secured under your network’s name — you are on Wi-Fi.
A newer Wi-Fi version can give you a stronger, smoother connection when your home internet supports it. Wi-Fi 6 or Wi-Fi 6E is current and fine. Wi-Fi 7 is the newest version — nice to have, but nothing you need yet.
Restarting your modem and router
When the internet stops working, this simple restart fixes it most of the time. First match your boxes to the pictures, then follow the steps. Give it five to ten minutes.
Narrated tutorial: restarting your modem and router
Spectrum: the two black boxes
The modem — the smaller black box. The internet comes into your house through this one.The Wi-Fi router — the tall black tower. This one sends the Wi-Fi through your house.
Unplug the small black power cable from the back of both boxes. Leave every other cable alone.
Wait 30 seconds. Count it out — the boxes need a real rest.
Plug the power back into the small box (the modem) first. Push it in firmly until it is snug.
Wait until the modem's lights turn solid. This takes a few minutes. The lights will blink while it wakes up — that is normal.
Now plug the power back into the tall box (the router). Wait a few more minutes until its light turns solid blue.
Try your internet. Open a web page or check your email.
The small white eero box (Spectrum or Frontier)
The eero — the small white box. It is your Wi-Fi router. Frontier Fiber includes one, and many Spectrum homes use one too. (Newer eeros are bigger square towers, not small round boxes.)
Unplug the power cable from the back of the white eero box. Leave every other cable alone.
Wait 30 seconds. Count it out.
Plug the power cable back in. Push it in firmly until it is snug.
Wait a few minutes until the light turns solid white, then try your internet.
Frontier Fiber: restart the wall box first
Frontier internet comes through a small fiber box mounted on the wall, usually in the garage or a closet. If restarting the eero did not help, restart that box too:
Unplug the black power cable from the bottom of the fiber box. Do not touch the thin fiber cable — it is glass and breaks easily. Only the power cable.
Wait 30 seconds, then plug the power cable back in.
Wait five to ten minutes. The fiber box wakes up slowly — this is normal.
Then restart the white eero box using the steps above.
Spectrum router (tall black tower)A solid blue light means it is working. Blinking blue means it is still waking up. A red light means something is wrong.
Spectrum modem (small black box)The Power and Online lights should be solid when it is working. Blinking means it is still waking up.
eero (small white box)A solid white light means it is working. A red light means something is wrong.
Lights blink while a box wakes up — that is normal. If lights stay off or turn red after ten minutes, the box may need help.
Wi-Fi keeps disconnecting
If your phone or computer keeps saying disconnected or the Wi-Fi drops out and comes back, try these in order:
Move closer to the router. Walls and distance weaken the signal. If it stays connected in the same room as the router, the signal is not reaching far enough.
Restart the router (unplug the power cable for 30 seconds, plug it back in, wait five minutes).
Forget the network and rejoin it. On your phone, go to Wi-Fi settings. On iPhone, tap the little "i" next to the network name, then Forget This Network; on Samsung, press and hold the network name and tap Forget network. Then join it again fresh.
Check for too many devices. If the whole house slows down at night, the router may be overwhelmed — this is normal on older routers.
A device that disconnects in one room but works fine in another has a range problem, not a broken device.
When to call us
If the restart does not fix it, or the lights stay red or off after ten minutes, do not unplug anything else.
Bandwidth is how much internet speed you have to share. More bandwidth means videos load faster and several devices can be online at once without slowing down.
A broadband connection is fast, always-on internet — the kind most homes have today through cable, fiber, or DSL. It replaced the old dial-up that tied up your phone line.
5G is the newest, fastest cell phone signal. If your phone shows 5G at the top, your mobile internet will feel quicker than the older 4G.
DNS is like the internet's phone book. When you type a name like google.com, DNS turns it into the number computers need to find that site. You never type it yourself — it just works quietly.
Internet is down When the whole internet is down, restart your modem and router: unplug the power cord from the small box your internet comes in on, wait a full 30 seconds, and plug it back in. Give it about five minutes to wake back up. If it's still down after that, the problem is usually with your internet company — call them before you change any settings.
Hotspot A hotspot turns your phone into a mini Wi-Fi station so your tablet or laptop can get online using your phone's mobile data. On iPhone, go to Settings, then Personal Hotspot, and turn on Allow Others to Join. On a Samsung phone, go to Settings, then Connections, then Mobile Hotspot and Tethering. On a Pixel, go to Settings, then Network & internet, then Hotspot & tethering. A hotspot uses your phone's mobile data, so watch your plan if you use it a lot.
Guest wifi The easiest way to share your Wi-Fi is to read the password off the sticker on your router — it's usually printed on the bottom. Many newer routers also have a "guest network," which is a separate Wi-Fi name just for visitors that keeps them off your main network. If you'd like one set up, that's something Sean can do on a visit.
Connected but no internet "Connected, no internet" means your phone reached the router, but the router isn't reaching the internet. Restart the router by unplugging it for 30 seconds and plugging it back in. If other devices in the house work fine and only your phone says this, turn your phone's Wi-Fi off and back on.
Forget a Wi-Fi network If your phone keeps joining the wrong Wi-Fi, tell it to forget that network. On iPhone, go to Settings, then Wi-Fi, tap the little "i" next to the network name, and tap Forget This Network. On a Samsung phone, go to Settings, then Connections, then Wi-Fi; press and hold the network name and tap Forget network.
Internet vs wifi The internet is the service coming into your house through the wire or fiber — that's what you pay the internet company for. Wi-Fi is just the wireless signal your router spreads around the house so your devices can use that internet without cables. If Wi-Fi is down but the internet is fine, your devices can't reach it — restarting the router usually fixes that.
Leave wifi on Yes, leave your Wi-Fi on — it uses less battery than mobile data does, and your phone needs it for updates and backups overnight. The only time to turn it off is if you're somewhere with a weak, unusable Wi-Fi signal that your phone keeps clinging to. Otherwise, just leave it alone.
Public wifi safe Public Wi-Fi at coffee shops and hotels is fine for browsing and videos, but avoid logging into your bank on it — strangers on the same network can snoop. If you must do banking away from home, use your phone's mobile data instead of the public Wi-Fi. And never do anything sensitive on a Wi-Fi network that doesn't ask for a password at all.
Connecting to Wi-Fi on a laptop Click the Wi-Fi icon at the bottom-right of the screen and pick your network's name from the list. Type the password carefully — it's case-sensitive, so capital letters matter. Check "Connect automatically" so you don't have to do this every time.
Forgetting a Wi-Fi network on PC Open Settings, go to "Network & internet," then Wi-Fi, then "Manage known networks." Click the network you want gone and choose Forget. Your computer will stop joining it automatically — useful for old networks with changed passwords.
Airplane mode on a laptop Airplane mode turns off all your laptop's wireless — Wi-Fi and Bluetooth — in one switch. Click the Wi-Fi icon at the bottom-right and click the airplane icon. Use it on planes, or anytime you want to be truly offline for a while.
Ethernet cable vs Wi-Fi An ethernet cable plugs your computer directly into the router — it's faster and steadier than Wi-Fi, great for video calls. The cable clicks into a wide port on the back or side of the computer. If Wi-Fi is flaky in one room, a cable is the most reliable fix there is.
No internet on PC but phone works If your phone's Wi-Fi works but the computer's doesn't, the problem is the computer, not the internet. First restart the computer — that alone fixes it half the time. Then click the Wi-Fi icon, turn Wi-Fi off and back on, and reconnect to your network.
Sharing your PC's internet (mobile hotspot) Your laptop can share its internet with your phone: open Settings, go to "Network & internet," then "Mobile hotspot," and turn it on. It shows a network name and password — join that Wi-Fi on your phone. Watch your data if the laptop itself is on a limited connection.
What is a router / modem vs router The router is the box that spreads the internet around your house as Wi-Fi — the modem brings it in, the router shares it. Many internet companies now give you one box that does both jobs. If your Wi-Fi is weak in some rooms, the router is the box to look at, not the modem.
What is a data cap A data cap is a monthly limit some internet companies put on how much you can download — go over it and they may charge extra or slow you down. Most cable and fiber plans these days have no cap, but some do, so it's worth asking. Streaming a lot of 4K video is what eats through a cap fastest.
What is a Wi-Fi extender A Wi-Fi extender is a small plug-in box that grabs your Wi-Fi signal and rebroadcasts it farther — made for that one room where the signal dies. They help, but they cut your speed roughly in half, so a mesh Wi-Fi set (two or three boxes that work together) is the better fix for a whole house. An extender runs about $25 to $50.
Do I need to rent the modem from my internet company Most internet companies charge about $10 to $15 a month to rent you their modem and router — that's $120 to $180 a year, every year. Buying your own approved modem (usually $70 to $150 once) pays for itself in under a year. Call your internet company first and ask which models they support, so you buy the right one.
How to restart the modem and router (right order) Unplug both boxes, then plug the modem back in first and wait until its lights stop blinking (about two minutes). Then plug the router back in and give it another two minutes. The modem has to fully wake up before the router can do its job — doing them in the wrong order is why a restart sometimes "doesn't work."
What do the modem lights mean Solid lights are good — blinking usually means the box is working or starting up. A red or orange light on the "internet" or "globe" symbol means the box can't reach your internet company, so restart it. If the red light stays on after a restart, call your internet company — the problem is on their end.
What is 5G home internet 5G home internet is a small box from your cell company (T-Mobile or Verizon) that gives your whole house internet over the cell signal — no cable or fiber wire needed. It's usually around $50 a month and works well if you get a strong cell signal at home. It's a good option where cable prices are high, but heavy 4K streaming households may find cable or fiber steadier.
What is an SSID / Wi-Fi name SSID is just the technical name for your Wi-Fi network name — the one you tap to connect, like "SmithFamily" or "Xfinity-5G." It's different from the password: the name is public, the password is what keeps neighbors off. Both are usually printed on the sticker on your router.
What is the WPS button WPS is a button on some routers that connects a device without typing the password — you press it, then choose the network on your device within two minutes. It's handy for printers and smart gadgets with no keyboard. Not every router has it, and it's fine to just type the password instead.
Wi-Fi keeps dropping / disconnecting Wi-Fi that drops and reconnects is usually the router getting overwhelmed or overheated — restart it first (unplug 30 seconds). If it keeps happening, move the router out into the open, up high, away from the microwave and fish tank. If only one device drops while others stay connected, restart that device — the problem is in it, not the Wi-Fi.
Wi-Fi dead zone / slow in one room A dead zone is a spot where your Wi-Fi barely reaches — usually the farthest room from the router, or upstairs. The real fix is moving the router to a central, open spot, or adding a mesh Wi-Fi set (two or three boxes that blanket the house, about $100 to $200). A cheap plug-in extender can help one room for about $30, but it halves your speed there.
My Wi-Fi password isn't working First, check the sticker on the router — you're probably typing it slightly wrong, and those passwords are case-sensitive (capital letters matter). If you changed it once and forgot the new one, you'll need to log into the router or reset it. Never "reset" the router with the pinhole button unless you mean it — that wipes everything back to the sticker password.
How to find my Wi-Fi password The easiest place is the sticker on the router itself — it's usually labeled "Wi-Fi password" or "network key." On a phone already connected, iPhone shows it under Settings, then Wi-Fi, then tapping the little "i" by the network name. On Windows, it's in the Wi-Fi settings under "show password."
Someone might be using my Wi-Fi If your internet suddenly got slow, a neighbor could be on your Wi-Fi — it happens when the password is weak or still the factory default. Change the Wi-Fi password to something long (a short sentence works great), and they'll be kicked off the next time they try. Your router's app or settings page shows every connected device if you want to check.
TV keeps losing Wi-Fi connection Smart TVs are the most common device to drop Wi-Fi, because their antennas are weak and they're often far from the router. First, restart the TV (unplug it 30 seconds, not just the remote). If it keeps dropping, run an ethernet cable from the router to the TV if you can — a $15 cable ends the problem forever.
Why does my phone switch between Wi-Fi and data Your phone drops Wi-Fi and uses mobile data whenever the Wi-Fi signal gets too weak to be useful — like at the far end of the house or in the yard. That's normal, but it can eat your data plan if your home Wi-Fi has dead zones. The fix is better Wi-Fi coverage (see "dead zone"), not a phone setting.
How many devices can my Wi-Fi handle A normal home router handles 20 to 30 devices fine — phones, TVs, tablets, smart gadgets and all. It only struggles when many are streaming video at the exact same time. If everything slows down in the evening, that's the cause, and a newer router or mesh set (about $100 to $200) raises the limit comfortably.
What is powerline adapter A powerline adapter sends internet through your house's electrical wiring — you plug one box by the router and another in the far room, and it acts like a wired connection between them. It's a good trick for a room where Wi-Fi won't reach and you can't run a cable. A pair costs about $40 to $60, and both boxes need to be plugged directly into the wall, not a power strip.
Printer keeps losing Wi-Fi Printers drop Wi-Fi more than any other gadget — their Wi-Fi parts are cheap and they "sleep" too deeply. Give the printer a fixed spot close to the router, and turn off its deep-sleep or "eco" mode if it has one. If it still drops, plug it into the router with a USB or ethernet cable once to set it up, then put it back — that often stabilizes it.
Bluetooth
Bluetooth is a short-range invisible link between your phone and nearby gadgets — no internet, no wires — and it does three handy jobs: connecting earbuds and headphones, sending photos between nearby phones, and linking your phone to your car for calls and music. You introduce the two devices once (this is called pairing); after that they find each other and reconnect by themselves. Here is each job, step by step.
Part 1: Earbuds and headphones
First choose a pair you will like, then pair it with your phone — each step is below.
Choosing a pair
Wireless earbuds
Wireless earbuds are the tiny speakers that sit in your ears. Headphones are the bigger ones that cup your whole ear. There is no wire to your phone — they connect by Bluetooth. Four brand names come up again and again: Apple AirPods, Samsung Galaxy Buds, SoundPEATS, and Beats.
What actually matters:
Fit. Earbuds come in two styles: ones that rest lightly in your ear (like most AirPods) and ones with soft silicone tips that seal the ear (like AirPods Pro and most Samsung buds). The sealed kind blocks more outside sound and usually sounds fuller, but some people find them uncomfortable. Over-ear headphones avoid the ear-canal question entirely.
Battery. Earbuds play about 5 to 10 hours, then you drop them back in their little charging case, which carries several more charges. Over-ear headphones play 20 hours or more on one charge.
Noise cancelling. It listens to the world around you and quietly cancels it out — lawn mowers, airplane hum, restaurant chatter. Lovely for travel and noisy rooms. The pricier models do it best.
Controls. Most earbuds pause when you tap them and answer calls with a tap. If tapping tiny earbuds sounds fiddly, headphones have real buttons you can feel.
The four brands, simply:
Apple AirPods — $129 to $549. Best if you have an iPhone. AirPods 5 ($129) with noise cancelling built in; AirPods Pro 3 ($249) with silicone tips and the strongest noise cancelling; AirPods Max 2 ($549), big over-ear headphones. Open the case near an iPhone and they pair in one tap, then hop between your iPhone, iPad, and Mac on their own.
Samsung Galaxy Buds — about $50 to $249. Best if you have a Samsung or other Android phone. Galaxy Buds Core (about $50, the starter pair); Buds3 FE ($149, a strong mid-range pick with good noise cancelling); Buds4 ($179, open-fit style like AirPods); Buds4 Pro ($249, the flagship). They pair instantly with Samsung phones.
SoundPEATS — about $40 to $60. The budget pick that still sounds good. The Air4 Pro (about $55) and the H3 (about $40) have real noise cancelling and clear call quality for the price. They work with any phone, iPhone or Android. You give up the instant-pairing magic, but for everyday listening they are hard to beat for the money.
Beats by Dre — $80 to $350. Bold sound, works with both phones. Beats is owned by Apple, so it pairs easily with iPhones and works fully with Android too — the only brand here that treats both phones as first-class. Solo Buds ($80, the simple starter); Studio Buds+ ($170, compact with noise cancelling); Powerbeats Pro 2 ($250, with ear hooks that keep them in during walks and exercise); Solo 4 ($200, on-ear with very long battery); Studio Pro (about $300, over-ear with strong noise cancelling). Beats are famous for extra bass, which makes music feel lively.
Prices move around a lot — sales and holidays shift them constantly. The prices above are what these cost in late 2026. Check before you buy.
Which one fits you?
You have an iPhone — AirPods, especially the Pro 3. Beats is the runner-up and works great too.
You have a Samsung or other Android phone — Galaxy Buds, especially the Buds3 FE or Buds4 Pro. Beats also works fully with Android.
You want to spend as little as possible — SoundPEATS. The H3 or Air4 Pro give you noise cancelling for the price of a dinner out.
You walk or exercise with them — Powerbeats Pro 2, with ear hooks that refuse to fall out.
Earbuds bother your ears — skip earbuds entirely and get over-ear headphones: Beats Studio Pro or AirPods Max 2.
A gentle word about volume: earbuds sit very close to your ears, so it is easy to turn them up louder than you realize. A good rule: if someone standing near you can hear your music, it is too loud.
Want help choosing the right pair before you buy, or is pairing simply not working? Call Sean at (813) 770-6082.
Pairing them with your phone
Pairing just means introducing your earbuds to your phone. You only do it once. After that, the earbuds connect by themselves every time you take them out of their case.
On an iPhone
1Open Settings, then tap Bluetooth.
2Make sure Bluetooth is switched on. Your phone is now visible to nearby gadgets.
3Put the earbuds in pairing mode. For AirPods: open the case lid. On older AirPods, hold the round button on the back until the little light flashes white. On AirPods 4, AirPods 5, and AirPods Pro 3, there is no button — double-tap the front of the case (below the little light) until the light flashes white. For other brands: hold the power or pairing button until its light flashes.
4On your phone, under Other Devices, tap your earbuds’ name.
5The earbuds move up to My Devices and say Connected. Done — they will connect by themselves from now on.
Narrated tutorial: pairing wireless earbuds with an iPhone
On a Samsung phone
1Open Settings, then tap Connections.
2Tap Bluetooth, and make sure it is switched on.
3Put the earbuds in pairing mode — open the case and hold the pairing button until the light flashes. (Galaxy Buds pair the moment you open the case near the phone.)
4Tap your earbuds’ name in the list, then tap Pair.
5It says Connected for calls and audio. Done — they will connect by themselves from now on.
Narrated tutorial: pairing wireless earbuds with a Samsung phone
If they won’t pair:
Charge the earbuds first — a low battery stops pairing.
Put the earbuds back in pairing mode. The light must be flashing; if it is not, they are not discoverable.
Turn Bluetooth off, wait a few seconds, and turn it back on. This fixes most stubborn cases.
Start fresh: tap the little i (iPhone) or gear (Samsung) next to the earbuds’ name, choose Forget This Device, then pair again from step 1.
Earbuds paired? Next: sending a photo to a nearby phone — no internet needed.
Part 2: Sending a photo or file
Bluetooth can send a photo from one phone to another phone nearby — handy when there is no internet and no cable. Both phones need Bluetooth turned on — on iPhone: Settings > Bluetooth; on Samsung: Settings > Connections > Bluetooth — and they need to be close together.
On a Samsung or other Android phone
1Open the photo, then tap Share.
2Tap the Bluetooth icon.
3Tap the other phone’s name in the list.
4They tap Accept on their phone, and the photo arrives.
iPhones do not send files over plain Bluetooth. Instead they use AirDrop: it finds nearby Apple devices with Bluetooth, then sends the file over Wi-Fi. It feels just as easy.
On an iPhone, with AirDrop
1Open the photo, tap Share, then tap AirDrop.
2Tap the person’s name.
3They tap Accept. Both of you need Wi-Fi and Bluetooth turned on.
Photos sent? Next: linking your phone to your car for calls and music.
Part 3: Your car — calls and music through the speakers
When your phone is paired with your car, calls and music play through the car's speakers. You answer with a button on the steering wheel and never pick up the phone. Here is how it works for every major brand.
On an iPhone
1Open the Settings app, then tap Bluetooth.
2Make sure the Bluetooth switch is green (on). Your iPhone is now looking for the car.
3When your car’s name appears under Other Devices, tap it.
4Check the code matches the one on your car’s screen, then tap Pair.
5Connected! Your car is now saved under My Devices, so it reconnects on its own.
6If the car asks for your contacts, tap Allow so it can show who is calling.
On a Samsung phone
1Open Settings, then tap Connections.
2Tap Bluetooth. If the switch is off, tap it to turn it on.
3Wait for your car’s name under Available devices, then tap it.
4Check the code matches the one on your car’s screen, then tap Pair.
5Paired! Your car stays under Paired devices and connects by itself next time.
The steps that work in almost every car
Park the car and turn it on. Pairing usually will not work while driving.
On your phone, go to Settings > Bluetooth and turn Bluetooth on.
On the car's screen, find Phone or Bluetooth, then choose Add Device or Add Phone.
On your phone, tap your car's name when it appears in the list.
A code appears on both screens. If the codes match, tap Pair on both.
Say yes when the phone asks to share contacts — that lets you call people by name.
Once paired, your phone connects by itself every time you start the car.
Narrated tutorial: pairing your phone with your car over Bluetooth
Where to look, by brand
Every brand names its screen a little differently. Below is what each brand's screen looks like, plus the menu words to look for.
Mazda (Mazda Connect)
Start the car. On the center screen, tap Settings, then Bluetooth.
Tap Pair New Device (some cars say Bluetooth Search), then Continue.
On your phone, open Settings > Bluetooth, turn Bluetooth on, and tap Mazda in the list.
A code appears on the car’s screen. Check that it matches the code on your phone.
Confirm on both. If the car asks, say yes to sharing your contacts.
To remove an old phone: On the car, go to Settings > Bluetooth > Delete Paired Device, tap the old phone, then tap Delete. On your phone, open Bluetooth settings and forgetMazda.
Good to know: Mazda holds only 5 to 7 phones, depending on the model year. If the list is full, delete an old one first. If pairing fails, delete the entry on both sides and start over.
Ford (SYNC) — Lincoln works the same way
Start the car and leave it in Park. Pairing will not work in accessory mode.
On the touchscreen, tap the Phone corner, then Add Phone.
On your phone’s Bluetooth list, tap your Ford.
A six-digit number appears on both screens. If the numbers match, confirm on both.
Say yes if the car asks to share your contacts.
On SYNC 4: tap the Phone icon, then Add a Phone — or Settings > Connectivity > Bluetooth > Add a Bluetooth Device — then match the number the same way.
To remove an old phone: SYNC 4: Phone tab > Phone List, tap the phone, tap the trash can, tap Yes. SYNC 3: Settings > Bluetooth > View Devices, tap the phone, tap Delete. Then forget the car on your phone.
Older Fords: Press the voice button on the steering wheel and say “pair phone.” Follow the voice prompts.
Lincoln uses the same SYNC system, so these steps match.
Toyota
Tap the gear (settings) icon on the car’s screen.
Tap Bluetooth & Devices.
Tap Search for devices (if a phone is already listed, tap Add another device first).
On your phone, open Settings > Bluetooth and keep that page open. Tap your Toyota when it appears.
A code appears on both screens. If they match, tap OK.
Answer the extra questions — contacts, and CarPlay or Android Auto.
To remove an old phone: Tap the gear icon > Bluetooth & Devices, tap the old phone, tap Forget, then Forget again.
Good to know: Toyota holds 5 phones, and you cannot add one while the car is moving.
Lexus
Tap the gear (Settings) icon on the main menu.
Tap Bluetooth & Devices, then Search for Devices (some screens say Add another device), then OK.
Tap your phone in the list. Check the code matches on both screens, then confirm.
To remove an old phone: Tap the gear Settings > Bluetooth & devices, tap the old phone, tap Forget.
Good to know: Lexus holds 5 phones. Deleting a phone also deletes the contacts it copied to the car.
Chevy — Cadillac works the same way
Turn the car on and leave it in Park. On your phone: Settings > Bluetooth, turned on.
On the car’s screen, tap the Phone icon, then Add Phone (or Pair Device).
On your phone, tap your Chevy in the list.
A code appears on both screens. If they match, tap Pair on the car and accept on your phone.
Say yes to sharing contacts if you want to call people by name.
Voice shortcut: Press the push-to-talk button and say “pair my phone.”
To remove an old phone: On the car, open Bluetooth Settings, tap the device name, tap Delete. Then forget the car on your phone.
Cadillac, GMC, and Buick use this same system. Pairing will not work while the car is moving.
Subaru (Starlink)
On the car’s screen, tap Phone. If no phone is paired yet, the car asks “Would you like to add one now?” — tap Yes.
Tap Manage Devices, then Add.
The car shows its name and a PIN on the screen.
On your phone, open Settings > Bluetooth, turn it on, and tap the Subaru.
Check the PIN matches on both screens, then confirm on both.
Answer the extra questions on your phone — contacts, and CarPlay or Android Auto.
To remove an old phone: Tap Manage Devices > Delete, then tap the old phone. Also forget the car on your phone.
Good to know:Pair only while parked.
Honda
Park the car. Press the PHONE button on the dashboard.
If the car asks about connecting a phone, choose No. Then tap Settings, then Bluetooth Settings, then Connect New Device. The car now waits for your phone.
On your phone: Settings > Bluetooth, turned on, tap the Honda.
A code appears on the car’s screen. Check it matches your phone, then confirm on both.
To remove an old phone: Press the PHONE button > Settings > Bluetooth Settings > Delete Device, tap the old phone, tap Yes.
Good to know: If CarPlay or Android Auto is connected, the Bluetooth add button can be grayed out — disconnect it first, then pair.
Nissan
Press the MENU button on the car’s controls. Tap Connections, then Devices, then Add New.
On your phone: Settings > Bluetooth, turned on, tap MY-CAR (or whatever name the car shows).
A code appears on the car screen. Check it matches your phone, accept on your phone, then tap OK on the car.
Say yes to the extra pop-ups about contacts and messages.
To remove an old phone: Tap MENU > Connections > Devices, tap the little info icon next to the old phone, tap Delete, then Yes.
Good to know: The car remembers 6 phones — delete one before adding another.
Hyundai & Kia
On the car’s screen, tap Home > All Menus > Setup > Device Connections > Bluetooth > Bluetooth Connections > Add New.
On your phone: Settings > Bluetooth, turned on, tap the car’s name.
A code appears on the car screen. Check it matches your phone, then confirm on both.
Shortcut: The call/answer button on the steering wheel can open the phone menu and offer to pair.
To remove an old phone: Same path to Bluetooth Connections, tap Delete Devices, tap the old phone (you can pick more than one), tap Delete, then Yes.
Jeep (Uconnect)
Park. Turn the ignition to ACC or ON.
Tap Phone on the bottom menu bar. If no phone is paired, tap Yes when it asks. Otherwise: Phone > Device Manager > Add Device.
On your phone: Settings > Bluetooth, turned on, tap Uconnect.
A code appears on both screens. Check they match, tap Yes on the car and Pair on your phone.
Say yes to sharing contacts if you want hands-free calls and texts.
To remove an old phone: Tap Phone > Device Manager, tap the old phone, choose Delete Device.
Good to know: If pairing fails, delete the phone from the car AND forgetUconnect on your phone, then start over.
Apple CarPlay and Android Auto, in plain words
Apple CarPlay puts your iPhone's apps on the car's screen — maps, music, calls, and messages — with big buttons and Siri reading your texts aloud. iPhones only.
Android Auto is the same idea for Samsung and other Android phones — maps, music, calls, and messages on the car's screen, read aloud by Gemini, Google's voice helper (it replaced Google Assistant in 2026). Android phones only.
Wired means you plug the phone in with a USB cable. It is the most reliable way, and it charges the phone at the same time. Use the USB port meant for the phone (often the one closest to the driver).
Wireless means no cable — the phone connects over Bluetooth and Wi-Fi. Not every car offers it, and it uses the phone's battery faster. Your phone connects by itself once it is set up.
Not every car has CarPlay or Android Auto. If your car is older, Bluetoothpairing (above) still gives you calls and music through the speakers.
When it does not work
Won't pair: make sure Bluetooth is on, the car is parked, and your phone is near the screen. Restart the phone, then try again. If the car's list is full of old phones, delete one you no longer use.
Paired, but no sound: check that the car's source is set to Bluetooth (not FM or USB), and turn the phone's volume up.
Keeps disconnecting: keep the phone inside the car with you — not in the trunk or a metal box. Make sure your phone's software is up to date.
CarPlay or Android Auto won't start: try a different USB cable and the car's phone USB port. Make sure CarPlay is allowed on your iPhone (Settings > General > CarPlay) and Siri is on. On Android, Android Auto is built into most phones made since 2020.
When to call Sean
Your car does not show up on your phone at all.
Pairing keeps failing even after restarting both.
You want CarPlay or Android Auto set up and working before you drive.
Your car's manual uses different menu names than the ones above.
Call/answer button Shortcut: The call/answer button on the steering wheel can open the phone menu and offer to pair.
The little i The little "i" in a circle next to your earbuds' name in Bluetooth settings — tap it, then Forget This Device, to pair fresh.
One AirPod not working Put both AirPods back in the case for 30 seconds, then try again — that fixes most one-sided dropouts. Check the silent one's speaker mesh for wax and wipe it gently. If one still won't charge, the case's contacts for that side may need cleaning.
Noise cancellation on AirPods Pro AirPods Pro can hush the world — press and hold either stem to switch between Noise Cancellation (quiet) and Transparency (hear around you). (You can add Off in the AirPods' settings.) Noise Cancellation is wonderful on planes; Transparency is safer for walks so you hear traffic.
Find My AirPods (lost earbuds) Open the Find My app — your AirPods show on the map at their last known spot, and you can play a loud chirp to hunt them down (one at a time). It works best when the buds are out of the case. If the case itself is lost with them inside, the map is your only clue.
AirPods battery / how long they last AirPods play about 5–6 hours per charge (AirPods Pro 3 lasts up to 8 hours), and the case holds several more charges — just drop them in to top up. Open the case near your iPhone to see both batteries pop up on screen. If old AirPods die in an hour, their batteries are worn out.
Cleaning AirPods Wipe AirPods with a soft dry cloth — never run them under water. Pick wax from the speaker mesh gently with a dry cotton swab or soft brush. Clean them weekly; wax buildup is the top reason an AirPod goes quiet.
If you live in Kings Point or Valencia Lakes, your community affects your TV and internet choices. Here is the simple version, in plain words.
Spectrum vs Frontier: the simple version
Spectrum — the cable company. They sell internet and TV together on one bill. The internet comes through the same cable line as the TV. TV packages come with lots of channels.
Frontier — a fiber company (bought by Verizon in 2026, so you may see Verizon branding on bills and boxes). Fiber is a glass line that runs straight to your home. It is the same speed uploading as downloading, which is nice for video calls. Their fiber plans start around $30 a month for 200 Mbps, though prices change often.
The honest difference — Spectrum is built around bundles of TV plus internet. Frontier is built around internet alone — you pair it with streaming services for TV. If you already pay for TV through your HOA, Frontier-style internet can be all you need.
One warning:Frontier still sells older DSL internet in some areas. DSL is much slower than fiber. If you choose Frontier, make sure you are getting fiber, not DSL.
Spectrum's free streaming apps
Spectrum's mid-level TV plans and up include about ten streaming apps at no extra cost. (The cheapest TV Lite plan does not include them.) Here is what they are, in plain words:
HBO Max — HBO shows and big movies (with ads).
Hulu — current TV shows and originals (with ads).
Disney+ — Disney, Pixar, Marvel, and Star Wars.
ESPN Unlimited — live sports and ESPN shows.
Paramount+ Essential — CBS shows, news, and movies.
Peacock Premium — NBC shows, sports, and movies (with ads).
FOX One — FOX shows and live sports.
AMC+ — AMC shows and movies (with ads).
ViX Premium — Spanish-language shows and sports (with ads).
discovery+ — Discovery, Food Network, and HGTV shows.
Each app still has to be turned on through your Spectrum account and signed in on your TV — that is the part most people get stuck on. I do the whole setup: I activate every app your plan includes, sign each one in on your TV or streaming stick, and show you how to open and use them. Call me at (813) 770-6082.
Packages change
Streaming-app bundles change often. If an app is listed here, turn it on through your Spectrum account or the Spectrum app. Packages change — check your Spectrum account for what yours includes today.
YouTube TV vs Hulu + Live TV
These two services replace cable over the internet. Both include your local channels and an unlimited DVR — a recorder in the cloud that saves your shows for about 9 months.
YouTube TV — about $83 a month. Over 100 channels, unlimited DVR, and 3 screens at once. The most like cable, and the easiest to use. They also sell cheaper smaller plans now (sports-only, entertainment, and Spanish packages) if you do not need everything.
Hulu + Live TV — about $100 a month. Over 95 channels, unlimited DVR, and 2 screens at once. The bonus: it also includes the Hulu on-demand library, Disney+, and ESPN Select.
Which to pick? If you mostly want live channels, YouTube TV costs a little less and carries a few more channels. If your household also wants Disney+ and Hulu's shows, the Hulu bundle can be the better deal.
Prices change often. Both services raise prices regularly. Check the current price before you sign up.
Thinking of cutting the cord?
You still need internet. Streaming services need your internet connection — “cutting the cord” only cuts the TV part, not the internet part.
A simple antenna gets your local channels — news, weather, and big-network shows — for free over the air. A basic indoor antenna is cheap and needs no monthly fee.
But check your HOA first. If Kings Point or Valencia Lakes already includes cable TV in your fees, you are already paying for TV — an antenna or a streaming service would be on top of it, not instead of it.
When to call Sean instead
You are not sure what your HOA already includes and don't want to pay twice.
You want to compare your total bill before switching anything.
A streaming service or the Spectrum app won't sign in or keeps buffering.
You want an antenna set up for free local channels.
Local channels An indoor TV antenna — about $25 to $40 — pulls in your local ABC, NBC, CBS, Fox, and PBS stations free, in high definition. Screw it into the antenna input on your TV and run a channel scan in the TV's settings. How many channels you get depends on how close you are to the broadcast towers.
Get rid of cable No — a smart TV with internet can replace cable for most people. You'd watch Netflix, Hulu, or YouTube instead, plus a cheap antenna for local channels. Add up what you'd pay for two or three streaming services versus your cable bill — most folks save money.
What is Netflix Netflix is the biggest streaming service — thousands of movies and shows you watch whenever you want, for a monthly fee (usually around $9 to $27 depending on the plan). There's no cable box and no schedule; you just open the app and pick. Most smart TVs, Rokus, and Fire Sticks have it built in.
What is HBO Max HBO Max is the streaming service from HBO — home to HBO shows, plus Warner Bros. movies, Discovery shows, and Sesame Street. It runs about $11 to $23 a month depending on the plan.
What is Peacock Peacock is NBC's streaming service — NBC shows, movies, live sports, and news. It has paid tiers around $13 to $20 a month that unlock everything (Premium with ads, Premium Plus without). The old free tier is gone — only a few cable or phone bundles still include Peacock free. It's the cheapest way to stream current NBC shows the day after they air.
What is Paramount+ Paramount+ is CBS's streaming service — CBS shows, live CBS in most areas, plus Showtime series and a big movie library. It's around $9 to $14 a month. It's the one to get if you want to watch CBS live without cable, including NFL games on CBS.
What is Apple TV+ Apple TV+ is Apple's small-but-quality streaming service — fewer shows than Netflix, but well-made ones (Ted Lasso, Severance). It's about $15 a month, and it's separate from the Apple TV box: you don't need Apple hardware to watch it. New Apple devices often come with a few free months.
What is Tubi (free) Tubi is a completely free streaming service — thousands of movies and older TV shows, paid for by ads instead of a monthly fee. No account or credit card needed, though a free account lets it remember where you left off. The selection is older stuff, but for free, it's one of the best deals in streaming.
What is Pluto TV (free) Pluto TV is free and works like old-fashioned channel-surfing — hundreds of live "channels" streaming 24/7, plus on-demand movies, all with ads and no fee. It's owned by Paramount, so there's a lot of CBS and MTV content. Great for background TV when you just want something on.
What is Sling TV Sling TV is the budget cable replacement — 30+ live channels starting around $46 a month, much cheaper than YouTube TV or cable. The tradeoff: fewer channels, and local channels (ABC, CBS, NBC) aren't included everywhere, so many people pair it with a $25 antenna. Good if you mainly want cable news and a few entertainment channels.
What is Fubo (sports) Fubo is the streaming service built for sports fans — 200+ channels with the most sports coverage of any service, around $89 a month. If you dropped cable mainly for football, baseball, and ESPN, Fubo replaces it best. Non-sports viewers get better value from cheaper services.
What is Philo (cheap) Philo is the cheapest live-TV streamer — 70+ entertainment channels for around $25 a month. The catch: no sports and no local channels, so it's for people who watch HGTV, Hallmark, Discovery, and AMC-type channels. Pair it with a free antenna for locals and you've replaced cable for under $30.
Which streaming service is cheapest overall The truly free ones — Tubi and Pluto TV — cost nothing. Cheapest paid: Philo at around $25 a month for live channels, or Netflix's ad plan around $9 for on-demand. Most seniors do well with one paid service plus the free ones, instead of stacking five subscriptions.
Can I share my Netflix / streaming password Netflix now requires everyone sharing an account to live in the same household — sharing with someone across town needs a paid "extra member" add-on (around $8 a month). Most other services (Hulu, Disney+, Max) still allow sharing more loosely, but they're all tightening up. When in doubt, check the service's help page — the rules change.
Do streaming services have commercials Every service now sells a cheaper plan with ads and a pricier one without — the ad plans run about $9 to $13 a month, ad-free about $16 to $27. The ads are shorter and fewer than cable (usually 1-2 minutes per break). If commercials don't bother you, the ad plans save real money over a year.
What does "on demand" mean "On demand" means you pick what to watch and when — the opposite of live TV with a schedule. Netflix is all on-demand; cable's on-demand menu lets you pull up past episodes. If you missed a show when it aired, check whether it's on-demand before assuming it's gone.
How to cancel a streaming subscription You cancel on the service's website, not on your TV — log in at netflix.com (or hulu.com, etc.), go to Account, and choose Cancel. It stays active until the end of the month you paid for, so there's no penalty for canceling mid-month. If you signed up through Roku, Apple, or Amazon, you cancel in that company's subscriptions page instead.
How many streaming services do I need Most people only regularly watch one or two — start there instead of subscribing to five at once. A good senior starter set: one main service (Netflix or Hulu) plus the free ones (Tubi, Pluto TV). You can rotate: subscribe to Max for two months to watch a show, cancel, then try another.
What is cord cutting "Cutting the cord" just means canceling cable TV and watching everything through the internet instead — Netflix, YouTube TV, an antenna, and the like. Most cord-cutters save $50 to $100 a month. The only things to plan for: live sports and local news need a specific replacement (like YouTube TV or an antenna), not just Netflix.
Cable vs streaming — which is cheaper Streaming is almost always cheaper: cable averages $100+ a month with box rentals and fees, while a YouTube TV + Netflix combo runs about $90 — and a Netflix + antenna combo is under $20. Cable's only price advantage is when it's bundled cheaply with your internet. Add up what you actually watch before deciding.
What is a TV antenna (indoor) A modern indoor antenna is a flat plastic square you stick on a wall or window — it pulls in free local channels (ABC, CBS, NBC, Fox, PBS) in HD, no monthly fee. A good one costs $25 to $40 once. How many channels you get depends on how far you are from the broadcast towers; city and suburbs do best.
How to scan for antenna channels After plugging in the antenna, go to the TV's Settings, then Channels or Tuner, and choose "Auto Program," "Channel Scan," or "Auto-Tune." It takes 5-10 minutes and finds every free channel your antenna can reach. Re-scan every few months — channels move around more than you'd think.
What is a DVR A DVR records live TV so you can watch it later and skip commercials — the cable box with a hard drive, or the cloud version that streaming services include. YouTube TV's DVR and Hulu's DVR are both unlimited and included — neither costs extra. If you record a lot, check the storage limit before you pick.
Can I keep cable and add streaming too Of course — most people start exactly that way, adding Netflix or Hulu alongside cable to see what they actually watch. After a month or two, most find they're barely touching the cable box, and that's the signal it's safe to cancel. There's no technical conflict; they just both use the TV's different inputs.
Why is my cable bill so high / how to lower it The bill is mostly box rentals ($10+ per TV per month), broadcast fees, and the promo rate expiring after year one. Call and ask for the "retention" or "loyalty" department — mentioning you're thinking of canceling routinely gets $20 to $40 off. Returning boxes you don't use (bedroom TVs can use a $30 Roku instead) is the fastest real saving.
What is a cable box vs streaming The cable box is the rented box ($10+/month each) that decodes your cable company's signal — one per TV. Streaming replaces it with a $30 Roku or Fire Stick you own, or an app right on the smart TV. Spectrum and Xfinity both now offer streaming apps too, so many customers can return the boxes entirely.
An email program is the app on your computer that shows your email.Thunderbird is free. Outlook comes in two versions — a free app and a paid program — and they look alike, which confuses everyone. Here is the simple version.
Narrated tutorial: Type your email address.; Sign in on your email company's own sign-in page.; Thunderbird sets it up — calendar and spam filter included.
Thunderbird, in plain words
Free, made by Mozilla — the nonprofit behind the Firefox browser. No price and no ads. It may mention optional paid extras, like a Thundermail address, but the program itself is free forever and never pressures you to pay.
Works with almost any email address — Gmail, Yahoo, AOL, Outlook.com, and your internet company's email. You type your email address, then sign in on your email company’s own sign-in page, and it sets it up.
Calendar and spam filter built in. It blocks most junk mail on its own, and it has a calendar for appointments.
Your email stays yours. It connects straight to your email company — nothing extra is stored on anyone else's computers in between.
Windows, Mac, and Linux. Download it free from thunderbird.net.
Narrated tutorial: If you see a "New Outlook" switch, it's the free app.; If the top-left says "File" with a ribbon, it's the paid program.
The confusing part: two Outlooks
Microsoft uses the same name for two different things. Here is how to tell them apart:
Narrated tutorial: The Outlook app is free and signs in with any email address.; Type your address and sign in.; Mail, calendar, and contacts stay together.
Outlook the program (classic) — the full desktop program. It comes with a paid Microsoft 365 subscription (about $100 a year for one person). It has a ribbon of buttons across the top and a File menu. This is the powerful one — offices use it.
Outlook the app (new) — the free one. It comes built into Windows 11 and replaced the old Windows Mail app at the end of 2024. It works with Outlook.com, Gmail, and Yahoo accounts. The free version shows small ads.
Which one do I have? Open it and look at the top-right corner. If you see a switch that says “New Outlook,” you are using the new app. If the top-left says “File” with a wide ribbon of buttons under it, you have the classic program.
Outlook on your phone — the Outlook app for iPhone and Android is free. It signs in with any email address and keeps your mail, calendar, and contacts together.
You still need an email address first
A program is not an account. Thunderbird and Outlook are the windows you look through — you still need an email address (Gmail, AOL, Yahoo, or Outlook.com) to look at. All three programs work with all of those addresses.
Free vs paid, honestly
Thunderbird — free, no ads. The best no-cost choice for most people.
New Outlook app — free, but shows ads. Fine if it came with your computer and you like it.
Classic Outlook program — paid, as part of Microsoft 365. Worth it if you already pay for Microsoft 365 for Word and Excel, or you want the most powerful email program.
All three work with Gmail, Yahoo, and AOL. You do not need to change your email address to change programs.
When to call Sean instead
You are not sure which Outlook you have.
You want Thunderbird installed and set up.
Your email will not sign in to any program.
The old Windows Mail app stopped working and you need your mail back.
A mailing list is a group email you join on purpose, like a store's newsletter or a club's updates. Every honest mailing list has an unsubscribe link at the bottom — tap it to stop the emails anytime.
Outlook the app (new) Outlook the app (new) — the free one.
Outlook the program (classic) Outlook the program (classic) — the full desktop program.
Composing an email on PC Open your email program or Gmail in the browser and look for a button that says Compose, New, or + New mail — usually top-left. Type the address, a subject line that says what it's about, then your message, and click Send. Keep the subject short and clear, like "Sunday dinner plans."
Attaching a file to email While writing your email, click the paperclip icon (or "Attach"), then find the file on your computer and double-click it. You'll see the file's name appear in the email — that means it's attached. Keep attachments under about 20 megabytes or the email may refuse to send.
Opening an email attachment safely Double-click an attachment to open it — but only if you were expecting it from someone you know. Never open an attachment from a stranger, especially one ending in .exe or .zip; that's how viruses arrive. When in doubt, call the sender first and ask if they really sent it.
Email folders (Inbox, Sent, Drafts, Trash) Your Sent folder holds copies of everything you've sent — check there if someone says they never got your email. Drafts holds messages you started but didn't send. Deleted mail sits in Trash for about 30 days before it's gone for good, so you can still rescue a mistake.
Searching your email Every email program has a search box at the top — type a word you remember, like the sender's name or "dentist," and it searches all your mail at once. If it's not in the Inbox, check Spam and Trash too; good mail lands in Spam more often than you'd think.
Reply, Reply All, Forward Reply answers just the sender; Reply All answers everyone who got the original — use it carefully on group emails. Forward sends the message to someone new who wasn't included. Before you forward a funny email to twenty people, delete the long chain of old addresses at the top.
CC and BCC CC sends a copy to someone else openly — everyone sees who got it. BCC sends a hidden copy; the other recipients can't see those addresses. Use BCC when emailing a group of people who don't know each other, so you're not sharing everyone's address around.
Email signature A signature is the little block — your name and phone number, say — that appears at the bottom of every email you send. In Gmail it's under the gear icon, "See all settings," then Signature. In Outlook it's under Settings, then "Email signature." Set it once and it's there forever.
Unsubscribing from emails Legitimate newsletters have an "Unsubscribe" link at the very bottom of the email — click it and follow the one step. If there's no unsubscribe link or you never signed up, it's spam: don't click anything, just delete it and mark it as spam.
Web browsers — used to visit websites by most modern devices.
1
Google Chrome
About 65.6% worldwide
Simple nameGoogle’s browser.
How to spot itA round red, yellow, and green icon with a blue center.
Where you see itAndroid phones and Chromebooks. You can also get it on Windows, Mac, iPhone, and iPad.
Why people use it: It works on nearly every kind of device and is the world’s most-used browser.
2
Apple Safari
About 18.7% worldwide
Simple nameApple’s browser.
How to spot itA blue compass with a red needle.
Where you see itIt comes on iPhone, iPad, and Mac.
Why people use it: It is already built into Apple devices and fits naturally with them.
3
Microsoft Edge
About 6.3% worldwide
Simple nameMicrosoft’s browser.
How to spot itA blue-and-green wave that looks like a lowercase “e.”
Where you see itIt comes on Windows computers. You can also get it on Mac, iPhone, iPad, and Android.
Why people use it: It is ready to use when you get a Windows computer.
4
Mozilla Firefox
About 2.92% worldwide
Simple nameMozilla’s browser.
How to spot itAn orange fox curled around a blue and purple globe.
Where you see itYou can get it on Windows, Mac, Android, iPhone, and iPad.
Why people use it: It is made by the nonprofit Mozilla Foundation and is known for privacy controls.
5
Brave
About 1% worldwide
Simple nameBrave’s browser.
How to spot itAn orange lion head.
Where you see itYou download it yourself on Windows, Mac, Android, iPhone, and iPad.
Why it made the list: It blocks ads and trackers on its own, which means fewer scam pop-ups — a real plus for staying safe.
Which one should you use?
For everyday use, the simplest answer is usually the browser that came with your device. All five can visit the same everyday websites.
iPhone or iPad
Safari is the easy choice because it is already there.
Windows computer
Edge is already included. Chrome is also a familiar choice if you already use Google services.
Android phone
Chrome is the usual choice.
What is a cookie, really?
A cookie is a little note a website leaves on your device so it can remember you. That is how a site keeps you signed in, remembers what was in your shopping cart, or recalls your language. Most cookies are harmless helpers.
Why do sites ask about cookies?
Privacy laws now make websites ask your permission. You will see buttons like Accept, Accept all, or Reject. In plain words: Accept lets the site keep its notes, including some used for ads. Reject means fewer ads follow you around — and the site still works. Either choice is safe. If you are unsure, Reject is the calmer choice.
How to clear cookies in each browser
Clearing cookies signs you out of most websites — email, Facebook, shopping sites. Make sure you know your passwords first (see our Passwords guide). Browsers move their buttons around sometimes, but the word to look for is always Privacy.
Chrome: Press Ctrl + Shift + Delete together. Check Cookies and other site data, choose a time range, and click Clear data. On a phone: the three dots → Settings → Privacy and security → Delete browsing data.
Edge: Press Ctrl + Shift + Delete together. Check Cookies and other site data and click Clear now. Or go the long way: the three dots → Settings → Privacy, search, and services → Clear browsing data → Choose what to clear.
Firefox: Press Ctrl + Shift + Delete together. Or: the menu button (three lines) → Settings → Privacy & Security, scroll to Cookies and Site Data, and click Clear Data.
Safari on a Mac: Click Safari in the very top menu, then Settings → Privacy → Manage Website Data → Remove All.
Safari on an iPhone or iPad: Open the Settings app, go to Apps → Safari → Clear History and Website Data. (On older iPhones it is just Settings → Safari.)
Narrated tutorial: clearing cookies in Google Chrome
Each browser in a nutshell
Edge — best if you use Windows. Already installed, nothing to download. Senior-friendly standout: it can read a page aloud to you. Good tip: press Ctrl + T for a new tab.
Chrome — best if you use several devices. Works on Windows, Mac, Android, and iPhone, and can carry your bookmarks everywhere. Good tip: accidentally closed a tab? Press Ctrl + Shift + T to bring it back.
Firefox — best if privacy matters to you. Made by a nonprofit, not an ad company. It blocks many trackers automatically. Good tip: press Ctrl + D to bookmark the page you are on.
Safari — best if you use Apple. Already on every iPhone, iPad, and Mac, and uses less battery. Good tip: Reader view (the little page icon in the address bar) strips a messy article down to clean, big text.
Everyday tricks that work in all four
Narrated tutorial: everyday browser tricks — new tab, close tab, reopen a closed tab, zoom.
New tab: Ctrl + T (Command + T on a Mac).
Bigger text: hold Ctrl and press the + key. Hold Ctrl and press 0 to go back to normal.
Bookmark a page: Ctrl + D, so you can find it again later.
Private window: each browser has one (called InPrivate, Incognito, or Private). It does not save your history on that device — handy on a shared computer. It does not make you invisible on the internet.
What each browser blocks for you automatically
You do not have to turn anything on: Edge blocks many trackers by default, Firefox blocks trackers and sneaky fingerprinting (a way sites recognize your device by its details) by default, and Safari blocks cross-site tracking by default. Chrome keeps third-party cookies on by default — that is why Chrome users see the most cookie pop-ups. None of these replace common sense: never type your bank password into a site you reached from a strange link.
When to call Sean instead
A website keeps signing you out or acting strangely no matter what you do.
You see scary pop-ups saying your computer is infected — do not call the number on the screen.
You want help moving your bookmarks and passwords to a new browser.
You are not sure which browser is on your device, or whether you should switch.
Tabs on a computer browser Tabs let one browser window hold many pages — each tab is a thin strip across the top. Click the + to open a new one, click the x to close one, and press Ctrl + Tab to hop between them. If tabs are eating your memory, closing the ones you don't need speeds everything up.
Bookmarks and favorites A bookmark saves a website so you can jump back in one click — press Ctrl + D while on the page. In Chrome they live under the three dots menu; in Edge, under the star icon. Turn on the bookmarks bar (Ctrl + Shift + B) to keep your favorites visible across the top.
Browser history on PC Press Ctrl + H to see every site you've visited recently, newest first — click any entry to go back. The search box at the top of the history page finds a specific site. This is the fastest way to recover a page you closed without bookmarking.
Downloads in the browser Press Ctrl + J to see everything your browser has downloaded, with the newest at the top — click "Show in folder" to find it on your computer. Files land in your Downloads folder unless you changed it. If a download seems stuck, the circle icon next to it usually just needs a click to retry.
Zooming a web page Hold Ctrl and press + to make a web page bigger, Ctrl and - to make it smaller, and Ctrl + 0 to snap back to normal. Or hold Ctrl and roll your mouse wheel. The browser remembers your zoom for each site.
Saving passwords in the browser When you log into a site, the browser offers to remember the password — say yes and it fills it in next time. In Chrome, your saved logins live under the three dots, then Settings, then "Autofill and passwords." Never save banking passwords in the browser; those belong in a proper password book.
Making Chrome or Edge the default Open Settings, go to Apps, then "Default apps," and click your preferred browser in the list. Then click "Set default" at the top. From then on, every link you click opens in the browser you chose.
Updating Chrome or Edge In Chrome, click the three dots, go to Help, then "About Google Chrome" — it checks and updates itself. In Edge, it's the three dots, Help, then "About Microsoft Edge." Browsers update quietly on their own most of the time; this page just forces it right now.
Too many toolbars / extensions Extensions are little add-ons that live in your browser — some useful, some just junk that slows things down. In Chrome, click the three dots, then Extensions, then "Manage Extensions," and remove anything you don't recognize. Fewer extensions means a faster, safer browser.
Homepage and startup pages In Chrome, go to the three dots, Settings, then "On startup" to choose what opens — a fresh page, your last tabs, or specific sites. Under "Appearance" you can set the home button's page. If your homepage changed by itself, that's often a junk extension — see the extensions entry.
Browser autofill Autofill is the browser remembering your name, address, and card details to fill forms in one click. It's convenient but check what it stored — in Chrome look under Settings, "Autofill and passwords," and delete anything old. Never let it save your full card number on a shared computer.
Which browser are you using right now?
Colorful circle:Chrome
Blue compass:Safari
Blue-green wave:Edge
Orange fox around a globe:Firefox
Orange lion:Brave
Website A website is a collection of pages on the internet, like s2wtech.com — and each individual page is called a web page. You get to a website by typing its address into your browser's address bar. A website can belong to a business, a person, or an organization, and most of them are free to visit.
Four common email services, compared in plain terms.
Gmail
Google’s free email service, built to work across phones and computers.
Free15 GB shared with Google Drive and Google Photos
Pros
Works on iPhone, Android, Windows, and Mac.
Strong search and spam filtering.
100 GB is available for $1.99 a month; 2 TB is $9.99 a month.
Cons
The free inbox includes ads.
The 15 GB is shared, so files and photo backups use the same space as email.
Important features for seniors
It works on the major kinds of phone and computer, and its search can make an older message easier to find. The shared storage is worth watching because email is not the only service using it.
Best for
Most people, especially anyone who already has a Gmail address or uses Google services.
An email service built around privacy, with a free option and no advertising.
Free1 GB, one address, and up to 150 messages a day
Pros
Encrypted: messages are scrambled so even Proton cannot read them.
Based in Switzerland and protected by Swiss privacy laws.
No ads on the free or paid plans.
Cons
The free 1 GB is much smaller than Gmail or Outlook.com.
Searching inside old messages is not as strong as Gmail’s.
The @proton.me address may be unfamiliar to some people.
Important features for seniors
There are no ads to sort around, and the privacy protection is built into the service. Mail Plus has 15 GB and costs $3.99 a month when billed yearly, or $4.99 month to month.
Best for
People who care about privacy, dislike inbox ads, or want a clean private address.
Microsoft’s free email service and a natural fit with Windows.
Free15 GB for email plus 5 GB of OneDrive file storage
Pros
Works well with Windows and Microsoft Office.
Includes a calendar and free web versions of Word, Excel, and PowerPoint.
Includes spam and malware filters.
Cons
The free inbox includes ads.
Email storage and OneDrive storage are separate amounts, which can be easy to mix up.
Important features for seniors
The free plan works on the web, computers, and phones. Its calendar and web versions of familiar Microsoft programs keep several everyday tools under one account.
Best for
Windows users and people who regularly use Word, Excel, or other Microsoft services.
The long-running free email service many people have used for years.
FreeThe current free storage amount could not be confirmed
Pros
AOL Mail is still active and free.
Existing @aol.com addresses still work.
Keeping an established address means friends and family can continue using the one they know.
Cons
It is not our recommendation for a brand-new address.
Current free storage and whether new addresses are available were not confirmed in our research.
Important features for seniors
AOL’s dial-up internet service ended in 2025, but AOL Mail did not. If your address works, there is no need to change just because the dial-up service closed.
Best for
Anyone who already has an AOL address and wants to keep using it.
Pick Gmail Pick Gmail If you want the broadest everyday fit across phones and computers.
Pick Outlook.com Pick Outlook.com If Windows and Microsoft programs are already part of your routine.
Pick Proton Mail Pick Proton Mail If privacy and an ad-free inbox matter more than having lots of free storage.
Social Media
Facebook, Instagram, YouTube, and more — what they are, how to set up an account, and where to get in-depth help.
Social media: staying connected
Social media lets you see photos, videos, and updates from family and friends. Each app works a little differently. Pick the ones your family uses — you do not need all of them. Every app below is free to join.
Facebook
The most popular social network for staying in touch with family and friends. See their photos and updates, share your own, join groups about your interests, and buy and sell safely on Marketplace.
To set up: Install the Facebook app from your app store, tap Create New Account, and follow the steps with your name, birthday, and phone number or email.
Instagram is all about photos and short videos. Follow family, friends, and topics you enjoy — cooking, gardening, travel, anything. Double-tap a photo to like it.
To set up: Install the Instagram app, tap Sign Up, and create your account with your email or phone number. Pick a username, add a profile photo, and start following people.
Watch free videos on almost any topic — how-to guides, music, news, hobbies, and more. You can watch without an account, but signing in lets you subscribe to channels and save favorites.
To set up: Install the YouTube app and sign in with your Google account. Tap Subscribe on any channel you enjoy to see their new videos.
Short, fun videos — usually under a minute. Swipe up for the next one. Many grandparents enjoy watching cooking tips, funny animals, and family moments here.
To set up: Install the TikTok app, tap Sign Up, and create your account. You can watch right away; following accounts tailors what you see.
TikTok User Guide — coming soon. It will cover settings, privacy, following and unfollowing, and managing what appears in your feed.
Pinterest
A visual idea board — save recipes, decorating ideas, gardening tips, and crafts to boards you create. Think of it as a digital scrapbook of things you want to try.
To set up: Install the Pinterest app, tap Sign Up with your email, and pick a few interests. Tap Save on any idea to pin it to a board.
Pinterest User Guide — coming soon. It will cover boards, settings, privacy, and organizing your saved ideas.
LinkedIn
The professional network — for work connections, job searching, and industry news. Less about family photos, more about careers and business.
To set up: Install the LinkedIn app or visit linkedin.com, tap Join Now, and build your profile with your work history and skills.
LinkedIn User Guide — coming soon. It will cover profiles, connections, privacy settings, and job searching.
Reddit
Reddit is a collection of communities (called subreddits) about every topic you can imagine — gardening, cooking, health, hobbies, news. People post questions, share advice, and discuss. You can read everything for free; joining lets you ask your own questions.
To set up: Visit reddit.com or install the Reddit app, tap Sign Up, and pick a username. Then search for topics you enjoy — try r/gardening, r/cooking, or r/AskOldPeople for friendly advice.
Tip: Every community has its own rules at the top of the page. Read them before posting. Be kind — moderators remove rude comments.
Staying safe on social media
A few simple rules keep you safe on every social app: never share your password, be careful about friend requests from strangers, and remember that scammers create fake profiles. Our Staying Safe section covers this in detail.
An emoji is a little picture you can add to a text, like a smiley face or a heart. Tap the smiley key on your keyboard to find them. Emoticons were the original version — faces typed with keyboard characters, like :-) for a smile.
Telegram is a messaging app like WhatsApp. It sends texts, photos, and voice notes over the internet, and it works on both phones and computers.
An algorithm is a set of steps a computer follows to decide things. When Facebook chooses which posts to show you first, that is its algorithm at work.
Facebook in Plain Words: The Feed, Friends, Groups, and Pages
Facebook is a place on the internet where people share news, photos, and messages with people they know. It has four main parts: the feed (the stream of posts you scroll through), friends (the people you are connected to), groups (clubs gathered around a shared interest), and pages (the public homes of businesses, churches, and organizations). Once those four are clear, the rest of Facebook makes sense.
The feed — your front page
When you open Facebook, the first thing you see is the feed: a long stream of posts, one after another, that you scroll through. Posts in your feed come from your friends, the groups you belong to, and the pages you follow.
Two things worth knowing about the feed:
It is not in time order. Facebook's computers choose what to show you based on what you have liked and lingered on before. That is why a post from three days ago can sit above one from this morning, and why you sometimes do not see a friend's post at all. If you want to see what a specific person has posted, visit their profile (their own page) directly rather than waiting for the feed to show you.
It is endless on purpose. There is no last page. Deciding in advance "I'll look for ten minutes" is a healthier habit than scrolling until it stops, because it never stops.
Reacting to a post — pressing Like, or writing a comment (a reply written under the post) — tells Facebook to show you more of that kind of thing. You are training your own feed with every tap.
Friends — the people connection
A Facebook friend is a two-way connection: you send a friend request (an invitation to connect), they accept, and then you each see the posts the other shares with friends. Friending is mutual — both sides agreed — which is different from following a page, described below.
Your friends list is meant to be people you actually know. There is no reward for having many friends, and a small list of real ones is the normal, healthy shape of an account.
Groups — the clubs
A group is a gathering place built around something shared: a church congregation, a neighborhood, a hobby like gardening or quilting, a high-school class, a town's buy-and-sell board. Inside a group, members post to the group rather than to all their friends.
Groups come in two kinds:
Public groups — anyone can see the posts, even non-members.
Private groups — only members can see what is posted. You ask to join, and a group admin (the person who runs the group) lets you in, sometimes after a simple question or two.
For many people, groups are the best part of Facebook: a grandchild's school parents' group, the neighborhood watch, the recipe exchange. What is posted in a private group stays among members — but remember that any member can take a screenshot, so post the way you would speak in a room full of people.
Pages — the public storefronts
A page is Facebook's home for a business, church, charity, public figure, or organization. Straight 2 Work Tech has one. Pages are public by design.
You connect to a page by pressing Follow (or Like on the page itself). Following is one-way: the page does not become your friend, cannot see your private posts, and you simply start seeing its public posts in your feed. You can unfollow at any time, and the page is never notified that you left.
A useful habit: your church's page, your town's page, the local library, and your favorite businesses are all worth following — that is how many organizations now announce schedule changes, events, and closures.
Your profile — your own home base
Your profile is your personal page: your name, your photo, and the posts you share. When someone taps your name anywhere on Facebook, they land here. What visitors can see depends on your privacy settings — the subject of another lesson in this section, and worth your attention.
If anything on Facebook ever pressures you — a post demanding you share it, a message asking for money or gift cards, a "friend" suddenly asking for help — slow down and do not respond in the moment. That pressure is the warning sign. When something feels off, call Sean at (813) 770-6082.
Words in this lesson
Feed — the scrolling stream of posts Facebook shows you when you open it.
Post — anything shared on Facebook: words, a photo, or a video.
Friend — a person you are mutually connected to on Facebook; you each see the other's friend-shared posts.
Friend request — an invitation to become Facebook friends, which the other person can accept or ignore.
Comment — a reply written under a post.
Like — the thumbs-up button under a post, telling Facebook you want more of that kind of thing.
Group — a gathering place on Facebook built around a shared interest, church, neighborhood, or hobby.
Page — the public Facebook home of a business, church, or organization.
Follow — connecting to a page one-way, so its public posts appear in your feed.
Profile — your personal Facebook page: your name, photo, and the posts you share.
Friend Requests from Strangers and Duplicates
A friend request from someone you do not know should almost always be declined — there is no cost to saying no, and no reward for saying yes. And if you get a "new" request from someone who is already your friend, it is very likely a copied account: a stranger has stolen your friend's name and photo to build a fake. Do not accept it. Tell your real friend, through a channel you already trust, what is happening.
Why strangers send friend requests
Real people you have lost touch with do sometimes find you on Facebook, and that can be a genuine pleasure. But a large share of stranger requests come from fake accounts, built for unglamorous reasons:
To get onto your friends list so they can see posts you share only with friends.
To send you messages — romance scams, investment pitches, and "you've won" stories almost always begin with a friend request.
To look more believable: a fake account with many real friends looks trustworthy to the next person it targets.
A polished photo and a friendly face prove nothing. Both can be copied or generated in seconds.
The simple rule for strangers
Ask one question: do I actually know this person, in real life, by name? If the answer is no — or "I think maybe…" — delete the request. Deleting is silent; the other person is not notified, and nothing bad happens. If it turns out to be a real long-lost friend, they can reach you another way and explain themselves. Real relationships survive a deleted request. Scams do not.
The duplicate: a "new" request from an old friend
This is the most important trick to know. One day a request arrives from your cousin, your neighbor, your friend from church — someone already in your friends list. The photo is theirs. The name is theirs.
What has almost always happened: a scammer has built a fresh account copying your friend's name and public photos. Then the scammer sends requests to everyone on your friend's visible friends list — including you. If you accept, a message usually follows within hours: a story about being stranded, a grant they "won" that you can get too, or a request for gift cards or a code from your phone.
Your real friend has not been hacked in the way people imagine — nobody broke into their account. Their public name and photos were simply copied, the way someone could copy a photo off a church bulletin board.
What to do, step by step
Do not accept the request. Leave it or delete it.
Check your friends list. Search the friend's name. If the original account is still there — it will be — the new request is the copy.
Tell your friend through a channel that is not Facebook. Call them, text their real phone number, or mention it in person: "Someone made a fake account pretending to be you." They will want to know, and Facebook gives them a way to report the copy.
Report the fake account if you have a spare minute: open the fake profile, tap the three dots, and choose the option to report it as pretending to be someone. This helps Facebook remove it, and it protects the next person on the list.
If you already accepted
Do not be embarrassed — this trick works on careful people every day. Do these three things:
Unfriend the fake account. Go to the fake profile and remove the connection.
Do not answer any messages from it, and never send money, gift cards, or codes, no matter the story.
Check your own recent posts for anything the fake account could now see that you would rather keep private.
If you accepted a request and then sent money, gift cards, or a code from your phone, do not wait — call Sean at (813) 770-6082.
Words in this lesson
Friend request — an invitation to become Facebook friends, which you can accept, delete, or leave alone.
Fake account — an account built by a stranger using someone else's name and photos.
Scam — a dishonest scheme designed to trick you out of money or information.
Report — telling Facebook that an account or post breaks its rules, using the three-dots menu on the profile or post.
Unfriend — removing someone from your friends list; they are not notified.
Friends list — the full list of people you are connected to, found on your own profile.
The Privacy Settings on Facebook That Actually Matter
Facebook has dozens of settings, but three do most of the real work: who can see your posts, who can find you and send you friend requests, and whether your birthday is on display. Setting those three the sensible way takes a few minutes and quietly prevents most of the trouble people run into — including the copied-account trick, which feeds on public information.
Before you start: where settings live
On the Facebook app, tap your profile picture or the menu (the three lines), then look for Settings & privacy, then Settings. On a computer, click your profile picture in the top corner and choose Settings & privacy, then Settings. Facebook moves these menus around from time to time, but the names of the settings themselves stay close to what is written below. The Privacy Checkup tool, also in that menu, walks you through the same choices with plain prompts — it is genuinely helpful and safe to use.
Setting 1: Who sees your posts
Every post has an audience (the set of people allowed to see it). Facebook remembers your last choice and uses it for the next post, so setting it once, well, carries forward.
Look for the setting about who can see your future posts and set it to Friends.
Public means anyone on the internet — including people with no Facebook account — can read it. A public post is like a notice pinned on a board in a public square. Rarely what you intend for family news.
Friends means only people on your friends list. This is the right everyday setting for most people.
Be aware that Facebook also has a setting to limit past posts. If you spent years posting publicly without realizing it, this one option changes all those old posts to Friends-only at once. It is worth using once.
Remember the limit of all this: any friend can screenshot anything. "Friends" is a good fence, not a vault. Post the way you would speak in a room of people you know.
Setting 2: Who can find you and contact you
In the same privacy area, look for these three choices:
Who can send you friend requests? Set it to Friends of friends instead of Everyone. Strangers then cannot request you at all, which quietly blocks most scam approaches before they start.
Who can look you up using your email address or phone number? Set both to Friends or Only me. With these tightened, someone who gets your phone number from a leaked list cannot use it to find your Facebook profile.
Who can see your friends list? Set it to Only me. This one matters more than it looks: the copied-account scam works by copying a person's friends list and sending fake requests to everyone on it. A hidden friends list takes away the scammer's map — it protects your friends, and theirs protects you.
Setting 3: Your birthday
Your birthday appears on your profile under About → Contact and basic info, and each part — the day, the month, the year — has its own audience setting.
Set the day and month to Friends if you enjoy birthday wishes, and set the year to Only me.
Why so careful? Your full date of birth is a security fact. Banks, medical offices, and government services use it to verify identity. A public birthday with the year attached hands a stranger one of the standard answers to "prove who you are" — and also tells them exactly how old you are, which scammers use to choose their targets and tailor their stories.
For the same reason, be sparing with other "About" details: your hometown is charming and low-risk; your full home address and phone number should never be on a profile at all.
A ten-minute habit, once or twice a year
Settings menus change, and new options appear. Twice a year — perhaps when you change the clocks — open the Privacy Checkup and read each screen before tapping through. If a choice is unclear, the more private option is the safer default while you think it over.
None of this requires perfection. Friends-only posts, friends-of-friends requests, a hidden friends list, and a private birth year put you ahead of most people on Facebook.
If you open the settings and what you see does not match these words at all, or an option worries you, that is a good moment to get a patient walk-through — call Sean at (813) 770-6082.
Words in this lesson
Privacy settings — the controls that decide who can see your information and contact you.
Audience — the set of people allowed to see a post or a piece of your profile: Public, Friends, or Only me.
Only me — a setting meaning the information is visible to you alone.
Privacy Checkup — Facebook's built-in walk-through that reviews your main privacy choices screen by screen.
Friends of friends — people who share at least one mutual friend with you.
Profile — your personal Facebook page: your name, photo, and the information and posts you share.
Messenger Explained: Facebook's Message App
Messenger is Facebook's private messaging service — the place for one-to-one and small-group conversations, as opposed to posts that go out to all your friends. It has its own app, but it uses your same Facebook account. Under each message, little marks tell you its status: sent, delivered to their device, or seen by the person.
How Messenger connects to Facebook
Think of Facebook as the town square and Messenger as the telephone. Posts are announcements in the square; Messenger conversations are private calls and letters between specific people.
The two are joined at the hip:
Messenger uses your Facebook account — same name, same friends list. There is no separate password.
Your Facebook friends are automatically your Messenger contacts. To message someone privately, they generally need to be your friend, or accept your message as a request (explained below).
The Messenger app (the separate program with the blue speech-bubble picture) is simply a dedicated doorway into those conversations. You can also reach the same conversations inside the Facebook app or on the Facebook website. Same conversations everywhere — start one on your phone, continue it on your computer.
This is why installing Messenger does not create anything new. It is a second front door to a room that already exists.
The little symbols, decoded
Under the last message you sent, Messenger reports its progress in small words or marks. These cause more confusion than anything else in the app, so here they are plainly:
Sent (an outlined circle with a check mark) — your message has left your phone and reached Facebook. If a message stays on "Sent" a long time, your own connection is usually the slow part.
Delivered (a filled-in circle with a check mark) — the message has arrived on the other person's device. It says nothing about whether they have looked at it. Delivered means the letter reached the mailbox.
Seen (a tiny copy of the person's profile photo appears under the message) — they have opened the conversation and the message has been on their screen. This is the one people watch for. Two honest cautions: a person can glimpse a message in a notification without it counting as seen, and "seen" with no reply usually means busy, not angry. Messages are not conversations at conversational speed, and nobody owes an instant answer — including you.
Message requests: the strangers' mailbox
If someone who is not your Facebook friend messages you, the message does not land in your main list. It goes to Message Requests (found by tapping your profile picture in Messenger, or in the menu). This is a sound design: you can read the message without the sender knowing, and choose to reply — which connects you — or delete it and never think of it again.
Treat requests the way you treat stranger friend requests. A request from a name you do not know, especially one that opens with flattery, a prize, or a story, should be deleted unanswered. Nothing bad happens to a real person whose message you delete; they can reach you some other way.
Sending photos to family
This is the job Messenger does best, and it is straightforward:
Open the conversation with the person (or the family group conversation).
Tap the photo icon (a small picture symbol) near where you type, or the camera icon to take a photo on the spot.
Tap the photo or photos you want — a check mark or number shows they are chosen.
Tap Send.
The photo goes only to the people in that conversation — it is not posted to your profile or your feed. A group conversation (one conversation with several people in it, like "The Whole Family") sends it to everyone in the group at once, which is usually exactly what you want and saves sending it five times.
One fact worth knowing: photos sent through Messenger are slightly reduced in quality along the way. For sharing with family, that hardly matters. For a photo someone intends to print large, email keeps more of the original quality.
A safety note that belongs in every Messenger lesson
If a "friend" messages you with an urgent story — stranded, arrested, in a hospital — and asks for gift cards, a wire transfer, or a code from your phone, stop. That pattern almost always means a copied account or a compromised one, no matter whose photo is beside the message. Close Messenger, and call the real person at the phone number you already have for them. The two minutes that takes are the whole defense.
If a Messenger conversation has rattled you, or money or a code has already been sent, call Sean at (813) 770-6082.
Words in this lesson
Messenger — Facebook's private messaging service and app, for one-to-one and small-group conversations.
Message request — a message from someone who is not your Facebook friend, held separately until you choose to answer or delete it.
Delivered — a message status meaning the message arrived on the other person's device.
Seen — a message status meaning the person has opened the conversation and viewed the message, shown by their small photo under it.
Group conversation — one Messenger conversation with several people in it; everything sent goes to all of them.
Account — your personal record with a company; Messenger uses your Facebook account rather than a separate one.
Staying Safe
Scams, passwords, and keeping your money and personal information safe.
Security means keeping your information private and your devices clean. Three ideas cover most of it: encryption scrambles your information, antivirus catches the bad programs, and a VPN gives you a private tunnel on public Wi-Fi.
Best antivirus and anti-malware, and why
Antivirus and anti-malware sound like the same thing, but they catch different criminals. You want both jobs covered — here is the simple version.
Antivirus: the guard at the door
Catches the classic viruses — bad programs that try to sneak onto your computer. Windows computers already have one built in, called Microsoft Defender, and it is free. Macs and Chromebooks have their own built-in guards too. For most people, the built-in guard is enough — you do not need to buy another one.
Anti-malware: the detective
Catches the newer tricks: fake virus pop-ups, spyware that watches what you type, and hijackers that change your homepage or search engine. Microsoft Defender provides the always-on antivirus protection built into Windows. Malwarebytes Free works as an on-demand cleanup scanner; paid Malwarebytes versions can also provide real-time protection.
Firewall: the bouncer
A firewall is a barrier that controls what comes in and out of your computer over the internet. It blocks unwanted visitors while letting your normal browsing and email through. Windows and Mac both have a firewall built in and turned on — you do not need to buy one or change anything.
Encryption
Scrambled so only you can read it
What it isEncryption scrambles your information into a code. Only the right person or device can unscramble it. If someone snoops in the middle, all they see is gibberish.
On your phone or laptopIf your phone or laptop is lost or stolen, encryption keeps everything on it unreadable to whoever finds it. iPhone: setting a passcode turns on Apple’s Data Protection — use a strong passcode and keep the phone locked (Apple: “Setting a passcode turns on data protection”). Samsung: modern Galaxy phones encrypt automatically once the phone has a lock screen — no switch to flip. Windows: BitLocker/Device Encryption is available only on supported hardware and editions. Mac: FileVault is at Apple menu → System Settings → Privacy & Security → FileVault — turn it on only if you have a safe copy of your recovery key. Why it matters: a lost phone without encryption hands a stranger your photos, email, and passwords.
On websitesThe little padlock and the letters https in your browser's address bar mean the site scrambles what you send it. The padlock only means the connection is private — it does not prove the site is honest. Why it matters: never type a password or card number on a page without the padlock — without it, what you type travels in the open.
In your messagesWhatsApp and iMessage scramble your messages end to end — only you and the person you are talking to can read them, not even the company. Why it matters: private family talk stays private, even if someone intercepts it along the way.
On your Wi-FiYour Wi-Fi password helps keep neighbors off your network. Why it matters: an open network with no password lets anyone nearby watch your traffic. Keep a password on your Wi-Fi and the encryption does the rest, in the background.
Malwarebytes
Anti-malware · the cleanup scanner
What it isMalwarebytes is the anti-malware scanner — the cleanup tool that finds and removes the sneaky stuff: spyware, fake pop-ups, and scam tricks. It does a different job than your antivirus, which is Microsoft Defender on Windows.
Why this brandIt is the one we install for clients most: simple, stays out of your way, and Malwarebytes Free works as an on-demand cleanup scanner; paid Malwarebytes versions can also provide real-time protection.
Good to knowOne real-time antivirus is enough — two will fight each other and slow your computer down. Microsoft Defender plus the free Malwarebytes scanner as an on-demand backup is the fine combo. If something already got through, stop using that computer for banking or email until it is cleaned.
Choosing security software wisely
Skip the “PC cleaners” and “speed boosters.”Windows already includes the maintenance tools most people need. PC optimizer programs, including System Mechanic, may add registry cleaning, renewal notices, and paid extras without producing a noticeable speed improvement. Windows maintains itself these days; you do not need a program to “clean” it.
McAfee and Norton are capable security programs. Many people dislike their renewal notices, extra features, and upselling. Some computers include a trial version — if you do not want to pay for it, uninstall the expired trial so Windows can use Microsoft Defender without the extra reminders.
One alternative to Malwarebytes: Bitdefender. If you want a paid antivirus in addition to Defender, Bitdefender is one option we recommend. It stays quiet in the background and is simple to use.
VPN: a private tunnel for public Wi-Fi
A VPN (virtual private network) adds extra privacy when you use someone else’s Wi-Fi — a coffee shop, a hotel, the airport. It encrypts the connection between your device and the VPN company. It does not make a dishonest website safe, stop scams, or replace the padlock check. At home, your Wi-Fi password plus the padlock already protect most of what you do.
NordVPN
VPN · two well-known paid options
What it doesYou tap one button and all your internet traffic runs through NordVPN's private tunnel. It works on phones, tablets, and computers.
Monthly feeVPNs are a paid service — usually a few dollars a month, cheaper by the year. Free VPNs are not recommended — stick with a paid one, or ask us and we will set it up.
ExpressVPN
VPN · two well-known paid options
What it doesThe same job as NordVPN: one tap, and your connection is private. It is known for being simple to use and fast.
Which one?Both do the same job — pick the app that looks simpler, or ask us and we will set it up.
Everyday safety habits
Keep the padlock habit. Before typing a password or card number, glance at the address bar for the little padlock.
Let updates install. Those “update available” messages patch the holes criminals use. Do not put them off for months.
One antivirus, kept on.Microsoft Defender comes built into Windows — keep it on and let it update itself.
Public Wi-Fi? Use the VPN. Turn it on before you open email or anything personal on hotel or coffee-shop Wi-Fi.
A scary pop-up saying your computer is infected is almost always the scam itself. Close it before you click anything.
Antivirus software watches for bad programs and stops them before they can hurt your computer. Windows has one built in called Defender, and it updates itself — you do not need to buy anything extra.
A hacker is someone who tries to break into computers or accounts to steal. Strong, different passwords and keeping your device updated are the two best ways to keep hackers out.
Bloatware is the extra apps that came with your device but you never asked for. They slow things down and take up space. You can remove the ones you do not use to make your device feel faster.
A CAPTCHA is the little test that asks you to prove you are human — typing wavy letters or tapping every picture with a bus. It keeps robots from abusing websites. They can be tricky; take your time.
Malware Malware is the catch-all word for any software designed to harm your device or steal from you — viruses are just one type of it. The warning signs are pop-ups everywhere, a suddenly slow device, or programs you didn't install. Don't download "free" programs from random websites, and never call a phone number shown in a virus warning pop-up.
Ransomware Ransomware is a nasty type of malware that locks your files and demands money to unlock them. The best protection is keeping backups of your photos and files — if you have copies, ransomware loses its power over you. Never pay the ransom; it rarely gets your files back.
I think I have been hacked Don't panic — take it step by step. First, change the password on your email — that's the key to everything else. Then change your bank password from a device you trust.
Windows Security / Defender Windows Security (once called Defender) is the antivirus built into Windows — it's on by default and it's genuinely good now. You'll find it by pressing the Windows key and typing "windows security." For most people it's all the protection they need, as long as Windows updates stay on.
Windows Firewall A firewall is a guard that blocks strangers on the internet from reaching into your computer — Windows has one built in and it's on by default. If a program you trust can't get online, Windows Security's firewall page lets you allow that one program through. Never turn the whole firewall off.
SmartScreen warnings When Windows shows "Windows protected your PC" about a download, it's SmartScreen warning you it doesn't recognize the program. If you got it from the program's official website, click "More info" then "Run anyway." If it came from an email or a strange site, don't run it — delete it.
Locking your computer (Windows+L) Press the Windows key + L before you walk away and your computer locks instantly — nobody can snoop without your password or PIN. Get in the habit every time you leave your desk, even at home. Press any key when you return and sign back in.
Signing out vs switching user Click Start, click your profile picture, and choose "Sign out" to fully close your session — use this when you're done for the day on a shared computer. "Switch user" (same menu) keeps your programs open for when you come back. Signing out is the tidier, safer choice on shared machines.
Suspicious email on PC ("phishing") A phishing email pretends to be your bank or a company to steal your password. Real companies never ask for passwords by email. Check the sender's actual address (not just the name), hover over links without clicking to see where they really go, and when in doubt, go to the company's site yourself instead of clicking.
Strong passwords on PC A good password is long — three random words with a number beat a short tricky one, like "coffee-garden-42." Use a different one for email and banking than for newsletters. Write them in a paper notebook kept at home; that's far safer than reusing one password everywhere.
What to do if you clicked something bad Don't panic and don't pay anyone who calls. First disconnect from the internet (unplug the cable or turn off Wi-Fi) to stop any damage spreading.
Scammers call everyone, and they especially like to target seniors. The good news: almost every scam follows the same few scripts. Once you know the scripts, the scam falls apart.
The toll text scam
What it looks like. A text message says you owe a small toll — usually $3 to $13 — and must pay today or face a $50 late fee or even a suspended vehicle registration. It includes a link to “pay now.” The message pretends to be from E-ZPass, SunPass, FasTrak, or TxTag. The FTC says a text like this is probably a scam.
Why it works. The amount is tiny on purpose — small enough that you don’t question it and just pay. The big threat (late fees, suspended registration) is there to panic you into acting fast. But they are not after the $4. The link takes you to a fake website designed to steal your credit card number, driver’s license number, and other personal information. You may even get one for a toll system you have never used, or a state you have never visited — texts cost scammers nothing to send, so they blast out millions.
What to do. (1) Do not click the link. Do not reply. Delete the text. (2) If you think you might really owe a toll, check the safe way: open the toll agency’s website yourself by typing the address — never use the link from the text — or call a phone number you already know. (3) Report it: forward the text to 7726 (which spells SPAM on your keypad). You can also report it to the FBI at ic3.gov or the FTC at reportfraud.ftc.gov. The FBI has logged more than 60,000 complaints about this one scam — just in 2024.
What NEVER to do. Never tap a payment link in a text message — no real toll agency collects payment through a text link. Real toll bills come by mail. Never type your card number, Social Security number, or driver’s license into a site you reached from a text.
If you already clicked or paid. Call your card company right away, dispute the charge, and ask for a new card number. If you entered your Social Security number, go to identitytheft.gov for a recovery plan and consider freezing your credit. Change any passwords you typed in.
Watch: The toll text scam
What to do when the scam text arrives (32 seconds).
The Zelle scam
What it looks like. You get a call or a text that looks like it comes from your bank. The caller ID shows your bank’s name. The caller knows your name — sometimes even your account balance. They say there is fraud on your account, and the only way to protect your money is to send it through Zelle to a “new safe account” or “reverse” the fraud. The call sounds urgent and professional. It is not your bank. It is a scammer.
Why it works. Caller ID can be faked — that is called spoofing, and it takes the scammer seconds. Scammers buy stolen account details, so knowing your name and balance does not prove they are real. The panic is deliberate: if you are scared and rushed, you do not stop to think. And Zelle payments move instantly — the money leaves your account in seconds and goes straight to the criminal. Because you sent it, the bank may not be able to get it back.
What to do. Hang up. Do not press any buttons. Do not send any money. Then call your bank yourself, using the phone number on the back of your debit card or on your bank’s real website — never the number the caller gave you. Ask the bank: “Is there really fraud on my account?” If there is, the real bank will handle it. You can also report the scam attempt to the FBI at ic3.gov or the FTC at reportfraud.ftc.gov.
What NEVER to do. Never send Zelle money because someone called or texted you. A real bank will never ask you to send money through Zelle — or any payment app — to “reverse” fraud or “protect” your account. That sentence, from any caller, always means scam. Also never read back a verification code from a text message to a caller — that code is what lets them into your account.
If you already sent the money. Call your bank immediately and ask about a fraud claim — Zelle has refunded some imposter-scam victims, but only in limited cases, and you must report it fast. File a report at ic3.gov and with your local police. Be honest with yourself about the odds: most Zelle scam payments are never recovered, because the money moved to the criminal’s account the instant you pressed send. The lesson going forward: no caller ever gets a Zelle payment from you.
Watch: The Zelle scam
Hang up, call your bank back (33 seconds).
The AI voice-clone scam
What it looks like. Your phone rings and you hear your grandchild crying. Or your son, panicking. They say they have been in a car accident, or they are in jail, or they are hurt at the hospital. They beg you to send money right away. The voice sounds exactly like them — and that is the whole point. Scammers only need about 3 seconds of audio — from a social media video, a voicemail greeting, a YouTube clip — to build a voice clone with AI software. The FTC warns: “scammers use AI to enhance their family emergency schemes.”
Why it works. Your brain hears the voice of someone you love in trouble, and your thinking shuts down — that is what love does. The scammer counts on it. The crying is deliberate: it conveniently explains why the voice sounds slightly wrong, and it makes you act on feeling instead of thinking. Then comes the pressure: do not tell anyone, send money now, there is no time. One survey found 1 in 10 people got one of these calls, and most of those people lost money. The FBI logged over $5 million in AI voice-clone distress-scam losses in a single year.
What to do. (1) Slow it down. Say: “I need to hang up and call you back.” A real emergency survives five minutes — a scam does not. (2) Hang up. Call your grandchild or your son directly on the number you already have saved in your phone — never the number that called you, and never a number the caller gives you. If they do not answer, call their parent, their spouse, or another relative. (3) Ask for the family code word. Set one up today: a word or short phrase only your family knows — never anything posted online. “Purple tractor.” “Aunt Rita’s meatballs.” Weird is good. Agree on it in person, never in a text or email. The rule is: no word, no money. A cloned voice can copy how your grandchild sounds. It cannot know what you agreed on at the kitchen table.
What NEVER to do. Never send money based on a phone call alone — not by gift card, wire transfer, cryptocurrency, or cash courier. No hospital, police station, or court takes gift cards. Never agree to keep it secret: “Don’t tell mom” is the scam isolating you from the one thing that breaks it — another person. And never stay on the line because they say you must not hang up. A real caller in trouble wants you to verify. A scammer needs you not to.
If you already sent money. Contact your bank, the wire service, or the gift card company right away and tell them it was a scam — speed matters more than embarrassment. Then report it to the FTC at reportfraud.ftc.gov and the FBI at ic3.gov; mention it involved AI or voice cloning. Tell a family member what happened. This is not carelessness — the whole call is designed to make a caring person act before they can think. Talking about it helps investigators catch the people behind these calls.
Before it happens. Set up the family code word this week, before the phone rings. Pick it together in person. Tell only your immediate family. And consider making your social media accounts private, so voice clips and family details are harder for scammers to harvest. A cloned voice can copy the panic. It cannot answer the code word.
Watch: The AI voice-clone scam
Hang up, call back, ask for the code word (29 seconds).
The grandparent scam
A call or text from someone claiming to be your grandchild — in trouble, begging you not to tell mom and dad, needing money fast. They ask for gift cards or a wire transfer. A real grandchild in trouble does not ask for gift cards in secret.
The cloned-voice scam (AI)
This is the grandparent scam with a terrifying upgrade: scammers can now copy a real person's voice using just a few seconds of audio from a video or voicemail. The "grandchild" on the phone can sound exactly like your grandchild — crying, scared, begging for help. It is still a scam. The defense is the same: hang up and call your family back on a number you already know. Better yet, agree on a family code word now — a silly word only your real family knows. Ask for it on any emergency call. A scammer cannot guess it.
Fake tech support
A scary pop-up or a call saying your computer has a virus. They tell you to call a number or let them into your computer. A call out of the blue saying your computer has a virus is a scam — the pop-up is the scam itself; close it. Microsoft says it does not make unsolicited support calls — genuine support calls only happen when you contacted the company first.
Phishing texts and emails
“Your package could not be delivered” or “your account is locked” — with a link to tap. The link opens a fake site that steals what you type. Real companies generally do not send you a text out of the blue asking you to log in from a link in the message. If you were not expecting it, do not tap — open the app yourself or type the address yourself.
Is that email or text real?
Scammers fake the display name — the “Apple Support” you see at the top may not be Apple at all. The trick is to look one tap deeper, at the real address underneath.
On iPhone (Apple Mail)
Tap the sender’s name at the top of the email. The real address usually appears underneath — something like support@apple.com. If it ends in @gmail.com or a jumble of letters instead of the company’s own name, delete it.
On Samsung (email app)
Tap the sender’s name or picture at the top, and look for the real address — usually shown just below. Same rule: a real company writes from its own domain — yourbank.com, not yourbank-security123@gmail.com.
Red flags in any message
Urgent threats. “Locked!” “Act now!” “Your account will be closed.” Real companies do not scare you into clicking.
Generic greetings. “Dear customer” instead of your name.
Misspellings and odd wording. Sloppy writing is a giveaway.
Never tap links in a suspicious message. Open the real app yourself, or type the real website address yourself, instead.
Treat any text asking for your password or security code as fake. Legitimate companies generally will not text you out of the blue asking for those — and never read a code to someone who calls or texts you. Do not tap shortened links either — when in doubt, delete it and call the company on a number you already know.
Block them — and unblock by accident
Blocking stops someone’s calls and messages from reaching you. It is the fastest way to silence a scammer — and if you ever block a friend or family member by mistake, here is how to undo it on both systems.
Block a text — iPhoneNarrated tutorial: Open the text conversation.; Tap the name or number at the very top.; Tap "Block Caller," then "Block Contact."; Blocked — their calls and texts can't reach you.
Open the text conversation.
Tap the name or number at the very top.
Tap Block Caller, then Block Contact.
Unblock: open Settings → Privacy & Security → Blocked Contacts. Swipe the name left and tap Unblock (or tap Edit, tap the red button beside the name, then tap Unblock).
Block a text — SamsungNarrated tutorial: Open the text conversation.; Tap the number or the three dots at the top.; Tap "Block," then confirm.; Blocked — their calls and texts can't reach you.
Open the text conversation.
Tap the number or the three dots at the top.
Tap Block or Block number, then confirm.
Unblock: Open Messages, tap the three dots → Settings → Block numbers and spam → Blocked numbers, and tap the minus sign next to the number.
Block an email — Apple MailNarrated tutorial: Open the email.; Tap the sender's name at the top.; Tap "View Contact Card," then "Block this Contact."; Blocked — their emails can't reach you.
Open the email.
Tap the sender’s name at the top.
Tap View Contact Card, then tap Block this Contact.
Unblock: open Settings → Privacy & Security → Blocked Contacts and remove the address. Your blocked email addresses live in that same list.
Block an email — Gmail appNarrated tutorial: Open the email.; Tap the three dots next to the reply arrow.; Tap Block "sender name."; Blocked — their emails can't reach you.
Open the email.
Tap the three dots next to the reply arrow.
Tap Block “sender name”.
Unblock: find an earlier message from that sender (check the Spam folder if you cannot find one), open it, tap the three dots next to Reply, then tap Unblock sender.
Blocking is not reporting
Blocking only stops their messages from reaching you. It does not tell anyone the message was spam.
Report spam on iPhone: in a text from an unknown sender, look for Report Junk under the message.
Report spam on Samsung: open the conversation, tap the three dots, and look for Report spam.
The one rule that stops them all
Hang up. Then call back on a number you know — the number on your bank card, or your grandchild’s real number. Never use the number they gave you.
Never pay with gift cards or wire transfers. Real companies and government offices do not normally ask for payment that way — be very suspicious of anyone who does.
Never share a verification code. Those codes texted to your phone prove it is you — reading one to a caller hands them your account.
When in doubt, stop. If something scared you or almost tricked you, do not click or pay anything — call the company on a number you already know.
Already paid? Act fast — speed matters
If it was a gift card, call the company on the back of the card right now. Say it was a scam and ask for your money back. Keep the card and the store receipt — you will need them.
Then tell the FTC at ReportFraud.ftc.gov. It takes a few minutes, and it helps stop the same scam from reaching someone else.
If it was a wire transfer, call the wire company immediately and ask them to reverse it. The sooner you call, the better your chances.
Phishing Phishing (pronounced "fishing") is a fake email or text that pretends to be from your bank, Amazon, or another company you trust, trying to trick you into typing your password or card number. The signs: urgent warnings, strange sender addresses, and links that don't look quite right. When in doubt, don't click — go to the company's real website yourself.
Caller asking for password Hang up. No real company — not your bank, not Microsoft, not the IRS — will ever call and ask for your password, Social Security number, or bank login. That's always a scam.
Robocall A robocall is a pre-recorded sales or scam call played by a computer — the "your car warranty is expiring" calls are the classic example. They're illegal when they're scams, but scammers fake their numbers so they're hard to stop completely. Don't press any buttons or call back — just hang up, and use Silence Unknown Callers on iPhone to quiet them.
Report a scam You can report scam calls and texts to the FTC at reportfraud.ftc.gov — it takes a few minutes and helps them track the scammers. On iPhone, you can also report a junk text right from the message by tapping Report Junk under it. Reporting won't get your money back, but it protects the next person.
Identity theft Identity theft is when someone uses your personal information — like your Social Security number — to open credit cards or take out loans in your name. The warning sign is bills or accounts you don't recognize. If that happens, call your bank first, then report it at identitytheft.gov, which walks you through every step.
Social security number over phone Only give your Social Security number when YOU called THEM — like calling your bank or doctor's office yourself. Never give it to someone who called you, no matter who they claim to be. Real companies already have your number on file and won't ask for the whole thing over the phone.
A password is the lock on each of your accounts. Two ideas make passwords easy: every account gets its own lock, and the lock itself can be simple for you but hard for criminals.
One password per account
If one website gets hacked and you reused that password everywhere, the criminals will try it on your email and your bank next. Different passwords keep one break-in from becoming ten. Your email password matters most — guard it best.
Use a passphraseNarrated tutorial: Use four ordinary words in a row.; Something personal and picture-like is easy to remember.; Add a number or two if the site asks.; Hard for a computer to guess. Write it in your password book.
Four ordinary words in a row beat one tricky word. Something personal and picture-like — coffee porch sunrise dog — is easy for you to remember and very hard for a computer to guess. Add a number or two if the site asks.
Write them down — safely
Memory is not a filing cabinet, and that is fine. Keep one private password book in a drawer at home — never sticky notes on the monitor, and never in an email to yourself.
Narrated tutorial: Google offers to save your passwords the same way.; Say yes — it fills them in next time.; They live in the Google Password Manager.; Write them in your book too — your book is the master copy.Narrated tutorial: When you log in somewhere new, your iPhone offers to save the password.; Say yes — it fills it in for you next time.; Open the Passwords app to see saved passwords.; Settings → General → AutoFill & Passwords: turn it on.
iPhone: When you log in somewhere new, the phone offers to save the password. It fills it in for you next time. Open the Passwords app to view saved passwords. To make sure the phone can fill them in, open Settings → General → AutoFill & Passwords and turn on password AutoFill.
Samsung:Google offers to save your passwords the same way, in the GooglePassword Manager. It fills them in next time you visit the site.
Your book is still the master copy. Write saved passwords in your book too — then you are covered even if the phone is lost.
Narrated tutorial: Those 6-digit codes texted to you prove it's you.; Never read one to a caller — no matter who they claim to be.; Banks and tech companies never ask for them.
Codes are secret too
Those 6-digit codes texted to your phone prove it is you. Never read one to a caller — no matter who they claim to be. Banks and tech companies never ask for them.
Change a password if a site tells you it was hacked. One changed password, right away, stops the damage.
Locked out or worried? Do not keep guessing — too many wrong tries can lock the account.
1Password is a password manager app. It remembers all your passwords for you, so you only need to remember one master password. It fills them in when you visit your sites.
Password fatigue is that tired feeling of juggling too many passwords. A password manager ends it — one password to remember, and the app handles the rest.
Username A username is the name you pick (or are given) to identify your account — it's often your email address. When you log in somewhere, you type your username first, then your password. If a site asks for a username and you're not sure what yours is, check any welcome email they sent you when you signed up.
Apple ID / Apple Account Your Apple ID (now called Apple Account) is the email and password that unlocks everything Apple — iCloud, the App Store, FaceTime. It's usually the email you used when you got the phone. You'll find it at the very top of Settings, with your name and photo.
ICloud Keychain (saved passwords) iCloud Keychain is Apple's password saver — it remembers your website logins and fills them in for you. Find them in Settings under General, then AutoFill & Passwords (you'll use Face ID to look). It syncs to your Mac and iPad too.
Family Sharing Family Sharing lets up to six people share App Store purchases, an iCloud storage plan, and Apple Music — everyone keeps their own account. Set it up in Settings under your name, then Family. The organizer's card pays, and kids' purchases ask permission first.
Two-factor authentication for Apple ID When you sign into your Apple ID on a new device, Apple texts a six-digit code to your trusted iPhone — type it in to prove it's you. This stops strangers from getting into your account even if they guess your password. It's on by default and worth keeping.
Sign out of Apple ID Open Settings, tap your name at the top, scroll all the way down, and tap Sign Out — you'll type your Apple ID password to confirm. Do this before selling or giving away a phone, or the next person can't use it. Your photos stay in iCloud if backup was on.
Activation Lock Activation Lock ties your iPhone to your Apple ID so a thief can't wipe and reuse it — that's why a used phone may demand the previous owner's password. If you bought a used iPhone stuck on this screen, only the seller can remove it, at iCloud.com/find. Never buy a phone you can't get past this screen on.
"Trust This Computer" prompt When you plug your iPhone into a computer, it asks "Trust This Computer?" — tap Trust only on your own computer, and never on a public or borrowed one. Trusting lets that computer see your photos and files. If you tapped it by mistake, reset it in Settings under General, then Transfer or Reset iPhone.
Your photos and documents only exist in one place until you back them up. Computers die, phones get lost, and hard drives wear out. A backup is simply a second copy — and “redundant” just means you keep more than one, so one failure can never take everything.
Cloud backup
Your copy is stored on the internet, on big computers run by Apple, Google, Microsoft, or Dropbox. It happens automatically, and it survives even if your house floods or your phone is stolen.
Hard drive backup
Your copy sits on a small external drive in your home. No internet needed, no monthly fee, and you hold it in your hand. Unplug it when the backup finishes so nothing bad can reach it.
The four big cloud backups, compared
Built into iPhone
Apple · iPhone, iPad, and Mac
iCloud
Apple's own backup. If you have an iPhone, it is already there — it quietly copies your photos and settings while you sleep.
What it isApple's cloud backup, built into every iPhone, iPad, and Mac. Turn it on once and it copies your photos, contacts, and settings by itself.
What it costsA small amount of space is free. Most people's photos fill that up, so Apple sells bigger plans for a few dollars a month.
Good to knowBackup covers Apple devices only — but you can still view your photos and files on a Windows PC or in any web browser. If the whole family uses iPhones, one plan can cover everyone.
Most free space
Google · Android phones and any computer
Google Drive
Google's backup gives you the most free space of the big four, and it works on almost anything.
What it isGoogle's cloud storage. On Android phones it backs up photos and settings automatically, and on any computer you can drag files straight into it.
What it costs15GB free — the biggest free slice here. Bigger plans cost a few dollars a month.
Good to knowThat 15GB is shared with your Gmail and Google Photos, so heavy photo takers still fill it up.
Comes with Word and Excel
Microsoft · Windows computers
OneDrive
Microsoft's cloud, built into Windows. The paid plan throws in Word, Excel, and a huge amount of space.
What it isMicrosoft's cloud backup, built into Windows 10 and 11. Your Documents folder can sync to it without you lifting a finger.
What it costsA little space is free. The Microsoft 365 plan costs about ten dollars a month and includes Word, Excel, and a full terabyte of backup space.
Good to knowIf you already pay for Microsoft 365, you already have the backup — most people never turn it on.
Simplest to share
Dropbox · works on any device
Dropbox
The original cloud backup. Not the cheapest, but dead simple — especially for sharing files with family.
What it isA folder on your computer that magically exists on all your other devices too. Put a file in, and it appears everywhere.
What it costsOnly a tiny bit is free. Paid plans run about ten dollars a month for a big chunk of space.
Good to knowSharing is its superpower — send a link and anyone can view or download, no account needed.
The backup you keep at home
No monthly fee
Home backup · one-time purchase · no monthly fee
External hard drive
A small box that holds a full copy of your files. You hold it in your hand, and nobody bills you every month.
What it isA small box, about the size of your phone, that plugs into your computer with a cable. It holds a full copy of your files.
How you use itPlug it in, copy your photos and documents over (or let the computer do it on a schedule), then unplug it and put it somewhere safe.
Why unplug itA backup only protects you if a virus or power surge can't reach it. Unplugged on a shelf, it is safe from both.
The simple rule: two copies, two places
One copy in the cloud (iCloud, Google Drive, OneDrive, or Dropbox) — protects against theft, fire, and a dead device.
One copy on an external drive at home — protects against internet problems and monthly fees, and it is fast to restore from.
Check once in a while. A backup you never look at might have stopped working months ago. Open it twice a year and make sure your newest photos are there.
I will set this up for you. I configure automatic recurring backups — your files copy to the USB drive and the cloud on their own, on a schedule, so you never have to remember. Redundant backups are the recommendation: a physical USB drive plus cloud backup. Call (813) 770-6082.
Online banking means your bank comes to you. Instead of driving to a branch, you check your balance, pay bills, and deposit checks right from your phone or computer. Almost every bank includes it free with your account. Here is what six banks actually give you, how to sign in with your finger or face, why the app beats the website, and how to stay safe from the scams that target bank customers.
Narrated tutorial: Tap Bill Pay in your bank's app.; Pick who to pay and type the amount.; Check it, then confirm.; Payment scheduled.Narrated tutorial: Open your bank's own app.; Your face or finger signs you in — no typing.; One tap shows your balance.
Why the app beats the website
Narrated tutorial: Tap Deposit a check in your bank's app.; Take a photo of the front of the check.; Then a photo of the back — sign it first.; Done — no drive to the branch.
Harder to fool. In a web browser you can land on a fake look-alike site and never know it. Your bank's own app only talks to the real bank.
Your face or finger is the password. Most bank apps let you sign in with Face ID or your fingerprint — no typing a password where someone could watch.
One tap to check your balance. The app keeps you safely signed in on your own phone, so there is no sign-in screen to fight every time.
It taps you on the shoulder. Instant alerts when money moves. If a charge you did not make shows up, you know right away.
Deposit checks with the camera. Take a photo of the check inside the app. No drive to the branch, no ATM line.
The six banks, simply
A credit union is a bank owned by its members instead of shareholders. It is not-for-profit, so fees are often lower. Everything below works the same way.
Wells Fargo. The app shows your balances, lets you deposit checks by taking a photo, pay bills, and send money with Zelle. You can lock or unlock your cards in the app, see your FICO credit score free, and ask Fargo, the built-in helper, everyday questions. Sign in with your fingerprint or face.
Bank of America. Photo check deposit, Zelle, and bill pay, plus Erica, the built-in assistant that finds transactions and pays bills for you. Touch ID or Face ID sign-in, budgeting and spending tools, and a free FICO score. Investing accounts (Merrill) live in the same app.
Truist. Mobile check deposit, Zelle, bill pay, and face or fingerprint login. Lock your card with one tap, get spending insights, and real-time alerts. Truist One Checking charges no overdraft fees.
Chase.QuickDeposit puts checks in your account from a photo, plus Zelle, bill pay, and fingerprint sign-in. The app shows monthly spending insights and budgeting tools to help you save.
Lake Michigan Credit Union (LMCU). Photo check deposit, bill pay, and transfers to other members. Turn cards on or off, set travel notices, and use the built-in budget tool. You can also bank by text message, and a mobile authenticator in the app makes sign-in safer.
Suncoast Credit Union. Florida’s big credit union. Face and fingerprint login, photo check deposit, bill pay, and Zelle. Lock or unlock your debit card in the app, get cashback offers, and link accounts from other banks to see everything in one place.
Fees and rules change
Banks change fees, limits, and features over time. If a fee or limit matters to you, check your bank’s website or ask at the branch before you decide.
Narrated tutorial: Open your bank's app, tap Settings or Profile.; Turn on "Sign in with fingerprint" or "Face ID."; One touch and you're in — keep your password written down too.
Signing in with your finger or face
What it is. Instead of typing your password every time, your phone checks your fingerprint or your face. One touch and you are in.
Your bank never sees your fingerprint. It stays locked inside your phone. Your phone just tells the bank, “yes, this is really them.”
How to turn it on. Open your bank’s app, tap Settings or Profile, and look for “Sign in with fingerprint” or “Face ID.” Follow the steps. Every bank above offers it.
Keep your password anyway. Fingerprint sign-in is a shortcut, not a replacement. Keep your password written down somewhere safe at home.
Staying safe from scams
Scammers target bank customers because money is involved. These five rules stop almost all of it:
Your bank will never ask for your password. Not by phone, not by text, not by email. Anyone who asks is a scammer — hang up.
Do not tap links in “fraud alert” texts. Scammers send fake texts that look exactly like your bank. Do not tap the link. Open your bank’s own app yourself, or call the number on the back of your card.
No bank employee will ever ask you to send money to “fix” a problem or “protect” your account. That is always a scam.
Slow down.Scammers rush you — “act now or your account closes!” A real bank will wait. Take your time and think.
When in doubt, call the number on your card. Never call back a number from a strange text or voicemail. The number printed on your debit card is always safe.
Narrated tutorial: Zelle moves money in minutes, with no fee.; The big rule: Zelle payments cannot be taken back.; Only send Zelle to people you know and trust.
Zelle — read this before you use it
What it is.Zelle moves money straight from your bank account to someone else’s bank account, in minutes, with no fee. It lives inside your bank’s app — there is nothing extra to install.
The big rule: Zelle payments usually cannot be taken back. Once the money reaches someone who is signed up, it is gone — like handing over cash. One exception: if someone got into your account and sent Zelle money without your permission, call your bank right away. The law says the bank must look into unauthorized transfers — and you usually have 60 days from your statement to report it.
Only send Zelle to people you know and trust — family, friends, people you have met. Never Zelle a stranger, an online seller you have not met, or someone who called you out of the blue.
Buying from a stranger? Use PayPal’s “Goods and Services” instead — it comes with buyer protection. Zelle has none.
Cash App, Venmo, and PayPal, simply
Cash App (from Block, the company once called Square). Send money to friends free using your bank account or debit card. Moving money to your bank the slow way (1–3 days) is free; the instant way costs a small fee. Paying with a credit card costs 3%. No purchase protection — friends and family only.
Venmo (owned by PayPal). Free to send with your bank or debit card; instant transfer to your bank costs 1.75%. It has a social feed that can show your payments — set it to private in settings. Payments marked “Goods and Services” carry some purchase protection.
PayPal. The oldest of the three. Sending to friends and family from your bank or PayPal balance is free; instant transfer to your bank costs 1.75%. Paying for an item with “Goods and Services” includes real buyer protection — the safest way to pay a stranger online. Never use “Friends and Family” to pay a stranger: it has no protection.
Fees change
These apps change their fees now and then. The numbers above are from late 2026 — check the app before you send.
What is Square?
Square is the little card reader you see at craft fairs, markets, and small shops. It lets a small business take credit cards using a phone or tablet — the business pays Square a small cut of each sale. If you see “SQ *” on your bank statement, that is just Square: it means you bought something from a small business that uses it. Nothing to worry about.
The paid guides in the store walk through each bank’s app screen by screen — signing up, settings, alerts, and safe setup.
When to call Sean instead
You want help setting up your bank’s app for the first time.
You want fingerprint or face sign-in turned on.
You got a strange text or call “from your bank” and want to check if it is real.
You want Zelle set up safely — or turned off.
Fargo Fargo is Wells Fargo's virtual assistant inside their app — ask it about your accounts or transactions.
TV & Streaming
Remotes, streaming devices, soundbars, and home theater.
A streaming device turns any TV into a smart TV. It plugs into the back of your TV and gives you Netflix, YouTube, Hulu, and hundreds of other apps on one simple home screen — no computer needed. If your TV is older, or its built-in apps are slow, a little stick or box like this is the fix.
There are four names that matter: Roku, Amazon Fire TV Stick, Apple TV, and Google TV Streamer. They all do the same basic job. The differences are price, the remote, and which phone you already own.
The four, compared simply
Roku — about $40 to $150. The simplest. Roku's menus are big, plain, and easy to read, which is why many seniors love them. The Streaming Stick (about $40) is the basic one for older TVs. The Streaming Stick Plus (about $60) suits newer 4K TVs. The Streaming Stick 4K (about $80) hides behind the TV. The Roku Ultra (about $150) is the top box with the best Wi-Fi and a remote that can find itself when lost. Every Roku runs the same simple system, and the free Roku Channel gives you free movies and shows with ads. (Roku raised all its prices in 2026 — you may still see the old lower prices as a sale.)
Amazon Fire TV Stick — about $40 to $85. The best value. The Fire TV Stick HD (about $40) is the starter for older TVs. The new Fire TV Stick 4K (about $60) is the middle pick for 4K TVs. The 4K Max (about $85) is the fastest with the best Wi-Fi. All have an Alexa voice remote: hold the button and say “open Netflix” or “find westerns” and it does it. Best if you already shop on Amazon or have Alexa devices. (Amazon also sells a bigger Fire TV Cube, about $200, that answers Alexa without a remote — overkill for most people.)
Apple TV 4K — $199 to $249. The premium pick for iPhone owners. It is the fastest, smoothest box of the four, with the cleanest menus and strong privacy. If you have an iPhone or iPad, everything works together: you can send photos and videos from your phone to the TV with AirPlay, and your apps sign in easily. It costs far more than the others, and the HDMI cable is sold separately. Worth it only if you are already an Apple person.
Google TV Streamer — about $150. The pick for Android and Google Home users. Google stopped making its little Chromecast sticks in 2025, so this small box is its replacement. It sits under the TV, gives you 4K, has a wired internet plug on the back for the steadiest connection, and doubles as a hub for Google smart-home gadgets like Nest doorbells and lights. Best if you use an Android phone or Google Home. Not the best value if you don't.
Prices change
Streaming-device prices move around a lot — sales, holidays, and rising parts costs all shift them. The prices above are what these cost in late 2026. Check before you buy.
Which one fits you?
You have an iPhone or iPad — Apple TV 4K fits your life best.
You have an Android phone or Google Home gadgets — Google TV Streamer fits best.
You shop on Amazon or talk to Alexa — a Fire TV Stick is the natural pick.
You just want the simplest menus and the lowest price — Roku, especially the Streaming Stick or Streaming Stick 4K.
Your TV's built-in apps already work fine — you don't need one of these at all. Save your money.
Setting up a Fire TV Stick, slowly
Narrated tutorial: setting up a Fire TV Stick, step by step.
Plug it into an HDMI port on the back or side of your TV. Sticks plug straight in; boxes use the HDMI cable in the box (Apple's cable is sold separately).
Plug in the power cord. The TV's USB port sometimes works, but the wall plug it comes with is more reliable.
Switch the TV to the right input with your TV remote — the button labeled Input or Source — until you see the setup screen.
Connect to your Wi-Fi by picking your network name and typing your Wi-Fi password.
Sign in to your apps — Netflix, YouTube, and the rest, one by one. This is the fiddly part, and it is a one-time job.
The step-by-step for each device — with every button press — is in the paid setup guides in the store.
When to call Sean instead
You want help choosing the right device before you buy.
Setup has you stuck — Wi-Fi won't connect, or apps won't sign in.
Your TV remote and the new remote are fighting each other.
You want the apps arranged simply so the grandkids' shows aren't the first thing on the screen.
An Xbox is a game box from Microsoft that plugs into your TV. It plays video games, and it can also stream Netflix, YouTube, and other apps — so it can double as your streaming device.
Premium channels are extra TV channels you pay for on top of the basics, like HBO or Showtime. They show big movies with no commercials.
The Siri Remote (Apple TV remote) The Siri Remote's touchpad clicks and swipes — swipe to move, click to select, and hold the microphone button to talk to Siri ("find comedies"). If it stops working, charge it with a Lightning or USB-C cable; a dead remote is the most common "broken" Apple TV.
HomePod (Apple's smart speaker) The HomePod is Apple's smart speaker — ask Siri to play music, set timers, or control smart-home gadgets. It sounds excellent for its size. The little HomePod mini does the same jobs cheaper.
AirPlay to TV (mirror iPhone to television) AirPlay beams your iPhone screen to an Apple TV or AirPlay-compatible smart TV. Swipe down from the top-right corner, tap Screen Mirroring, and pick your TV. Your photos, videos, and even video calls appear big on the television.
What is a Roku TV (vs Roku stick) A Roku TV has the Roku system built right in — no stick needed, the apps are on the home screen when you turn it on. TCL and Hisense are the main brands, and they're usually the cheapest smart TVs. If you already own one, don't buy a separate Roku stick — you'd just be duplicating it.
What is Apple TV 4K (the box) The Apple TV 4K is a small box (about $199-$249) that turns any TV into an Apple-powered smart TV — fastest and smoothest of the streaming boxes, and the only one with no ads on the home screen. You don't need an iPhone to use it, but it shines if you have one. Only worth it if your TV's built-in apps feel slow.
Roku vs Fire Stick — which should I get Roku is simpler — big app icons, no clutter, easiest for most seniors (around $40). Fire Stick is better if you shop on Amazon or talk to Alexa a lot, and its voice remote is excellent. Either one does Netflix, Hulu, and everything else.
Do I need a streaming stick if I have a smart TV Usually not — your smart TV already has the apps built in, and a stick just duplicates them. The two good reasons to add one: your TV is more than 5 years old and its apps run slowly, or you prefer Roku's simpler menu over your TV's system. Otherwise, save the $40.
How to set up a Roku (basic) Plug the stick into an HDMI port, plug in its power cable (use the wall adapter, not the TV's USB port — the TV port is often too weak), and switch the TV to that HDMI input. The Roku walks you through Wi-Fi and creates a free Roku account. The whole thing takes about 15 minutes.
How to add apps/channels on Roku On the Roku home screen, go to "Streaming Channels" (their word for the app store), find the app, and choose "Add channel." It's free to add apps — you only pay if that service itself charges monthly. To remove one, highlight it, press the * button, and choose Remove.
Fire Stick remote not working First, fresh batteries — weak ones cause most "dead remote" cases. If that fails, hold the Home button for 10 seconds to re-pair it (keep it within 10 feet of the stick). Still nothing?
Roku remote not working Fresh batteries first — always. If it still won't work, open the battery cover and hold the little pairing button for 5 seconds until the light blinks, then wait for the TV to find it. If your Roku remote has no pairing button (the simple infrared kind), just point it straight at the Roku — and make sure nothing's blocking it.
Streaming stick is slow or freezing Unplug the stick's power for a full 30 seconds — that clears most sluggishness. If it's still slow, check your Wi-Fi speed at the TV (the stick may be too far from the router). Sticks older than 4-5 years just get slow with newer apps; a $40 replacement is the fix, not a setting.
How to update a Fire Stick / Roku On Roku: Settings, then System, then System Update, then Check Now. On Fire Stick: Settings, then My Fire TV, then About, then Check for Updates. Both usually update themselves overnight, so you only need this if an app is misbehaving — an update fixes that more often than you'd think.
How to cast from phone to TV Open YouTube or Netflix on your phone and tap the little TV-with-waves icon — pick your TV or Chromecast from the list and it starts playing there. Both devices must be on the same Wi-Fi. On iPhone with an Apple TV or AirPlay TV, swipe down and tap Screen Mirroring instead.
What is Xumo (Spectrum) Xumo is the streaming box Spectrum gives its TV customers — it replaces the old cable box, with Spectrum channels plus Netflix, YouTube, and other apps on one home screen. If you're a Spectrum TV customer, it's included rather than a $10-a-month box rental. It works like a Roku, but with your Spectrum channels built in.
How to connect a smart TV to Wi-Fi On the TV remote, open Settings (the gear icon), then Network or Wi-Fi, choose your network name, and type the password carefully — it's case-sensitive. If it fails twice, restart both the TV (unplug 30 seconds) and the router, then try again. A TV too far from the router may need an ethernet cable instead.
TV says "no signal" "No signal" almost always means the TV is on the wrong input — press the Input or Source button on the remote and cycle to the right HDMI (try each one). If every input says no signal, check that the cable box or stick is actually powered on, and that its HDMI cable is pushed in firmly at both ends.
Smart TV software update Yes, let your TV update — updates fix apps that crash and patch security holes. Find it under Settings, then Support or System, then Software Update. Most TVs do it automatically overnight.
Smart TV is slow / apps won't open Unplug the TV (not just turn it off with the remote) for a full 30 seconds — that fixes most slow or stuck apps. If one app always misbehaves, delete it and reinstall it fresh. TVs older than 5-6 years get slow with new apps no matter what; a $40 streaming stick gives an old TV new life.
TV keeps turning off by itself Nine times out of ten, it's the sleep timer — check Settings, then System or General, then Sleep Timer, and turn it off. The other common cause is "HDMI-CEC" turning the TV off when the cable box sleeps; disabling CEC in settings stops that. If it still shuts off randomly with both off, the TV itself may be failing.
What is 4K / UHD 4K (also called UHD) just means a sharper picture — four times the detail of regular HD. You only see the difference on bigger screens (50 inches and up) sitting at normal distance. Most new content streams in 4K automatically when your internet is fast enough (25 Mbps or more).
What is HDR HDR makes the bright parts brighter and the dark parts more detailed — it's the reason a 4K picture can look dramatically better, not just sharper. It turns on automatically when you watch HDR content; there's nothing to set up. If HDR looks washed out or too dark, that's usually a cheap cable or an old HDMI port.
How to delete apps on a smart TV Highlight the app on the TV's home screen, then press and hold the OK or Enter button (on some TVs it's the * or Options button) and choose Delete or Remove. Deleting the app doesn't cancel the subscription — you still have to cancel that on the service's website. Reinstalling is free from the TV's app store.
"My shows disappeared" (app logged out) Your shows didn't go anywhere — the app almost certainly logged you out (it happens after updates). Open the app and sign back in with your email and password. If the app icon itself is gone from the TV's home screen, it got deleted; reinstall it free from the TV's app store and sign in again.
"The Wi-Fi box is blinking" Blinking is usually normal — it means data is moving. What matters is the COLOR: green or white blinking is fine; red, orange, or amber means no internet — restart the box (unplug 30 seconds). If the red light survives a restart, call your internet company; the outage is theirs.
"Netflix isn't working" First, check if your internet works at all (open YouTube — if that plays, it's Netflix, not your connection). Then close the Netflix app fully and reopen it; on a TV, unplug the TV 30 seconds. If it asks you to sign in again, your password may have changed — or someone changed the account.
"My TV says no internet" Go to the TV's Settings, then Network, and check whether it shows your Wi-Fi name — if it does but says "not connected," re-enter the password (it's case-sensitive). If no networks show at all, the TV's Wi-Fi is off or the TV needs a restart (unplug 30 seconds). TVs are the first thing to drop when the router gets flaky, so restart the router too.
"The remote won't change the TV" You've probably got the wrong remote in hand — the cable remote changes channels, the TV remote changes volume and inputs. If the TV remote itself does nothing, fresh batteries first, then make sure you're pointing at the TV, not the cable box. Universal remotes need to be "paired" to each device; the setup code is in the remote's manual.
"My video keeps buffering" (spinning circle) Buffering (the spinning circle) means the video is arriving slower than you're watching it — it's an internet speed problem, not a broken TV. Drop the video quality to 720p in the app's settings as a quick fix. The real fix is faster internet at the TV: move the router closer, or run an ethernet cable to the TV.
"The picture doesn't match the sound" (lip sync) This is called lip-sync error, and it's usually the soundbar or speaker lagging behind the picture. Look in the TV's sound settings for "audio delay" or "lip sync" and nudge it until mouths match words. If you use a soundbar on optical cable, switching to HDMI ARC often fixes it permanently.
"What's eating my internet" (slow when everyone's home) Video is the hog — one 4K stream eats as much as twenty phones browsing. In the evening, it's usually two TVs streaming plus video calls at once. Check the router's app to see which device is the hungriest.
"How do I watch the news for free" Three free routes: a $25-$40 indoor antenna gets you live ABC, CBS, NBC, Fox, and PBS in HD; the free NewsON app streams local newscasts; and Pluto TV has free 24/7 news channels (NBC News Now, CBS News). Between the antenna and those apps, most people never miss cable news.
"I can't find my show" (search across streaming) Ask your streaming device's search — Roku, Fire Stick, and Google TV all search across every app at once and tell you where a show lives and what it costs. Or check justwatch.com on your phone: type the show name and it lists every service carrying it, free or paid. Shows move between services constantly, so search fresh each time.
"Do I still need the cable remote" If you still have cable, yes — the cable remote is the only one that changes cable channels. But you can shrink the pile: most TV remotes can learn the cable box's power and volume (check the TV manual for "universal remote setup"), and HDMI-CEC lets one remote's arrow keys work the Fire Stick or Roku. Two remotes is a realistic goal; one is possible if you drop cable.
"My phone won't connect to the TV" Both must be on the same Wi-Fi network — that's the cause most of the time (phones love to cling to a neighbor's or the 5GHz-vs-2.4GHz twin). Then use the cast icon (YouTube/Netflix) or Screen Mirroring (iPhone, needs AirPlay TV or Apple TV). If the TV never appears in the list, restart the TV — its Wi-Fi advertised service crashes more than you'd think.
What is a coax cable Coax is the thick round cable with a little metal pin in the middle — it's what carries cable TV and cable internet into your house from the wall. You screw it on finger-tight; if it's loose, your internet and TV both get flaky. If a technician ever says "check your coax," they mean this cable.
Should my 2.4GHz and 5GHz Wi-Fi have different names Most routers combine them under one name and steer each device to the right one automatically — leave it that way. Splitting them into two names only helps if a specific gadget (some smart plugs, older printers) refuses to connect to the combined network. If everything connects fine, don't touch it.
What is airplane mode Airplane mode turns off all your phone's radios at once — cell, Wi-Fi, and Bluetooth — which is what airlines ask for. On the ground, it's a handy troubleshooting trick: toggling it off and on resets a stuck connection faster than restarting the phone. You can turn Wi-Fi back on while still in airplane mode if you want.
What is Amazon Freevee (free) Freevee was Amazon's free streaming service — movies and shows with ads, no Prime membership needed. The Freevee app closed in August 2025, but the same shows did not go away: they now live inside the Prime Video app under "Watch for Free." Open Prime Video, look for Watch for Free, and you can watch without paying for Prime. The selection rotates, but it's genuinely free, making it a nice companion to whatever paid service you have.
Can I watch live sports without cable Yes: an antenna gets you NFL on CBS/Fox/NBC and much more, free. For ESPN and the rest, YouTube TV (around $83/month) or Fubo (around $89/month) carry the full sports lineup; Sling (around $46) covers ESPN on a budget. The cheapest sports setup is antenna + one service during your season, canceled after.
How to use the voice button on the remote Hold the microphone button, speak your request ("open Netflix," "find comedies"), then let go — don't just tap it. It searches across all your apps at once, which beats typing with arrow keys. If it mishears you, speak slower and hold the remote a few inches from your mouth.
Streaming stick vs box (Roku Stick vs Ultra, Fire Stick vs Cube) The cheap sticks (about $40) do everything most people need. The pricier boxes ($85-$200, Roku Ultra / Fire Cube) are faster, have better Wi-Fi range, and the Cube doubles as an Echo speaker. Buy the cheap one first — you can only tell the difference side by side, and most seniors never miss the expensive one.
What is a TV tuner The tuner is the part inside the TV that receives free antenna channels — without one, an antenna can't work. Nearly all TVs have one built in. The exception: some cheap "displays" sold online are monitors, not TVs, with no tuner — if you plan to use an antenna, make sure the box says "TV," not "display."
What does OTA / over-the-air mean "Over-the-air" just means free TV broadcast through the air to an antenna — the way everyone watched before cable. It's still there, it's still free, and it's HD now. When someone says "OTA channels," they mean the ones your antenna picks up.
What is an optical audio cable (Toslink) An optical (Toslink) cable carries TV sound to a soundbar as pulses of light through a thin cord — it's the backup option when your TV has no HDMI ARC port. Sound quality is the same as ARC for most ears. It doesn't carry remote signals, so you'll still use the soundbar's remote (or its app) for volume.
How to set up an Echo (first time) Plug it in, then open the Alexa app on your phone (free from the app store) — it finds the Echo and walks you through Wi-Fi and your Amazon account, about 15 minutes. The one thing people miss: the phone must be on the Wi-Fi you want the Echo to use. After setup, just say "Alexa" and ask something to test it.
Smart home: where should a beginner start Start with one Echo Dot (around $80) and two smart plugs ($10 each) — voice-controlling two lamps teaches you the whole idea for about $100. Next steps people actually keep: a video doorbell, then a smart thermostat. Don't buy a system; buy one gadget, live with it a month, then decide what's next.
What is Ecobee Ecobee is the main rival to Nest — a smart thermostat (around $170-$250) with little remote sensors you put in other rooms, so it heats based on where you actually are, not just the hallway. It works with Alexa, Google, and Apple, while Nest leans Google. Either one cuts heating and cooling bills about the same.
"My bill went up and I changed nothing" Your first-year promo rate expired — that's the cause 90% of the time. The bill creeps up $20-$40 with no warning. Call the company's loyalty or retention department and ask what promotions are available; mentioning you're considering switching routinely gets the discount back.
Mirroring: Mirroring video and images to a smart television
Mirroring copies your whole phone screen onto your TV, live. Whatever is on the phone — photos, a video call, a website, an app — appears on the big screen at the same moment. It is the easiest way to share what is on your phone with everyone in the room.
This is different from casting. Casting sends one app's video — like a YouTube video — to the TV while your phone stays free to do other things. Mirroring copies everything on the screen. If you want to show photos or make a video call on the big TV, you want mirroring.
The 30-second check, before anything else
Do this first
Most mirroring trouble is not broken mirroring — it is the Wi-Fi. Both devices must be on the same Wi-Fi name. If the phone says “Home” and the TV says “Home_5G,” they cannot see each other. Also turn off any VPN on the phone, and stay off guest Wi-Fi — guest networks are designed to keep devices apart.
iPhone to a smart TV — AirPlay, free
If your TV is a Samsung, LG, Vizio, or Sony from about 2019 or newer — or a Roku TV, or certain Fire TV televisions — it already speaks your iPhone's language, called AirPlay. Nothing to buy, nothing to install.
Put both on the same Wi-Fi. On the iPhone, check Settings → Wi-Fi and note the network name. Check the TV's network menu too — the names must match.
Open Control Center on the iPhone — swipe down from the top-right corner of the screen.
Tap Screen Mirroring — the button with two overlapping rectangles.
Tap your TV's name in the list. If the TV shows a code, type it on the phone.
To stop, open Screen Mirroring again and tap Stop Mirroring.
If it doesn't work: your TV may simply be too old for AirPlay. The reliable fallback is Apple's own HDMI adapter (about $49) plus an HDMI cable — plug it into any HDMI port on the TV. Buy Apple's adapter, not a cheap copy; the cheap ones fail on movie apps.
Samsung Galaxy to a smart TV — Smart View, free
Every Galaxy phone has Smart View built in — it lives in the quick-settings panel, not in an app you download. (Samsung still supports it; only the old 2020 standalone app was retired.)
Put both on the same Wi-Fi, same as above.
Swipe down from the very top of the phone to open the quick-settings panel.
Tap Smart View — the icon looks like a small screen with a play triangle. If you don't see it, tap the pencil or Edit button in the panel and add it.
Tap your TV's name. The TV may show a PIN — type it on the phone — then tap Start now.
To stop, swipe down again, tap Smart View, and tap Disconnect.
If it doesn't work: for movies, tap the cast buttoninside the YouTube or Netflix app instead — that sends just the movie in full quality.
iPhone to a Windows PC — AirServer, free to try
Windows cannot receive an iPhone's screen on its own, so this one needs a small receiving program on the PC. AirServer is the simplest: a 30-day free trial, then $19.99 one-time if you keep it.
Install AirServer on the PC and open it.
On the iPhone, open Control Center and tap Screen Mirroring.
Tap the PC's name in the list. The phone screen appears on the computer.
Don't go down these roads: Microsoft's Phone Link does not mirror iPhone screens (calls and texts only), and Windows' Wireless Display cannot see an iPhone at all. The alternative to AirServer is Reflector ($27.99 one-time).
Samsung Galaxy to a Windows PC — Phone Link, free
Microsoft and Samsung built this together: the Phone Link app on the PC pairs with Link to Windows on the phone. Once paired, mirroring the screen is one click — and the PC's mouse and keyboard can even control the phone.
Open Phone Link on the PC (it comes with Windows 11) and follow the pairing steps on the phone.
Click the phone-screen button in Phone Link. That's it.
If it doesn't work: Samsung's own Samsung Flow app is the solid backup — same idea, free.
To a Fire TV Stick
Samsung Galaxy: use Smart View from quick settings, exactly as above. Two minutes, nothing to install — the simplest path of all.
iPhone or iPad: a Fire TV stick cannot see an iPhone on its own. Install the free AirScreen app on the Fire Stick (from the Amazon Appstore), then use the iPhone's Screen Mirroring button. (Fire TV televisions, like the Omni, often have AirPlay built in — then no app is needed.)
Windows PC: press the Windows key + K, then pick the Fire TV from the list. Free and built in — fine for slides and video calls, a little too delayed for games.
To a Roku
iPhone or iPad:AirPlay from Control Center — tap Screen Mirroring, tap the Roku, enter the code. Needs a Roku from about 2019 or newer; turn AirPlay on at Settings → Apple AirPlay and HomeKit → AirPlay → On.
Samsung Galaxy:Smart View from quick settings. On the Roku, set the screen mirroring mode to Prompt or Always allow (Settings → System → Screen mirroring) — “Never allow” blocks it.
Windows PC: press the Windows key + K and pick the Roku.
Why is the movie black?
Copy protection, not a broken device
Netflix, Disney+, Prime Video, and most sports apps deliberately show a black screen with sound when mirrored. That is copy protection doing its job — nothing is broken, and no setting fixes it. The fix is simple: open the app on the TV itself (or the Roku / Fire Stick) and play the movie there, or use the app's own Cast button.
Don't buy this
Money wasters
Any Miracast dongle or app for an iPhone. iPhones only speak AirPlay — Miracast gear can never work with them.
Cheap no-name iPhone-to-HDMI cables. They fail on movie apps. Apple's own adapter is the one that works.
A USB-C video cable for a Galaxy A-series phone. Those phones cannot send video out of the USB port at all — the screen stays black.
The old “DeX for PC” app. Samsung retired it. Use Phone Link instead.
Paid “screen mirroring” apps with a monthly fee. AirPlay and Smart View do the same job free.
Roku's “Play on Roku.” It sends photos and music only — not your screen. That is not mirroring.
The Fire TV phone app. It is only a remote control. It cannot mirror anything.
When to call Sean instead
You want mirroring set up and tested before the grandkids visit.
The TV never appears in the list, or the connection keeps dropping.
You are not sure which method fits your exact TV and phone.
A receiver is the brain of a home theater. It is a box that your TV, speakers, and everything else plug into. One box controls it all: you switch from the news to a movie to music with one remote, and the sound is far richer than your TV speakers alone.
Below are the five receiver brands worth knowing in 2026, then a plain-words tour of the speaker types that go with them.
The top 5 receiver brands
Denon — the most recommended brand. Excellent value and the easiest setup menus in the business — a small included microphone listens to your room and tunes the sound for you automatically. Popular models include the AVR-X1800H and AVR-X3800H. Price: middle of the road to high-end.
Yamaha — the reliability pick. Known for clear, natural sound and receivers that last for years. The RX-V385 is a great budget 5.1 starter; the Aventage line (RX-A4A and up) is their premium range. Price: budget to middle of the road to high-end.
Onkyo — premium features, fair prices. You often get high-end extras like THX certification and Dirac Live room tuning for less money than rival brands. Popular models: TX-NR6100 and TX-RZ50. Price: middle of the road to high-end.
Marantz — the audiophile favorite. Warm, musical sound and beautiful styling. Their Cinema series (Cinema 30, 40, and 50) is the current lineup. Price: premium — this is the luxury lane.
Sony — the easy beginner pick. Simple to set up and budget-friendly, and pairs especially nicely if you already own a Sony TV. The STR-DH590 is the budget starter; the STR-AN1000 steps up. Price: budget to middle of the road.
Speaker types, in plain words
A home theater setup
Soundbar. A single long speaker that sits under the TV. The simplest, cheapest big upgrade — one box, almost no wires. (We have a whole soundbars guide.)
Bookshelf speakers. Small speakers, about the size of a shoebox, that sit on shelves or stands. Wonderful sound for their size.
Tower speakers. Tall floor-standing speakers. Big, full, powerful sound — the classic home theater look.
Center speaker. A wide speaker that sits under or above the TV. It carries the dialogue — the single most important speaker for hearing speech clearly.
Surround speakers. Smaller speakers that go behind or beside your couch. They make the rain, the crowd, and the spaceship fly around you.
In-ceiling speakers. Speakers mounted flush in the ceiling. Invisible when done, great for overhead movie sound — but installation takes real work.
Subwoofer. The big box that makes the low rumbles — explosions, thunder, deep music. If your movies feel flat, this is what's missing.
How many speakers do you actually need?
5.1 means five speakers plus one subwoofer. For most living rooms, this is the sweet spot — full surround sound without going overboard.
A soundbar with a wireless subwoofer is enough if you want simple: one bar, one sub box, done. It will still sound far better than the TV alone.
Go to 7.1 or add overhead (Atmos) speakers only if you have a dedicated movie room and the budget for it. More speakers means more wires and more setup.
Matching speakers to a receiver: every speaker has an “ohms” number printed on it — most home speakers are 8 ohms, and nearly every receiver handles those. When in doubt, ask before buying; mismatched parts are the most common reason a system sounds wrong.
Setup basics (the simple version)
Narrated tutorial: home theater setup basics.
Connect the receiver to the TV with one HDMI cable — plug into the HDMI port on the TV labeled ARC or eARC. That one cable carries all the TV's sound to the receiver.
Plug your other devices into the receiver — cable box, streaming stick, Blu-ray player. They all go into the receiver's HDMI inputs now, not the TV.
Run the automatic setup. Plug in the small microphone that came with the receiver, place it where you sit, and let it tune the speakers for you.
Pick the right input on the receiver when you watch — the receiver switches, not the TV.
When to call Sean instead
You want help picking a receiver and speakers that fit your room and budget.
Running speaker wire or mounting speakers is more than you want to take on.
The sound worked yesterday and doesn't today — the receiver is probably on the wrong input.
You want a full home theater set up from start to finish.
A soundbar is one slim speaker that sits under your TV and makes everything sound much better. Modern TVs are so thin that their speakers are tiny and point backward — that is why voices sound muffled and you keep reaching for the volume. A soundbar fixes it with a single box: clearer voices, fuller sound, no more volume riding.
The five worth knowing
Sonos Beam Gen 2 — the simple all-rounder
A compact bar (mid-range price) with a Speech Enhancement mode that lifts voices out of the background. One HDMI cable carries the sound, and your regular TV remote controls the volume. Setup walks you through the Sonos app on your phone.
Heads-up: no remote in the box — your TV remote does the job, and the Sonos app is required for setup.
Bose TV Speaker — easiest to use
A small, simple bar (budget-friendly) with a Dialogue Mode button right on the remote — one press makes voices clearer. One HDMI cable, and your TV remote handles the volume. A favorite for people who want better sound with zero fuss.
Heads-up: the HDMI cable is sold separately, so grab one with it.
Polk Audio Signa S4 — best dialogue control
Its VoiceAdjust feature turns voices up or down on their own, without changing the music and sound effects (mid-range price). Comes with a wireless subwoofer for fuller, richer sound.
Why seniors like it: voices get clearer without everything getting louder.
ZVOX AccuVoice AV157 — built for hard-to-hear TV
Made for people who struggle to hear TV dialogue. Twelve levels of voice boost plus a SuperVoice mode that pushes background noise down (mid-range price). Compact enough to fit anywhere.
Heads-up: it connects with a wire only (optical cable) — no Bluetooth music streaming.
Samsung HW-Q990F — the full home theater
The big one (premium price): soundbar, subwoofer, and wireless rear speakers for true surround sound. Pairs beautifully with Samsung TVs — they work together as one system — and it automatically tunes itself to your room.
Best for: movie lovers who want the full cinema feeling at home.
Hooking one up, in plain words
Narrated tutorial: hooking up a soundbar.
HDMI ARC — the best way. Plug one end of an HDMI cable into the soundbar and the other into the TV port labeled “ARC” or “eARC.” This one cable carries the sound and lets your TV remote control the volume.
Optical — the backup. If your TV has no ARC port, use the optical cable — a thin cable with a little square plug. It carries sound only, so you may need the soundbar remote for volume.
Place it centered. Set the bar right under the TV, centered, with nothing blocking its front. If it came with a subwoofer, set that box on the floor nearby — it connects on its own.
Pick the right input — once. Use the soundbar remote one time to select HDMI (or optical). After that, the TV remote runs everything.
Tell the TV to use the soundbar. On your TV remote, open Settings, then Sound, and change it from “TV speakers” to your soundbar — it may be called “external speakers,” “ARC,” or the optical port. Without this step you may hear nothing at all.
What matters most for seniors
A voice or dialogue mode. The single most important feature — it makes speech clearer without making everything louder.
One remote. With HDMI ARC, your regular TV remote controls the soundbar too. Fewer remotes, fewer headaches.
Simple beats fancy. You do not need rear speakers and ten sound modes to hear the news clearly. Start simple.
Match the bar to the problem. If hearing voices is the whole issue, a voice-focused bar (Polk, ZVOX) matters more than a famous brand name.
When to call Sean instead
Choosing between models before you buy — bring the room and I will match the right one.
Connecting it to your TV — HDMI ARC versus optical, and getting the sound working.
Getting your TV remote to control the soundbar’s volume.
Fixing lip-sync, where voices do not match lips on screen.
How to connect a soundbar Easiest: one HDMI cable from the soundbar to the TV's HDMI port labeled "ARC," then turn on ARC/CEC in the TV's sound settings. No ARC port? Use the optical (Toslink) cable instead — same idea, one cord.
TV volume too low / can't hear dialogue First, look for a "Clear Voice," "Dialogue," or "Speech" mode in the TV's sound settings — it boosts voices specifically. Turn off any "surround" or "3D sound" mode, which buries dialogue. If voices are still muddy, that's exactly what a $100 soundbar fixes; it's the most common senior TV complaint there is.
Pause, rewind, and fast forward
Every remote and every streaming app has the same basic playback buttons. Once you know what each one does, they work the same everywhere — on your TV, your phone, and your computer.
The five buttons to know
Play / Pause (▶ / ❚❚) — one button that toggles. Tap once to freeze the picture, tap again to resume. This is the same button doing both jobs.
Rewind (◀◀) — goes backward. Each tap usually jumps back 10 seconds; holding it down scans backward faster.
Fast forward (▶▶) — goes forward. Each tap usually jumps ahead 10 seconds; holding it down scans forward faster. You can also say fastforward as one word — it means the same thing.
Skip back / Skip forward (curved arrows) — jumps a fixed amount, usually 10 or 30 seconds. Handy for replaying something you missed.
Stop (■) — ends playback completely and goes back to the menu. (Many streaming remotes skip this button — just press Back instead.)
On a phone or tablet, tap the video once to make the buttons appear, then tap rewind or fast forward. Tap again to hide them.
When to call Sean instead
The picture freezes but the sound keeps going (or the reverse).
Rewind and fast forward do nothing on one particular app.
Projectors: the big-screen alternative
A projector throws a huge picture onto a wall or screen — 100 inches or more, far bigger than any TV for the money. It is a popular choice for movie nights and for people who want a giant picture without a giant TV dominating the room.
What you need to know
Brightness matters most. Projectors are measured in lumens — higher means a brighter picture that survives room light. For a living room with some light, look for at least 2,000 lumens. A dark room can use less.
You need a surface. A plain white or light-gray wall works fine to start. A dedicated projector screen gives a sharper picture and costs less than you might expect.
Sound is separate. Most projectors have tiny built-in speakers. Plan on a soundbar or speaker — the same ones in the soundbar section work here.
Plug in a streaming stick. A Roku, Fire Stick, or Xumo box plugs into the projector's HDMI port and gives you all the same apps as a smart TV.
A projector needs a fairly dark room to look its best — it will never beat a TV in a bright sunny room.
When to call Sean instead
Picking a projector for your room size and lighting.
Mounting it on the ceiling or running the cables neatly.
Getting the sound working through a soundbar or speakers.
A TV headset sends the TV's sound straight to your ears. You hear every word clearly — without turning the TV up loud for everyone else. If you keep asking “what did they say?” while others say it sounds fine, this is the fix.
Why a headset helps
Modern TVs are thin, so their speakers are tiny and often fire backward off the wall. Music and sound effects drown out the talking. A headset puts the sound right at your ears, and everyone else can listen at their own volume — or mute the TV entirely.
The four worth knowing
TV Ears — simplest of all
This is the one I point most people to. Made for this one job: their headsets connect to almost any TV, clarify voices, and let you set your own volume while others listen normally. The popular Digital model is plug-and-play — no pairing, no apps. Their dual model lets two people listen at once, each with their own volume. Best if: you want the simplest thing that works.
Sennheiser RS 175 — best sound quality
If sound quality matters most, this is my answer. A wireless system with its own transmitter box that plugs into the TV's optical or audio output. The over-ear headphones have surround and bass buttons, stay comfortable through long movies, and you can walk to the kitchen without losing sound. Best if: you want the best sound and the freedom to move around.
Bose TV Speaker — the whole room hears better
One honest note first: Bose does not sell a headset made just for TV. Their fix is the Bose TV Speaker — a small soundbar with a Dialogue Mode button that lifts voices out of the background noise. It helps everyone in the room, not just one listener. Best if: you want one simple upgrade the whole room benefits from.
Sony WH-1000XM5 — one great pair for everything
Top-rated noise-canceling headphones that also pair to your TV over Bluetooth. Great sound, very comfortable, and they work with your phone and travel too (a newer XM6 model also exists). One honest catch: regular TV Bluetooth can lag slightly behind lips on some TVs — Sony's own TVs handle it best. Best if: you want one great pair of headphones for everything.
How they connect, in plain words
Narrated tutorial: how TV headsets connect.
Optical cable. A small square-ish plug from the TV to the headset's base — the most reliable sound. TV Ears and Sennheiser both support it.
Dedicated transmitter. A little base box sits by the TV and sends wirelessly to the headset — no lag, and you can walk around the house.
Bluetooth. Pairs like a phone does — convenient, but on some TVs the voices lag slightly behind the lips.
What matters most for seniors
Dialogue clarity beats loudness. Voice-clarifying tech (TV Ears) or a Dialogue Mode (Bose) helps more than just turning it up.
Comfort. Lightweight under-chin style (TV Ears) or soft over-ear cushions (Sennheiser, Sony) for long movies.
Simple controls. Volume right on the headset — avoid anything that needs an app for basic listening.
Hearing the room. Closed headphones block the doorbell and conversation. Some Sony modes let room sound in, and TV Ears' style leaves your ears open.
Hearing aids.TV Ears are designed to be worn with hearing aids in. Over-ear models can press on them — try before you commit.
When to call Sean instead
Connecting a headset to your specific TV — optical, Bluetooth, or another output.
Choosing between models before you buy — bring the room and I will match the right one.
Setting it up so the TV speakers and the headset both behave the way you want.
Fixing Bluetooth lag where voices don't match lips.
Smart Home
Voice assistants, smart lights, thermostats, and robot helpers.
An AI assistant is like texting a very knowledgeable helper. You type or speak a question, and it writes back an answer. It is not a person — it is a computer program that has read an enormous amount of writing and predicts the most helpful reply. There are five big names. They all do the same basic job.
The five big names
Each one has a free version. You do not need to pay to try any of them.
ChatGPT — by OpenAI
The most famous one. A good all-rounder for questions, writing help, and explaining things simply.
How to open it: type chatgpt.com into your web browser, or install the free ChatGPT app on your iPhone or Android phone. Sign up with your email.
Cost: free with limits. A paid plan called Plus is around $20 a month. Prices change, so check before you buy.
Microsoft Copilot — by Microsoft
The one already on your Windows computer. Handy because there is nothing to install.
How to open it: click the Copilot button on the taskbar at the bottom of your screen, or hold the Windows key and press C. It is also built into the Edge web browser — look for the Copilot mark in the top corner.
Cost: free for everyday use. An optional Pro plan is around $20 a month, which most people do not need.
Gemini — by Google
The one already on Samsung and other Android phones. It replaced the old Google Assistant.
How to open it:press and hold the side button on your phone, then type or speak your question. On a computer, go to gemini.google.com and sign in with your Google account.
Cost: free. A paid plan is around $20 a month. Prices change, so check before you buy.
Claude — by Anthropic
Known for clear, careful answers. A favorite for writing help and explaining things in plain words.
How to open it: go to claude.ai in your web browser and sign up with your email — no credit card needed for the free version. There is also a free Claude app for phones.
Cost: free with limits. A paid plan called Pro is around $20 a month.
Grok — by xAI
Elon Musk's helper. It lives inside the X app (the one that used to be called Twitter), and it also has its own website and app.
How to open it: go to grok.com in your web browser, or open the X app on your phone and look for Grok.
Cost: free with usage limits. The paid plan is around $30 a month — the priciest of the five. Prices change, so check before you buy.
Which one is easiest to start with?
Start with the one already on your device
On a Windows computer? Start with Copilot — it is already there on the taskbar.
On a Samsung or Android phone? Start with Gemini — hold the side button.
On an iPhone? If your iPhone has iOS 27, Apple's own assistant Siri AI is already built in — look for the Siri app. Otherwise, install the free ChatGPT app from the App Store, or try Claude at claude.ai in your browser.
They are all free to try. Pick one, ask it a simple question, and see how you like the answers. You can always try another.
Opening one for the first time
The steps are nearly the same for all five.
Narrated tutorial: open your web browser; type the address and press Enter; sign up or sign in; type your question; read the answer.
Open your web browser — Edge, Chrome, or Safari.
Type the address — for example, chatgpt.com — and press Enter.
Sign up or sign in. Most ask for your email address and send you a code to type in. None of the free versions ask for a credit card.
Type your question in the box at the bottom and press Enter or tap the send arrow.
Read the answer. If it is not quite right, say so in plain words. “Explain that more simply” works wonders.
Good uses
Things they do well
Writing help — drafting a letter, a message, or a note.
Looking things up — quick answers without digging through websites.
Explaining simply — ask it to explain anything “in simple words.”
Translating — turning words from one language into another.
Ideas and planning — recipes, trip ideas, gift ideas.
What to watch out for
AI is useful, but it has limits. Knowing them keeps you safe.
Narrated tutorial: it can be confidently wrong; never share private information; scammers can fake voices — hang up and call back.
It can be wrong — confidently wrong. It sometimes states false things as fact. For anything important — health, money, legal matters — double-check elsewhere or ask me.
Never share private information. No passwords, no bank account numbers, no Social Security number, no medical details. Treat it like a stranger you just met.
Scammers can now fake voices. A caller can sound exactly like a grandchild begging for money. If that happens: hang up and call the person back on the number already saved in your phone. A real emergency survives a two-minute check.
A family code word
Agree on a secret word with your family for real emergencies. A cloned voice cannot guess it. No code word, no money — hang up and call back.
When to call Sean instead
An AI answer told you to change a setting or download something and you are unsure — check with me first.
You want help picking one and setting it up on your phone or computer.
ChatGPT Install the free ChatGPT app from the App Store, or try Claude at claude.ai in your browser.
Claude Install the free ChatGPT app from the App Store, or try Claude at claude.ai in your browser.
Gemini Start with Gemini — hold the side button.
Secret word Agree on a secret word with your family for real emergencies.
An Alexa device is a small speaker — or a speaker with a screen — that listens and helps. You say "Alexa," then ask a question, play music, set a timer, or turn off the lights. Amazon makes a whole family of them, from a $40 speaker to a big kitchen screen. Here is every one, in plain words.
Speakers (no screen)
These play music, answer questions, and control your smart home by voice. No screen — just sound.
Echo Pop — cheapest of all
The smallest, cheapest Echo — around $40. Fits on a nightstand or bathroom shelf. It is the same Alexa with a smaller speaker, so it is best for a second room or a first try.
Echo Dot — the classic
The round speaker most people picture — around $80, after Amazon raised Echo prices in August 2026 (it used to be $50). Good sound for its size, and it comes in a version with an LED clock on the front. The safe default pick.
Echo Dot Max — bigger sound, still small
New in late 2025 — around $120. Two speakers and much deeper bass than the Dot, still compact enough for a shelf. The one to get if music matters but space is tight.
Echo — the full-size one
The bigger ball-shaped speaker — around $100, and it goes on sale often. Room-filling sound, and it doubles as a smart-home hub, so some gadgets connect straight to it with no extra bridge needed.
Echo Studio — best sound Amazon makes
Around $220. The music-lover's Echo — big, rich sound with Dolby Atmos that fills a living room. Overkill for the kitchen; perfect where you really listen.
Smart displays (with a screen)
Everything the speakers do, plus a touchscreen for video calls, photos, recipes, and the weather at a glance.
Echo Spot — the bedside clock
Around $110. A smart alarm clock with a small screen — time, weather, and song titles at a glance. It has no camera, which is why many people prefer it on the nightstand.
Echo Show 5 — the smallest screen
Around $100. A 5.5-inch screen — fine for a nightstand clock or kitchen timer, but small for video calls and recipes.
Echo Show 8 — the sweet spot
Around $200. An 8.7-inch screen with a sharp 13-megapixel camera — the best all-rounder for video calls, photos, and the kitchen counter. The newest version arrived in late 2025.
Echo Show 11 — the new mid-size
Around $250. An 11-inch screen that replaced the old rotating Echo Show 10. One honest note: unlike the old one, the screen does not rotate, and there is no physical cover over the camera — it switches off in software only.
Echo Show 15 — the wall screen
Around $350. A big 15.6-inch screen made to hang on the wall like a picture — family calendar, photos, video calls, and Fire TV built in.
Echo Show 21 — the biggest
Around $500. A giant 21-inch screen for the kitchen or living room wall. Wonderful — and priced like the small TV it nearly is.
You may also see the Echo Hub (around $180) — a thin wall panel for controlling smart-home gadgets. Handy, but its speakers are weak: it is a controller, not a music speaker.
How to choose
Match the device to the room
Bedroom or office?Echo Dot or Echo Pop. Small, affordable, plenty loud.
Love music?Echo Dot Max or Echo Studio. The Studio fills a living room.
Want video calls with family? Pick a screen — the Echo Show 8 is the sweet spot.
Kitchen?Echo Show 11 or 15 — recipes on screen, timers you can see.
A word about prices
Amazon raised Echo prices in August 2026 — some went up a lot (the Echo Dot jumped from $50 to $80).
Echo devices go on sale constantly — holidays, Prime Day, and random weeks. If you can wait, you will almost always pay less than the list price.
Prices here are "around" prices. Check the current price before you buy.
Alexa+ — the smarter Alexa
In 2026 Amazon rolled out Alexa+, a much smarter Alexa that holds real conversations and remembers context instead of just answering one question at a time. It is free if you have Amazon Prime, or $19.99 a month without Prime. The newest devices — Dot Max, Studio, Show 8, and Show 11 — were built for it.
The competition
Google Nest Hub — the main rival
Google's smart display (around $100) with a 7-inch screen — lovely for Google Photos slideshows and video calls through Google Meet. Google also released a new Google Home Speaker (around $100) in 2026. Pick this one if your world is Google — Gmail, Google Photos, Android.
Meta Portal — discontinued
Facebook's Portal smart displays were discontinued for consumers at the end of 2022. If you already own one, you can still call family and friends, but Meta is slowly removing features and will never add new ones. Do not buy a used one expecting a full smart display.
What seniors use them for most
Video calls. "Alexa, call" plus a name, on any Echo Show — the grandkids appear on screen.
Photo slideshows. A Show on the counter cycles through your pictures — like a digital frame that also talks.
Reminders and timers. "Alexa, remind me to take my pills at 8." "Alexa, set a timer for 20 minutes."
Voice control. "Alexa, turn on the living room lamp" — works with smart bulbs and plugs.
Answers and music. The weather, the news, "how many cups in a quart," and any song you can name.
When to call Sean instead
Setting up the device and connecting it to your Wi-Fi and Amazon account.
Linking your smart bulbs, plugs, or thermostat so Alexa can control them.
Setting up video calling so the grandkids are one voice command away.
Choosing between models before you buy — bring the room and I will match the right one.
Cortana was Microsoft's voice helper, similar to Alexa or Siri. Microsoft has retired her from most devices, so if you hear the name, it is mostly history now — Alexa, Siri, and Google Assistant are the ones in use today.
What is Google Home / Nest speaker Google Home (now called Nest Audio) is Google's version of the Echo — you say "Hey Google" instead of "Alexa." It's better at answering general-knowledge questions; Alexa is better at shopping and smart-home gadgets. For most seniors, either works — pick the one matching the phone you have (Google for Android, Alexa is fine with iPhone too).
Alexa isn't responding First, check the light ring: red means the microphone is muted (press the mic button to unmute). No light at all means it's unplugged or the outlet died. If the ring is spinning blue forever, it's stuck on Wi-Fi — unplug the Echo for 30 seconds and plug it back in.
Is Alexa always listening (privacy) The Echo is always listening FOR its wake word ("Alexa") — that's done on the device itself. It only records and sends audio to Amazon after it hears the wake word. If that still bothers you, the microphone-off button (it turns the ring red) physically disconnects the mics.
How to make calls with Alexa "Alexa, call [name]" works if that person is in your phone contacts and has the Alexa app — it rings their Echo or phone, free. It can't call 911 or most business numbers, so keep a real phone for emergencies. Set it up once in the Alexa app under Communicate, and it just works after that.
Smart speaker vs smart display (Echo Show) A smart display (Echo Show, Google Nest Hub) is a smart speaker with a screen — it shows the weather, your Ring doorbell video, recipes step-by-step, and video calls. Around $90-$250 depending on size. For seniors, the screen is the point: video calls with grandkids and seeing who's at the door beat voice-only.
Smart bulbs and smart plugs let you control lights and lamps from your phone or your voice. No rewiring, no electrician — you screw in a bulb, or plug a small adapter into the wall outlet, and the lamp across the room answers to “turn on the living room lamp.”
What they do for you
Narrated tutorial: turn lamps on and off from your chair; put lights on a schedule; make the house look lived-in.
Turn lamps on and off from your chair. A phone app or a voice command — no more getting up, and no more fumbling for a lamp in the dark.
Put lights on a schedule. Porch light on at dusk, bedroom lamp off at bedtime — automatically, every single day.
Make the house look lived-in while you travel. Lamps that turn on and off by themselves are the simplest vacation protection there is.
Dim without new switches. Many smart bulbs dim from the app — soft evening light with no rewiring.
Smart bulbs: the names to know
There are two kinds: bulbs that need a small hub box, and bulbs that connect straight to your Wi-Fi with no hub at all.
Philips Hue — needs a hub
The best-known smart bulb. Most Hue setups use a small Hue Bridge box that plugs into your internet router — the bulbs talk to the bridge, and the bridge talks to your phone. Very reliable, and it works with Alexa, Google, and Apple Home. Without the bridge, a Hue bulb only works over Bluetooth for a few nearby bulbs.
Worth it if you plan to do many rooms. For one or two lamps, a hub-free bulb below is simpler and cheaper.
Wi-Fi bulbs — no hub needed
Brands like TP-Link Kasa and Tapo, Govee, and Wyze make bulbs that connect directly to your home Wi-Fi — no extra box to buy or plug in. Screw it in, open the brand's app, connect, done.
Stick to a handful of Wi-Fi bulbs — dozens of them can crowd a basic router.
LIFX — bright, no hub
Very bright Wi-Fi bulbs with rich color, also hub-free. A good pick when you want strong, vivid light from a single bulb.
Warm white or cool white?
Warm white is the cozy yellowish light of a regular living-room lamp — pick it for bedrooms and living rooms.
Cool white or daylight is the crisp, brighter light — better for kitchens, reading chairs, and work areas.
Most smart bulbs let you slide between warm and cool in the app, so you never have to choose once and for all.
Smart plugs: the names to know
A smart plug is a small adapter that goes into your wall outlet — then you plug your lamp into the adapter. The lamp becomes “smart” without changing the lamp. Perfect for lamps behind furniture that are a pain to reach.
Wemo by Belkin
Two things to know. First: Belkin shut down the Wemo cloud service in January 2026 — older Wemo plugs that were set up in the Wemo app lost their app control, schedules, and voice control. If your Wemo plug suddenly stopped working, that shutdown is why. Second: the newer Wemo Smart Plug with Thread still works fine, and it sets up through the Apple Home app on an iPhone — no Wemo app needed, and it never worked with the Wemo app anyway.
Setting it up:
Narrated tutorial: setting up a Wemo smart plug with the Apple Home app.
Plug it in and press the power button. Wait for the light to blink white and orange, back and forth.
Hold the unlocked iPhone near the plug (upper back of the phone) and follow the prompts that pop up.
No prompts? Open the Home app, tap +, tap Add Accessory, and type in the 8-digit HomeKit code printed on the quick-start guide.
Name it by room — “Porch light” — then say “Siri, turn on the porch light.”
Fastest with a HomePod mini or Apple TV 4K nearby (that unlocks Thread); without one it uses Bluetooth. To control it while away from home you need a home hub: HomePod, Apple TV, or iPad. Stuck? Unplug it and plug it back in to restart; hold the power button 5 seconds (until the light blinks white) to factory-reset it.
Amazon Smart Plug
Amazon's own plug, and the smoothest setup of the bunch for Alexa households. Setting it up:
Narrated tutorial: setting up an Amazon Smart Plug with the Alexa app.
Install the Alexa app on your phone and sign in to your Amazon account.
Plug the smart plug into the wall.
In the Alexa app, tap More (bottom menu), then Add Device, then Plug, then Amazon.
When asked, scan the QR code on the printed quick-start guide (not the barcode on the box). Follow the remaining prompts.
Connect it to your 2.4GHz Wi-Fi when asked, then name it by room — “Bedroom lamp.”
Say “Alexa, turn on the bedroom lamp.” An Echo speaker makes voice control effortless, but the app alone works too.
Alexa-only: it will not work with Google Home or Apple HomeKit. To reset it, press and hold the button for 10 seconds until the light blinks red and green.
TP-Link Kasa and Tapo
A solid all-around alternative: no hub, connects straight to Wi-Fi, and set up in the Tapo app (which now handles Kasa devices too). Timers, schedules, and a vacation mode. Works with Alexa, Google, and Apple Home — the flexible pick when a home is not all-Alexa or all-Apple.
Safety: what never goes in a smart plug
Never plug in a space heater, air conditioner, hair dryer, or electric kettle — they draw too much power and can overheat the plug. This is a fire risk.
Smart plugs are for lamps and small electronics: table lamps, floor lamps, fans, radios.
Outdoor lights need an outdoor-rated smart plug — indoor plugs must stay dry.
The one setup gotcha: 2.4GHz Wi-Fi
Narrated tutorial: connecting to 2.4GHz Wi-Fi during setup.
Almost every smart bulb and plug only speaks to the 2.4GHz part of your Wi-Fi — not the faster 5GHz part your phone probably uses. If a bulb or plug refuses to connect during setup, this is almost always the reason.
Stand near your router with your phone during setup — many routers sort this out on their own when you are close.
If it still will not connect, look in your Wi-Fi list for a network name ending in something like “_2G” — that is the 2.4GHz side. Join it on your phone just for the setup, then switch back afterward.
Some routers use one name for both bands. In the router's settings you can temporarily turn off the 5GHz band (sometimes called “band steering”) during setup, then turn it back on after.
Once the bulb or plug is set up, you are done. It stays connected on its own, and your phone can go back to 5GHz — everything still works.
Name things by room. Call each bulb or plug what it controls — “Porch light,” “Bedroom lamp” — so voice commands feel natural: “Alexa, turn on the porch light.”
Good first uses
Narrated tutorial: voice control from the couch; dusk-to-dawn porch light; one bedtime command.
Voice control from the couch. “Alexa, turn on the living room lamp.” Works with Alexa, Google, and Siri once the device is linked — the bulb or plug app walks you through the linking step.
Dusk-to-dawn porch light. Put the porch light on a schedule so it is on when it gets dark — no more coming home to a dark doorway.
Bedtime, one command. A routine like “goodnight” can switch off every lamp at once.
Vacation mode. Lamps turn on and off on a varied schedule while you are away, so the house looks occupied.
When to call Sean instead
The bulb or plug will not connect and the 2.4GHz steps above did not fix it.
Router settings feel out of your depth — this is a quick visit.
You want a whole room, or the whole house, done at once.
8-digit HomeKit code Open the Home app, tap +, tap Add Accessory, and type in the 8-digit HomeKit code printed on the quick-start guide.
What is a Ring doorbell A Ring doorbell replaces your doorbell with one that has a camera — when someone rings, you see and talk to them on your phone, wherever you are. The battery version is around $100 and screws on in 15 minutes; the wired version uses your existing doorbell wires. Saving videos needs a Ring subscription (about $5 a month); without it, you still get live view and alerts.
Do I need the Ring subscription Without the subscription (about $5/month), you still get motion alerts and live video when someone rings — you just can't save or rewind clips. If you only want to see who's at the door right now, skip it. If you want evidence of a package thief from yesterday, you need it.
What is a video doorbell (generic) A video doorbell is a doorbell with a camera and speaker — you see who's there on your phone and can talk to them ("just leave it by the door") without getting up. Ring is the famous brand; Blink, Wyze, and Google Nest make cheaper ones. All of them need your Wi-Fi to reach the front door.
What is a Nest thermostat The Nest thermostat replaces your wall thermostat and learns your routine — turning the heat down when you leave and back up before you're home. It shows the temperature in big numbers and you can change it from your phone. Around $130-$250 depending on the model, and it typically trims 10-15% off heating and cooling bills.
Can a smart thermostat save money Yes — about 10-15% on heating and cooling, because it stops heating an empty house and learns your schedule instead of you remembering to adjust it. At typical Florida power bills, a $170 thermostat pays for itself in roughly a year. The savings come from the scheduling, not from anything magical — a programmable thermostat you actually program does nearly as well.
What is Philips Hue / smart bulbs Smart bulbs (Philips Hue is the famous brand) screw in like normal bulbs but you control them from your phone or voice — dimming, schedules, even color. A starter set with the hub runs around $70-$100; single bulbs $15-$25. Cheaper brands (Wyze, Govee) do the same basics for less.
What is a smart lock / are they safe A smart lock replaces your deadbolt with one you open by code, phone, or fingerprint — no key to lose (around $150-$250). They're as safe as a good regular deadbolt against break-ins; the real risk is a dead battery, so change them yearly and keep a physical key hidden outside. Great for letting family in with their own code instead of copying keys.
What is Blink (Amazon cameras) Blink is Amazon's budget camera brand — battery cameras that last up to two years on one set of batteries, around $35-$100 each. They cover the basics (motion alerts, live view, night vision) with almost no maintenance. Saving clips needs a small subscription (about $3/month per camera) or their Sync Module with a USB stick.
What is Arlo Arlo makes premium wireless security cameras — sharper video than Ring or Blink, around $130-$200 per camera. They're the pick when you want the clearest picture of who's at the door (faces and license plates). Like the others, saving video history needs a subscription, around $8-$13 a month.
Do security cameras need Wi-Fi Almost all of them, yes — Ring, Blink, Wyze, and Arlo all send video over your Wi-Fi to your phone. No Wi-Fi, no alerts and no remote viewing. The camera needs a solid signal wherever it's mounted, which is why doorbell cameras struggle on houses where the router is far from the front door.
Where do camera videos go (cloud vs local) Most cameras upload clips to the company's servers ("the cloud") — you watch them in the app, and that's what the $3-$13 monthly subscription pays for. Some (Blink with Sync Module, Wyze with SD card) can save to a memory card or USB stick in your house instead, with no monthly fee. Cloud is easier; local is cheaper long-term.
What is a robot vacuum (generic) A robot vacuum is a flat disc that vacuums your floors by itself on a schedule — you just empty its bin (or its dock empties it for you on fancier models). Around $150-$600 depending on features; the sweet spot for most homes is $250-$350. They don't replace a deep clean, but they keep floors presentable between real vacuumings, which is the whole point.
Do I need a hub for smart home devices Mostly not anymore — most current gadgets (Ring, Hue with Bluetooth, Echo devices) connect straight to Wi-Fi or to each other. You only need a hub if you're buying older Z-Wave/Zigbee gear or want one app for a big mixed system. Start hubless; add one later only if something you buy demands it.
A smart thermostat is a thermostat you can control from your phone. Change the temperature from the couch, from bed, or from across town.
Do you even need one?
It can lower your bills. Heating and cooling are about half of the average home energy bill. Certified smart thermostats save around 8% on that, according to ENERGY STAR.
It adjusts itself. These thermostats learn when you are home, away, and asleep — then set the temperature for you.
Honest advice: if your current thermostat works fine and you are happy with your bills, you do not need to rush. This is a comfort upgrade, not an emergency.
1. Google Nest Learning Thermostat (4th gen) — about $280
The one that learns. It studies your routine for a week or two, then builds its own schedule. The big round dial is easy to turn and read.
Room sensor included. A small sensor goes in another room, so the temperature is right where you spend time — not just in the hallway.
Phones: the app works on iPhone and Android. It also answers to Google Home and Alexa.
Wiring: works in most homes without a C-wire. Use Google's compatibility checker before you buy.
2. ecobee Smart Thermostat Premium — about $250
The all-rounder. Big color touchscreen, and it works with Alexa, Google Home, andApple Home — the only one here that does all three.
Room sensor included. It can even tell when a room is empty, so it does not waste energy heating it.
Bonus: a built-in air quality monitor, plus an Alexa speaker in the thermostat itself.
Phones: the app works on iPhone and Android.
Wiring: includes a Power Extender Kit, so most homes without a C-wire are covered.
3. Honeywell Home T9 — about $170
The value pick. Room sensors and a clear color screen for about $100 less than the top two. From Honeywell, a name heating companies have trusted for decades.
Phones: the app works on iPhone and Android. It works with Alexa and Google Home.
Wiring: this one needs a C-wire (or an adapter). Check before you buy.
Narrated tutorial: Check your wiring first — use the compatibility checker before you buy.
The C-wire, in plain words
A C-wire is an extra wire behind your thermostat that gives it steady power. Some homes have one, some do not. I can check your wiring before you buy anything — a quick look behind the thermostat tells the whole story.
Narrated tutorial: Change the temperature from your phone — one big number, plus and minus.
Good to know for seniors
Big, clear displays. All three are easier to read than the tiny screens on old thermostats.
Simple apps. One big temperature number, plus and minus buttons. That is most of what you will ever tap.
Voice control. “Set the temperature to 74” works with Alexa or Google on all three.
Narrated tutorial: “Set the temperature to 74” — works with Alexa or Google.
Prices change. All three go on sale often — check the current price before you buy.
When to call Sean instead
You want to know if your home's wiring works with a smart thermostat.
You bought one and the screen will not power on.
You want it installed and set up without the hassle.
You are not sure which of the three fits your heating system.
A robot vacuum is a little disc that cleans your floors all by itself. You press a button — or set a schedule — and it roams the house, vacuuming (and on many models, mopping) while you do something else. It is a wonderful helper for seniors, pet owners, and anyone who would rather not push a heavy vacuum around.
What it does for you
Cleans on a schedule. Tell it to run every morning at 9, and your floors stay clean without you lifting a finger.
Gets under furniture. Its low, round shape slides under beds, sofas, and dressers where a regular vacuum cannot reach.
Finds its own way home. When the battery runs low, it drives back to its dock, charges up, and can pick up where it left off.
Stays out of trouble. Sensors keep it from falling down stairs, and smarter models steer around shoes, cords, and pet messes.
The features that matter, in plain words
Self-emptying base. The big one. After each run, the dock sucks the dirt out of the robot into a bag or bin in the base — you only deal with that every month or two instead of bending down to empty a tiny dustbin every day.
Smart mapping. Better models use a laser to learn your floor plan, so you can tell the app “clean just the kitchen” or mark rooms it should never enter.
Mopping. Many models vacuum and mop in one trip — handy if you have tile or hardwood. The best ones wash and dry their own mop pads in the dock.
Obstacle avoidance. Cameras and sensors help pricier models steer around cords, shoes, and pet waste instead of plowing through them.
App control and scheduling. Every model here is set up and scheduled from an app on your phone. Most also answer to Alexa or Google voice commands.
Upkeep. Even the smartest robot needs you sometimes: swap the base bag every month or two, pull hair off the brushes, and wipe the sensors now and then.
The five worth knowing
Dozens of robot vacuums exist, but these five cover every need — from simple and affordable to a do-everything flagship.
Roborock Qrevo Curv — best overall
The do-everything pick: strong vacuuming, very good mopping with spinning mop pads, and a dock that empties the dustbin, washes and dries the mop pads, and refills its water — all by itself. It steers around obstacles well and climbs over tall thresholds. Set up and scheduled from the Roborock app.
Premium price, but it is often on sale now that newer models are out — the sales make it a much easier yes.
Roborock Q7 M5 — best budget
The simple, affordable way in: reliable cleaning and accurate room mapping for a fraction of the flagship price, with a small charge-only dock. The trade-off is no self-emptying base on the standard model — you empty its bin yourself — and the mopping is basic.
There is a Q7 M5+ version that adds a self-emptying dock if you want the convenience without the flagship price.
Dreame L40 Ultra — best for pet hair
Built for homes with shedding pets: strong suction that pulls hair out of carpet, and a big dock bin so you are not changing bags constantly. Its mopping pads stay in the dock when they are not needed and lift away from carpet. Controlled from the Dreamehome app.
Mid-premium price — worth it if pet hair is your daily battle.
Eureka J20 — best for hard floors
If your home is mostly tile or hardwood, this is the mopping champion: a roller mop that constantly rinses itself with clean water instead of pushing dirty water around. The dock drains, refills, and washes and dries the mop for you.
Premium price, and the dock is on the bulky side — give it a permanent parking spot.
iRobot Roomba Combo j9+ — the familiar name
Roomba is the name everyone knows. This one vacuums and mops, empties itself into its Clean Base, and its mop pad flips up out of the way on carpet. It is famously good at dodging pet waste. Set up from the iRobot Home app.
One honest note: iRobot went through bankruptcy in late 2025 and is now under new ownership. Existing Roombas still work fine and new models are still being sold — just buy from a store with a good return policy.
How to choose
Start with your home, not the specs
Mostly tile or hardwood? Pick a strong mopper — the Eureka J20 or the Roborock Qrevo Curv.
Pets that shed? The Dreame L40 Ultra was made for you.
Want simple and affordable? The Roborock Q7 M5 keeps it easy.
Want one machine that does it all? The Roborock Qrevo Curv.
Stairs? No robot vacuum does stairs — cliff sensors keep it safely on one floor. You will still want a regular vacuum for steps.
What matters most for seniors
A self-emptying base. This is the quality-of-life feature: no bending down to empty a tiny dustbin every day. Worth paying extra for.
A simple app. Fancy specs mean nothing if the app confuses you. All five of these have straightforward apps — and I can set yours up with you.
A Wi-Fi pairing tip. Robot vacuums connect to the 2.4 GHz flavor of your Wi-Fi, not the faster 5 GHz one. If pairing keeps failing, that is almost always why — I sort this out in minutes.
It maintains, not deep-cleans. A robot vacuum keeps clean floors clean. For a once-in-a-while deep clean — thick rugs, stairs, upholstery — you will still want a regular vacuum.
When to call Sean instead
Choosing between models before you buy — bring your floor plan and I will match the right one.
Wi-Fi pairing that will not cooperate, or an app that keeps asking for things you do not understand.
Setting up schedules, no-go zones, and room-by-room cleaning the easy way.
A robot vacuum is a little disc that vacuums your floors by itself. You press a button — or set a schedule — and it roams the house, steers around furniture, and drives itself back to its charger when it is done. Three brand names come up again and again: Roborock, Shark, and iRobot Roomba. Here is how they honestly compare — including Roborock, the excellent brand most people have never heard of.
The three brands, simply
Roborock Saros 20The brand you may not know — reviewers rate it at the very top.
Roborock — about $240 to $2,600. The one you have not heard of. Roborock is a company from Beijing, China, and professional reviewers consistently rank its vacuums among the very best you can buy. Its secret is laser navigation — a tiny spinning laser on top that maps your whole home quickly and precisely, so it cleans in neat rows instead of bumping around. It is also famous for mopping: many models scrub hard floors with real mopping pads, and the fancier ones wash those pads with heated water all by themselves. The current lineup: the Q7 M5+ (about $280, the value pick reviewers love); the Q10 S5+ (about $240 to $550 on sale, strong suction for the money); the Qrevo S5V (lists about $900 but often on sale near $500 — reviewers call it top-tier for half the flagship price); the Qrevo 2 Pro (about $800, built for pet hair with a zero-tangle brush); the Qrevo CurvX (about $900); the Saros 10R (lists about $1,600, on sale near $900 — very strong suction in an ultra-slim body that fits under low furniture); the flagship Saros 20 (list price about $1,600 — sales have brought it near $1,500); and the Saros Z70 (list price about $2,600, though it is on deep sale now — it has a little robotic arm that picks up socks out of its path).
Shark AI Ultramy own brand — famous for hair that never tangles.
Shark — about $120 to $800. The familiar American brand. Shark (SharkNinja) is the brand I own myself. Its big claim to fame is the self-cleaning brushroll — hair does not wrap around it, which pet owners love. Shark is usually the best value of the three: solid cleaning for less money. The lineup is numbered, which actually makes it simple: ION 700 series (about $120 to $280, the budget starter); Navigator 2100 series (about $450 to $680); AI Ultra 2500 series (about $300 to $600, with laser navigation); Matrix Plus 2-in-1 2600 series (vacuums and mops); Stratos 2-in-1 2700 series; and PowerDetect 2800 series (the newest and smartest).
Roomba Max 875 ComboThe original robot vacuum brand — all new for 2026.
iRobot Roomba — about $170 to $1,200. The original. iRobot invented the robot vacuum, and the Roomba name is the one everyone recognizes. Its classic strengths: two rubber brushes instead of bristles (hair does not tangle), and a camera that spots and avoids obstacles — including the pet messes nobody wants smeared. The 2026 lineup is all new: the Roomba 105 Combo (about $170, the cheapest way in); Plus 415, 515, and 575 Combos ($600 to $800); Max 705, 715, and 775 ($700 to $1,000); and the brand-new flagships, the Plus 678 Combo ($899) and Max 875 Combo ($1,199), with a new SealForce system that presses down on carpet for deeper cleaning and a roller mop washed with heated water.
Head to head, in plain words
Finding its way. Roborock's laser mapping is the fastest and most precise — it learns your home in one run. iRobot's new flagships now use laser plus a camera too. Shark's pricier models have laser navigation; the budget ones find their way more simply and take a little longer.
Mopping. Roborock leads here — real scrubbing mops, and heated-water pad washing on the flagships. iRobot's new 2026 flagships mop with a heated roller and are catching up fast. Shark's 2-in-1 models vacuum and mop in one pass, but the mopping is simpler.
Emptying itself. All three sell bases that suck the dustbin clean for you, so you go weeks without touching dirt. Look for “self-empty” or “Plus” in the name.
The phone app. All three have apps for schedules, “don't go in there” zones, and naming rooms. All three answer to Alexa and Google voice commands. Roborock's app gets the most praise from reviewers.
Pet hair. This is the big one for many homes. Shark's brushroll is famous for never wrapping hair. Roborock's zero-tangle system and iRobot's rubber brushes solve the same problem their own way. Any of the three beats a bristle brush.
Prices change
Robot vacuum prices move around constantly — sales and holidays shift them all the time. The prices above are what these cost in late 2026. Check before you buy.
Which one is right for you?
Mostly hard floors, and you want real mopping — Roborock. Nothing else mops this well.
Pets, and you want the best value — Shark. The self-cleaning brushroll earns its reputation.
Deep carpet cleaning, or you trust the original brand — iRobot's new 2026 models, especially the Max 875 Combo.
Spend as little as possible — a Shark ION or the Roomba 105 Combo. Both do the daily floors just fine.
The full step-by-step setup for each brand — unboxing, the app, the first mapping run — is in the paid robot-vacuum guides in the store.
When to call Sean instead
You want help choosing the right one before you buy.
A smart lawn mower is a small robot that mows your grass by itself. It charges itself, follows a schedule you set on your phone, and trims a little bit every day so the lawn always looks neat. No pushing, no gas, and far quieter than a regular mower.
How they find their way
Boundary wire — a thin wire you lay or bury around the edge of your lawn. The mower senses the wire and stays inside. Simple and very reliable, but it takes an afternoon to install.
GPS and cameras — newer mowers use satellites and a camera to learn your yard, with no wire at all. You draw the boundary on your phone by walking the mower around once. Much easier to set up, but heavy tree cover can weaken the satellite signal.
1. Husqvarna Automower — the premium pick
Who makes it:Husqvarna, a Swedish company that has made mowers for decades. The longtime leader in robot mowers.
Example: the 435X AWD, around $3,000. Handles up to about 0.9 acres and climbs steep slopes other mowers cannot — the all-wheel drive is made for hilly yards. About as loud as a quiet conversation (60 dB).
How it navigates: GPS-assisted with a boundary wire. The wire makes it extremely reliable — it almost never gets lost or stuck.
Phone app:the Automower Connect app sets schedules, shows the mower on a map, and alerts you if it is lifted or moved.
Dealer install: most buyers have a local dealer lay the wire and set it up, and the dealer services it later. That hands-on help is part of what the higher price buys.
Best for: larger or hilly yards, and anyone who wants a dealer to handle everything.
2. Segway Navimow — the easy wire-free pick
Who makes it:Segway, the company behind the self-balancing scooters.
Example: the i105, around $799. Mows up to about 0.125 acres — a typical small-to-medium yard. Quiet, at 58 dB, and comes with a 3-year warranty.
How it navigates: no wire needed. It uses satellite positioning plus a camera to map your lawn. You set the boundary with your phone during a one-time walk-around.
Phone app:the Navimow app draws the map, sets schedules, and handles separate zones.
Best for: flat, simple yards where you want the easiest setup and the least fuss.
The honest limit: small yards only, and heavy tree cover can weaken the satellite signal it depends on.
3. Worx Landroid — the budget-friendly pick
Who makes it:Worx, a popular power-tool brand. Its mowers use the same 20V batteries as Worx's other tools.
Example: the WR155 handles up to half an acre with a boundary wire, and is often the cheapest way to try robot mowing. Newer Vision models skip the wire and use cameras and GPS, with larger models costing around $2,000 and up.
Phone app:the Landroid app sets schedules and zones over Bluetooth and Wi-Fi.
Best for: anyone who already owns Worx tools, or who wants the lowest-cost way to try a robot mower.
The honest limit: the older wire models can struggle on steep slopes; the newer wire-free models cost much more.
Prices change
Robot mower prices move with sales and new models. The prices here are from fall 2026 — check the current price before you buy.
What they cannot do
Edges still need trimming. The mower cannot cut right against fences and walls, so you will still need a string trimmer now and then.
Very steep or messy yards with thick sticks, toys, or deep ruts will stop most mowers.
They mow a little every day, not once a week — that is how they keep the grass healthy. The mower will be out on the lawn often, which is normal.
Blades wear out. The small razor blades need replacing every few months. They are cheap and snap in easily.
Theft and weather, in plain words
Theft: every major brand uses a PIN code and an alarm — the mower will not run for anyone who does not know the code, and Husqvarna adds GPS tracking in its app. Segway offers GPS tracking too, but on the i105 it needs an optional 4G add-on module — ask before you buy if that matters to you. A mower locked to your account is worthless to a thief.
Rain: they are built to work in the rain, and most have rain sensors that send them home in a downpour. In a bad lightning storm, unplug the charging station — the same as any outdoor electronics.
When to call Sean instead
You are not sure which mower fits your yard size and shape.
You want help setting up the app and the mowing schedule.
The mower keeps getting stuck or will not connect to Wi-Fi.
You want a second opinion before spending this much on a mower.
Health & Everyday
Watches, rings, medical portals, and apps for rides, reading, and the library.
A smartwatch is a watch that thinks a little. It tells the time, and it also shows your messages, lets you answer calls from your wrist, tracks your steps and sleep in the background, and — the feature many people buy it for — can call for help if it senses a hard fall and you do not answer.
What it does for you
Narrated tutorial: Messages and calls on your wrist — tap the watch to answer.; Health tracking, quietly — steps, heart rate, sleep, automatically.; Fall detection — no response and it calls for help by itself.
Messages and calls on your wrist. See who is calling or texting without digging the phone out of your pocket or purse. Tap the watch to answer.
Health tracking, quietly. Counts your steps, checks your heart rate, and records your sleep — all automatically, in the background.
Fall detection. If the watch senses a hard fall and you do not respond to its alert, it can call for help and notify your emergency contacts by itself.
Maps your walks. Built-in GPS records your walks and shows directions, without needing the phone in your hand.
The four names to know
There are four main choices — and the golden rule is: start with the phone you already own. The watch has to match the phone.
Apple Watch — iPhone only
The best-known smartwatch. Fall detection is built into every model from Series 4 onward, and it turns on by itself for anyone 55 or older once your age is in your Health profile. Every model except the budget SE also takes an ECG (heart-rhythm) reading from your wrist — the SE skips the ECG to keep the price down. If an ECG reading matters to you, step up to a Series or Ultra model. It only works with an iPhone — it will not pair with a Samsung or any Android phone. Plan on charging it every night.
Three levels: SE (budget, has the essentials), Series (mid-range, the most popular), Ultra (premium, bigger screen and longer battery).
Samsung Galaxy Watch — Android only
Samsung's watch for Android phones. Full health tracking: steps, heart rate, sleep, and sleep-apnea screening. It does not work with iPhones at all. Note: the ECG and blood-pressure features only unlock when paired with a Samsung phone, not just any Android. Expect to charge it every night or two.
Unlike the Apple Watch, fall detection is not on by default — turn it on in the Galaxy Wearable app under Watch settings → Safety and emergency → Hard fall detection, and add at least one emergency contact.
Google Pixel Watch — Android only
Google's watch, with Fitbit health tracking built inside. Includes fall detection and car-crash detection. It needs an Android phone and a Google account, set up through the Pixel Watch app — it will not pair with an iPhone. Battery lasts about a day and a half.
Some deeper health reports also use the Fitbit app, and a few extras sit behind an optional paid Fitbit Premium plan.
Fitbit by Google — works with both
Google owns Fitbit, so a Fitbit tracker is a Google product. It is the simplest choice: a slim band that counts steps, checks heart rate, and tracks sleep, with a battery that lasts about a week instead of a day. Fitbit devices work with both iPhones and Android phones. Setup needs two things on your phone: the Fitbit app and a Google account to sign in with — the old Fitbit-only accounts are retired, so a Google account is now required.
The Charge 6 is the current all-rounder (budget-friendly, with ECG and GPS). No app store and no speakerphone calls on most models — it is a health tracker first, a smartwatch second.
How to choose: start with your phone
The one rule
Have an iPhone? Your choices are Apple Watch or Fitbit by Google.
Have a Samsung or other Android phone? Your choices are Samsung Galaxy Watch, Google Pixel Watch, or Fitbit by Google.
What matters most for seniors
Narrated tutorial: Samsung: switch on fall detection by hand in the Galaxy Wearable app.; A screen you can read — bigger watch, bigger text.; Apple, Samsung, Google: charge nightly. Fitbit: about a week.
Fall detection. This is the safety feature that matters. Apple Watch, Galaxy Watch, and Pixel Watch all have it — just remember the Samsung one must be switched on by hand. Set up your emergency contacts when you first set up the watch.
A screen you can read. Bigger watch, bigger text. If small print is hard for you, skip the smallest sizes.
Battery life you can live with. Apple, Samsung, and Google watches need charging roughly every night. A Fitbit by Google tracker lasts about a week — much less fuss.
Cellular or GPS-only? A cellular watch can call for help even when your phone is at home — but it adds a monthly charge from your phone carrier. A GPS-only watch needs your phone nearby to call out. For fall safety away from home, cellular is worth considering.
What matters less
Do not pay extra for rugged “Ultra” models or pro sports features unless you are hiking mountains. For everyday life, the regular models do everything above. And one honest note: a watch's fall detection calls emergency services, but it is not a staffed medical-monitoring service — if your doctor says you need one of those, keep it.
When to call Sean instead
Choosing between models before you buy — bring your phone and I will match the right watch to it.
Setting up fall detection and emergency contacts the right way.
The watch will not pair, will not charge, or keeps asking for things you do not understand.
Apple Watch Your choices are Apple Watch or Fitbit by Google.
Google Pixel Watch Your choices are Samsung Galaxy Watch, Google Pixel Watch, or Fitbit by Google.
Activity rings The three colored rings are Move (red — calories burned), Exercise (green — brisk minutes), and Stand (blue — hours you stood up). Closing all three each day is the goal, but the watch adjusts to you. It's gentle motivation, not a drill sergeant.
Charging the Apple Watch The Apple Watch charges on its little magnetic puck — snap the back of the watch onto it and a lightning bolt shows it's charging. It takes about an hour and a half for a full charge. Most people charge overnight and wear it all day.
Apple Watch water resistance Apple Watches survive splashes, rain, and swimming — they're water-resistant, not fully waterproof. Rinse it with fresh water after a swim, especially in the ocean or a pool. Don't take it deep diving, and skip the hot tub — heat and soaps wear the seals.
Cellular vs GPS Apple Watch A GPS Apple Watch needs your iPhone nearby for calls and internet. A cellular one has its own connection — you can leave the phone home and still call and text, for a monthly fee from your carrier. If your phone is always with you anyway, GPS is plenty.
The Digital Crown The Digital Crown is the little dial on the side of the Apple Watch — turn it to scroll, press it once for your apps, press and hold for Siri. It's the watch's main control alongside the touchscreen. Pressing it always gets you back home.
Changing the watch face Press and hold the watch face until it zooms out, then swipe to browse faces and tap the one you like — or tap the plus sign for more. Tap Edit (or the customize button) to change its colors and complications. Bigger, high-contrast faces are easiest to read.
Apple Watch heart rate & ECG The Heart Rate app on your watch shows your pulse anytime — open it and hold still. The ECG app (on newer watches) takes a 30-second heart reading you can share with your doctor. If it ever flags an irregular rhythm repeatedly, mention it at your next visit.
A smart ring is a health tracker you wear on your finger — like a wedding band with a tiny computer inside. It keeps an eye on your sleep, heart rate, and daily movement, then shows it all in an app on your phone. No screen. No buzzing. And no charging every night — most rings go about a week between charges.
Why a ring instead of a watch?
It is comfortable at night. Many people find a watch too bulky for sleep — a ring is one you forget you are wearing.
Nothing to tap or swipe. The ring quietly collects; you look at the results on your phone whenever you feel like it.
One charge lasts for days. Roughly a week for most rings, versus a day or two for many smartwatches.
The trade-off: there is no screen, no fall detection, and no emergency calling — if those matter to you, a smartwatch is the better pick.
The top 3, compared simply
1. Oura Ring 5 — the most polished
The best sleep and recovery insights of the three, in the easiest-to-read app.
Starts around $399. The catch: a $5.99-a-month membership (about $70 a year, first month free) unlocks the full app. Without it, you see far less.
About 6 to 9 days per charge. Works with iPhone and Android.
Pick it if: you want the deepest health picture and do not mind the monthly fee.
2. Samsung Galaxy Ring — simplest if you own a Samsung phone
No monthly fee — buy it once (around $399) and every feature is yours.
About 7 days per charge. Made for Samsung Galaxy phones (it works with other Android phones, but some features need a Samsung).
Pick it if: you already carry a Samsung phone and want tracking with zero ongoing cost.
3. RingConn Gen 2 — the best value
No monthly fee, and the lowest price of the three — around $299.
The longest battery: about 10 to 12 days per charge.
Works with iPhone and Android. Solid sleep tracking that keeps getting better.
Pick it if: you want the most ring for your money and hate subscriptions.
Sizing: try before you buy
Ring sizes are not the same as jewelry sizes — and fingers swell and shrink through the day. Every maker sends a free plastic sizing kit first. Wear the sizer for a day, including overnight, then order your real size. Skipping this step is the number-one reason rings get returned.
What the numbers really mean
Each morning the app gives you a sleep score and a readiness score — simple grades for how you slept and how recovered you are.
Watch the trend, not one night. Doctors say the pattern over weeks is what matters; one bad night means almost nothing, so never panic over a single score.
These are wellness trackers, not medical devices. They cannot diagnose anything. If a pattern worries you, take it to your doctor — that is what it is for.
A note if you wear a pacemaker
Oura itself advises anyone with a pacemaker or implanted heart device to check with their doctor before buying a smart ring. It is a quick question at your next visit — no need to worry, just ask first.
When to call Sean instead
You are not sure which ring fits your phone and your budget — I will talk it through with you.
You bought a ring and want help with the sizing kit, the app, or reading your scores.
The ring will not connect to your phone, or the app keeps signing you out.
Any health number in the app worries you — I can help you save it to show your doctor.
A smart scale tells you more than your weight. Step on with bare feet and it estimates your body fat, muscle, water, and more — then sends it all to an app on your phone so you can watch your trends over weeks and months.
How does it know your body fat?
The scale sends a tiny, harmless electrical signal up through your feet. Muscle and fat slow that signal down differently, so the scale can estimate what your body is made of. That word matters — see the honesty box below.
The top 3
1. Withings Body Smart — best overall (around $100). The reviewer favorite. Connects by Wi-Fi, so it sends your readings to your phone even when your phone is in another room. The free Withings app is clear and calm, works with Apple Health and Google Fit, and recognizes different family members automatically. No subscription needed — Withings sells an optional coaching plan, but the scale works fully without it.
2. Eufy Smart Scale P3 — most features for the money (around $100, often on sale for less). Tracks 16 measurements including body fat, muscle, heart rate, and BMI. Wi-Fi and Bluetooth both. The free EufyLife app is friendly, with a little 3D figure that changes as you do. Syncs with Apple Health, Google Fit, and Fitbit. Has a simple mode for pacemaker users that skips the electrical signal and just tracks weight.
3. RENPHO Elis 1 — best budget (around $30). Does the same basic job for a fraction of the price: 13 body measurements, a free app with charts, and syncing to Apple Health, Samsung Health, Fitbit, and MyFitnessPal. Uses Bluetooth, so keep your phone nearby when you step on. Tens of thousands of happy reviews.
An honest note about accuracy
Home scales give you estimates, not lab results. Your body-fat number can shift a little day to day with water, meals, and sleep — that is normal. What matters is the trend over weeks, not any single number. And if you have a pacemaker or are pregnant, use weight-only mode or check with your doctor first.
Getting started: the simple version
Narrated tutorial: Put the scale on a hard, flat floor — not carpet.; Install the scale's free app and make an account.; Step on with bare, dry feet — the numbers appear in the app.
Put the scale on a hard, flat floor — not carpet.
Install the scale's free app on your phone and make an account.
Step on with bare, dry feet, standing still. That is it — the numbers appear in the app.
Wi-Fi scales (Withings, Eufy) sync on their own. Bluetooth scales (RENPHO) need your phone close by with the app open. For the full step-by-step setup of each scale, see our detailed paid guides in the Store.
When to call Sean instead
The app will not pair with the scale no matter what you try.
Your readings look wildly wrong or jump around.
You want help picking the right scale before you buy.
Anything about your health numbers worries you — talk to your doctor, then call me for the tech part.
Body fat Step on with bare feet and it estimates your body fat, muscle, water, and more — then sends it all to an app on your phone so you can watch your trends over weeks and months.
A patient portal is your doctor's website or app. It is the private place where your test results land, where you can message your doctor's office, see your appointments, and request prescription refills — any time of day, without waiting on hold.
You do not get to pick which portal your doctor uses — each office chooses one. But the big ones all do the same everyday jobs, so once you learn one, the others will feel familiar.
The top 5
1. MyChart (by Epic) — the most common by far. Used by most large hospitals and health systems. View test results, message your care team, schedule appointments, request refills, pay bills, and even manage records for a family member. There is a free app for iPhone and Android.
2. Oracle Health Patient Portal (was Cerner/HealtheLife). Used by hospitals running Oracle's system. Book appointments, view doctor's notes, medication lists, and test results. The newest version can explain your results in plain language and answer questions about them.
3. athenahealth Patient Portal. Common at smaller doctor's offices and clinics. Same everyday jobs: results, messaging, appointments, refills, and bill pay.
4. FollowMyHealth (by Veradigm). Works with many different practices. View your health history and lab results, message providers, request prescription renewals, make appointments, and pay bills.
5. NextGen Patient Portal. Used by many independent practices. Results, secure messaging, appointment requests, and refill requests.
Getting signed up: the usual way
Narrated tutorial: Ask the front desk at your next visit — they can sign you up on the spot.; You'll get an activation code — often on your After Visit Summary.; Type it into the signup page to create your username and password.; No visit coming up? Sign up online with your name and birthday.
Ask the front desk at your next visit — they can sign you up on the spot or send you a signup link by text or email.
You will get an activation code (often printed on your After Visit Summary). Type it into the signup page to create your username and password.
No visit coming up? Many portals let you sign yourself up online by matching your name, birthday, and other details against your medical record.
Everyday things you can do
Read test results — they usually appear automatically, sometimes before your doctor has called.
Message your doctor's office — for non-urgent questions. Replies usually come within a business day or two.
Request prescription refills with a couple of taps.
Schedule appointments and fill out check-in forms ahead of time.
See your visit notes and medication list — handy to bring up at the next visit.
Your privacy
Portals are private and secure — protected by law (HIPAA) and by your password. Always sign out when you are done, especially on a shared or public computer. Never share your login with anyone except a trusted family helper you have formally approved.
When to call Sean instead
You lost your activation code or can't get signed in.
The portal's emails keep landing in your spam folder.
You want the app installed on your phone with notifications turned on.
Anything in the portal confuses you — I can walk through it with you.
Your library card is a key to free books, audiobooks, and movies. Three free apps — Libby, Kanopy, and Hoopla — let you borrow e-books, listen to audiobooks, and stream films using nothing but your library card. Everything is free and legal. No subscriptions, no late fees, ever.
Libby — free e-books and audiobooks
Libby, made by OverDrive, is the main way libraries lend digital books. If your library has Libby, you get thousands of e-books and audiobooks on your phone or tablet.
Narrated tutorial: Install Libby from the App Store (iPhone/iPad) or Google Play (Android). It is free.; Open Libby and tap “Yes, I have a library card.”; Search for your library by name, city, or zip code.
Install Libby from the App Store (iPhone/iPad) or Google Play (Android). It is free.
Open Libby and tap “Yes, I have a library card.” Search for your library by name, city, or zip code.
Enter your library card number and PIN. Card numbers here usually start with 21677. Do not have a card? Most libraries let you sign up free online or at the front desk.
Find a book. Use the magnifying glass to search by title or author, or browse the library's shelves by tapping the building icon.
Tap the book, then tap Borrow. The book lands on your Shelf. Tap it to start reading or listening.
To read on a Kindle: on your Shelf, tap Read With…, choose Read with Kindle, then tap Get Library Book on the Amazon page that opens. (Kindle sending works with U.S. libraries.)
Holds and returns, in plain words
Popular book checked out? Tap Place Hold to join the line. Libby tells you roughly how long the wait is and notifies you when it is your turn.
Books return themselves. When your loan period ends, the book goes back on its own. There are no late fees — that cannot happen.
Finished early? On your Shelf, tap Manage Loan, then Return Early, so the next person in line gets it sooner.
Kanopy — free streaming movies
Kanopy is a streaming service for thoughtful films, documentaries, and series — think film-festival picks and classics rather than the latest blockbusters. Your library pays for it, so it costs you nothing.
Silent step-by-step pictures: how Kanopy tickets work, how long you have to watch a film once you press play, and where the Kanopy app works.
How the tickets work: each month your library gives you a set number of tickets — often somewhere between 8 and 30. A regular movie costs 2 tickets, a big feature film costs 4, a short film costs 1.
Once you press play, you have about 2 to 3 days to watch it as many times as you like. Unused tickets do not roll over — they reset on the 1st of each month.
Kanopy Kids is unlimited — children's shows and movies for the grandkids cost no tickets at all.
Watch anywhere: the Kanopy app works on phones, tablets, Apple TV, Fire TV, Roku, Android/Google TV, and Samsung smart TVs.
Hoopla — movies, TV, music, and more
Hoopla is your library's all-in-one media app: movies, TV shows, music albums, audiobooks, e-books, and comics. Its big selling point is no waiting — everything is available instantly, no hold lines.
Silent step-by-step pictures: how Hoopla borrowing works, how long each kind of loan lasts, and where the Hoopla app works.
Your library sets a monthly limit — often somewhere between 2 and 8 borrows a month. Unused borrows do not carry over.
Loan lengths: movies and TV shows check out for about 3 days, music albums for 7 days, and audiobooks, e-books, and comics for 21 days.
Everything returns itself when the loan ends. No late fees, no fines, ever.
Watch or listen anywhere: the Hoopla app works on phones, tablets, computers, Apple TV, Fire TV, Roku, and Chromecast.
Check what YOUR library offers
Not every library has all three. Yours may offer Libby and Kanopy, or Libby and Hoopla, or just one of them.
Look on your library's website under “e-books,” “digital,” or “streaming” — or simply ask at the front desk. Librarians love this question.
You can use more than one at once. If your library offers both Libby and Hoopla, use Libby for popular books and Hoopla while you wait in a hold line.
Why seniors love these apps
Free is free. No subscriptions, no rentals, no surprise charges.
No late fees, ever. Everything returns itself automatically.
Bigger text: e-books let you make the print as large as you like.
Audiobooks for tired eyes: listen while you walk, cook, or rest.
No trips needed:borrow from your couch, at any hour.
When to call Sean instead
Installing Libby, Kanopy, or Hoopla and signing in with your library card.
Getting borrowed Libby books onto your Kindle.
Getting Kanopy or Hoopla playing on your TV.
A library card that will not sign in, or a forgotten PIN.
These apps bring rides, groceries, and restaurant food right to your door. No driving, no parking, no lines. You order on your phone, you see the price before you say yes, and you pay in the app — no cash changes hands.
What each app does
Uber: requests a ride from a nearby driver. Type where you are and where you want to go, and a driver picks you up in minutes.
Lyft: the same idea as Uber — a ride when you need one. Having both on your phone is handy because prices and wait times differ.
Uber Eats: restaurant food delivered to you. Browse local restaurants, order, and watch your food come to your door.
DoorDash: the same idea as Uber Eats, often with different restaurants. Independent drivers, called Dashers, make the deliveries.
Instacart: groceries from your favorite stores. A personal shopper shops for you and delivers, or you can order for pickup.
Getting set up (all five work the same way)
Narrated tutorial: getting set up with ride and delivery apps.
Install it: find the app in the App Store (iPhone) or Play Store (Android) and tap Install.
Make an account: enter your name, phone number, and email. The app texts you a code to prove the phone is yours.
Add a card: every app needs a credit or debit card on file. It is saved in your account and you are only charged when you order — never for just having the app. Never give your card number to a driver or to anyone who calls claiming to be the company.
Turn on location: the apps need to know where you are to send a driver or delivery to you. When your phone asks, choose While Using the App.
Getting a ride: Uber and Lyft
Narrated tutorial: getting a ride with Uber and Lyft.
Open the app. It usually guesses your pickup spot from your location — check that the address is right.
Type your destination (for example, "doctor's office" or the address).
Pick the kind of ride. The plain one (UberX or the standard Lyft) is the everyday choice.
You see the price before you confirm. If it looks fine, tap to request. If it looks high (prices rise when lots of people want rides), you can wait a few minutes and try again.
The app shows your driver's name, photo, car, and license plate, plus how many minutes away they are.
Ordering food: DoorDash and Uber Eats
Narrated tutorial: ordering food with DoorDash and Uber Eats.
Open the app and enter your delivery address.
Browse restaurants near you. Tap one, add dishes to your cart, and check out.
You see the full total before you place the order: food, delivery fee, service fee, tax, and your tip. Nothing is a surprise.
Track the order live: the app tells you when the restaurant starts cooking, when the driver picks it up, and when it is at your door.
DoorDash lets you schedule an order ahead of time instead of ordering right now. Uber Eats has a Pickup option if you would rather grab the food yourself and skip the delivery fee.
Ordering groceries: Instacart
Narrated tutorial: ordering groceries with Instacart.
Open the app and pick your store. Add groceries to your cart like a shopping list.
Choose a delivery time — as soon as possible, or schedule it for later.
A personal shopper shops for you and delivers. If an item is out of stock, they message you in the app with a replacement choice.
You can also order for pickup: the store gathers your groceries and you collect them, often without leaving your car.
Some stores mark prices up a little on Instacart versus in-store — you are paying for the convenience.
What it costs, honestly
Rides: the price depends on distance and demand. You always see it before you tap to confirm.
Deliveries: your total is food plus a delivery fee, a service fee, tax, and a tip you choose. Delivery fees and service fees go to the company — only the tip goes to the driver.
Tipping: a tip is not required, but it is how drivers and shoppers earn their living, and orders with a fair tip get picked up faster. Around 15–20% of a food order is a common guideline; Instacart suggests a default of about 5% for groceries.
Memberships: each app sells a monthly or yearly membership (Uber One, DashPass, Instacart+) that lowers fees if you order often. Skip it until you know you order enough to make it worth it.
Safety: your five-second checklist
Before getting into any ride, check three things: the license plate, the car's make and model, and the driver's photo — all shown in the app. If anything does not match, do not get in.
Ask, don't tell: ask the driver who they are picking up, instead of saying your name first.
Turn on the PIN: both apps can show a 4-digit code you give the driver before the trip starts (in Settings, look for Verify Your Ride or similar). The ride cannot begin until the code matches.
Share your trip: both apps can text your route to a family member or friend so someone knows where you are. Set this up once and it can run automatically.
Sit in the back seat and keep your seatbelt on, just like any car.
For deliveries: you can meet the driver at your door or choose contactless drop-off in the app. If anything is wrong with an order — missing items, wrong food — use the Help or Support button inside the app for a refund or credit.
If you ever feel unsafe, both ride apps have an emergency button in the app during a trip. Cancel the ride and report it in the app.
When to call Sean instead
Getting your account, card, or login set up the first time.
An app keeps charging you and you cannot tell why.
Confusion over a fare, fee, or membership you did not mean to buy.
Anything on these apps that feels wrong or scary — talk to a person first.
An iPad is a big iPhone without the phone calls. Same apps, same look — just a much bigger screen that is easier to read and tap. If the phone screen feels too small for your eyes or fingers, an iPad is the answer most of my clients love.
The two things that confuse everyone
There is no Home button on newer iPads. To go back to the main screen, put your finger at the very bottom edge and swipe up — one quick flick upward. It feels odd the first three times, then it feels natural.
The strip of apps at the bottom is the Dock. Those are your favorites — they stay there on every screen. Tap and hold any app icon, then drag it down to the Dock to park it there.
Making everything bigger
Open Settings → Appearance → Text Size and drag the slider up. (On older versions it is Settings → Display & Brightness → Text Size.) For even larger everything, go to Settings → Accessibility → Display & Text Size and turn on Larger Text.
Wi-Fi only is fine for most people
iPads come in two kinds: Wi-Fi only (cheaper, connects at home like your phone does) and Wi-Fi + Cellular (works anywhere, but needs its own monthly plan). If you will mostly use it at home, save your money — Wi-Fi only is plenty.
Charging
Newer iPads charge with a USB-C cable — the small oval plug that fits either way up. The 10th-generation iPad and later all use it. Plug it in overnight, same as your phone.
When to call Sean instead
You are choosing between an iPad, a Kindle Fire, and a Chromebook and want honest advice.
The iPad will not connect to your Wi-Fi.
You want your photos, contacts, and email from your iPhone to appear on the iPad too.
The screen is cracked or the battery dies fast.
IPad vs iPhone (which do I need) An iPad is a big iPhone without the phone calls — same apps, bigger screen, better for reading, video calls with the grandkids, and puzzles. If your eyes struggle with the small phone screen, an iPad is often the kinder choice. It needs Wi-Fi (or cellular) but not a phone plan.
Apple Pencil The Apple Pencil is a stylus for drawing and handwriting on an iPad — much more precise than a finger. The Pencil 2 and Pencil Pro charge by sticking magnetically to the iPad's edge; the USB-C Pencil attaches magnetically but charges through its USB-C port. Not every iPad works with every Pencil, so check your iPad model before buying one.
IPad keyboard (typing on iPad) Tap any text box and the iPad's on-screen keyboard pops up — turn it sideways for bigger keys. For lots of typing, a Bluetooth keyboard pairs like any Bluetooth device and feels like a laptop. Apple's own keyboard cases cost more but fit perfectly.
Split View on iPad (two apps at once) Split View puts two apps side by side — email on the left, web on the right. Open one app, then drag a second app's icon from the Dock to the screen's edge. Drag the middle divider to give one app more room.
IPad as an e-reader (books on iPad) The Books app (orange icon) is Apple's bookstore — buy once, read on iPad, iPhone, or Mac. The free Kindle app reads the same Amazon books. Turn on Night mode (dark background) for bedtime reading; it's much easier on the eyes.
IPad won't charge iPads need more power than phones — use the bigger wall plug it came with, not a phone charger, and give it a while. Check the charging port for lint. If it's been dead a long time, leave it plugged in for an hour before trying to turn it on.
Which iPad do I have Open Settings, tap General, then About — the Model Name tells you which iPad it is, like "iPad Air" or "iPad 9th generation." That name matters when buying a case or a Pencil, since sizes and Pencils differ by model.
An e-reader is a small tablet made for one job — reading books. The screen looks like paper instead of a glowing phone screen, so it is gentle on tired eyes. One charge lasts for weeks, and it holds thousands of books in something lighter than a paperback.
What an e-reader does for you
A screen like paper. It uses electronic ink — no glare in sunlight, and it does not shine in your face like a phone.
Weeks of battery. Charge it about once a month, not every night.
Big, adjustable text. Make the words as large as you like in any book.
Thousands of books in one place. 16GB of storage holds roughly 16,000 books.
The ones worth knowing
Kindle (basic) — the affordable start
This is the one I point budget shoppers to. Around $150 gets you Amazon's entry Kindle: a sharp 6-inch screen, a built-in light for reading in the dark, and USB-C charging. It is not waterproof and there is no warm night light. A fine first e-reader if you want to spend as little as possible.
Kindle Paperwhite — the one most people should buy
If you ask me which e-reader to get, this is usually my answer. Around $200: a bigger 7-inch screen, a warm light that is easier on the eyes at night, waterproof for the bath or pool, and up to 12 weeks of battery.
When you buy, choose the version "without ads" — about $20 more, and it removes ads from the lock screen.
Kindle Colorsoft — for color
Around $290 for a 7-inch color screen — comics, magazines, cookbooks, and children's books. Waterproof, with weeks of battery. I would only spend the extra if you read a lot of color content.
Kindle Scribe — the big one with a pen
Around $430 and up. A large 11-inch screen with a pen, so you can write notes right on books and documents. I recommend it for students and professionals — overkill if you just read novels.
Kobo Clara BW — best outside Amazon
Around $160, from Rakuten Kobo. Its big advantage: borrowing library books is built right into the device — no phone needed, no Amazon account required.
Kobo Libra Colour — color with buttons
Around $260. A 7-inch color screen with physical page-turn buttons — I like these for stiff or arthritic hands — waterproof, library borrowing built in, and an optional stylus for note-taking.
NOOK GlowLight 4 — for Barnes & Noble readers
Around $150, tied to the Barnes & Noble bookstore. If your books already live there, this is the simple choice.
Prices change often — check the current price before you buy.
Borrowing library books — free
Narrated tutorial: borrowing library books free with Libby.
Get a library card. Free from your local public library.
On your phone, install the free Libby app and add your library card.
Find a book and tap Borrow, then choose "Read with Kindle."
Sign in to your Amazon account and tap "Get Library Book."
On your Kindle, connect to Wi-Fi and sync — the book appears in your library.
It returns itself when the loan ends. No late fees, ever.
Kobo readers skip the phone entirely — you browse and borrow library books right on the device.
Which one should you get?
Most readers?KindlePaperwhite. The best balance of screen, light, and price.
Tight budget? The basic Kindle. Same sharp text, smaller screen.
Comics, magazines, or cookbooks?Kindle Colorsoft or Kobo Libra Colour.
Borrow mostly from the library?Kobo Clara BW keeps it simplest.
Take notes on what you read?Kindle Scribe.
What matters most for seniors
Text size. Tap the "Aa" at the top of any book and make the words as big as you need.
Warm light. The Paperwhite's warm light is gentler at night than a bright white screen.
Light to hold. Most e-readers weigh less than a paperback.
Audiobooks.Kindles can play Audible audiobooks over Bluetooth when your eyes need a rest.
When to call Sean instead
Setting up the reader and connecting it to your Wi-Fi and Amazon account.
Borrowing library books for the first time — the Libby steps are fiddly once, easy after.
Choosing between models before you buy — tell me how you read and I will match the device.
Poor eyesight does not have to mean giving up your independence. There is a whole world of technology built to help: software that reads the screen out loud, tools that make everything bigger, and free apps that describe the world around you through your phone's camera.
Many of the best options are already on your devices and free — you just have to know where to look. Always start there before spending a dollar.
Start free: what's already on your devices
Windows Magnifier. Hold the Windows key and press Plus (+) — the whole screen zooms in. Press Windows key + Esc to turn it off. Built into every Windows 10 and 11 computer, free.
Windows Narrator. Press Ctrl + Windows key + Enter to switch on the built-in screen reader — it reads aloud whatever is on the screen. Also free and built in.
iPhone and iPad: VoiceOver and the Magnifier app.VoiceOver (Settings > Accessibility > VoiceOver) reads the screen aloud as you swipe your finger across it. The separate Magnifier app turns your camera into a magnifying glass for menus, labels, and pill bottles. Both free, both already on your iPhone.
Android phones: TalkBack and magnification.TalkBack (Settings > Accessibility > TalkBack) reads the screen aloud. Android also has a built-in screen magnifier under Accessibility. Both free.
Screen readers: the computer reads to you
NVDA — free, for Windows. Reads web pages, email, and documents aloud. It is free, open-source, and run by a nonprofit — surveys show it is one of the most widely used screen readers in the world, and the most widely used free one. If you are starting from zero on a Windows computer, start here.
JAWS — paid, for Windows. The long-time professional choice with the deepest set of features. A home yearly plan costs about $95 a year. Best when you need the most powerful option and don't mind paying for it.
Apple VoiceOver — free, built into every iPhone, iPad, and Mac. Controlled by finger gestures on touch screens and keyboard commands on a Mac. No download, no cost.
Google TalkBack — free, built into Android phones. Swipe and tap gestures read apps and web pages aloud. No download, no cost.
Windows Narrator — free, built into Windows. Simpler than JAWS or NVDA, but fine for everyday basics — and it works right from the login screen.
Narrated tutorial: turning on Windows Narrator for the first timeNarrated tutorial: turning off VoiceOver on an iPhone when it starts talking by accident
Magnifier software: make the screen bigger
ZoomText — paid, for Windows. Enlarges the screen far beyond what Windows alone can do, with high-contrast color modes (like yellow text on black) that are easier on weak eyes. It can also read text aloud. Yearly home plans are available and there is a free trial — try before you buy.
Windows Magnifier — free, built in. Described above. For many people, this plus larger text settings is all they ever need.
Narrated tutorial: turning on Windows Magnifier with the keyboard
Free apps that describe the world
Seeing AI (by Microsoft) — free. Point your phone's camera at anything and it talks back: reads printed text and even handwriting, scans barcodes to name products, recognizes money, identifies colors, and describes scenes and photos. Works on iPhone, iPad, and Android.
Be My Eyes — free. Two kinds of help in one app: a live video call with a sighted volunteer — a real person, available any time of day — who can read a label or describe what is in front of you, and Be My AI, an artificial-intelligence assistant that answers questions about photos you take.
Worth knowing: some smart glasses can now describe what their built-in camera sees and connect to Be My Eyes volunteers hands-free. Still new, but promising — ask me before buying.
Top 3 desktop magnifier machines
These are physical machines for your desk: you slide a book, letter, or pill bottle under the camera, and it appears huge and sharp on a big screen. They are the gold standard for reading paper when your eyes can't manage it anymore.
1. Optelec ClearView C HD — 24-inch screen. Crisp high-definition picture, simple color-coded controls, and high-contrast modes. Around $3,500.
2. Freedom Scientific TOPAZ XL HD — 24-inch screen. Very sharp image even at low magnification (so more words fit on screen), and it can connect to a computer too. Around $4,250.
3. Enhanced Vision DaVinci Pro HD. A full HD magnifier that can also read the page out loud at the push of a button — magnification and speech in one machine. Around $5,000.
An honest word: these are serious investments. Try every free option first, and talk to your eye doctor — some vision plans and assistance programs help with the cost.
When to call Sean instead
Turning on VoiceOver, TalkBack, Narrator, or the Magnifier for the first time.
Choosing between NVDA, JAWS, and ZoomText for your computer.
Setting up Seeing AI or Be My Eyes on your phone.
Advice before spending money on a desktop magnifier machine.
Power & Gadgets
Power banks, backup power, solar, speakers, frames, and drones.
A power bank is a rechargeable battery you carry with you. When your phone or tablet runs low and there is no outlet nearby — the doctor's office, the airport, a long car ride — you plug your device into the power bank and it charges, just like a wall outlet would.
What those numbers mean, in plain words
mAh is the size of the tank. A bigger number means more charges before the bank itself runs out. A 10,000 mAh bank charges most phones about two full times. A 20,000 mAh bank gives about four. You do not need the biggest one — just enough for your day.
W (watts) is the speed. Higher watts charge faster. For phones, 20–45W is plenty. Only laptop owners need 65W or more.
USB-C is the plug you want. Every current phone and tablet charges through USB-C. A good bank has at least one USB-C port that both charges your device and refills the bank itself.
The top five
INIU 10,000 mAh 45W — best for most people
Reviewers keep naming this the one to buy: 45W fast charging, two USB-C ports plus a USB-A, light in the pocket, and usually around $25 to $30. About two full phone charges. Best if: you want the safe, well-reviewed pick at a fair price.
Charmast 10,000 mAh slim — simplest to use
One of the thinnest banks made — about half an inch — with cables built right in, so there is nothing extra to buy, carry, or lose. Best if: you want zero fuss. Just plug the built-in cable into your phone.
Anker Nano 10,000 mAh 45W — best for travel
Compact with a retractable cable that pulls out when you need it and disappears when you do not. Anker is the most trusted name in chargers, with strong warranties. Best if: you travel and hate tangled cables.
Anker MagGo 10,000 mAh — best for iPhone
Snaps magnetically onto the back of an iPhone (12 and newer) and charges wirelessly — no cable at all while it charges. Also has a USB-C port for wired charging. Best if: you have an iPhone and want the easiest possible charging.
Anker Laptop Power Bank 25,000 mAh 165W — for laptops and tablets
The heavy-duty one: charges a laptop plus a phone at the same time, with three USB-C ports and a built-in retractable cable. Bigger and heavier, but it is still fine for carry-on. Best if: you carry a laptop or charge several devices at once.
Using one, in plain words
Narrated tutorial: using a power bank.
Charge the bank first. Plug it into a wall charger with a USB-C cable until its lights show full. Do this the night before a trip.
Plug your phone into the bank. Use the bank's built-in cable, or your own charging cable. Charging starts on its own — on some banks you press a small button first.
Recharge the bank when it runs low. The lights or tiny screen show how much is left. A 10,000 mAh bank refills in a couple of hours.
One good cable is enough. If your bank has a built-in cable, you are set. Otherwise keep one USB-C cable with the bank so they are always together.
Flying with a power bank
Carry-on only — never checked luggage. Airlines require power banks in your carry-on bag, where the crew can reach them.
Every bank on this list is fine to fly with. Airlines allow up to 100Wh, and even the big 25,000 mAh laptop bank is under that. The limit is printed on the bank itself as “Wh.”
Card note: keep the bank where you can reach it during the flight, not buried at the bottom of your bag.
How to choose
Just my phone, keep it cheap and simple: the INIU — best-reviewed value.
I lose cables: the Charmast — the cables are built in.
iPhone, no cables at all: the Anker MagGo — it snaps on magnetically.
Laptop or several devices: the Anker Laptop Power Bank — the only one here with real laptop power.
Card note: stick with known brands — Anker, INIU, Charmast, Belkin, UGREEN. Cheap no-name banks wear out fast and can be unsafe.
When to call Sean instead
Your phone charges slowly or not at all from a power bank.
Choosing between models before a trip.
A bank that gets hot, swells, or smells strange — stop using it and call.
Charging several devices at once and not sure what you need.
Why Phone Batteries Wear Out — and the Habits That Slow It Down
Every phone battery wears out a little with every charge. That's not a defect — it's how the chemistry works, like tires wearing with every mile. You can't stop the wearing, but heat is the battery's worst enemy, and a few easy habits can slow the wear enough to matter over the years you own the phone.
What's happening inside
Your phone's battery stores energy using a quiet chemical reaction that runs forward when you use the phone and backward when you charge it. Each full trip — drained and refilled — is called a charge cycle. The materials inside gradually lose their spring, so the battery holds a little less each year. A typical phone battery keeps about 80% of its original capacity after roughly 500 full cycles — about a year and a half to two years of daily charging. That's why a two-year-old phone feels like it "doesn't last like it used to." It truly doesn't.
Heat: the real villain
Of everything on this page, remember this one: heat ages a battery far faster than charging does. A battery in a hot car, on a sunny windowsill, or under a pillow while charging is quietly losing months of life. Practical translations:
Don't leave your phone in a parked car in the Florida sun. (Good for the phone, and you already knew it for everything else in the car.)
If the phone feels hot while charging, take off the thick case so the heat can escape.
Avoid charging under blankets or pillows — trapped heat, and a poor idea generally.
The myths, sorted
"You must let the battery drain to zero before charging." False — and that advice belongs to battery types from decades ago. Modern phone batteries prefer the opposite: shallow sips. Topping up from 40% to 80% is gentler than running flat and refilling. Charge whenever it's convenient; don't wait for empty.
"Charging overnight ruins the battery." Mostly a myth, with a kernel of truth. Your phone is smart enough to stop taking power when it's full — it won't "overfill." The kernel: sitting at 100% in a warm room for eight hours adds a little wear. If you charge overnight on a nightstand in a cool room, as millions do, the effect is small. Many phones even have a setting that waits to finish charging until just before your alarm — worth turning on, not worth losing sleep over either way.
"Fast chargers destroy batteries." Overstated. Fast charging (using a powerful charger to fill the battery quickly) does create more heat, and heat is the enemy — so a steady diet of nothing but fast charging adds some wear. But phones regulate this themselves, slowing down as they fill and as they warm. Using the fast charger when you're in a hurry is fine. Using the slow one overnight is fine. The battery will not be ruined by either.
"Close all your apps to save the battery." False, and it can backfire — reopening apps from scratch uses more power than leaving them resting. This is advice from another era. Ignore it.
Habits that genuinely help
Keep the phone out of heat — car dashboards, sunny sills, saunas of any kind.
Charge in sips when it's easy; never worry about reaching empty first.
Use the charger that came with the phone, or a decent one from a known brand.
Turn on the "optimized" or "adaptive" charging setting if your phone offers one — it handles the overnight question for you.
When a phone will sit in a drawer for months, store it around half charged, not full and not empty.
When the battery itself is the problem
A worn battery announces itself: the percentage drops in sudden cliffs, the phone dies at 20%, or it only lasts a few hours no matter what you do. Most phones can show you the battery's health (its remaining capacity compared to new) in settings. Below about 80%, a battery replacement — far cheaper than a new phone — often makes the phone feel young again.
If your phone is dying by lunch and you'd like a straight answer on whether it's the battery or something else, call Sean at (813) 770-6082.
Words in this lesson
Charge cycle: one full round of using a battery up and charging it back; batteries wear a little with each one.
Capacity: how much energy a battery can hold; it shrinks slowly as the battery ages.
Fast charging: using a more powerful charger to fill a battery quickly; safe, with a little extra heat.
Battery health: a percentage in your phone's settings showing how much capacity remains compared to when it was new.
My Battery Drains Too Fast: The Causes You Can Check Yourself
When a battery suddenly drains faster than it used to, the cause is almost never a mystery illness. It's usually one of four things: the screen is brighter than it needs to be, one app is working too hard in the background, the phone is straining to find a weak signal, or the battery itself is wearing out. Your phone keeps a list of which apps use the most power — that list is where the truth lives.
Start with the detective work: the battery list
Every phone keeps a record of what used the battery since the last charge. On most phones it's in Settings, under Battery. The list shows each app and its share of the drain. If one app you barely opened is near the top, you've found your culprit. If the screen itself is the top item, that's actually normal — the screen is the hungriest part of any phone.
Check this list before changing anything. Guessing wastes an afternoon; the list takes one minute.
Cause 1: The screen
The display is the single biggest power user, and brightness is the dial. A screen at full brightness can use two to three times the power of one at half. Two safe checks:
Turn on auto-brightness (the phone adjusts to the room — bright on the porch, dim in the den). Most people can leave it there and forget it.
If you set brightness by hand, try it a notch or two lower indoors. You may not even notice the difference after a day.
Also check the screen timeout — how long the screen stays lit after you set the phone down. If it's set to five or ten minutes, every glance costs you. One minute is plenty for most people.
Cause 2: An app working in the background
Apps (the programs on your phone) can keep working after you've stopped looking at them — fetching mail, tracking location, refreshing feeds. That's called background activity, and it's usually harmless. It stops being harmless when one app misbehaves: a social media app stuck refreshing, a weather app checking your location every few minutes, a game that never rests.
Your battery list names the offender. Your options, in order:
Restart the phone. A stuck app often unsticks. Simple, safe, fixes more than it has any right to.
Update the app. Makers fix power bugs in updates.
Limit its background activity in the battery settings — most phones offer this per app.
Delete it if you don't use it. You can always install it again later.
Cause 3: Signal hunting
A phone far from a strong signal works hard — it raises its power to reach the tower, again and again. In a weak-signal spot (a rural road, a metal-roofed building, the middle of a big store), the battery can drain noticeably faster with the phone just sitting in your pocket. This is normal behavior, not a fault. If you spend long stretches somewhere with one bar, that's likely part of your drain, and the fix is simply knowing it.
Cause 4: The honest one — age
If the drain has grown slowly over two or three years rather than arriving suddenly, and no app stands out on the list, the battery is wearing out. That's the subject of the "Why phone batteries wear out" lesson — the short version is that batteries hold less as they age, and below about 80% health a replacement is usually money well spent.
A safe order to work in
Restart the phone.
Read the battery list — find the top names.
Set auto-brightness on, screen timeout to one minute.
Update your apps; deal with any single app hogging the list.
Check battery health in settings; note the percentage.
None of these steps can harm your phone or lose your information. They are the same first checks any honest technician runs.
The warning signs that are not normal
The phone gets hot doing nothing, sitting untouched.
The percentage falls off a cliff — 60% to 20% in minutes.
The phone swells, the screen lifts, or the case no longer closes flat.
Heat doing nothing means something is wrong inside; swelling means the battery is physically failing. Stop using a swollen phone, don't charge it, and get it looked at promptly — that one isn't a settings problem.
If you've worked the list and the drain is still a mystery, that's a fair reason to get hands-on help — call Sean at (813) 770-6082.
Words in this lesson
App: a program on your phone that does a particular job, like mail, weather, or photos.
Background activity: work an app does when you're not looking at it, like fetching new mail.
Auto-brightness: a setting where the phone adjusts screen brightness to the light around you.
Screen timeout: how long the screen stays on after you stop touching it.
Battery health: a percentage in settings showing how much charge the battery can still hold compared to new.
Surge Protector vs Battery Backup: What Each One Actually Protects
A surge protector and a battery backup (called a UPS) solve two different problems. A surge protector guards against a sudden spike of power — the jolt that can fry electronics. A UPS does that and keeps your equipment running for a few minutes when the power goes out, so nothing dies mid-sentence. In Florida, with our thunderstorms and flickering power, most homes want surge protection everywhere and a UPS on one or two important things.
First, the two problems
A surge is a brief spike in the electricity coming into your home — more voltage than your devices were built for, arriving in a blink. Lightning strikes nearby are the famous cause, but surges also happen when the power comes back on after an outage, or when big appliances cycle. One strong surge can damage a TV, a computer, or a router (the box that spreads internet around your home) in an instant. Small surges nibble away at electronics over the years.
An outage — including those Florida flickers where the lights dip for two seconds — is power disappearing. The danger isn't darkness; it's a computer or recording device dying in the middle of saving something, or never quite recovering from being cut off mid-thought.
What a surge protector does
A surge protector is a power strip with a guardian inside. It lets normal power through and absorbs or diverts the spike when one arrives. Two honest details:
Not every power strip is a surge protector. Many strips are just extra outlets in a row, with no protection at all. The box must say "surge protector," and it should list a joule rating — joules measure how much surge energy it can absorb. For a TV or computer, look for 1,000 joules or more.
They wear out. Each surge a protector absorbs uses up some of its life. After a major storm event, or every few years, replacing them is wise. Many have a small "protected" light — if that light is out, the strip still gives power but no longer protects.
A decent surge protector runs about $20 to $40. That's cheap insurance for a television that costs a thousand.
What a UPS does
A UPS (uninterruptible power supply — a battery box your equipment plugs into) sits between the wall and your devices. It includes surge protection, and when the power fails, its battery takes over instantly, so nothing even flickers. The battery is small — expect roughly 5 to 20 minutes of running time, depending on what's plugged in. That is not enough to watch a movie through an outage, and it isn't meant to be. It's enough to finish what you're doing, save your work, and shut down properly — or to ride out the two-second Florida flickers that never become outages at all, which is where it quietly earns its keep every single week.
A home-sized UPS runs about $70 to $150.
Who needs which
Surge protectors — for nearly everything with a plug and a brain:
TVs and their boxes
Computers
The router and internet equipment
Game consoles, quality lamps with electronics, anything you'd grieve
A UPS — for the few things that hate being cut off:
A desktop computer you work on (documents, photos, finances)
The internet router, if your phone service or medical alert runs through the internet — a UPS keeps your connection alive during short outages
A home phone base or security hub, for the same reason
Neither helps much: a laptop already has a battery inside — an outage just means it runs on battery, exactly what it was built to do. It still deserves surge protection when plugged in at your desk.
One storm-season habit
When a serious storm is overhead, the simplest protection ever invented still works: unplug the precious things. No surge protector made can promise to stop a direct lightning strike, and a plug gap is absolute. If unplugging is a nuisance, that's the honest case for good surge protectors and a UPS doing the everyday work, with unplugging saved for the big ones.
Not sure which of your equipment deserves what? Walk the house with your phone and call Sean at (813) 770-6082 — he'll sort it with you in plain terms.
Words in this lesson
Surge: a brief spike of extra electrical power that can damage electronics.
Surge protector: a power strip with a guardian inside that absorbs surges; not all strips have this.
Joule: a measure of how much surge energy a protector can absorb; for TVs and computers, 1,000 or more is a good target.
UPS (battery backup): a battery box that protects against surges and keeps equipment running for a few minutes when power fails.
Router: the box that spreads your internet connection around your home.
Cables and Chargers: Why Some Charge Slowly, and What the Watt Numbers Mean
How fast your phone or tablet charges depends on three things working together: the charger (the plug), the cable, and the device itself — the slowest of the three sets the speed. The charger's strength is measured in watts, and more watts can mean faster charging, but only up to the limit your device accepts. A cheap cable is fine for overnight charging; for fast charging and for your main everyday cable, a decent one from a known brand is worth a few extra dollars.
The team of three
Charging is a chain, and every link matters:
The charger — the plug that goes in the wall (sometimes called a brick or adapter). It supplies the power.
The cable — the wire. It carries the power, and not all cables can carry the same amount.
The device — your phone or tablet decides how much power it will accept, and it will never accept more than its own limit, no matter how mighty the charger is.
If any one of the three is slow, everything is slow. A powerful new charger with an old worn cable charges like the old cable. This is why "I bought a fast charger and nothing changed" is such a common complaint — the cable or the phone was the limit all along.
Watts, in plain terms
Chargers are rated in watts (W) — a measure of how much power the charger can supply. Think of it as the size of the water pipe: a bigger pipe can deliver more water, but the faucet — your phone — decides how much it actually takes.
Rough guide for phones:
5 watts — the small chargers that came free in phone boxes for years. Slow and steady: a full charge can take three hours or more. Perfectly fine overnight.
15 to 25 watts — the modern middle ground. Most current phones are built to accept about this much, and it fills a typical phone in an hour to an hour and a half.
45 watts and up — only useful if your specific phone is built for it (some are). On any other phone, the extra capacity simply goes unused — harmless, but no faster.
So a bigger number is not automatically a better charger for you. Match the charger to what your device accepts. That number is in the phone's manual or on the maker's website — or ask when you buy, and write it on a label on the charger. Future you says thanks.
Why two cables that look identical behave differently
Cables differ inside, where you can't see:
Thickness of the wires. Fast charging pushes more power; thin wires can't carry it, so the phone settles for slow. This is the main reason a bargain-bin cable charges at a crawl.
The plug ends. Charging plugs come in shapes — the older wide flat one (USB-A), and the modern small oval one (USB-C) that fits either way up. Newer fast chargers use the oval end. An adapter or an old-shaped cable in the chain often drops you back to slow speed.
Wear. A cable that's been yanked, kinked, or chewed by the recliner develops damage inside. Intermittent charging — works if you hold it just so — is a worn cable asking to be replaced.
When cheap is fine, and when it isn't
A cheap cable is fine when:
It's for overnight charging, where slow is no hardship
It's a spare for the car or the guest room
It carries a safety certification mark (look for "UL" or "ETL" on the package — those mean an independent lab tested it)
Spend a little more when:
You fast-charge every day — a proper cable is what makes fast charging actually fast
It's your one main cable, used and bent daily for years; better-built ends survive the flexing
The deal looks too good to be real. Chargers and cables plug into your home's power and a lithium battery. Off-brand chargers with no certification, sold for pocket change, have earned their bad reputation — a certified charger from a known brand runs about $15 to $25 and is the cheapest peace of mind in this whole lesson.
A tidy way to end the drawer of mystery cables
Label each charger with painter's tape: the device it belongs to and its watts ("Phone — 20W"). Keep one known-good cable and charger together as your "fast set." Retire cables that charge only at certain angles — they're done, and they're the ones that will fail you in a hotel room at midnight.
If your phone charges slowly and you'd like someone to sort out which link in the chain is the weak one, call Sean at (813) 770-6082.
Words in this lesson
Watt (W): a measure of how much power a charger can supply; more watts can charge faster, up to your device's limit.
Charger (adapter/brick): the plug that goes into the wall and supplies power to the cable.
USB-A: the older, wide, flat charging plug shape that only fits one way.
USB-C: the modern, small, oval charging plug shape that fits either way up.
Fast charging: charging at higher wattage to fill a battery in about an hour instead of several.
UL / ETL mark: a stamp showing an independent safety lab tested the product.
Think of it as a giant version of the power bank that charges your phone — but with regular wall outlets built in, so it runs real appliances. You charge it from a wall outlet ahead of time, and most models can also recharge from solar panels or your car.
Watt-hours tell you how much it holds. A 1,000 watt-hour box can run a 100-watt device for roughly 8 or 9 hours. Bigger number, longer it lasts — and heavier it is to carry.
Watts tell you what it can handle at once. A 1,500-watt station runs a fridge, a fan, and phone chargers together. It will not run the whole house or central air — beware anyone who says otherwise.
No gas, no fumes, no carbon monoxide. A gas generator must stay 20 or more feet outside the house. A power station sits in your living room and hums quietly. That difference alone is why so many people are switching.
It runs out, then you recharge it. A gas generator keeps going as long as you pour in fuel; a power station lasts hours, then needs a wall outlet, solar panels, or a car charger to fill back up.
The three worth knowing
Jackery Explorer 1000 v2 — simplest and lightest
The name most people know. About 1,070 watt-hours and 1,500 watts of output, and at about 24 pounds it is the lightest of the three — easy to carry from room to room. The battery is rated for thousands of charges, about a decade of use. Best if: you want the easy, familiar pick.
EcoFlow DELTA 3 — fastest charging
About 1,024 watt-hours and 1,800 watts of output. Its standout trick is speed: it recharges from a wall outlet in under an hour, and you can add extra batteries later if your needs grow. Best if: the power flickers often and you want it ready again fast.
BLUETTI Elite 100 V2 — best for solar
About 1,024 watt-hours and 1,800 watts of output. It accepts up to 1,000 watts of solar panels — the strongest solar charging of the three — so it refills fastest when the sun is doing the work. Best if: you want solar panels for multi-day outages.
What one can actually run
A 1,000 watt-hour station — the size of all three above — handles the essentials that matter in an outage:
A full-size fridge: about 8 to 12 hours — long enough to ride out most outages without losing food.
A CPAP machine: roughly 11 to 19 hours — several nights of sleep, by the maker's own tested numbers.
Phones: around 40 full charges — the whole family stays connected.
Wi-Fi router, a lamp, and a fan together: through the evening on one charge.
What it cannot do:central air conditioning, an electric stove, or the whole house at once. For that you would need a much bigger and heavier system, or a gas generator outside.
How to choose
Keep it simple: the Jackery — lightest to carry, easiest to understand.
Outages are frequent: the EcoFlow — recharges in under an hour, ready for the next one.
Planning for days without power: the BLUETTI with solar panels — the sun refills it.
Mind the weight: these three run 22 to 28 pounds. The 2,000 watt-hour models weigh 40 to 60+ pounds — think twice before going bigger.
Card note: prices change often and these sell for several hundred dollars — check the current price before buying, and buy before storm season, not during it.
Hurricane season here in Florida
Charge it full before the storm. Then unplug it and set it where you will need it.
Fridge first. Plug the fridge in right away — every hour of cooling saves your food.
Between storms: store it about half to three-quarters full, and top it up every few months so it is ready when you need it.
Solar panels (sold separately) keep it going if the outage lasts days — set them in direct sun.
Card note: safe indoors does not mean careless — keep the vents clear, keep it dry, and follow the manual. And never bring a gas generator inside, not even the garage.
When to call Sean instead
Choosing the right size before hurricane season.
Figuring out what your fridge, CPAP, or other devices actually need.
Setting up solar panels with a power station.
A station that will not charge, or shuts off unexpectedly.
When the power goes out, a backup battery power station keeps your fridge cold, your phone charged, and a fan running. It is a big rechargeable battery in a box — no gas, no fumes, no pull cord. You charge it from a wall outlet (or solar panels), and it quietly powers your things.
The two numbers that matter
Capacity (Wh) — how long it lasts. Think of it as the size of the tank. A 1,000Wh battery runs a 50-watt fan for about 20 hours.
Output (W) — how much it can power at once. A fridge needs a few hundred watts; a space heater needs 1,500. If your devices add up to more than the output number, it will not run them.
Simple math: divide the Wh number by your device’s watts for a rough idea of hours. A 2,000Wh battery ÷ a 100-watt load = about 20 hours.
1. Jackery
The best-known name. Jackery’s current models use long-life LiFePO4 (lithium iron phosphate) batteries. Prices change often — the figures below are recent street prices, so check before you buy.
Explorer 1000 v2 — the medium one (about $499). 1,070Wh, 1,500W output, about 24 pounds. Runs phones, a fan, a lamp, and a TV. Jackery’s own runtime chart lists up to about 37 hours for a refrigerator (a fridge cycles on and off, so it sips power).
Explorer 2000 v2 — the large one (about $699). 2,042Wh, 2,200W output, about 40 pounds. Powers a fridge plus more at the same time — a longer-outage box.
HomePower 3000 — the biggest (about $1,599). About 3,000Wh, 3,600W output, about 60 pounds. Runs heavy loads like a microwave; Jackery lists up to about 70 hours for a cycling fridge.
2. EcoFlow
Known for very fast recharging — some models refill from a wall outlet in about an hour. Check current prices before you buy; they change often.
RIVER 3 Plus — the small one. 286Wh, 600W output, about 10 pounds. Good for phones, a laptop, a small fan, or a lamp during a short outage. Easy to carry.
DELTA 3 — the medium one. 1,024Wh, 1,800W output, about 28 pounds. Runs a fridge, Wi-Fi, phones, and a laptop together; recharges from empty in under an hour on a wall outlet.
DELTA 3 Max — the large one. 2,048Wh, 2,400W output. A step up for longer outages — more capacity for the same kinds of loads.
3. Bluetti
Known for long battery life — many models are rated for thousands of recharge cycles. Recent sale prices are below; prices change often.
Elite 100 V2 — the medium one (often about $449 on sale). 1,024Wh, 1,800W output, about 25 pounds. A solid middle choice for a fridge, phones, and lights.
AC180 — the medium one (often about $449 on sale). 1,152Wh, 1,800W output, about 35 pounds. Similar to the Elite 100 V2 with a little more capacity.
Elite 200 V2 — the large one (often about $899 on sale). 2,073Wh, 2,600W output, about 53 pounds. Runs bigger loads and lasts longer — a serious outage box.
How to pick the right size
Short outages (a few hours): a small unit (under 500Wh) keeps phones, a fan, and a lamp going.
A full day: a medium unit (around 1,000Wh) keeps a fridge cold, charges everything, and can run a CPAP machine all night (about 40–60 watts without the heated humidifier).
Multiple days: a large unit (2,000Wh or more) — or a medium unit plus solar panels to refill it each day.
Watch the heavy hitters. A space heater (1,500W) will drain a 1,000Wh battery in under an hour. Heaters and hair dryers are the fastest way to empty any battery — use them sparingly or not at all.
Solar panels, in plain words
Panels refill the battery from sunlight. They work best in direct sun and take several hours — slow but free.
Match the panel to the unit. Each battery lists a maximum solar input (for example, 500W). Bigger panels refill faster, up to that limit.
A note on tax credits. The federal home solar tax credit ended at the end of 2025, so a new system you buy now does not get it. (Leased panels or power-purchase plans are different — the leasing company may still qualify.) Tax rules change; ask your tax preparer before counting on any credit.
Stay safe
These are safe to use indoors — no gas, no fumes, no carbon monoxide. But do not plug in more than the output rating, keep the vents clear so the unit can cool itself, and keep it dry. Never try to power your whole house through a wall outlet — that takes special wiring by an electrician.
When to call Sean instead
You are not sure what size you need for your fridge and medical devices.
You want help picking between these brands before you spend the money.
You want solar panels set up with the battery.
Your unit will not charge or shows an error light.
A solar panel turns sunlight into electricity that your backup power station can store. Set the panel in the sun, plug it into the power station, and the battery refills itself — free, silent, and with no gas to buy. Here is how it all works, in plain words, plus the three brands worth your money.
What a solar panel actually does
Sunlight in, electricity out. The dark blue surface is covered in tiny cells that react to sunlight and produce electric current. No moving parts, no noise, nothing to pour in.
The panel does not store power. It only makes electricity while the sun shines. The backup power station is the part that stores it — think of the panel as the faucet and the power station as the bucket.
Panels are sold by watts (W). A 200W panel can make up to 200 watts in perfect lab sunlight. In your yard on a bright Florida day, expect more like 70 to 80 percent of that number. That is normal, not a defect.
Portable panels vs rooftop panels
Portable (folding) panels — what this guide covers. They fold up like a briefcase, set up in the yard or driveway in a minute, and plug straight into a backup power station. No electrician, no permits, no holes in your roof. You take them inside when the storm passes.
Rooftop panels are a permanent home installation — bolted to the roof, wired into your house, installed by licensed contractors with permits. They cost thousands and are a different project entirely. If a hurricane is coming next week, portable is the answer.
1. EcoFlow
The technology leader — EcoFlow's panels squeeze the most electricity from the same sunlight, and they pair perfectly with EcoFlow power stations. Prices change often — the figures below are recent prices, so check before you buy.
220W Bifacial (NextGen) — the sweet spot (about $399 on sale, up to $549 at list). The panel in the photo. Bifacial means it catches sunlight on both sides — the back picks up light bouncing off the ground for up to 25% extra power. Folds up with its own kickstand case.
160W Portable (NextGen) — the light one (about $219). Uses newer TOPCon cells for high efficiency in a smaller fold. Good for topping up a small station like the RIVER 3 Plus.
400W Portable — the big one (about $499 to $599). Serious refilling power for large stations like the DELTA 3 Max. Heavier at about 35 pounds — a two-hand carry, not a one-hand carry.
Who it is for: anyone who wants the most power per square foot, and especially anyone who already owns an EcoFlow power station — the plugs and cables just work together.
2. Jackery
The best-known name in portable power — Jackery's SolarSaga panels are the toughest of the three, built to live outdoors. Recent prices below; they change often.
SolarSaga 200W — the sweet spot (about $379 to $429). The panel in the photo, with the orange handles. Also bifacial, about 24% efficient, and rated IP68 waterproof — the highest weather rating here. It can sit out in a downpour. Under 15 pounds.
SolarSaga 100 Prime — the small one (about $199). A 100W panel for small stations and short outages. Light and simple.
SolarSaga 500X — the big one (about $799). 500 watts from one panel — pairs with Jackery's largest stations for the fastest solar refills the brand offers.
One honest note:Jackery uses its own plug shape on some stations, so a Jackery panel is the simplest match for a Jackery power station. Other brands' panels can work but may need an adapter cable.
Who it is for: anyone who will leave panels outside in real weather, and anyone who already owns a Jackery power station.
3. Bluetti
The value pick with a clever advantage — Bluetti panels use standard plugs, so they work with almost any brand's power station. Recent prices below; check before you buy.
PV200 — the sweet spot (about $449). The panel in the photo. 200W, about 23% efficient, folds into four sections with a carry handle and built-in kickstands. Tough ETFE coating resists scratches.
PV120 — the small one (about $279 to $299). 120W for small stations. A good first panel if you only need to keep phones and a few lights going.
PV350 — the big one (about $849). 350W for large stations — Bluetti's own Elite 200 V2 can accept up to 1,000W of solar, so two of these refill it fast.
Who it is for: anyone who wants the most flexibility — the standard MC4 connectors (the universal solar plug) mean a Bluetti panel can plug into EcoFlow, Jackery (with an adapter), Bluetti, and most other stations. Also the best choice if price matters most.
How panels refill your power station — simple math
Panel watts × sun hours ≈ watt-hours per day. A 200W panel in 5 hours of good Florida sun makes roughly 1,000Wh in a day — enough to refill a medium (1,000Wh) power station from empty.
Florida gets about 5 peak sun hours a day on average — more in summer, a bit less in winter. Morning and late-afternoon sun count for less, so most of your power comes between about 10 AM and 3 PM.
Match the panel to the station's solar limit. Every power station lists a maximum solar input — for example, the JackeryExplorer 1000 v2 accepts up to 400W of solar, and the BluettiElite 100 V2 accepts up to 1,000W. A bigger panel than the limit buys you nothing; the station simply caps it.
You can use two panels. Two 200W panels refill twice as fast as one, as long as the total stays under the station's limit.
Sun placement basics
Face the panel south. In Florida the sun spends the day in the southern sky — a south-facing panel catches the most hours of direct sun.
Tilt it toward the sun. Lay it flat and you lose power morning and evening. The built-in kickstands let you angle it — steeper in winter, flatter in summer.
No shade — not even a little. Shade hurts far more than you would guess: a shadow across one corner can cut a panel's output in half. Keep it clear of trees, fences, and the house's shadow.
Keep the glass clean. Dust, pollen, and leaves block sunlight. A wipe with a damp cloth now and then keeps output up.
Move it if you can. Nudging the panel to follow the sun — east in the morning, south midday, west in the afternoon — adds meaningful power over the day.
What NOT to expect
Solar panels are wonderful for outages, but be honest with yourself about the limits. A cloudy day can cut output to a small fraction of the rated watts. Panels make no power at night — that is what the stored battery is for. And no portable panel setup will run your central air conditioner or electric stove — those need thousands of watts all at once. Panels plus a power station cover the essentials: fridge, phones, lights, fans, internet, and medical devices like a CPAP.
I will build your whole system with you
The panel and the power station have to match — the right watts, the right plugs, the right size for yourfridge and your outage plan. I do this for you, in person. I will help you pick the panels and the power station as one working system, set it all up, plug it together, and show you exactly how it runs your home when the power goes out.
On-site help in Sun City Center and nearby. I come to you — no hauling heavy batteries to a store.
One working system, not two boxes. Panels, station, cables, and placement — configured together and tested before he leaves.
Call Sean: (813) 770-6082. Tell him what you want to keep running in an outage, and he will size the whole system for you.
The speakers built into a computer or monitor sound thin and harsh. A pair of desktop speakers fixes that for good — clearer voices on video calls, fuller music, and movies you can actually hear.
Why Logitech is a top contender — and where others win
Logitech is one of the best names in desktop speakers, and reviewers keep them at the top. But they are not the best at everything — here is the honest picture.
Logitech wins on flexibility and value. The Logitech Z407 is GamesRadar's best overall pick for 2026: two speakers plus a subwoofer, Bluetooth, USB, and a regular audio cable — all three. It even comes with a wireless dial so you can turn the volume up from across the room without reaching behind the computer.
Edifier wins on pure music sound. PCGamesN ranks the Edifier R1280DB as the best computer speakers overall, calling it the top choice for music and everyday listening. Its wooden cabinets give music a warm, full sound that plastic speakers cannot quite match.
Creative wins on budget. The Creative Pebble V3 costs less than $35 and plugs in with a single USB cable. Reviewers say it sounds far better than anything near its price.
For big sound that lasts, Klipsch. The Klipsch ProMedia 2.1 is the pick for the biggest sound under $200, and owners report theirs working fine after eight years or more.
The top picks
Logitech Z407 — best all-around
Two speakers plus a subwoofer for deep bass, a wireless control dial (volume and bass from across the room), and three ways to connect: Bluetooth, USB, or a regular audio cable. The speakers can stand upright or lie flat under a monitor. Mid-range price, usually around $100. Best if: you want one set that does everything well.
Edifier R1280DB — best for music
Wooden bookshelf-style speakers with a warm, full sound that reviewers rate above everything else for music. Bluetooth plus a remote control, so you can stream from your phone. No subwoofer — the cabinets provide the body. A step up in price. Best if: you mostly listen to music.
Creative Pebble V3 — best budget
Tiny round speakers that plug into the computer with one USB cable — no power brick, no fuss. Under $35 and a huge step up from built-in speakers. Best if: you want better sound for the least money and the simplest setup.
Creative T100 — best simple pair under $100
Clean-looking speakers with clear sound and Bluetooth, no subwoofer to find floor space for. A good middle ground: nicer than the budget picks, simpler than a full 2.1 system. Best if: you want good sound without extra boxes.
Klipsch ProMedia 2.1 — biggest sound
The most powerful sound on this list, with a subwoofer that you can feel. Owners keep them for years — a buy-it-once choice. Under $200. Best if: movies and music matter most and you have the desk space.
Hooking them up, in plain words
Narrated tutorial: hooking up desktop speakers.
The green cable: most speakers connect with a standard audio cable that plugs into the green headphone or speaker jack on the computer. That is the whole setup for basic models.
USB models: plug the USB cable in and the computer usually switches to the speakers on its own. Some models get both power and sound through one USB cable.
Bluetooth models: hold the speaker's Bluetooth button until the light blinks, then pick the speakers from the Bluetooth list on your computer or phone.
Where everything goes: put the subwoofer on the floor under or beside the desk — bass sounds better low. Set the two small speakers at ear level, angled to face you.
Volume: set the computer's volume to about 80%, then use the speaker's own knob or dial for day-to-day control. That gives the cleanest sound.
How to choose
Simplest setup: the Creative Pebble V3 — one USB cable, done.
Best all-rounder: the Logitech Z407 — subwoofer, Bluetooth, and the wireless dial.
Music lover: the Edifier R1280DB — the warmest sound on the list.
Movies and big sound: the Klipsch ProMedia 2.1 — the most power, built to last.
Card note: prices shift with sales — the prices here are rough guides, not quotes. The picks are about features and sound, which do not change.
A digital picture frame is a photo frame with a screen instead of a printed picture. It connects to your Wi-Fi, and family members can send new photos to it straight from their phones — from anywhere in the world. It is one of the best gifts for grandparents: the grandkids send pictures, and they simply appear.
How they work, in plain words
It connects to Wi-Fi. One-time setup, usually done by whoever gives the frame. After that, it just stays connected.
Family installs a free app. Whoever owns the frame invites family members, who install the frame's app on their phones.
They send photos. Anyone invited picks pictures (and short videos, on most frames) and sends them. The frame updates by itself — no buttons to press.
It plays a slideshow. The frame cycles through the photos on its own. Most dim or turn off at night and wake up in the morning.
It plugs into the wall. There is nothing to charge and no batteries to replace — it just stays on, showing your people.
The three worth knowing
Dozens of frames exist, but these three cover every need — from the simplest gift to the biggest screen for the money.
Aura — best overall
The frame most reviewers name the best you can buy. The Carver (10.1 inch, around $150) and the larger Walden (15 inch) show photos that look like real prints — the screen adjusts its own brightness and color to the room. Family members send photos and short videos from the free Aura app, and cloud storage is unlimited.
No subscription, ever. The price you pay is the whole price — and the giver can set everything up before wrapping it.
Nixplay — most ways to share
Nixplay frames (around $140 for the 10.1-inch) take photos through the appand through a special email address — anyone can email pictures to the frame without installing anything. Touchscreen models let you swipe through photos right on the frame.
One honest heads-up: Nixplay cut its free cloud storage to a tiny 500 MB. Keeping lots of photos costs $20 a year (100 GB) or $30 a year (unlimited). Know that going in.
Frameo frames — best value
Frameo is a free app used by many frame brands, so you shop by screen size and reviews while the app stays the same. Big, bright screens for the money — a 15.6-inch frame runs around $130, 10-inch models around $60 — with generous built-in storage and 15-second video clips.
No subscription. If you want the biggest screen for the least money, start here.
How to choose
Match the frame to the family
Want the simplest gift?Aura. No subscription, and you can set it all up before you give it.
Some relatives will not install an app?Nixplay — they can just email photos to the frame. (Remember the yearly storage cost.)
Want a big screen cheap? A Frameo frame — 15 inches for about the price of Aura's 10.
10 inches or 15? Ten inches is perfect for a desk or shelf. Fifteen inches belongs on a mantel or wall where everyone sees it.
What matters most for seniors
Someone else does the setup.Wi-Fi, app invites, the first batch of photos — all of it should be done before the frame is given. The grandparent should only ever plug it in.
Family sends the photos. That is the whole magic: the grandkids send pictures from their phones, and new memories just appear. Nobody at home has to do a thing.
Watch out for subscriptions. A frame that keeps asking for money is the wrong gift. Aura and Frameo frames have none; Nixplay's storage costs $20–$30 a year.
Put it where life happens. A kitchen counter, hallway, or living room shelf — somewhere the day walks past it.
It is a gift that keeps giving. Birthdays, holidays, a Tuesday — every new photo is a small surprise. That is why families love these.
When to call Sean instead
Connecting the frame to Wi-Fi, or inviting family members so they can send photos.
New photos not arriving — usually a Wi-Fi hiccup I fix in minutes.
Choosing between models before you buy — bring who it is for and I will match the right one.
A drone is a small flying camera. It takes off, hovers in the air, and shows you the picture live on your phone screen while you steer it. People use them for overhead photos of family gatherings, beautiful shots of the beach or the lake, and checking the roof or gutters after a storm — without climbing a ladder.
Today's beginner drones practically fly themselves: they hover in place on their own, warn you when the battery runs low, and can fly back to you by themselves at the press of a button.
The top 3
1. DJI Mini 4K — about $269. The best value. Real 4K video (a very sharp picture), and the camera rides on a tiny motorized mount called a gimbal that keeps the picture steady even in wind. Flies about 31 minutes per battery — in real life, plan on the low 20s, so a spare battery is worth it. Weighs 249 grams, just under the magic number, so no FAA registration for fun flying.
2. DJI Neo — about $149. The smallest and simplest. Only 135 grams — it fits in a jacket pocket. It can take off right from your palm and follow you by itself, which makes it the easiest first drone. Flies about 15 to 18 minutes per battery. Full propeller guards come built in, so bumping into things is no big drama.
3. DJI Flip — about $439. The step-up pick. A bigger camera sensor, so photos and video look noticeably better in low light. It can sense obstacles in front of it and stop by itself — much harder to crash. About 31 minutes per battery, and propeller guards are included.
What to compare, in plain words
Camera: 4K means a very sharp picture. The gimbal (Mini 4K and Flip) is what keeps video smooth — it matters more than megapixels.
Flight time: 15 to 31 minutes per battery. Short flights are normal — that is why spare batteries exist.
Obstacle sensing: only the Flip can see things in front of it and stop on its own. The others need you to steer around trees and wires.
Weight: all three are under 250 grams (about half a pound). That number matters for the rules below.
The rules, in simple words
All three drones weigh under 250 grams, so for fun flying you do not need to register with the FAA.
You do need to pass the TRUST test — a free online safety quiz from the FAA that takes about 30 minutes.
Keep the drone where you can see it, stay under 400 feet, and never fly over people or near airports.
Rules can change — check the FAA's website before you fly.
Beginner advice
Narrated tutorial: start in a big, open field; learn the return-to-home button first; charge the battery fully before every flight.
Start in a big, open field — not a backyard full of trees.
Learn the return-to-home button first. One press and the drone flies back to you and lands by itself.
Charge the battery fully before every flight, and land when the app warns you the battery is low.
One note for Android phones: the DJI Fly app is no longer in the Google Play Store — you download it from DJI's own website instead.
When to call Sean instead
You want help picking the right drone before you buy.
Setting up the app or pairing the controller has you stuck.
You want a walkthrough of the TRUST test.
You would like someone beside you for the very first flight.
Quick Answers
Fast answers to the questions people ask most.
⚡ Quick answers
The questions I hear most, answered in a sentence or two. Tap Full instructions on any one for the complete step-by-step guide. Below them: 114 new lessons on scams, Wi-Fi, TV, computers, phones, and passwords — same plain-words promise.
Phone basics
1. How do I make the text bigger on my phone?
Open Settings and drag the text-size slider up. Ten seconds, and text is bigger everywhere.
Wi-Fi is your home internet without wires — faster, and it doesn't use your cell data. Pick your network in Settings and type the password from the router sticker.
Plug into the charger, connect to Wi-Fi, then Settings → Software Update. Updates are designed to keep everything, but back up your photos first just in case — a failed update can lose data.
iPhone: on newer iPhones (15 Pro, 16, 17, and iPhone Air) press and hold the side Action button (it silences by default); on older iPhones, flip the little side switch. Android: hold volume-down. For church or meetings, Do Not Disturb (the moon icon) is better.
Turn on cloud backup, then double-check it worked — iPhone: Settings → your name → iCloud → Photos. Android: Google Photos → Turn on backup. A backup you never verified is no backup at all.
111. I met someone wonderful online, and now they say they need money. What do I do?
Anyone you have never met in person who starts asking for money — for a medical emergency, a plane ticket, a business crisis — is almost certainly a scammer. It does not matter how kind they sound or how…
113. I got a text saying my package couldn't be delivered and I need to click a link. Is that real?
That text is fake. The Postal Service, UPS, and FedEx do not send you a text out of the blue saying your package is stuck and asking you to click a link or pay a small fee.
117. A company called and said they owe ME a refund, but they need remote access to my computer to send it. Is that okay?
No — do not let them in. This is one of the sneakiest scams out there, because it starts with something nice: "we owe you money." They get onto your computer, pretend to send your refund, then say "oops, we…
126. A friend told me about Bitcoin ATMs and says you can send money overseas with them. It sounds easy — is it safe?
Here is what nobody told your friend: scammers love those machines. A Bitcoin ATM looks like a regular ATM, but when you put cash in, it converts it to cryptocurrency and sends it to a digital wallet.
Fakes almost always leave clues: check the sender's address closely, watch for pressure like 'Act now or your account will be closed,' and remember real companies address you by name. Never click the link inside a suspicious email.
128. It says my attachment is too big to send. What do I do?
I hear this one a lot, and it is almost always photos. Your email service only lets you attach so much to one message — for Gmail it is about 25 megabytes, which sounds like a lot until you realize a few…
131. My video calls keep freezing and breaking up. What can I do?
Oh, I hear this one constantly — usually right after "the grandkids' faces froze mid-sentence." It is almost never your fault. It is a signal problem, and a few simple things fix it most of the time.
132. How do I stop all these newsletters I signed up for?
I cover this one in full right here: How do I stop all these junk emails? — including the two-pile system, Gmail's one-click Manage subscriptions view, and the all-important rule about only unsubscribing…
134. Why does my printer keep disappearing from the Wi-Fi?
Your computer or phone swears it cannot find the printer, but nothing looks wrong. A printer "disappearing" is almost always a Wi-Fi hiccup, not a broken printer.
138. How do I organize my email into folders? Gmail does not seem to have any.
You are right — Gmail has no folders, and you are not missing anything. Gmail uses labels instead: sticky notes on an email rather than boxes it sits in.
142. I got an email saying my information was found in a data breach. What should I do?
Take a breath — this does not mean your email was hacked. A data breach means some company got hacked and information it held about you may have leaked.
144. What is a guest Wi-Fi network, and should I set one up?
A guest network is like a guest room for your internet: visitors get online, but they cannot wander into your private rooms. Your main password stays yours alone, and guests cannot see your personal files…
79. Outlook keeps asking for my password even though I typed it right. What is wrong?
Your password is probably fine — Outlook is usually trying an old saved password behind the scenes, failing, and asking you again. Clearing the stale saved passwords and signing in fresh fixes it.
81. My internet went out. What should I do before calling for help?
Before you wait on hold, try the five-minute fix: unplug the power from both the modem and the router, wait a full 30 seconds, then plug the modem back in first. It resolves most outages.
82. Where is my Wi-Fi password? I need it for a new device.
Start with the sticker on the bottom or back of your router — the original password is printed right there. If you changed it and forgot, a computer already connected to your Wi-Fi can show it to you.
83. My email says my storage is full. How do I fix that?
Gmail gives you 15 GB shared across your email, Google Photos, and Google Drive, and it fills up quietly over the years. The fastest cleanup: search for your biggest emails, delete them, then empty the Trash so they stop counting.
85. Is it safe to use Wi-Fi at a coffee shop, hotel, or the airport?
Public Wi-Fi is fine for reading the news or checking directions — but other people nearby can potentially see what you are doing. Save banking, shopping, and important sign-ins for your home network.
148. My TV keeps turning itself off in the middle of a show. How do I make it stop?
Nine times out of ten, the culprit is the sleep timer — a feature for people who fall asleep with the TV on. If it is on by accident, the TV shuts off mid-show, which is maddening.
The Roku is the simpler of the two, in my opinion. Its home screen is a neat grid of your apps — Netflix, Hulu, whatever you use — a neat grid with much less clutter than most.
150. Why is my picture so dark? And why do the people look all stretched out and fat?
Dark picture: on a Roku TV, press the star button and pick Picture settings. Change Picture mode — the options are usually things like Movie, Normal, Sports, and Vivid.
155. Are Pluto TV, Tubi, and the Roku Channel actually free? What is the catch?
I cover this one in full right here: Does Roku cost money every month, or is it free after I buy it? — including the full cost breakdown, the activation-fee scam warning, and what's really the catch with…
156. I got an antenna for local channels. How do I set it up so the TV actually finds them?
I cover this one in full right here: How can I watch my local channels without paying for cable? — including the channel scan, antenna placement tips, and antennaweb.
160. How do I turn on the captions with my cable box?
I cover this one in full right here: How do I turn on captions and make the words bigger? — including the separate caption setting hiding in your cable box's own menu — it's independent of the TV's.
162. There is a voice describing everything happening in the movie. How do I turn that off?
Different from talking menus — this is a narrator describing the show itself: 'She walks to the door. He looks worried.' It is called audio description (sometimes AD), meant for viewers with vision trouble.
50. Does Roku cost money? How do I get free movies and shows?
The Roku itself is a one-time purchase — using it costs nothing. Plenty of channels like the Roku Channel, Pluto TV, and Tubi are completely free; you only pay for the ones you choose, like Netflix.
104. What do I actually need to cancel cable and switch to streaming?
You need exactly two things: internet service in your home, and a smart TV or a streaming device like a Roku or Fire Stick that plugs into any TV. That is genuinely it.
It can — cable now averages over $200 a month, while an antenna plus one or two services you actually watch often totals under $40. The trap is stacking up subscriptions until it costs like cable again.
106. My streaming remote stopped working. How do I get it going again?
A dead streaming remote is almost never dead — start with fresh batteries, which is the cause most of the time. If that fails, the remote has usually just lost its pairing, and that is fixable too.
108. The TV dialogue is too quiet but the music blasts. What helps?
It is not your hearing — modern TV sound is mixed so the voices sit under the music. Look in your TV's sound settings for Dialogue Enhancement or Clear Voice to lift the talking back up, and turn on captions, which help more than anything.
109. Can I pair my hearing aids directly to the TV?
Yes — if your hearing aids and your TV both have Bluetooth, the TV sound can go straight to your ears, clear as a phone call, while the room stays quiet for everyone else.
110. My remote has too many tiny buttons. Is there a simpler one?
Yes — big-button universal remotes have large backlit buttons and only the controls you actually use. They cost about $15 to $30 and work with most TVs, cable boxes, and streaming sticks.
165. Windows 10 support ended. What am I supposed to do now?
I see this one a lot, and here's the short version: your computer won't stop working tomorrow. It just isn't getting security updates anymore, and that's what we need to handle. Good news: Microsoft gives home users free extra security updates through October 2027 — ask us and we can set that up.
166. My screen went sideways or upside down. How do I fix it?
This one trips up a lot of folks, and it looks alarming — but it's a two-minute fix. Somebody (or some key combination) changed the display orientation, that's all.
169. My keyboard is typing the wrong letters or symbols.
Nine times out of ten, I see this one because the keyboard language got changed by accident. There's a key combination that switches it, and people hit it without knowing.
This is one of the most useful things you can learn on a computer, and it's simpler than it looks. There are just two moves: copy (pick it up) and paste (put it down).
179. How do I make a web page bigger without changing everything else?
I cover this one in full right here: How do I make the words bigger on my computer screen? — including browser zoom and the full computer text-size walkthrough.
181. My computer's fan is very loud, and it's getting hot.
Here's what I tell my clients: a loud fan usually means the computer is working hard, not that it's broken. Video calls, lots of open tabs, or a warm room all make it run hotter.
89. How do I get my printer connected to the Wi-Fi?
You connect the printer to Wi-Fi on the printer itself, not on the computer. Find Wireless Setup Wizard in the printer's Network settings, pick your home network name, and type your Wi-Fi password carefully.
90. My printer is printing blank pages. The black ink will not print. What do I do?
The cartridge is not empty — the ink has dried up and is blocking the tiny openings it flows through. Your printer's Clean Printhead option, in its Maintenance or Tools menu, usually clears it.
91. The printer says there is a paper jam. What do I do?
Do not yank — pulling hard tears the paper and turns a two-minute fix into a real repair. Turn the printer off, open the panels, and ease the paper out gently in the direction it normally travels.
93. My computer will not turn on at all. The screen is black.
Most of the time this is a power problem, not a dead computer. Follow the power cable to the wall, push both ends in firmly, and check the power strip's switch before you worry.
94. My computer keeps asking me to update. Should I let it? Will it break anything?
Let them install — updates are mostly security repairs, closing the holes that scammers and viruses use to get in. Your files and programs stay right where they are; just pick a time when you will not need the computer.
95. Do I need antivirus software, or is the one built into Windows enough?
For most people, the protection built into Windows — Microsoft Defender — is enough, and it is free. Just do not run two antivirus programs at once; they fight each other and slow the computer down.
97. I downloaded something from the internet and now I cannot find it. Where did it go?
Nothing you download ever disappears — it all goes to one place: the Downloads folder. Open File Explorer on Windows, or Finder on a Mac, click Downloads, and your newest file sits at the top.
100. Is it time for a new computer, or can this one be saved?
I answer this with a checklist, not a guess. Lean toward replacing if the computer is 7 or more years old, or a repair would cost close to half the price of a new one; lean toward keeping it if it is under 5 and just slow — a tune-up often buys years more life.
Yes. A backup is a copy of your files kept somewhere safe — so if your computer is stolen, dies, or gets a virus, your photos and documents are not gone.
96. I accidentally deleted a file on my computer. Can I get it back?
Good news first: a deleted file is usually not gone — it is sitting in the Recycle Bin on Windows or the Trash on a Mac. Find the file, right-click it, and choose Restore or Put Back.
187. My phone suddenly started talking to me — how do I turn that off?
A screen reader got turned on — VoiceOver on iPhone, TalkBack on Android. When it's on, your phone reads everything aloud, and the touches change: a single tap only selects something, and you have to…
189. How do I move everything from my old phone to a new one?
Samsung's own Smart Switch app moves your photos, contacts, messages, and apps from your old phone to your new one. It usually opens by itself the first time you set up the new phone.
First, the two rules that never change: don't reply to a suspicious text (even "STOP" — it tells them your number is live), and don't tap any links in it. If it looks like your carrier or bank, go to their…
191. How do I connect my hearing aids to my phone?
Made-for-iPhone hearing aids pair right through Settings. On an iPhone: go to Settings > Bluetooth (make sure Bluetooth is on), then Settings > Accessibility > Hearing Devices.
192. My alarm didn't go off this morning — what happened?
First, the good news: your alarm should have gone off. Apple states plainly that Do Not Disturb, the side switch (or the Action button on newer iPhones), and Silent mode do not affect the Clock alarm sound.
I cover this one in full right here: How do I silence my phone quickly? — including the quick-silence steps plus the full Do Not Disturb walkthrough — scheduling quiet hours and letting favorites and alarms…
196. How do I stop unknown callers from ringing my phone?
I cover this one in full right here: How do I stop all these robocalls? — including the habits that stop most robocalls, the Do Not Call registry, and the current phone settings for screening unknown callers.
197. How do I block one specific person from calling me?
I cover this one in full right here: How do I block a number that keeps calling or texting me? — including the step-by-step blocking steps for iPhone and Samsung, how to unblock someone later, and what…
A little warmth is normal — especially while charging, during a software update, on a long video call, or playing games. Apple's own support page lists all of those as normal causes.
199. How do I stop my screen from rotating when I turn my phone?
On an iPhone: open Control Center — on newer iPhones swipe down from the top-right corner; on iPhones with a Home button, swipe up from the bottom edge. Tap the button that looks like a padlock with a…
A hotspot lets your phone share its cellular data with another device — like your tablet or laptop — over Wi-Fi, so that device can get online where there's no Wi-Fi.
Tap the microphone button on your keyboard and just talk — your phone types what you say. If the microphone button is missing, turn dictation on first: on iPhone, go to Settings > General > Keyboard >…
203. Can my car read my texts out loud while I drive?
Yes — if your car supports CarPlay (iPhone) or Android Auto (Samsung/Android), your texts can be read aloud and you can reply by voice without touching the phone.
62. My phone is frozen and nothing responds. How do I restart it?
A frozen phone is almost never broken, and forcing a restart deletes nothing — your photos, contacts, and apps will all still be there. The trick is holding the buttons down longer than feels natural, until the logo appears.
68. How do I send my photos to family or get them onto my computer?
It all starts with one button: Share — the little square with an arrow pointing up that appears whenever a photo is open. From there you can text or email the photo, and plugging the phone into your computer moves photos the other way.
73. What is that square barcode thing, and how do I scan it?
That square is called a QR code — just a shortcut that opens a website or a menu so you do not have to type a long address. You do not need a special app: open your Camera, point it at the code, and tap the banner that pops up.
64. All my contacts disappeared from my phone. Where did they go?
Take a breath — contacts almost never truly vanish on their own. Your phone most likely signed out of the account holding them, often right after a software update, and they are still sitting safely in that account.
71. How do I take a screenshot, a picture of what is on my screen?
A screenshot is just a picture of whatever is on your screen — one of the handiest tricks I teach. It is two buttons pressed at the same time, and the picture lands in your Photos app.
72. How do I delete apps I do not use? Do I need to close apps to save battery?
Deleting an app and closing an app are completely different things. Press and hold the icon, then tap Remove App on iPhone or Uninstall on Android — and no, you do not need to swipe apps closed to save battery.
205. I forgot my Apple ID password. How do I get back in?
I cover this one in full right here: Why does the App Store keep asking for my password, and my apps will not update? — including the Face ID fix and the full Apple ID recovery walkthrough.
206. What IS an Apple ID — and do I even have one? What about a Google account?
Here's what I tell my clients: think of it as your phone's name tag. An Apple ID — Apple now calls it an Apple Account, but it's the same thing — is the email and password your iPhone uses for the App…
208. I got a new phone and now the codes don't come anymore. What do I do?
This one trips up a lot of folks, and I wish the phone stores warned people about it. Those codes went to your old phone — your new phone doesn't know it's you yet.
209. What is this authenticator app thing? It keeps asking for a code.
An authenticator app is like a little code machine that lives on your phone. Some websites ask for a number that changes every 30 seconds, and that app is where the number lives.
210. Which password manager should I use, and how do I get started?
I cover this one in full right here: How am I supposed to remember all these passwords? — including the simple system I recommend and the truth about how the built-in password managers unlock.
211. My face (or fingerprint) stopped unlocking my phone. How do I fix it?
Nine times out of ten this is something simple. First, wipe the front of the phone and wash and dry your hands — lotion, sweat, or a cut can confuse the sensor, especially for fingerprints.
212. My phone keeps filling in my passwords. Is that safe? Should I turn it off?
Yes, it's safe — and honestly, it's safer than typing passwords by hand. When you tap a login box, your phone checks the website's address first and won't offer your password on a look-alike fake — that's…
215. Can my phone help me read tiny print — like a medicine bottle?
Yes — your phone has a magnifying glass built in, and it's wonderful for pill bottles and menus. On iPhone, open the Magnifier app (just swipe down on your home screen and type "Magnifier").
217. I can barely hear people on phone calls. Is there a phone that writes down what they say?
Yes, and for many people it's completely free. There's a service called CaptionCall — it's a special phone (and a phone app) that prints out what the caller is saying while you talk, almost like subtitles…
224. All the zooming and sliding on the screen makes me dizzy. Can I calm it down?
Yes — you're not imagining it, and there's a switch for exactly this. It's called Reduce Motion, and it lives at Settings > Accessibility > Motion > Reduce Motion.
It came with your phone — look for the Calculator app. On iPhone, swipe down on the home screen and type “calculator”; on Android, open the app drawer and look for Calculator.
Plenty — and most are free. Solitaire, crossword and word games, matching puzzle games like Candy Crush, and bingo are all in the App Store or Google Play. This site has free games to try right now at s2wtech.com/games.
A warm phone is normal; a hot phone is working too hard. Move it out of the sun, unplug the charger for a bit, take the case off, and let it rest 10–15 minutes. Never put it in the fridge or freezer.
99. I forgot my Mac password and I cannot log in. What do I do?
Apple built a way back in — you will just need your Apple ID, the email address tied to your Mac. On the login screen, click the question mark in the password box, and it will offer to reset your password using your Apple ID.
That code is called two-step verification, and it is extra protection. Even if someone steals your password, they still cannot get into your account without the code that goes to your phone.
87. I forgot my password and I am locked out of my computer. What do I do?
Do not panic — there is usually a way back. If your sign-in screen shows an email address, you sign in with a Microsoft account and can reset the password online, usually within minutes.
In-depth guides you can buy and keep — $2.99 each.
Paid guides
Every step-by-step guide, all in one place. $2.99 each · PDF you keep
Amazon Echo & Alexa Setup Guide15 pages
Gets your Echo speaker set up from the box: plug it in, connect it to Wi-Fi, install the Alexa app, and ask your first question.
Amazon Echo User Guide19 pages
Everyday life with Alexa: play music, set timers and alarms, ask questions, and learn handy tricks like the mute button.
Amazon Fire Tablet Setup Guide13 pages
Sets up your Fire tablet from scratch: charge it, join Wi-Fi, sign in with your Amazon account, and learn the first screen.
Apple Maps Setup Guide19 pages
Gets Apple Maps ready on your iPhone or iPad so you can hear spoken turn-by-turn directions, including letting Maps know where you are.
Apple Maps User Guide23 pages
Using Apple Maps day to day: get directions anywhere, read the map screen, listen while you drive, and share your trip safely.
Apple Pay Setup Guide16 pages
Adds your card to the Wallet app and verifies it with your bank, so Apple Pay is ready to use on your iPhone.
Apple Pay User Guide19 pages
Paying with your iPhone in stores, sending money in text messages with Apple Cash, and managing your cards with confidence.
Apple Watch for Seniors User Guide25 pages
Everyday Apple Watch use for seniors: calls, messages, Fall Detection, Emergency SOS, Medical ID, and emergency contacts.
Apple Watch Setup Guide23 pages
Sets up your Apple Watch: charge it, pair it with your iPhone, and turn on the safety features.
Bluetooth Pairing Setup Guide19 pages
Connects earbuds, speakers, and hearing aids to your iPhone, iPad, or Android phone for the first time — pairing made simple.
Bluetooth Pairing User Guide16 pages
Everyday Bluetooth use: listening through earbuds, playing music on a speaker, and hearing phone calls through your hearing aids.
Brother Printer Setup Guide31 pages
Takes your Brother printer from the unopened box to your first print: load it, join Wi-Fi, add ink or toner, print from your phone, and fix offline or streaked prints.
Canon Printer Setup Guide28 pages
Takes your Canon printer from the unopened box to your first print: PIXMA cartridges, MegaTank ink bottles, or imageCLASS laser — join Wi-Fi, print from any device, and fix common print problems.
Chromebook Setup Guide18 pages
Sets up your Chromebook from the box to browsing: turn it on, sign in with your Google account, and learn your way around.
Digital Photo Frame Setup Guide22 pages
Sets up your digital photo frame (Frameo, Aura, Skylight, and similar): plug it in, connect Wi-Fi, link your phone, and send the first family photos.
Digital Photo Frame User Guide21 pages
Everyday photo frame use: send new photos from your phone, invite family to share, and adjust the screen brightness and slideshow.
Epson Printer Setup Guide25 pages
Takes your Epson printer from the unopened box to your first print: EcoTank ink bottles or cartridge models, join Wi-Fi, print from any device, and fix blank or streaked prints.
eBay Safety Setup Guide15 pages
Set up your eBay account safely: creating your account, setting up payments, and learning to spot safe sellers before you buy.
eBay Safety User Guide23 pages
Buy and sell on eBay with confidence: bidding, Buy It Now, reading seller feedback, safe payment, and avoiding the common scams.
Facebook for Seniors User Guide63 pages
The complete Facebook guide: Marketplace buying and selling safely, every account and privacy setting, posts, photos, Messenger, friends, groups, events, and stopping scams.
Facebook Setup Guide13 pages
Installs the Facebook app, creates your account, and helps you connect with the people you love.
Instagram Setup Guide18 pages
Installs the Instagram app, creates your account, adds your profile photo, and helps you follow family and friends.
Instagram for Seniors: The Thorough Edition60 pages
The complete Instagram guide: every setting, followers and privacy, stories, direct messages, posting photos, and staying safe from scams.
FaceTime Setup Guide15 pages
Sets up FaceTime on your iPhone or iPad so you can video-call family in a few taps.
FaceTime User Guide17 pages
Using FaceTime: make video calls, add the whole family on group calls, mute, and flip the camera.
Fire TV Smart TV Setup Guide15 pages
Sets up your Fire TV Stick: plug it into any TV, connect Wi-Fi, sign in with your Amazon account, and start watching.
Fire TV Smart TV User Guide39 pages
Everyday Fire TV use on TVs with Fire TV built in: the remote and voice control, Home screen, apps, picture and sound, Wi-Fi, and common fixes.
Free Streaming for Seniors18 pages
Great TV that costs nothing: free streaming apps like Tubi, Pluto TV, the Roku Channel, and PBS — plus using an antenna for local channels.
Free Up Space on Android21 pages
Frees up space on your Android phone: safe cleanups like clearing app cache and removing unused apps, so it runs faster.
Free Up Space on iPhone17 pages
Frees up space on your iPhone: safe steps like offloading unused apps while keeping your data, clearing cache, and seeing what is filling the phone.
Galaxy Watch 8 Setup Guide18 pages
Sets up your Galaxy Watch8: charge it, pair it with your phone using the Wearable app, and learn the watch face.
Galaxy Watch 8 User Guide33 pages
Everyday use of your Galaxy Watch8: reading the screen, using apps, and setting up safety features like Emergency SOS and fall detection.
Gmail Setup Guide19 pages
Creating your free Gmail address or signing in on your phone, step by step — plus adding a recovery phone number so you can get back in if you forget your password.
Gmail User Guide19 pages
Everyday email: reading, replying, writing new messages, adding photos, and spotting junk mail before it tricks you.
Google Maps on Android Setup Guide16 pages
Getting Google Maps ready on your Android phone: signing in, turning on location, saving your home address, and getting your first directions.
Google Maps on Android User Guide27 pages
Using Google Maps for everyday trips — getting to the doctor, visiting family, finding your way home, and letting someone you trust follow your trip.
Google Nest Setup Guide16 pages
Setting up your Google Nest speaker, display, or thermostat: plugging it in, connecting it to Wi-Fi through the Google Home app, and asking your first question.
Google Nest User Guide18 pages
Talking to your Google speaker every day: playing music, setting timers, getting answers, and sending announcements to every speaker in the house.
Google Pay Setup Guide16 pages
Getting tap-to-pay ready on your Android phone: adding your bank card to Google Wallet and verifying it with your bank.
Google Pay User Guide17 pages
Paying with a tap at the checkout, keeping your cards organized in the phone, and checking what you spent.
Google Photos Setup Guide17 pages
Setting up automatic photo backup on your Android phone, so you never lose a photo even if the phone breaks or gets lost.
Google Photos User Guide16 pages
Finding any photo in seconds with search, making albums, sharing pictures with family, and freeing up space on your phone.
Home Wi-Fi Setup Guide25 pages
Setting up your home internet from scratch: what each box does, plugging them in, connecting your phones and TV, and changing your Wi-Fi name and password.
Home Wi-Fi User Guide17 pages
When the internet acts up: simple fixes for slow Wi-Fi, dead spots in the house, and connections that keep dropping.
HP Printer Setup Guide25 pages
From the unopened box to your first print: loading paper and ink, connecting to Wi-Fi, printing from your phone or computer, and fixing common print problems.
iCloud Photos Setup Guide16 pages
Back up your iPhone photos so you never lose one: an honest talk about iCloud storage (including the paid plans if you need more room), then turning on iCloud Photos.
iCloud Photos User Guide18 pages
Enjoy your photos everywhere: finding any photo, hearting your favorites, sharing albums with family, and watching the automatic Memories slideshows your iPhone makes from your pictures.
iPad A16 Setup Guide
Get your new iPad A16 out of the box and running: the first-time setup screens, Apple Account sign-in, and the settings that matter most. (Coming soon — not yet for sale.)
LG Smart TV Setup Guide24 pages
From the box to your first show on your LG smart TV: the Magic Remote, connecting to Wi-Fi, and opening apps.
LG Smart TV User Guide33 pages
Everyday use of your LG smart TV: the Home screen, apps, picture and sound settings, and easy fixes when something goes wrong.
LinkedIn Setup Guide20 pages
Set up your LinkedIn profile step by step: creating your account, adding your work history and photo, and connecting with people you know.
LinkedIn User Guide49 pages
Using LinkedIn every day: finding people, joining conversations, looking for work or volunteers, and keeping your information private.
Lyft Setup Guide16 pages
Setting up the Lyft app: creating your account, saving your home address, and understanding the price before you book a ride.
Lyft User Guide17 pages
Getting rides with Lyft: requesting a driver, the four safety checks before getting in any car, and sharing your trip with family.
Netflix Setup Guide20 pages
Setting up Netflix on your TV: choosing a plan, creating your own profile, and getting the app ready to watch.
Netflix User Guide19 pages
Finding something good to watch: browsing and searching, saving shows to your list, turning on captions, and picking up where you left off.
Online Banking Safety Guide22 pages
Checking balances and paying bills online safely: the rules that protect your money, including bank text alerts and why public Wi-Fi is never safe for banking.
Online Shopping Safety Guide17 pages
Shopping online with confidence: spotting fake stores, checking out safely, and why a credit card protects you better than debit.
Password Manager Setup Guide19 pages
Setting up your phone's built-in password saver — free and already on your phone — so you never have to remember passwords again.
Password Safety for Seniors17 pages
Strong passwords made simple: what makes a password safe, what to never share, and how scammers try to steal them.
Pinterest Setup Guide17 pages
Set up your Pinterest account: creating your profile, picking topics you love, and saving your first ideas to boards.
Pinterest User Guide51 pages
Enjoy Pinterest every day: finding recipes, crafts, and home ideas, organizing boards, following people, and sharing your own pins.
Creating your doctor's online account (MyChart and similar portals), step by step, using the activation code from your clinic.
Patient Portal User Guide (MyChart & Similar)23 pages
Using your patient portal day to day: booking appointments, messaging your care team, refilling prescriptions, and reading test results.
QR Codes for Seniors19 pages
Those little square barcodes are everywhere. Learn to scan them with your phone camera — on iPhone and Android — and stay safe doing it.
Ring Doorbell Setup Guide20 pages
Setting up your battery-powered Ring doorbell: charging it, mounting it by the door, connecting it to Wi-Fi, and testing it.
Roku TV Setup Guide20 pages
Setting up your Roku TV: unboxing, attaching the stand, pairing the remote, connecting to Wi-Fi, and linking your Roku account.
Roku TV User Guide32 pages
Everyday use of your Roku TV: the remote, the Home screen, apps, picture and sound, and easy fixes.
Samsung Smart TV Setup Guide21 pages
Get your Samsung smart TV out of the box and running: plugging it in, connecting Wi-Fi, signing into apps like Netflix and YouTube, and using the SolarCell remote — one calm step at a time.
Samsung Smart TV User Guide29 pages
Learn to use your Samsung Smart TV every day: the remote, the Smart Hub menu, opening apps like Netflix and YouTube, adjusting picture and sound, connecting to Wi-Fi, and fixing small problems.
Senior Tech Made Simple27 pages
Five short courses in one book: Samsung phone, iPhone, iPad, Roku, and Fire TV — bigger text, clearer sound, and the skills that matter.
Sony Smart TV Setup Guide (Google TV)22 pages
Get your new Sony Google TV out of the box and running: attaching the stand, plugging it in, putting batteries in the remote and pairing it, connecting to Wi-Fi, and signing in — all the way to your first show.
Sony Smart TV User Guide (Google TV)29 pages
Everyday use of your Sony Google TV: the remote, the Home screen, opening and closing apps, adjusting picture and sound, connecting to Wi-Fi, and simple fixes when something goes wrong.
Spotting Scams18 pages
The scams targeting seniors right now: how to recognize a fake call, text, or email in seconds — and what to do.
Telehealth Setup Guide17 pages
Get ready for doctor visits by video: what you need, what it costs with insurance and Medicare, setting up your patient portal account, and installing your doctor's app with the camera and microphone allowed.
Telehealth User Guide17 pages
Do a video doctor visit from your living room: joining the appointment 10 minutes early, waiting in the virtual waiting room, talking to your doctor, and reading your visit notes and follow-up steps afterward.
TikTok Setup Guide20 pages
Set up TikTok safely: installing the app, creating your account, setting privacy controls, and finding videos you enjoy.
TikTok User Guide50 pages
Using TikTok with confidence: watching videos, following creators, liking and sharing, making your own short videos, and staying safe.
Two-Factor Authentication Setup Guide17 pages
Add a second lock to your important accounts: turn on text-message codes or an authenticator app, save your emergency backup codes somewhere safe, and test that it works.
Two-Factor Authentication User Guide17 pages
Use your second lock every day with confidence: typing in the 6-digit codes, approving the “Was this you?” prompt on your phone, and telling sites to remember your own trusted devices.
Uber Setup Guide18 pages
Get Uber ready on your phone: installing the app, creating your account with your phone number, adding a payment method, and saving your home address so requesting a ride takes one tap.
Uber User Guide20 pages
Request rides and travel safely: choosing the right ride type, setting your pickup spot, checking the driver's name, photo, license plate, and car before getting in, and sharing your trip live with family.
Vizio Smart TV Setup Guide21 pages
Set up your new VIZIO Smart TV from the box: attaching the stand, plugging it in, getting the remote working, connecting to Wi-Fi, and opening your first app.
Vizio Smart TV User Guide24 pages
Everyday use of your VIZIO Smart TV: the remote and the Home screen, opening Netflix and YouTube, switching back to cable, fixing the picture and sound, and connecting to Wi-Fi.
Voicemail Setup Guide14 pages
Set up voicemail on your iPhone or Samsung Galaxy phone: creating your password, recording your greeting, and making sure new messages come through.
Voicemail User Guide17 pages
Use your voicemail every day: listening to new messages, calling people back, deleting old ones, and changing your greeting — with steps for both iPhone and Samsung phones.
WhatsApp Setup Guide15 pages
Get WhatsApp on your phone: installing the app, verifying your phone number with the 6-digit code, setting up your name and photo, and letting it find your family in your contacts.
WhatsApp User Guide15 pages
Stay close with WhatsApp every day: sending texts, voice messages, and photos, making free voice and video calls, and chatting with the whole family in one group.
Windows 11 Senior Course15 pages
A calm step-by-step course for your Windows 11 computer: the desktop, the Start menu, your files, the internet, and staying safe.
Xfinity Cable Remote Setup Guide12 pages
Get your Xfinity X1 voice remote working: putting in the batteries, pairing it to the cable box (with fixes if the pairing code fails), and using the microphone button to find shows with your voice.
Xumo on Spectrum Setup Guide15 pages
Set up your Xumo Stream Box from Spectrum: connecting it to the TV, getting on the right HDMI input, joining Wi-Fi, and getting your favorite apps working together.
Xumo on Spectrum User Guide24 pages
Watch television with your Xumo Stream Box every day: turning everything on, using the remote and voice search, finding shows on the Home screen, using apps, and fixing common problems.
YouTube Setup Guide18 pages
Get YouTube ready on your TV, phone, or tablet: finding the app, and signing in with your Google account so you can save favorites — watching is free either way.
YouTube User Guide18 pages
Enjoy YouTube every day: finding videos by typing or speaking, subscribing to channels you love for free, and saving interesting videos to your Watch Later shelf.
Zelle Setup Guide13 pages
Set up Zelle inside your bank's app: enrolling your phone number, sending a small test payment, and learning the one rule that keeps scammers away from your money.
Zelle User Guide20 pages
Send and receive money safely through your bank's app: paying people you trust, accepting money sent to you, and spotting the tricks scammers use.
Zoom Setup Guide15 pages
Get Zoom on your device and join your first video call: installing the app and joining from a link in a text or email — you don't even need an account just to join.
Zoom User Guide16 pages
Feel at home on Zoom calls with family, doctors, and friends: muting and unmuting, switching between gallery and speaker view, sending chat messages, and hosting a meeting of your own.
The Kinds of Home Cameras, in Plain Words
Home cameras come in four main kinds: doorbell cameras, outdoor cameras, indoor cameras, and floodlight cameras. The main choice after that is how the camera gets its power — batteries you recharge, a plug, or wires in the wall. Most people start with one doorbell camera, and that alone covers the spot that matters most: your front door.
Doorbell cameras
A doorbell camera replaces your regular doorbell. It has a camera, a doorbell button, and a small speaker and microphone (the parts that let you hear and talk). When someone presses the button or walks up, it records a short video and sends an alert to your phone.
You can see who is at the door and talk to them from wherever you are — the couch, the grocery store, or another state. This is the camera most people buy first, because nearly everything that arrives at your home — packages, visitors, salespeople — comes to the front door.
Good for: almost everyone. If you only ever buy one camera, buy this one.
Outdoor cameras
An outdoor camera is a weatherproof camera that mounts on a wall, under the edge of the roof, or on a post. It watches a driveway, a side yard, a back door, or a pool area.
Unlike a doorbell camera, it does not have a button. It simply records when it sees movement and sends you an alert.
Good for: driveways, back doors, and any side of the house nobody watches.
Indoor cameras
An indoor camera sits on a shelf or table inside the house and watches a room. People use them to check on a pet, keep an eye on an elderly parent who lives alone, or see that everything is fine while they travel.
These are the least expensive cameras of all — often the price of a pizza or two. They plug into a wall outlet, so there are no batteries to charge.
Good for: checking on pets, checking on a loved one, and peace of mind on vacation. One honest note: many people find indoor cameras uncomfortable in living spaces. A common compromise is to plug one in only when you travel, or to use the camera's privacy cover (a little shutter that physically closes over the lens) when you are home.
Floodlight cameras
A floodlight camera is an outdoor camera with bright lights built in. When it sees movement at night, the lights come on and the camera records. Some models can also sound a loud alarm (a siren) that you trigger from your phone.
The light itself does much of the work — a person up to no good usually leaves when a yard suddenly lights up.
Good for: dark driveways, back yards with no streetlight, and side yards. These almost always need to be connected to house wiring where an existing outdoor light is, so they are the one kind that usually needs an installer or an electrician.
The power choice: battery, plug-in, or wired
Every camera needs power, and this choice matters more than most people expect.
Battery powered. No wires at all — you stick it up or screw it up, and it runs on a rechargeable battery. Charging is needed every few weeks to every few months, depending on how much movement the camera sees. A busy front door drains a battery much faster than a quiet back yard. When the battery runs low, the app warns you. Then you take the camera down (or pop the battery out), charge it for a few hours, and put it back.
Plug-in. The camera has a cord that runs to an outlet. You never think about batteries, but you need an outlet within cord's reach, and the cord is visible.
Wired. The camera connects to your home's electrical wiring, the way a porch light does. No batteries, no cords to see — but installing one usually means working with house wiring, which is a job for a professional.
Who needs which — the honest version
One doorbell camera is enough for most homes. It covers deliveries, visitors, and the front entrance.
Add an outdoor camera if your driveway or back door is out of sight of the front door, or if packages are left somewhere other than the front step.
Add a floodlight camera only if you have a dark area that worries you. It is the most expensive and the hardest to install.
Add an indoor camera only for a specific reason — a pet, a parent, travel. It is rarely worth watching your own living room every day.
More cameras is not automatically better. Every camera sends alerts, and a house with six cameras can send sixty alerts a day. Most people end up ignoring them — which defeats the whole purpose. Start small. You can always add later; all the major brands let you add cameras to the same app.
One more thing every camera needs
All of these cameras use your home Wi-Fi (your wireless internet) to send video to your phone. A camera in a spot with a weak Wi-Fi signal will miss recordings and load slowly, no matter how good the camera is. If a far corner of the house has weak internet, that is worth fixing first — and it is a common reason a "bad camera" turns out not to be the camera's fault at all.
If you would like help choosing, or want cameras installed and set up for you, call Sean at (813) 770-6082.
Words in this lesson
Wi-Fi — your home's wireless internet; the signal your phone and cameras connect to without a cord.
Alert — a message that pops up on your phone, for example "Movement at the front door."
Weatherproof — built to survive rain and heat outside without being damaged.
Siren — a loud alarm sound the camera can make to scare someone off.
App — a program on your phone; each camera brand has its own app for viewing your cameras.
Ring vs Blink vs Arlo: An Honest Comparison
Ring, Blink, and Arlo all make good cameras, and all three are watched on your phone the same way. The real differences are price and the monthly plan: Ring is the best-known name and works best with its paid plan, Blink is the simple budget choice with batteries that last a remarkably long time, and Arlo makes the sharpest pictures and cameras that need no wires at all — for the highest prices of the three. Prices change, so treat every number below as "the shape of it," not a quote.
First, who these companies are
Ring is owned by Amazon. It is the biggest name in doorbell cameras — when most people say "Ring," they mean any doorbell camera, the way people say "Kleenex" for any tissue.
Blink is also owned by Amazon. It is Ring's simpler, cheaper sibling.
Arlo is its own company. It is known for cameras that are completely wire-free — no power cord, nothing to plug in — and for picture quality a step above the rest.
These are the three brands Sean sets up for his clients himself: Ring, Blink, and Arlo.
All three work with a free app on your phone. All three offer optional monthly plans that save your recordings. The cameras themselves are only half the cost story — the plan is the other half, which is why this lesson covers both.
What the cameras cost to buy
Prices change with sales (and these brands run sales constantly), but the shape of it is steady:
Blink is the least expensive. Its cameras commonly sell in the $40 to $100 range, and multi-camera bundles (two or three cameras in one box) are often the best deal of the three brands.
Ring sits in the premium middle. Its doorbell cameras commonly run from about $100 to $200 or more, and its floodlight cameras are its priciest items.
Arlo is the most expensive of the three. Its cameras commonly run from about $100 to $250 or more, and its sharpest models cost more still. You are paying for the picture and the total freedom of placement.
The monthly plans — and what you lose without one
This is the part the advertisements skip. Here is what each brand's plan is called and what happens if you never pay for it.
Ring — the plan is called Ring Home (it used to be called Ring Protect).
Cost shape: a few dollars a month — around $5 — for one camera, or around $10 a month to cover every Ring camera at your home.
With the plan: recordings are saved online for up to 180 days, so you can go back and watch or save a video from weeks ago.
Without the plan: you can still watch live video and get motion alerts, but nothing is recorded for later. If a package is stolen at noon and you see the alert at 3 p.m., there is no video to look at. For most Ring owners, the plan is effectively part of the price.
Blink — the plan is called the Blink Subscription Plan.
Cost shape: about $3 a month for one camera, or about $10 a month for all your Blink cameras.
With the plan: recordings are saved online for 60 days.
Without the plan: you still get live viewing and motion alerts. And Blink has one real advantage here — its cameras can save short recordings onto a small memory drive (a USB stick) plugged into Blink's little base box, called a Sync Module, with no monthly fee. The setup is a bit more fuss, the saved videos are slower to browse, but the option exists, which Ring does not offer.
Arlo — the plan is called Arlo Secure.
Cost shape: a few dollars a month for one camera, or a higher flat price — more than Ring's or Blink's — to cover every Arlo camera at your home.
With the plan: recordings are saved online for about 30 days (longer on the top tier), and the cameras can tell the difference between a person, a package, a pet, and a car, so you get fewer pointless alerts.
Without the plan: like Ring, you can watch live and get motion alerts, but nothing is saved online for later. One exception: some Arlo cameras work through Arlo's base box, called a SmartHub, and can save recordings onto a memory stick or card plugged into that box, with no monthly fee. Browsing those saved videos is slower, but the option exists.
Where recordings are kept
Ring: only online, in "the cloud" — meaning on the company's computers, reached through the internet. There is no memory-card option.
Blink: online with the plan, or saved to a USB drive in your home (on the Sync Module) without one.
Arlo: online with Arlo Secure, or saved to a memory stick or card in its SmartHub base box (on models that use one) without one.
Lesson 4 in this series explains cloud vs memory card vs hub in plain words.
How they feel to live with
Ring has the most polished app, the widest selection (doorbells, floodlights, alarms, and more), and its cameras' batteries typically need charging every few weeks to a few months. If you already use Alexa (Amazon's voice assistant), Ring fits right in.
Blink is the set-it-and-forget-it champion. Its outdoor cameras run on AA lithium batteries that famously last up to two years, because the cameras sip power. Video quality is a step below Ring, and the app is plainer — but many people prefer plain. Blink also works with Alexa.
Arlo gives you the clearest picture of the three — faces and license plates stay readable further away — and because its cameras need no wires at all, they can go on a fence post, a tree, or anywhere Wi-Fi reaches, where the other brands simply cannot go without a cord. Night pictures on many Arlo models are in color, not just gray. The trade-offs are the prices: the cameras cost the most, the plan costs the most, and the batteries on its hardest-working cameras need charging more often than Blink's. Arlo works with both Alexa and Google's voice assistant.
The honest bottom line
Choose Ring if you want the best-known doorbell camera and are comfortable paying a few dollars a month — budget for the plan from day one.
Choose Blink if you want simple, inexpensive cameras you can mount anywhere and not think about for a year or two at a time, especially for driveways and back doors.
Choose Arlo if you want the sharpest picture and a camera you can stick on a fence or a tree with no cord at all — and the budget allows for the priciest cameras and plan of the three.
Whichever brand you pick, stick with one brand for the whole house. Mixing brands means two apps, two plans, and twice the alerts to manage.
If you would like a hand picking a brand for your home, or want the cameras installed and the app set up on your phone, call Sean at (813) 770-6082.
Words in this lesson
The cloud — the company's computers, far away, that hold your recordings; you reach them through the internet.
Wire-free — a camera with no cords at all: it runs on its own battery and sends its picture over Wi-Fi.
Sync Module — Blink's small base box that connects Blink cameras to your Wi-Fi and can hold a USB memory drive.
SmartHub — Arlo's small base box that connects Arlo cameras to your Wi-Fi and can hold a memory stick or card for recordings.
USB drive (memory stick) — a small plug-in stick that stores files, like a tiny filing cabinet for the camera's videos.
MicroSD card — a fingernail-sized memory card that slides into a base box and stores recordings.
Voice assistant — a helper you talk to out loud, like Alexa or Google Assistant, to control devices by voice.
Bundle — several cameras sold together in one box, usually for less than buying them one at a time.
Do You Need a Subscription for a Camera?
No law and no camera forces you to pay monthly — every major brand works, in a basic way, for free. But "works" and "works the way you saw in the advertisement" are two different things: without the plan, most cameras will show you live video and warn you about movement, but will not keep a video you can watch later. Whether that trade is worth it depends on why you bought the camera.
What a camera subscription actually buys
A subscription (also called a plan) is a monthly or yearly payment to the camera company. In exchange, the company stores your recordings on its computers ("the cloud") and, on most plans, adds smarter features. Nothing about the camera itself changes — the plan is about saving and finding videos.
A subscription almost never buys the camera's basic use. You keep the camera either way.
What works for free — every major brand
Without paying anything monthly, you can still:
Watch live video. Open the app and see what the camera sees, right now.
Get motion alerts. Your phone buzzes when the camera sees movement.
Talk through the camera. Speak to a delivery driver or a visitor through the doorbell camera's speaker, live.
Use the doorbell. A Ring or Blink doorbell still rings and alerts you without any plan.
For some people, that is genuinely enough. If your goal is "let me see who is at the door before I get up," the free version does that job completely.
What stops working (or never starts) without a plan
Here is what is usually missing with no subscription:
No saved video history. This is the big one. On Ring, without the plan, when you tap a motion alert an hour later, there is no recording — it was never saved. The moment is gone.
No sharing evidence. No saved video means nothing to show the police, a neighbor, or the delivery company when something goes wrong.
On some brands, nothing saved at all. Ring and Arlo keep no recording you can watch later without the plan — live viewing and alerts are all you get.
Fewer smart alerts. Plans usually add the ability to tell a person from a passing car or a swaying bush. Without it, you get more alerts — and more of them are false alarms.
No going back weeks later. Plans store recordings for a set number of days (about 30 days on Arlo's plan, 60 on Blink's, up to 180 on Ring's). Free accounts store nothing, or next to nothing, online.
The exception: cameras that save at home
Some cameras can save recordings without any plan, because they keep the video at your house instead of on the company's computers:
Blink cameras can save clips to a USB memory stick plugged into Blink's Sync Module base box.
Arlo cameras that work through Arlo's SmartHub base box can save recordings to a memory stick or card plugged into that box.
Both work and both are covered in Lesson 4. The honest trade-offs: local saving is a little slower to look through, the videos are usually viewed through the app one at a time, and if someone steals the camera itself (rare, but it happens), the recordings go with it. In exchange, the monthly cost is zero, forever.
How to decide — three honest questions
1. Why did I buy this camera?
"To see who's at the door" → free is fine.
"To have proof if something happens" → you need saved video: either a plan, or a camera that saves at home.
"To check on Mom / the dog / the house while I travel" → live viewing is free; saved video is a nice extra.
2. How many cameras do I have? Plans priced "per camera" (a few dollars for each one) get expensive as you add cameras. Whole-house plans — every brand in this series offers one, running from around $10 a month on Ring and Blink to a higher price on Arlo — cover every camera for one price. With three or more cameras, whole-house plans usually win.
3. Monthly or yearly? Every brand discounts the yearly plan — paying for a year typically costs about ten months' worth of monthly payments. If you know you will keep the plan, yearly is the cheaper shape. If you are trying a camera out, pay monthly for a month or two first, then switch.
Traps worth knowing about
Free trials start automatically. New cameras usually come with a free trial of the plan, often 30 days. It feels like the camera "just works" — then the trial ends and either the recordings stop or a charge begins. Know which one you agreed to. If the recordings stopping surprises you, this is why.
A plan is per household, per brand. Ring's plan does not cover Blink cameras, even though Amazon owns both.
Canceling is safe. If you cancel, you lose the saved-video history going forward, but the camera keeps working in its free mode. You can restart a plan later.
Prices change. The numbers in this lesson are the shape of things as of this writing — a few dollars a month for one camera, around ten for the whole house. Check the current price in the app before you decide.
The bottom line
The plan is not a scam, and it is not mandatory. It is a storage fee: you are paying rent on a shelf where your videos sit. If you need to look back at what happened, pay for the plan or choose a camera that saves at home. If you only ever look live, keep your money.
One more note: Ring, Blink, and Arlo are the three camera brands Sean sets up for clients himself, so whichever of the three you have — or end up choosing — the plan question is one he can walk you through.
Not sure which way to go for your house? Call Sean at (813) 770-6082.
Words in this lesson
Subscription / plan — a monthly or yearly payment for extra features; the two words mean the same thing here.
The cloud — the camera company's computers, which hold your recordings where you can reach them from your phone.
Live video — watching what the camera sees right now, as it happens.
Video history — the list of past recordings you can scroll through and watch again.
Sync Module — Blink's small base box that connects its cameras to your Wi-Fi and can hold a USB memory stick for recordings.
SmartHub — Arlo's small base box that connects its cameras to your Wi-Fi and can hold a memory stick or card for recordings.
Free trial — a short period where the paid features work for free, after which they stop or start charging.
Where Your Camera Recordings Live
A camera recording has to sit somewhere, and there are only three places it can go: the cloud (the company's computers, reached over the internet), a memory card inside the camera, or a small storage box — a hub — inside your home. Each choice changes how long recordings are kept, how easy they are to watch, and who could possibly see them.
Option 1: The cloud
"The cloud" sounds mysterious, but it simply means the camera company's computers in a big building somewhere. When your camera sees movement, it sends the video through your internet connection to those computers. When you open the app and tap a recording, the video travels back to your phone.
How long recordings are kept depends on the plan you pay for:
Ring's plan keeps recordings for up to 180 days.
Blink's plan keeps them for 60 days.
Arlo's plan keeps recordings for about 30 days (longer on its top tier).
After that time, recordings are deleted automatically to make room. If a recording matters — say, evidence of a theft — save it or share it to your phone before it expires.
What is good about the cloud: recordings are safe from anything that happens at your house. If a thief takes the camera, or a fire takes the house, the video survives. You can watch from anywhere, and scrolling through a day's events is fast and easy.
What to weigh: it requires the monthly plan on most brands, and it requires your internet to be working — if the internet is down, nothing gets saved during the outage.
Option 2: A memory card in the camera
Some cameras have a slot for a microSD card — a memory card about the size of your thumbnail's tip. The camera records onto the card, right inside itself. Some of these cameras can even record all day and all night, not just when they see movement. An honest note: none of the three brands in this series — Ring, Blink, and Arlo — put a card slot in their cameras. Ring and Blink offer no version of this at all, and Arlo keeps its at-home recordings in its base box instead, which is the next option.
How long recordings are kept: until the card fills up — then the camera erases the oldest recordings to make room, like writing over the beginning of an old tape. A card in the common sizes holds a few days to a couple of weeks of recordings, depending on the camera and its settings. There is no monthly fee, ever — the card costs a few dollars once.
What is good about a card: no subscription, recordings keep saving even if the internet goes down (you watch them later, when it returns), and the video never leaves your house.
What to weigh: if someone steals or smashes the camera, the recordings go with it. And browsing a full day of recordings on a card is usually slower than browsing the cloud.
Option 3: A hub in your home
A middle path: some systems keep recordings on a small box that lives in your house and connects to your internet router (the box that brings internet into your home).
Blink's version is its Sync Module — a small base box. Plug a USB memory stick into it, and Blink cameras save their clips there with no monthly fee.
Arlo's version is its SmartHub — also a small base box. Plug a memory stick or card into it, and the Arlo cameras connected through it save their recordings there, again with no monthly fee.
Ring does not offer this option — Ring is cloud or nothing.
How long recordings are kept: until the stick or box fills up, then the oldest are erased — the same pattern as a memory card. A roomy memory stick can hold weeks or months of short motion clips.
What is good about a hub: no monthly fee, and the recordings stay under your own roof, but in a box tucked safely indoors — not out on the porch inside the camera.
What to weigh: clips saved this way are somewhat slower to open in the app, and the setup has one or two extra steps.
Who can see your recordings?
This is the question people whisper, so here is the plain answer for all three options:
You, and anyone you share with. Recordings are tied to your account in the brand's app. Anyone you give your login to — a spouse, an adult child you asked to keep an eye on things — can see them. Share deliberately, and use the app's sharing features rather than handing out your password where you can.
The company. The companies promise that employees do not sit around watching customer videos, and recordings are scrambled (encrypted) as they travel and while stored, so outsiders cannot simply read them. Camera brands in general have had occasional bad headlines over the years — usually an employee misbehaving or a break-in at a company's systems — and have tightened their rules since, including stronger sign-ins. The honest shape of it: the risk is small, but it is not zero, and it is largest with cloud storage, because the video exists on someone else's computers.
The police. Camera companies can be required to hand over recordings with a legal order (a warrant or subpoena — official court paperwork). In declared emergencies, Ring has in the past shared video without asking the owner first, though it says this is rare. Videos you choose to post to neighborhood apps (like Ring's Neighbors app) are public to that community — only post what you mean to share.
Memory cards and hubs change this picture: recordings in your house cannot be handed over by a company that never had them. Someone would have to physically take the card or box. For many people, that is the strongest argument for local storage.
A simple way to choose
Want the easiest experience and proof that survives a stolen camera? Cloud, with the plan.
Want no monthly bill and don't mind a little fuss? Memory card or hub.
Want both? Some people run a cloud plan on the front-door camera and at-home saving through a base box on the rest. That is a perfectly sensible split.
Wherever your recordings live, check on them once in a while: open the app, tap a recording from yesterday, and make sure it plays. A camera that quietly stopped saving is worse than no camera, because you were counting on it.
If you would like your cameras set up so the recordings go where you intend — and checked to be sure they are really saving — call Sean at (813) 770-6082.
Words in this lesson
The cloud — the camera company's computers; your recordings are stored there and reached through the internet.
MicroSD card — a tiny memory card that slides into the camera and stores recordings inside it.
Hub (base box) — a small box inside your home that connects your cameras and stores their recordings.
Router — the box in your home that spreads the internet connection to your devices.
USB memory stick — a small plug-in stick that stores files; Blink's hub uses one for recordings.
Encrypted (scrambled) — locked with a code so that anyone who intercepts the video sees gibberish instead of pictures.
Warrant / subpoena — official court paperwork that can require a company to hand over recordings.
Where to Put Cameras So They Actually Help
A camera helps when it is pointed at a place people must pass through, at a height that captures faces, close enough to the action to see detail, and within reach of a decent Wi-Fi signal. The front door, the driveway, and the back door are the three spots that matter for nearly every home — in that order.
Start with the doors, in this order
1. The front door. Nearly every visitor, delivery, and stranger comes here. A doorbell camera covers it and lets you talk to whoever is there. Doorbell cameras are designed to be mounted at about chest-to-face height — around 48 inches (4 feet) from the ground is the common recommendation — so they capture faces rather than the tops of heads.
2. The driveway. A camera over the garage or under the roof edge, aimed along the driveway, records cars coming and going and anyone approaching the house from the street. If packages are sometimes left by the garage instead of the door, this camera covers that drop spot too.
3. The back door. Back doors and sliding patio doors are out of sight of the street, which is exactly why intruders prefer them. One camera watching the back door and patio closes that gap.
Side gates and first-floor windows come after those three, only if your home has a spot that genuinely worries you.
Height: the most common mistake
Mount outdoor cameras about 8 to 10 feet up — high enough that someone cannot reach up and knock the camera down or cover it, low enough to still see a face.
Too high (up on a second-story roof edge) is the classic error. The camera sees the yard beautifully — and the top of every head that walks through it. A hat brim hides a face completely from above, and the recording is useless for identifying anyone.
Too low (sitting on a porch railing) makes the camera easy to steal or swat away, and pets will trigger it all day.
Angle the camera slightly downward, so its view covers the ground where people walk, not the horizon.
Point it where people must walk
Cameras help most when they cover a choke point — a place everyone has to pass: a gate, a walkway, a porch, a driveway entrance. One camera on a choke point beats three cameras watching open lawn.
Aim along the path people walk rather than straight at it head-on where you can; a person walking across the camera's view spends more time on screen than one walking directly toward it.
Mistakes that quietly ruin a camera
Pointing at the street or a busy sidewalk. Cars and dog-walkers pass all day. You get a hundred alerts, the battery drains quickly, and you start ignoring the alerts — including the one that mattered. Angle the camera to cut off at your property line, and use motion zones (Lesson 6) to ignore the street.
Mounting behind glass. A camera inside, looking out a window, mostly fails: its night-vision light reflects off the glass and whites out the picture. Cameras that watch outdoors belong outdoors.
Facing the sun at morning or evening. A camera staring into a low sun gets blinded at exactly those hours, and every recording is a silhouette. Face cameras north or south where you can, or tuck them under the roof edge in shade.
Too far from the action. A camera is not a telescope. Faces and license plates become guesswork beyond roughly 20 to 30 feet. Put the camera nearer the spot it watches, even if that spot is less convenient to mount.
Ignoring the Wi-Fi. A camera mounted where the Wi-Fi signal is weak will miss recordings and freeze. Before mounting anything permanently, hold your phone at the spot: if your phone shows a weak Wi-Fi signal there, the camera will struggle too. Moving the camera a few feet, or adding a Wi-Fi extender (a small plug-in box that stretches your Wi-Fi further), fixes most cases.
Forgetting the neighbors. It is normal and expected to record your own porch, yard, and driveway. Pointing a camera mainly at a neighbor's yard or into their windows is a fast way to start a feud, and in some places there are rules about recording sound in particular. Keep cameras aimed at your own ground; if a camera's edge catches a bit of a neighbor's yard, most brands let you block out (hide) that part of the picture with a privacy zone.
Never checking it. Spiders love cameras — one web across the lens turns every night recording into fog. Glance at each camera's picture once a month, wipe the lens with a soft cloth, and make sure the picture is still aimed where you left it.
A sensible order for most homes
Doorbell camera at the front door.
One outdoor camera on the driveway.
One outdoor camera on the back door.
Stop. Live with three for a month. Add a fourth only if a real gap shows itself.
That covers the entrances, the cars, and the deliveries for nearly every house — without a swarm of alerts or a shelf of batteries to keep charged.
If you would like the cameras mounted and aimed properly, with the alerts tuned so you only hear about what matters, call Sean at (813) 770-6082.
Words in this lesson
Choke point — a narrow spot everyone must pass through, like a gate or walkway; the smartest place for a camera.
Motion zone — a part of the camera's picture you choose for movement alerts; Lesson 6 explains it fully.
Privacy zone — a part of the picture the camera is told to black out and never record, such as a neighbor's window.
Wi-Fi extender — a small plug-in box that stretches your home's wireless internet signal to reach farther.
Lens — the glass eye at the front of the camera that it sees through.
License plate — the numbered tag on a car; cameras can only read them when fairly close.
Camera Words That Matter: Motion Zones, Night Vision, Two-Way Talk, Field of View
Camera boxes and advertisements are full of special words, but four of them do most of the real work in daily life: motion zones (which parts of the picture trigger alerts), night vision (how the camera sees in the dark), two-way talk (hearing and speaking through the camera), and field of view (how wide an area the camera can see). Understand these four and you understand what a camera will actually do for you.
Motion zones — "only watch this part"
A motion zone is an area you draw on the camera's picture — right on your phone, with your finger — telling the camera: "Movement here matters. Movement everywhere else, ignore."
In daily life: your front-door camera can probably see the street. Without zones, every passing car sends you an alert, all day, until you start ignoring your phone. Draw the zone over just your porch and walkway, and the car alerts stop while the visitor alerts keep coming. This one setting is the difference between a camera that helps and a camera that nags.
A close cousin is the privacy zone: an area the camera blacks out entirely and never records — for example, the part of the picture that catches a neighbor's window.
Motion sensitivity — "how easily it reacts"
Sensitivity is how big a movement must be before the camera reacts. Set it high and a moth sets it off; set it low and only a person walking close will.
In daily life: expect to adjust this twice — once when you install the camera, and once after a windy day teaches you what your bushes look like to a camera. Most brands also offer smarter person detection (often part of the paid plan): the camera tries to alert you only about people, not cars, pets, or shadows. It is not perfect, but it cuts false alarms enormously.
Night vision — "how it sees in the dark"
At night, most cameras switch to infrared night vision. Infrared is a light your eyes cannot see but the camera can; it works like a flashlight only the camera knows is on. The picture turns black and white, and the clear range is usually about 15 to 30 feet — much shorter than in daylight.
In daily life: a person at your door at night shows up clearly; a person at the far end of the driveway may be a gray shape. Some newer cameras offer color night vision, using a tiny built-in light or extra-sensitive parts to keep some color — nicer, but still shorter-ranged than daylight. Two honest tips: porch lights help any camera at night, and night vision cannot see through window glass — the infrared light bounces off the glass and blinds the camera (one more reason outdoor cameras belong outdoors).
Two-way talk — "a speakerphone on your wall"
Two-way talk means the camera has both a microphone (so you can hear) and a speaker (so you can talk back), through the app on your phone. Press and hold a button in the app, speak, and your voice comes out of the camera.
In daily life: "Hi, you can just leave the package by the door, thank you." "Hello? Can I help you?" — said from the couch, the office, or a hotel room, with the visitor none the wiser that you are not home. It is the single most-used feature of doorbell cameras. One realistic note: there is a short delay of a second or two, like talking on an old speakerphone — speak, then pause and listen.
Field of view — "how wide it sees"
Field of view is how wide an area the camera can see, measured in degrees (parts of a circle). A bigger number means a wider view: many doorbell cameras see about 130 to 160 degrees, which from your front door can cover the whole porch and both sides of the walkway.
In daily life: a wide view means one camera can cover a corner where two walls meet, or a whole small yard. The trade-off: the wider the view, the smaller and more stretched-out people look at the edges — faces get harder to recognize. Wide is good for "knowing something happened"; narrower and closer is better for "knowing exactly who it was."
Some doorbell cameras also advertise a tall view (sometimes called a head-to-toe view): the picture is shaped so you can see a visitor's whole body and the package sitting on the ground at their feet. If delivered packages matter to you, that shape is genuinely useful.
Two more words you will meet
Resolution (1080p, 2K, and so on) — how detailed the picture is; bigger numbers are sharper. In daily life, 1080p (also called HD) is clear enough to recognize faces at porch distance. Higher numbers help a little, cost more, and use more of your internet.
Live view — watching the camera right now, rather than a recording. Every brand includes this for free.
The four, in one sentence each
Motion zones decide where movement counts. Sensitivity decides how much movement counts. Night vision decides how well it sees after dark. Two-way talk lets you speak through it. Field of view decides how much it takes in at once.
If camera settings feel tangled, they can be adjusted for you — the zones drawn, the alerts quieted down, the picture checked day and night. Call Sean at (813) 770-6082.
Words in this lesson
Motion zone — an area you draw on the camera's picture; movement inside it triggers alerts, movement outside it does not.
Privacy zone — an area the camera blacks out and never records.
Sensitivity — how easily the camera reacts to movement; high reacts to almost anything, low only to big movement.
Person detection — a smarter alert that tries to report only people, ignoring cars, animals, and shadows.
Infrared — invisible light the camera shines at night so it can see in the dark; the picture appears black and white.
Microphone — the part that picks up sound, letting you hear through the camera.
Speaker — the part that plays sound, letting your voice come out of the camera.
Field of view — how wide an area the camera sees, measured in degrees; a bigger number means a wider view.
Resolution — how detailed and sharp the picture is; 1080p (HD) is the common standard.
Live view — watching what the camera sees right now, as it happens.
Want hands-on help?
You do not need to memorize every term. Straight 2 Work can help you understand your choices in plain words.
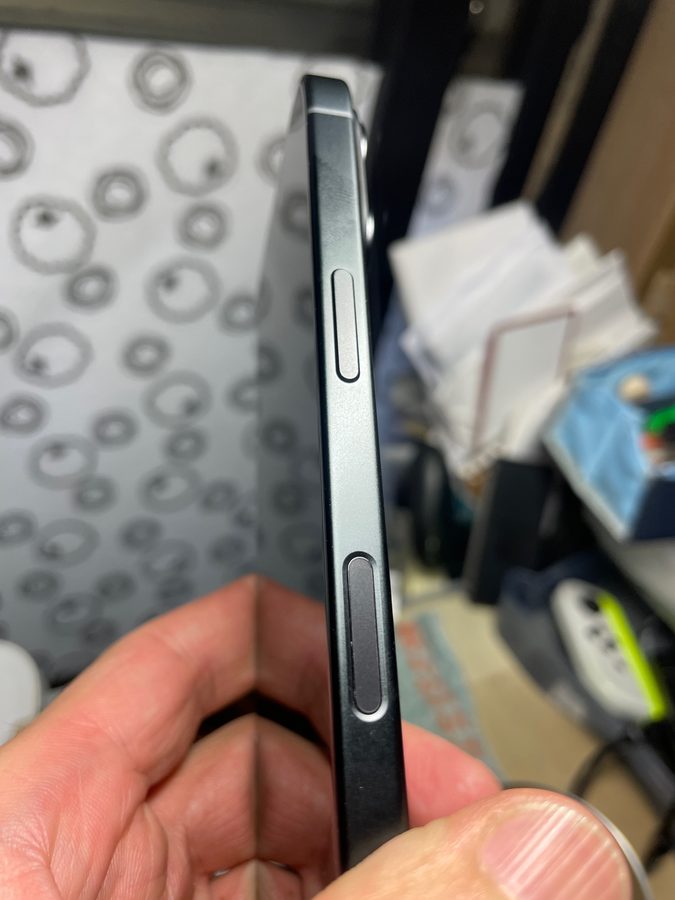
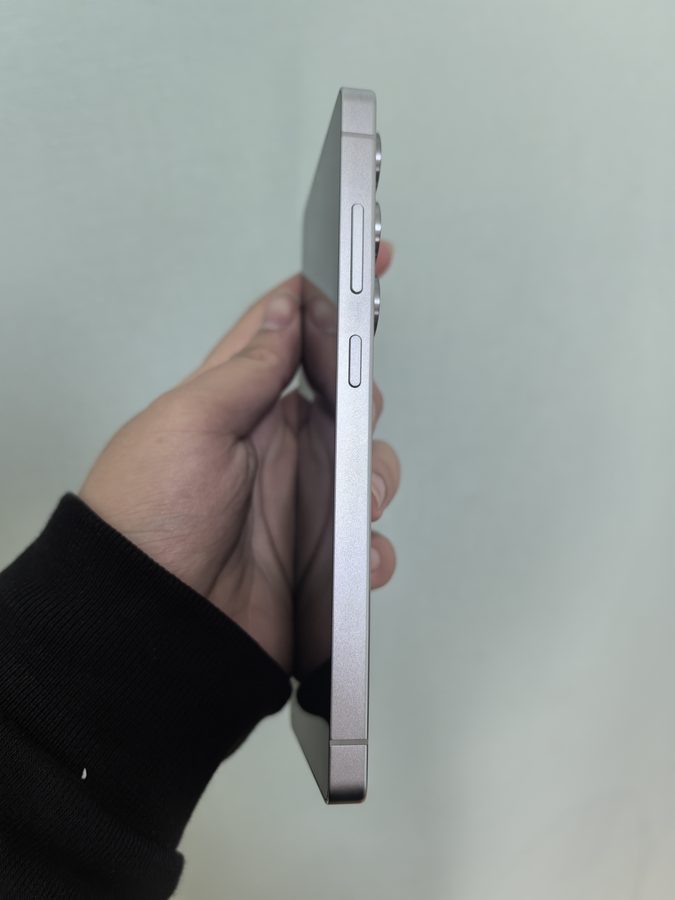
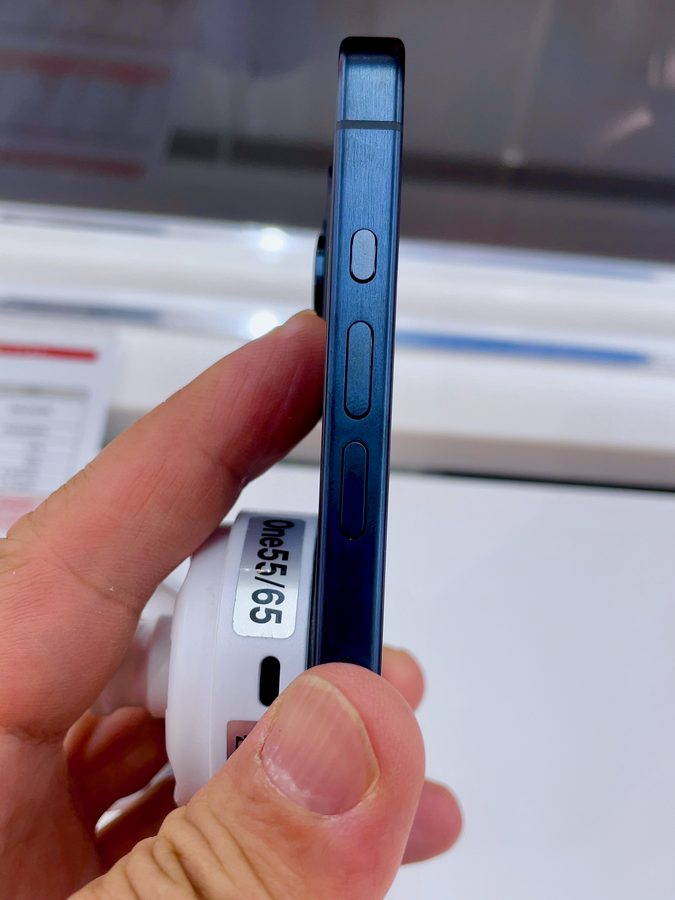
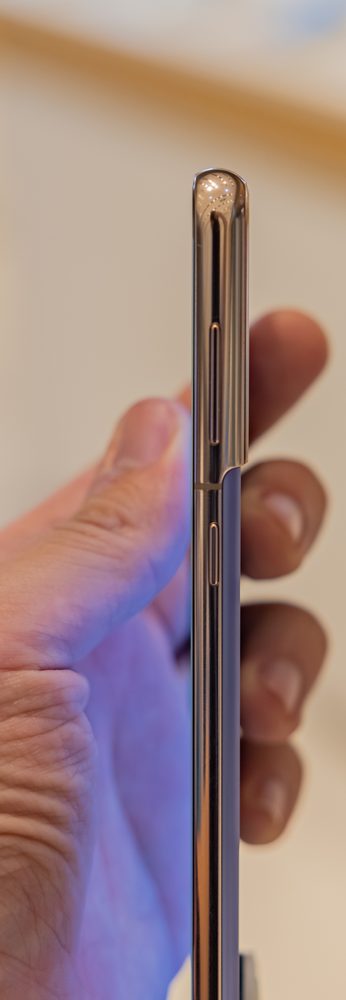
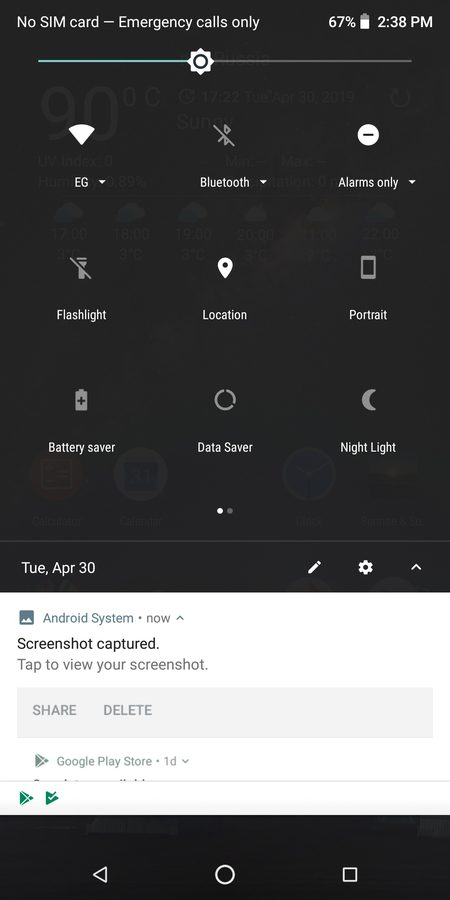


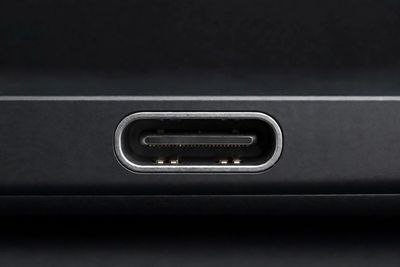
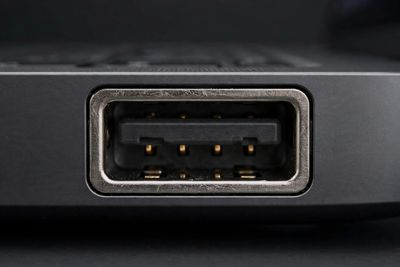
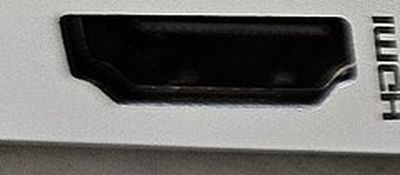
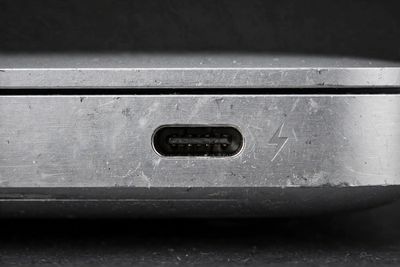
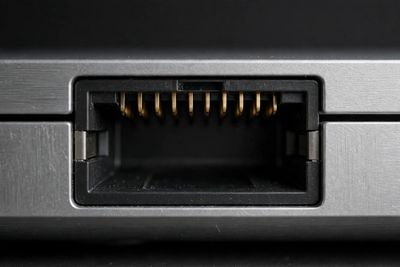
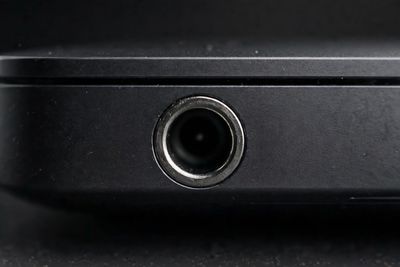
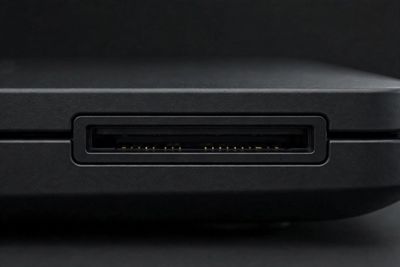
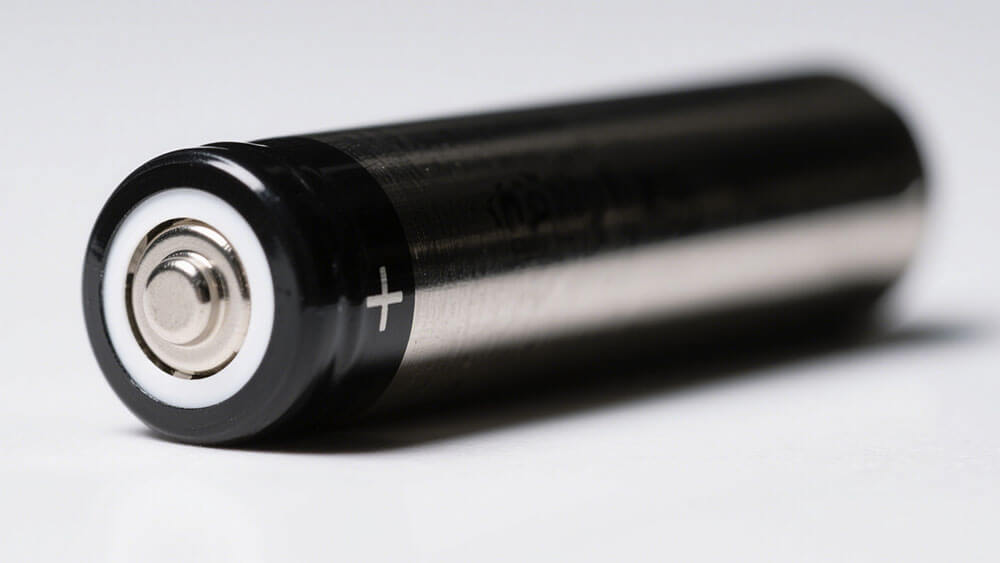
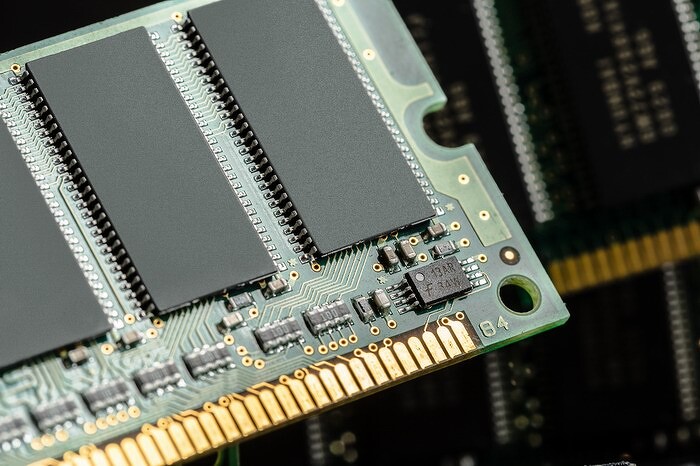
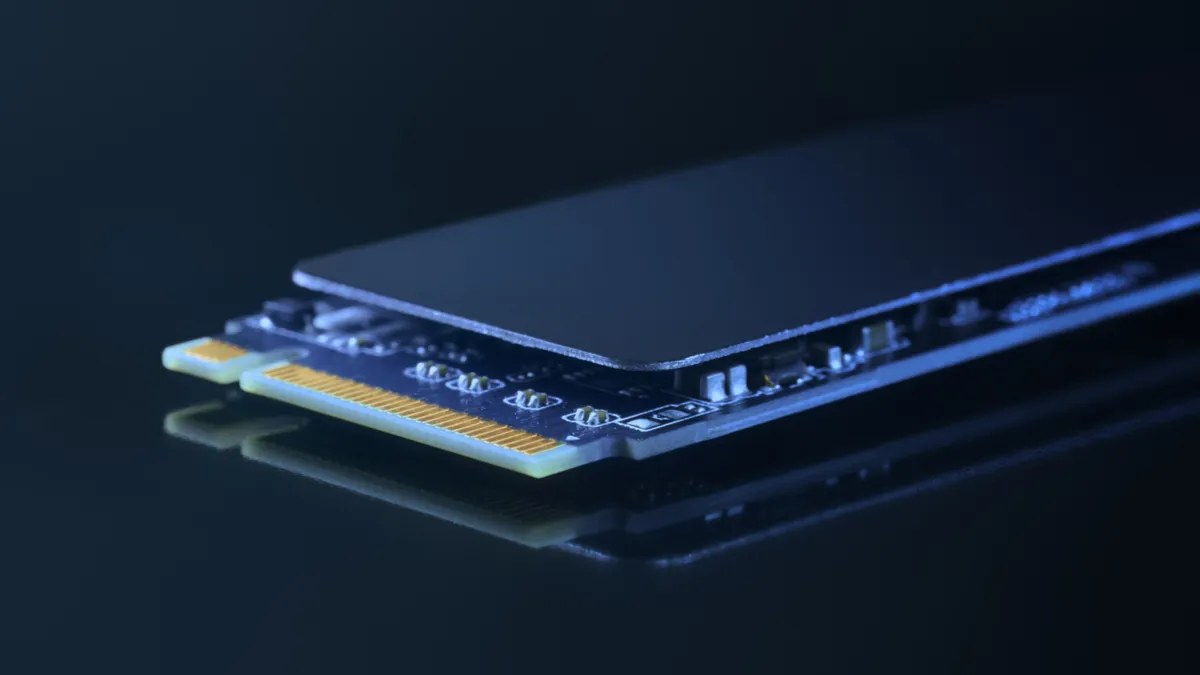





 Google
 Bing
 DuckDuckGo
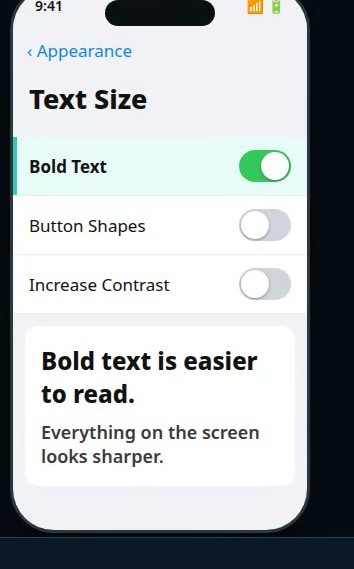
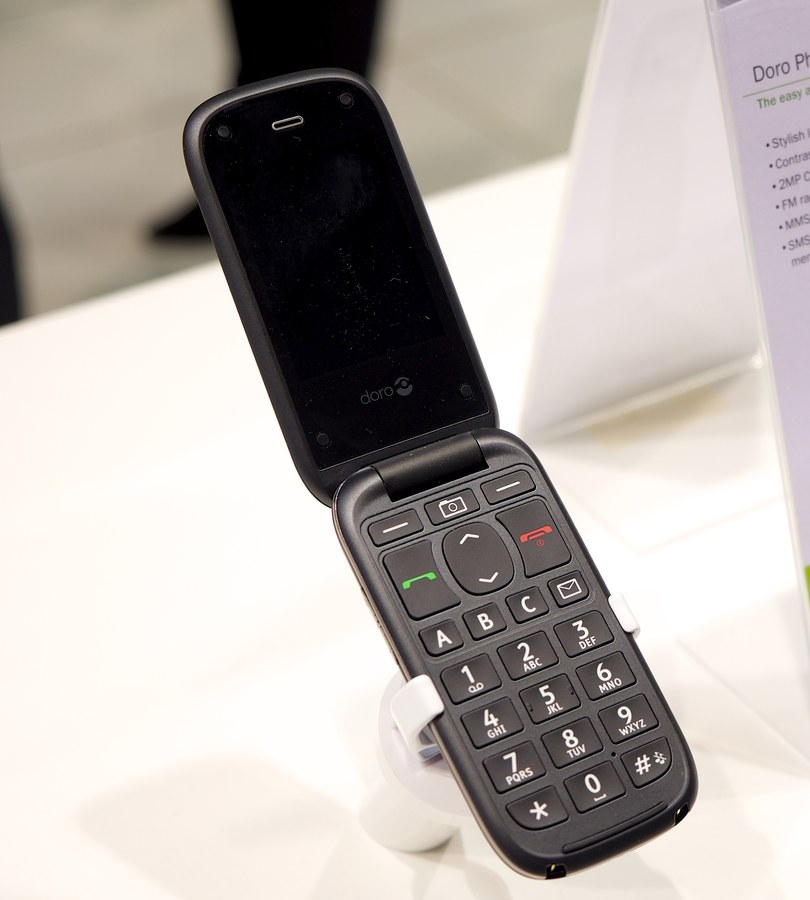
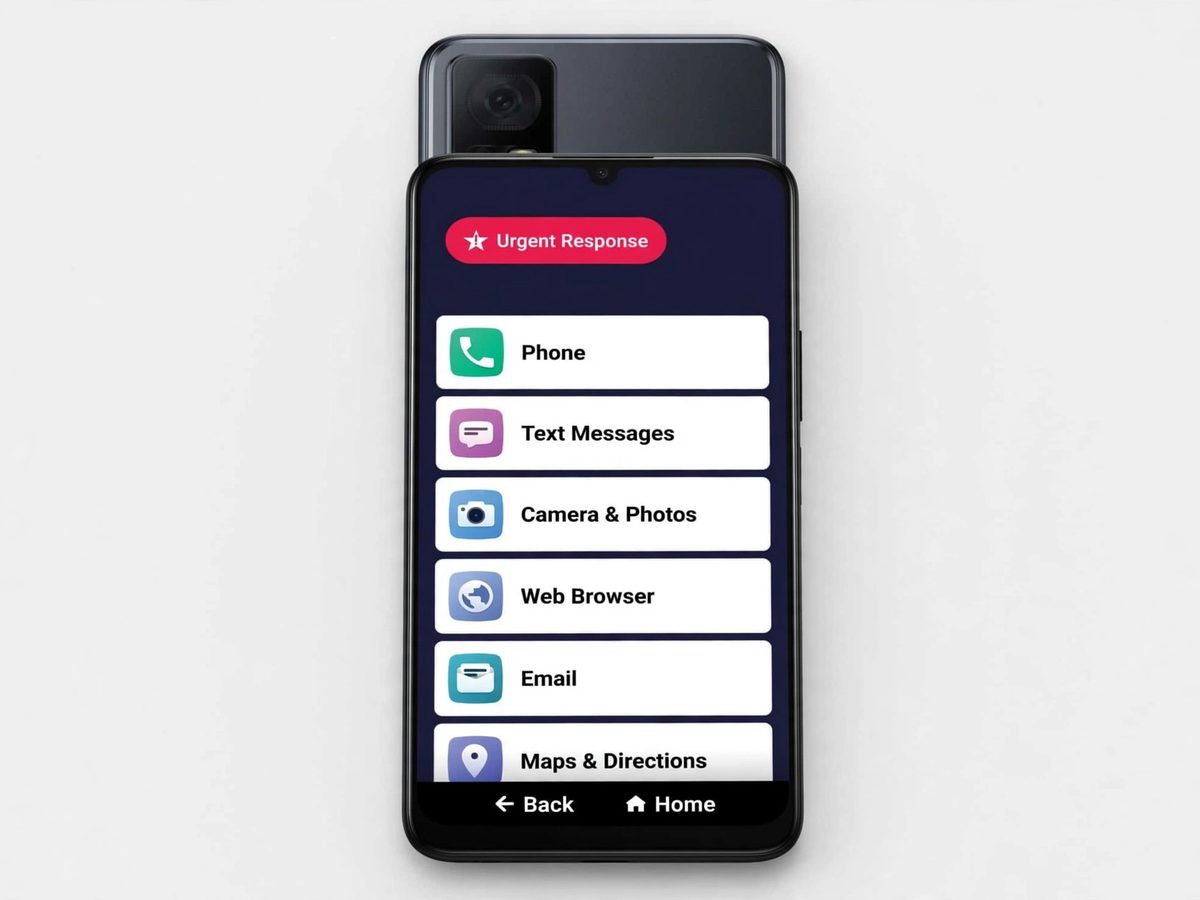
 T-Mobile
 Verizon



 TracFone




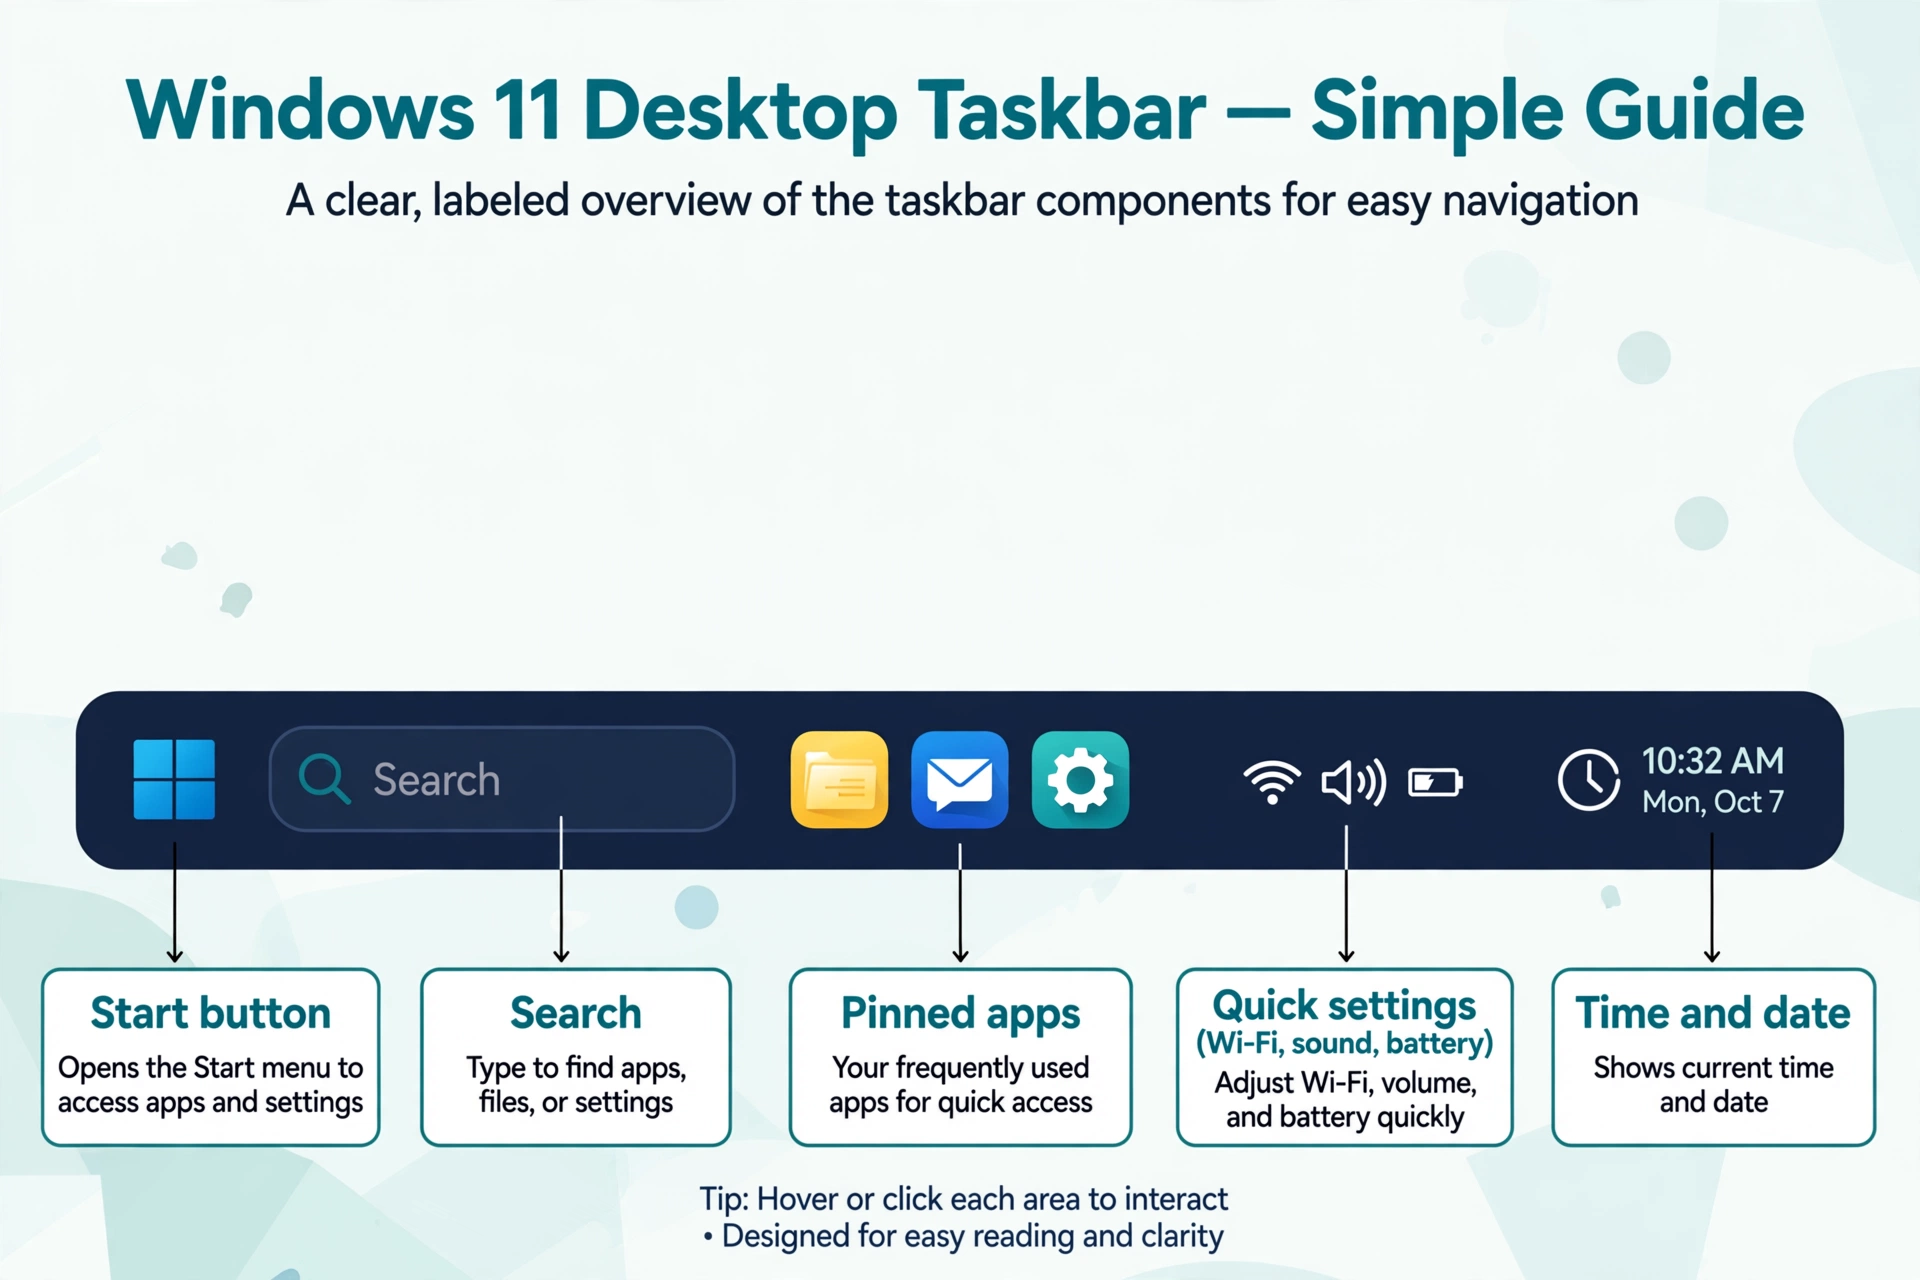
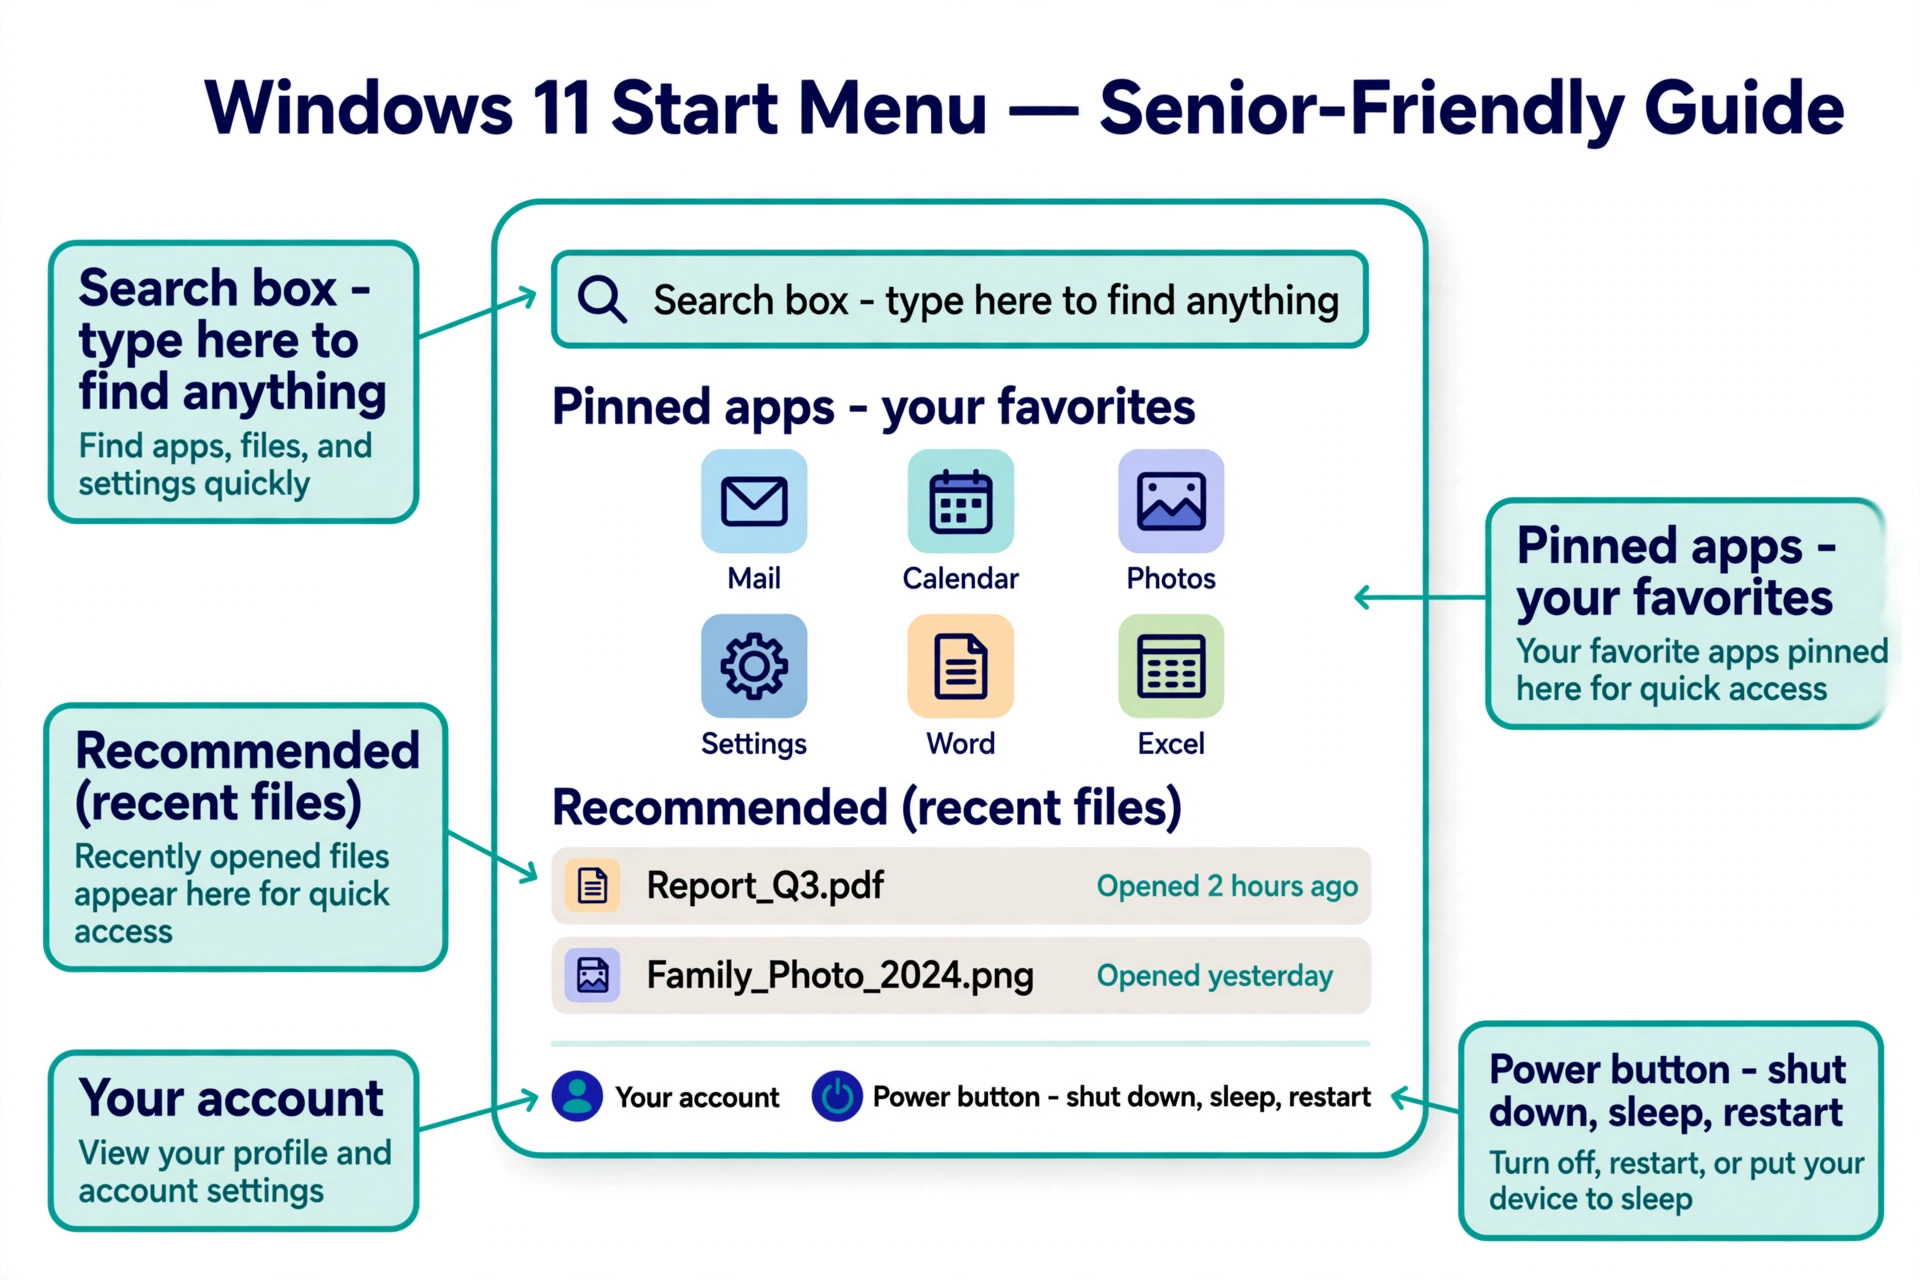
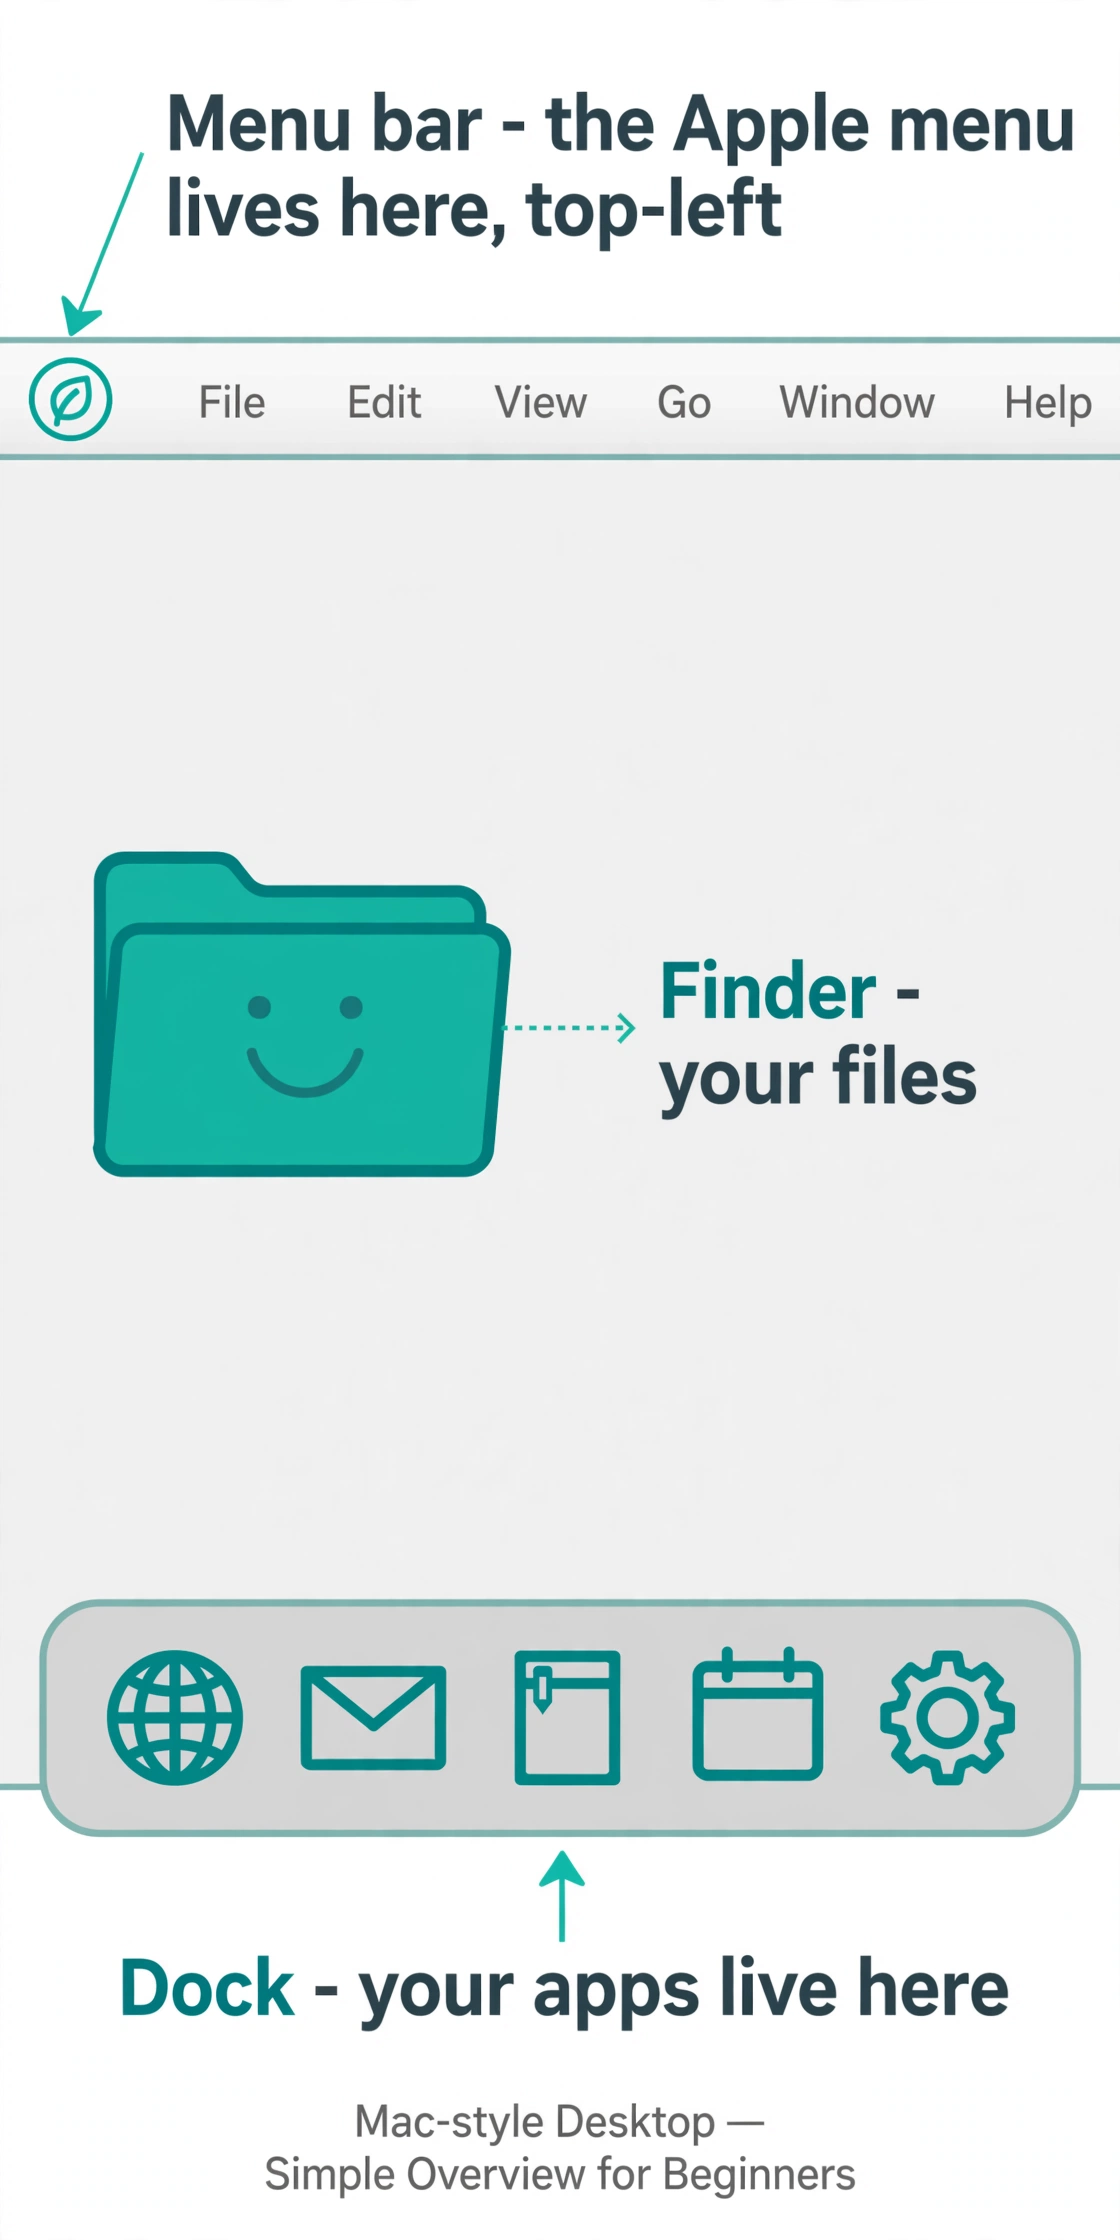
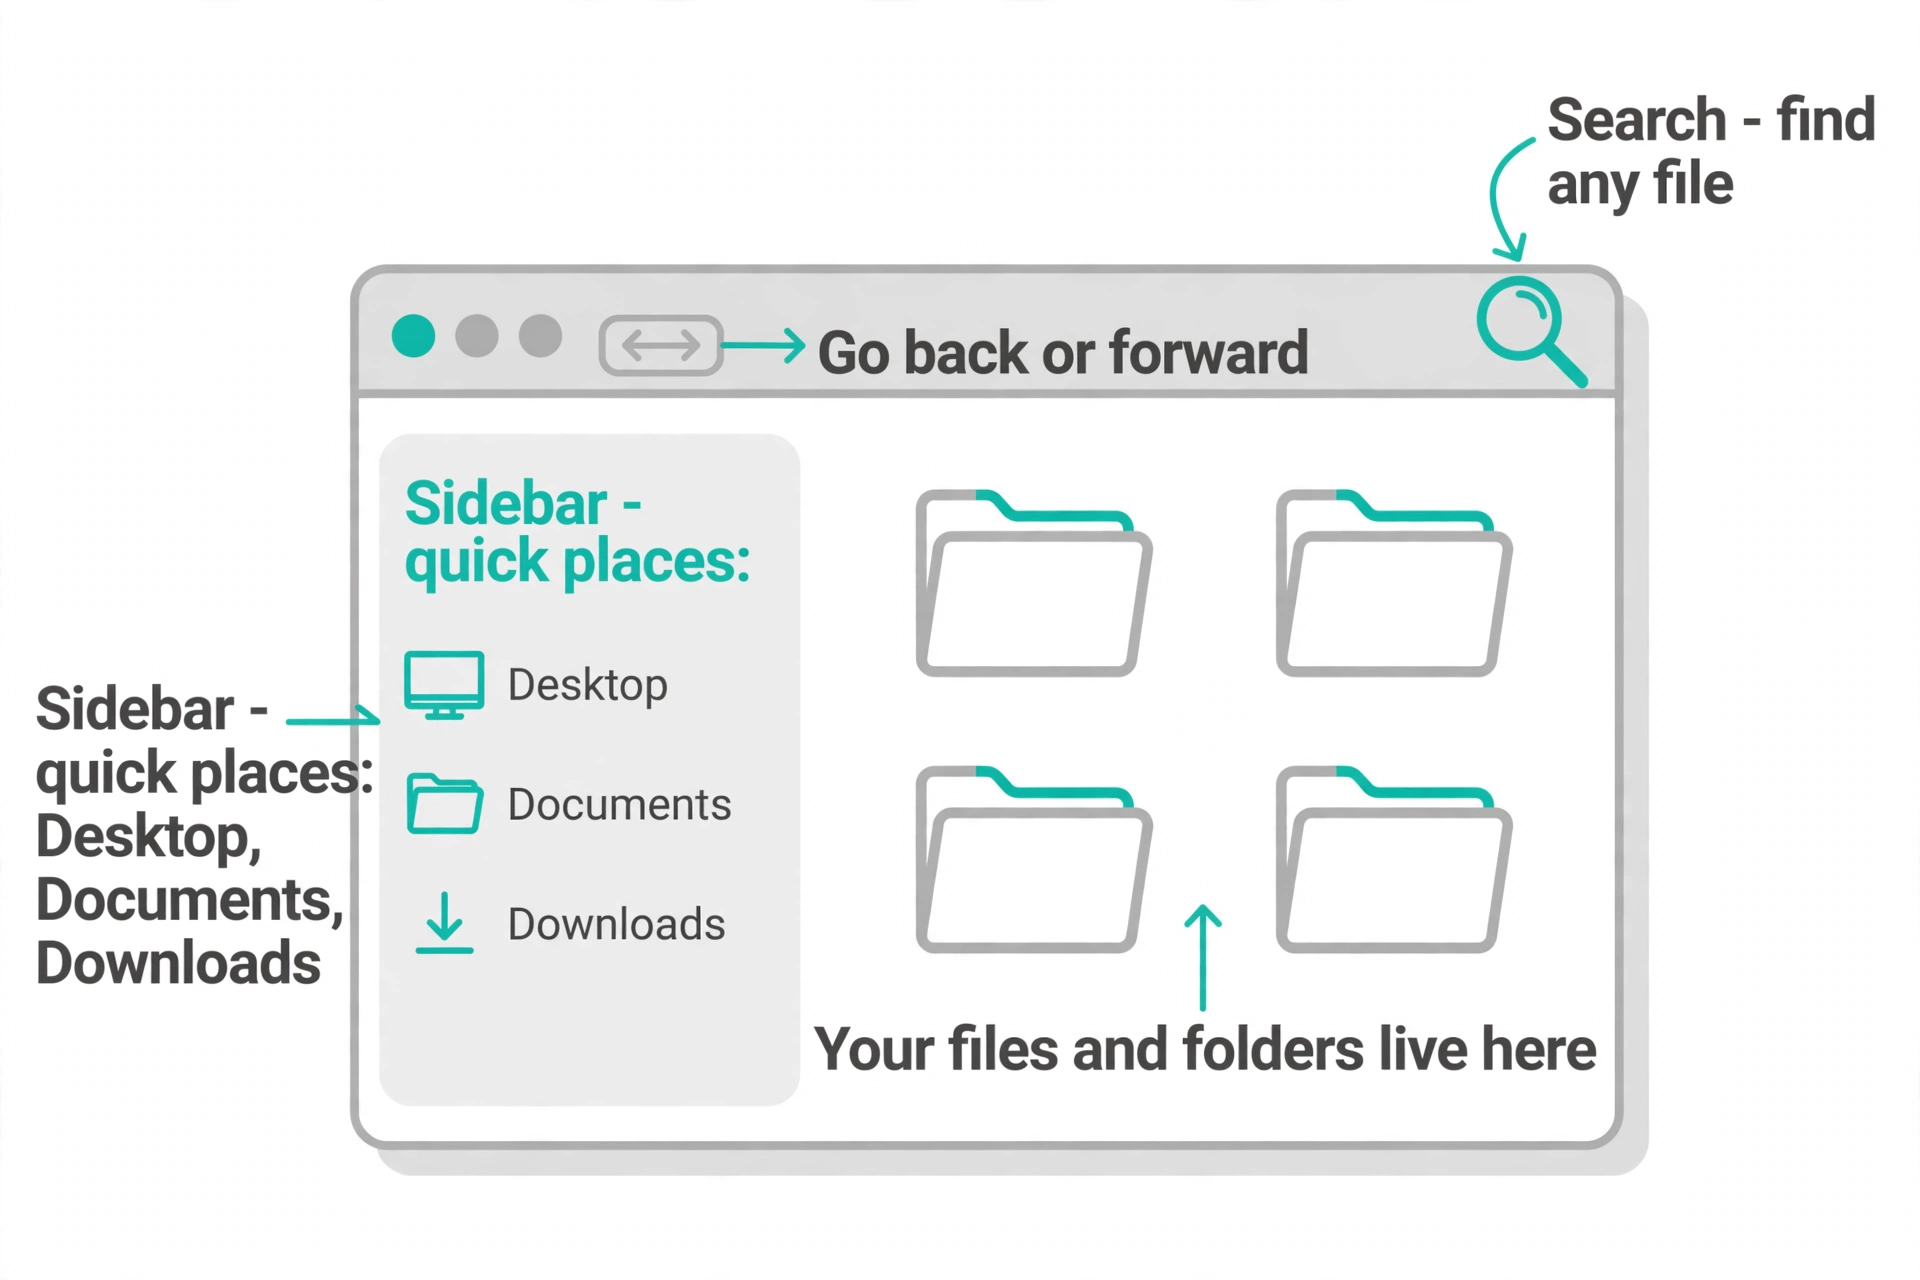
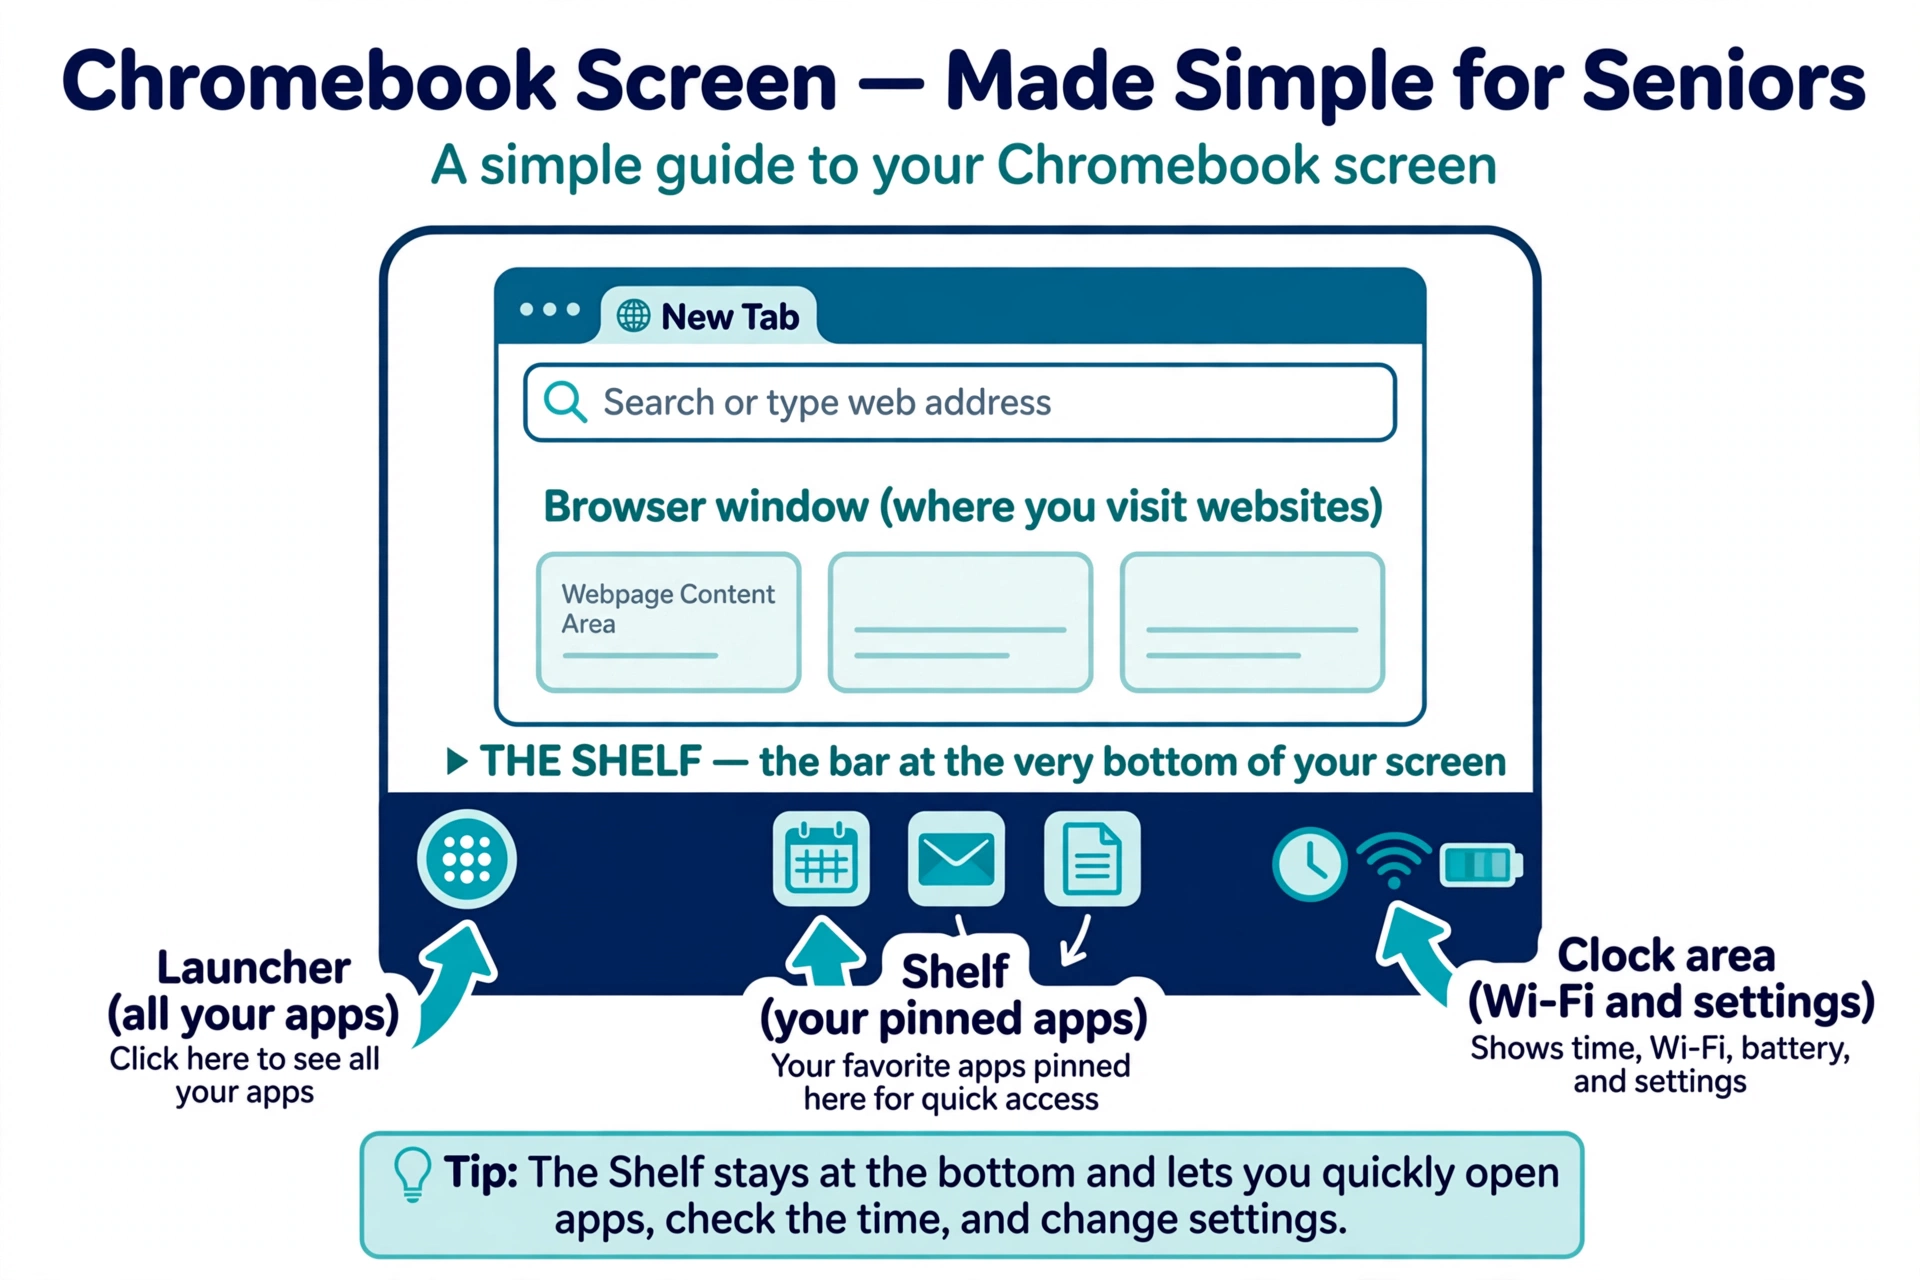
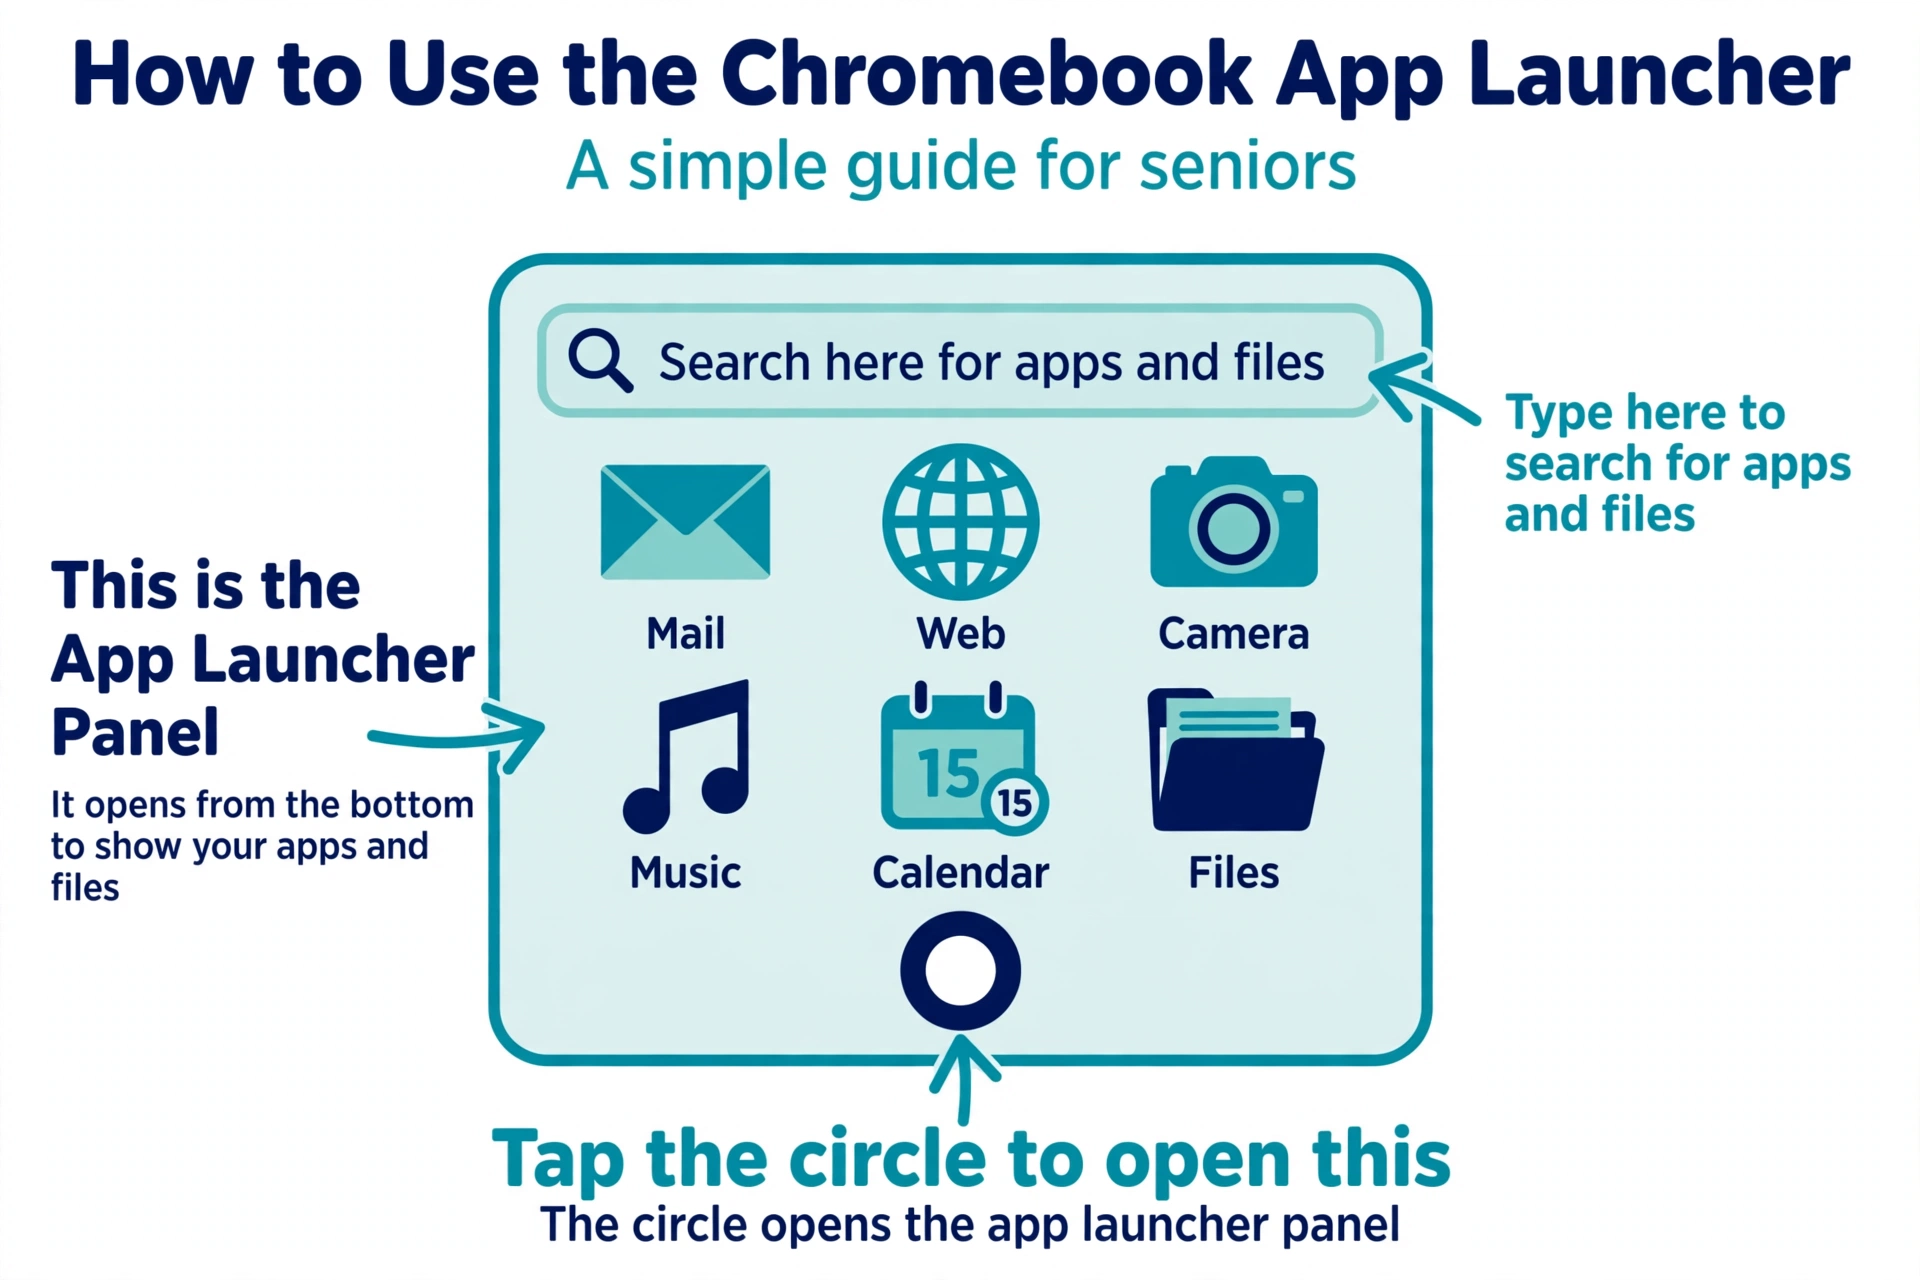
 Microsoft 365, in plain words
 LibreOffice, in plain words
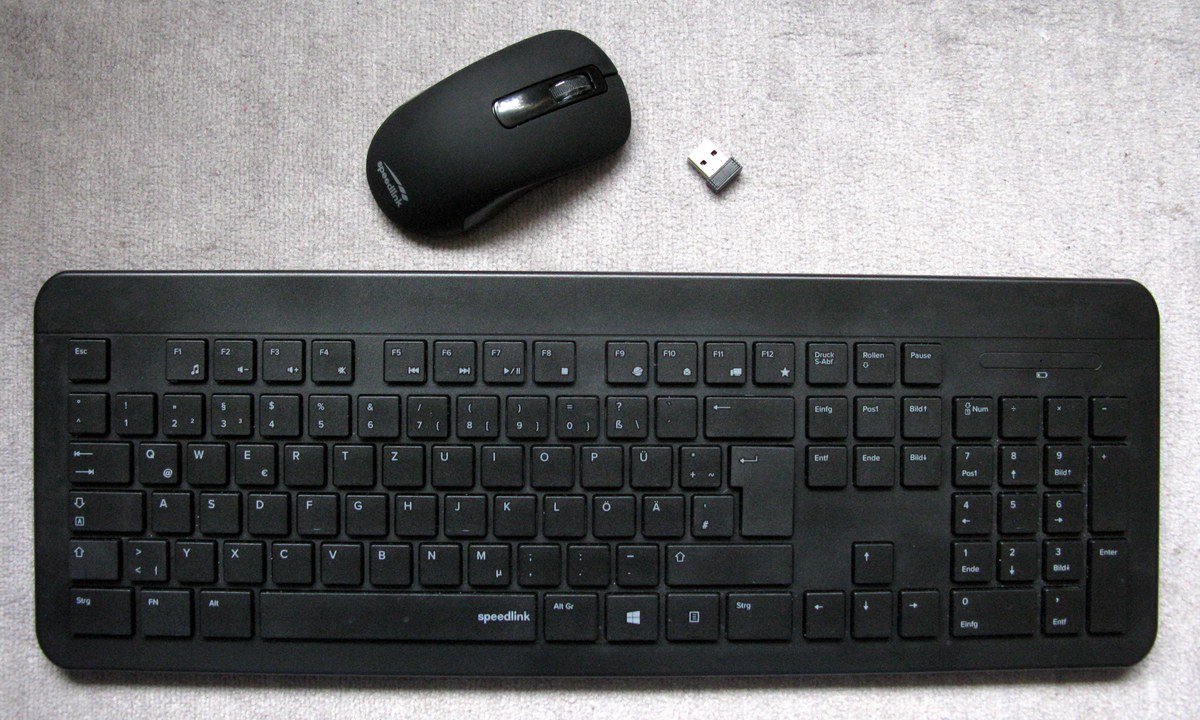
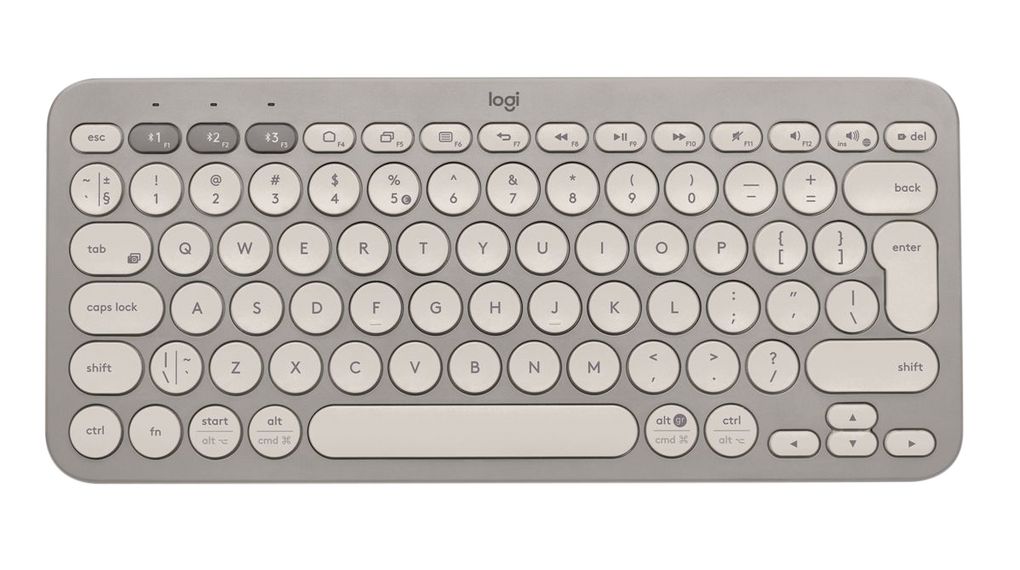
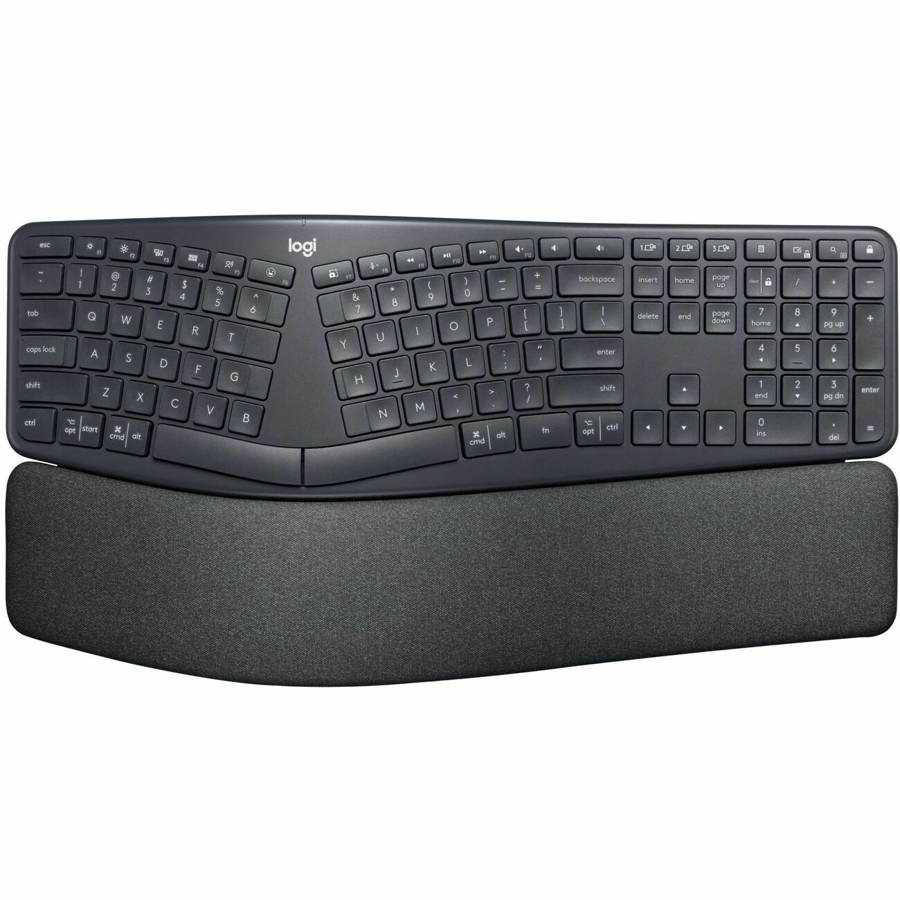
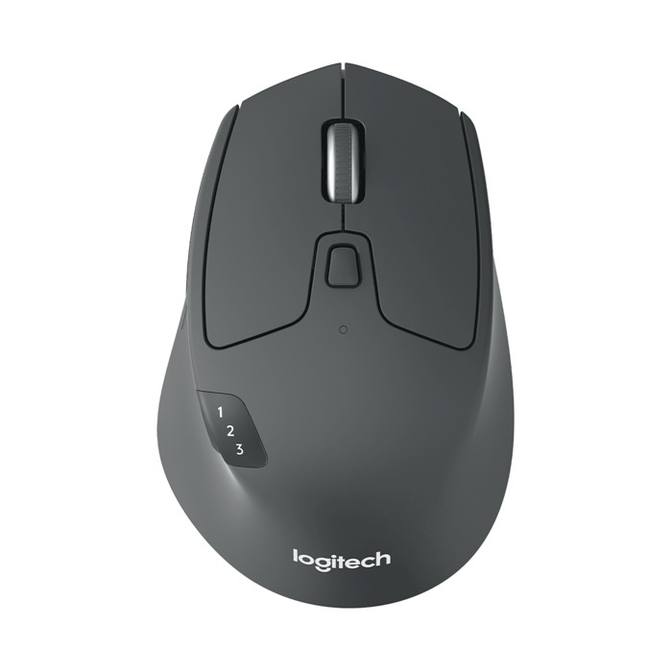
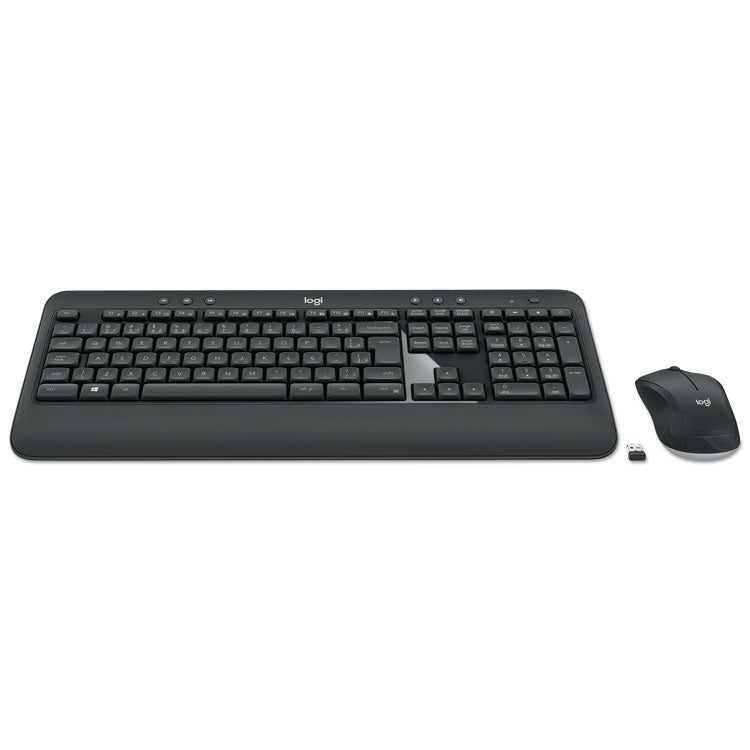
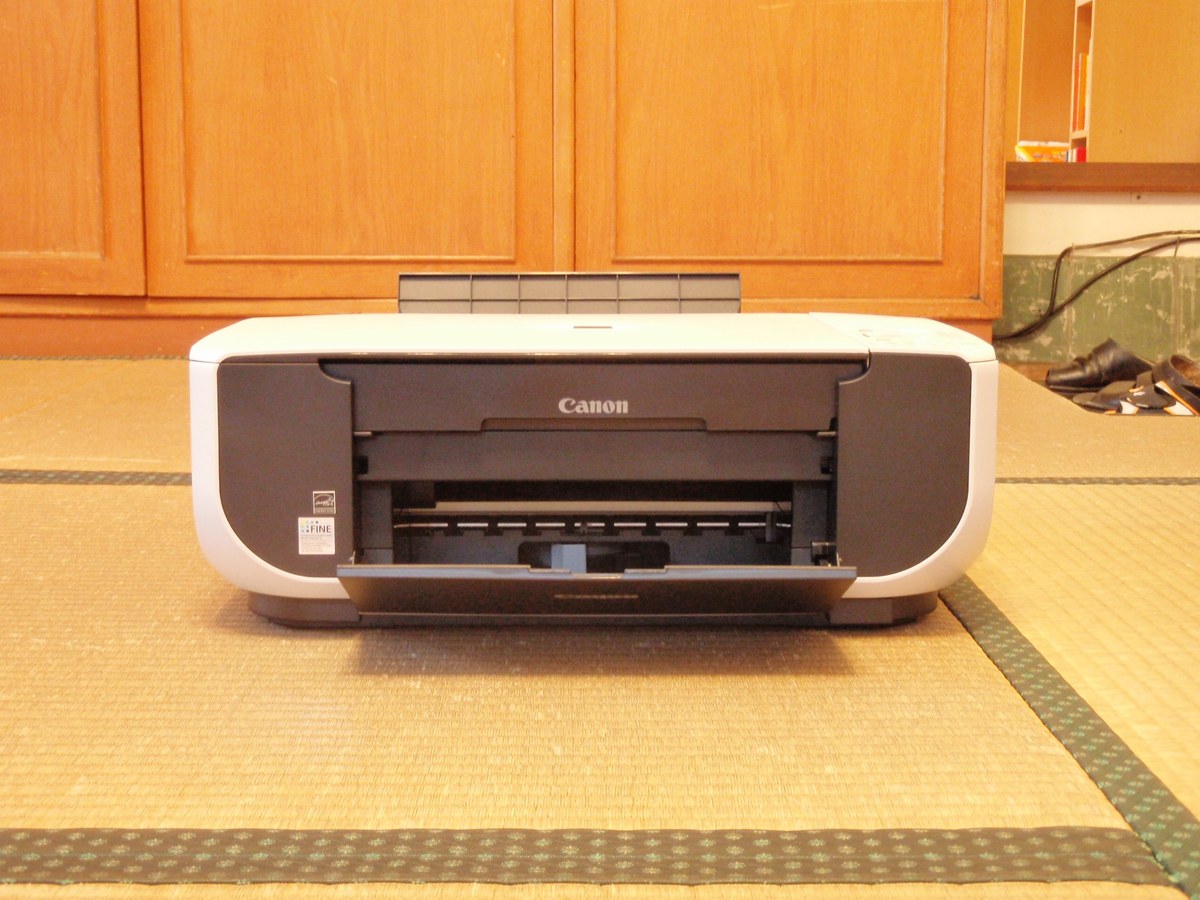
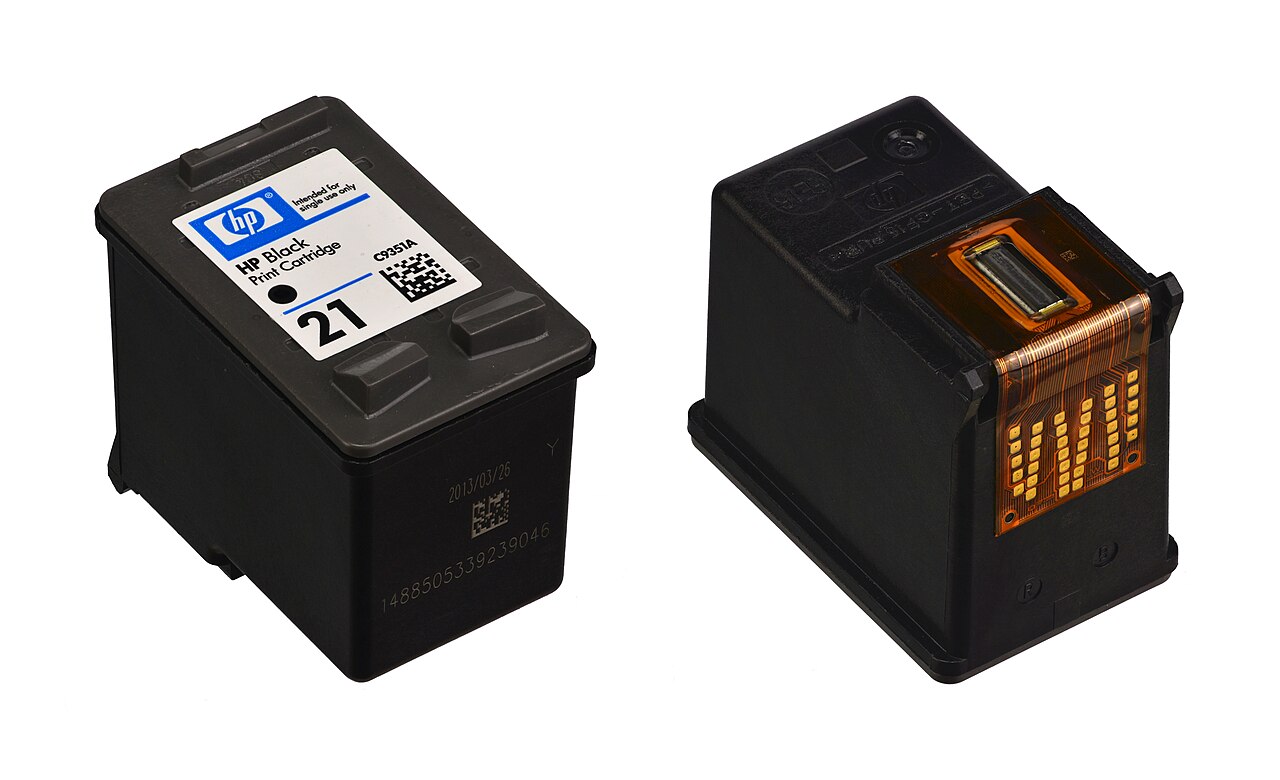
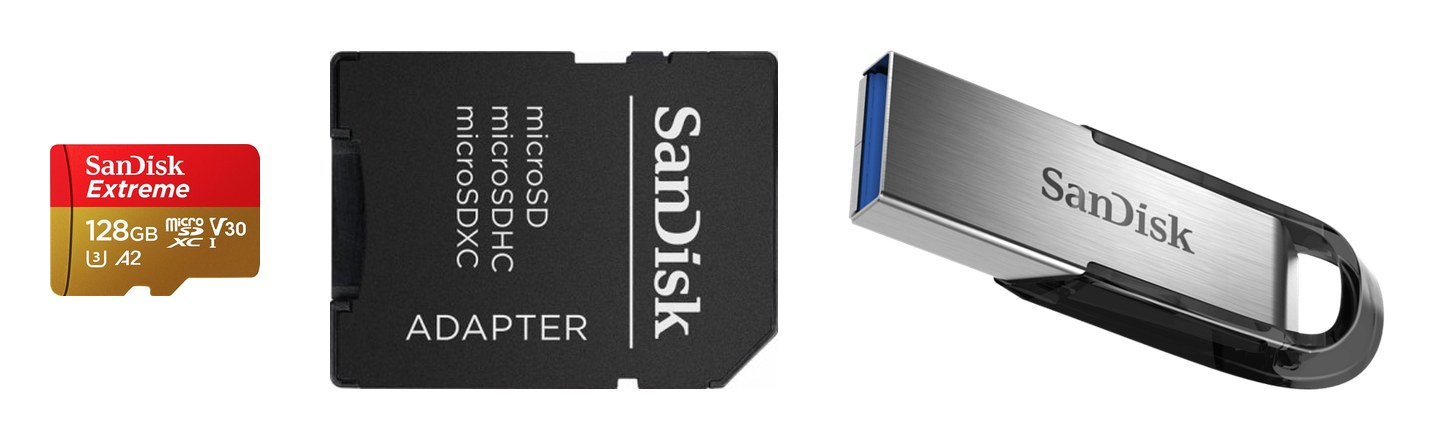
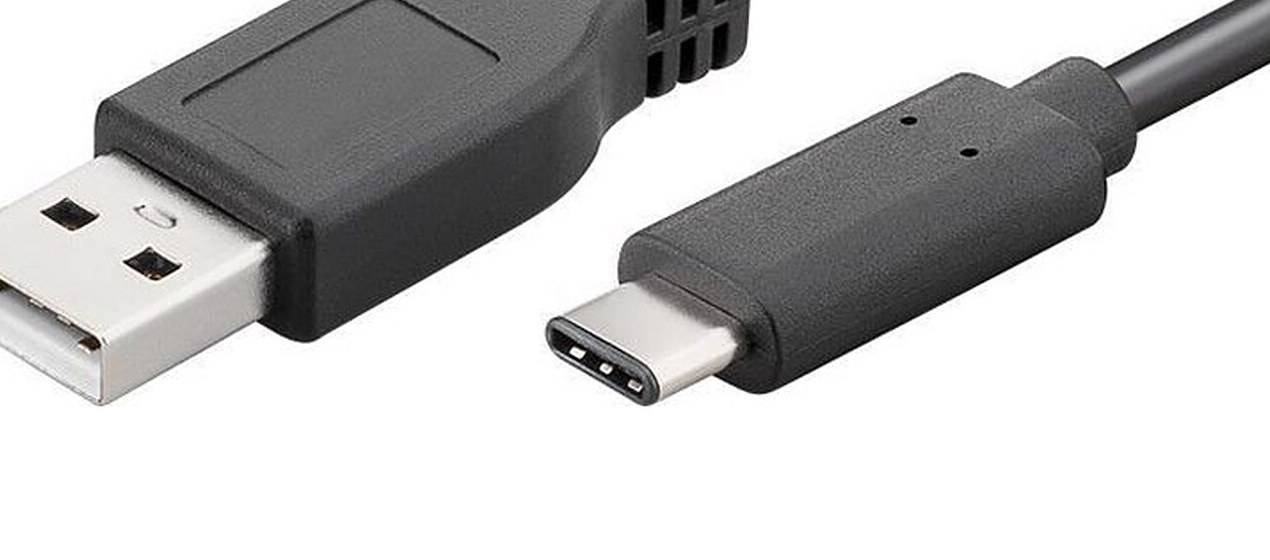
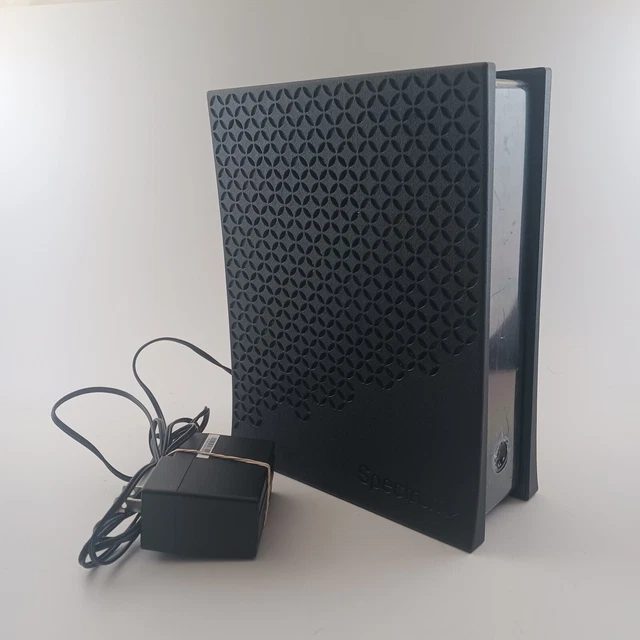
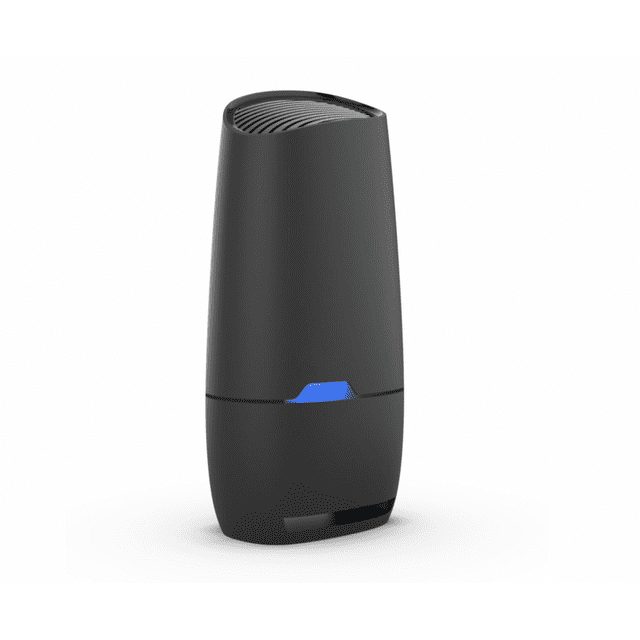

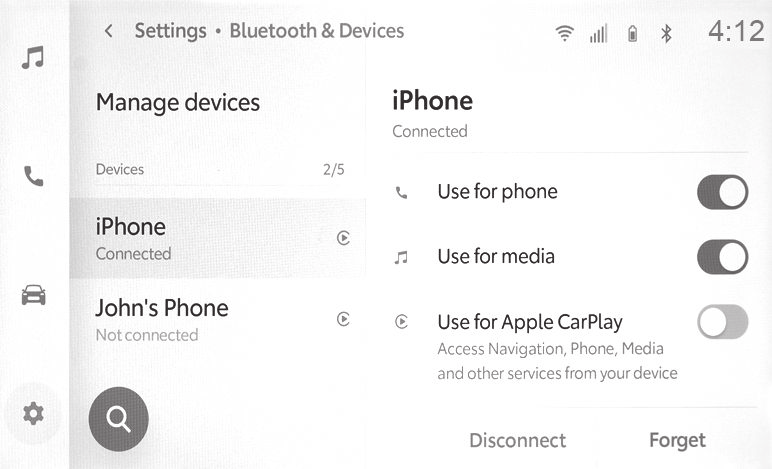
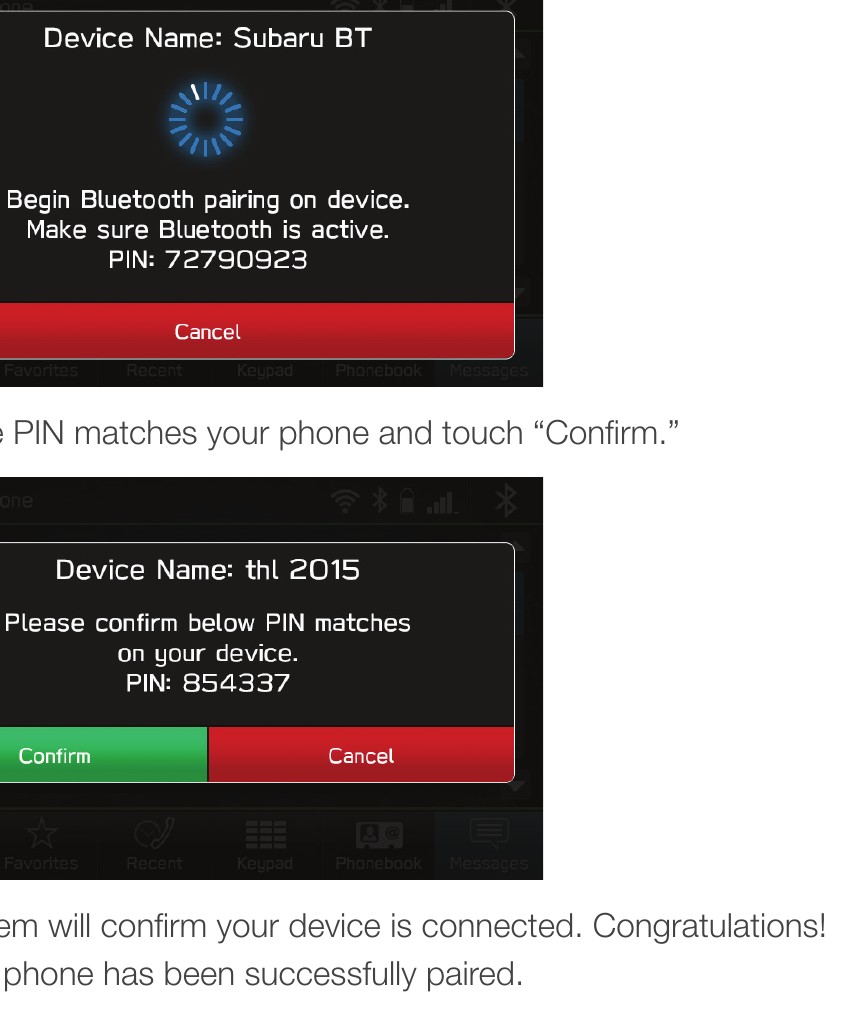
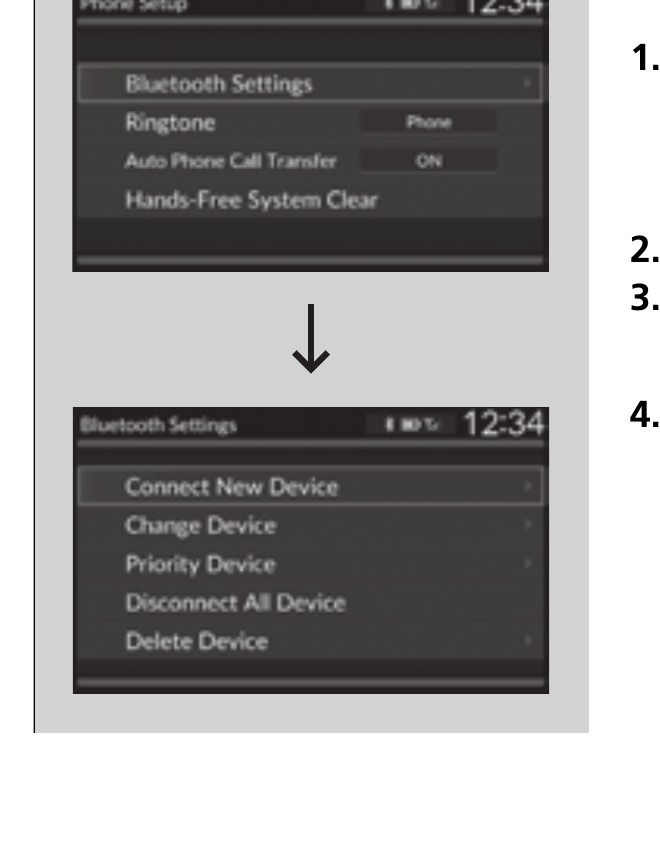
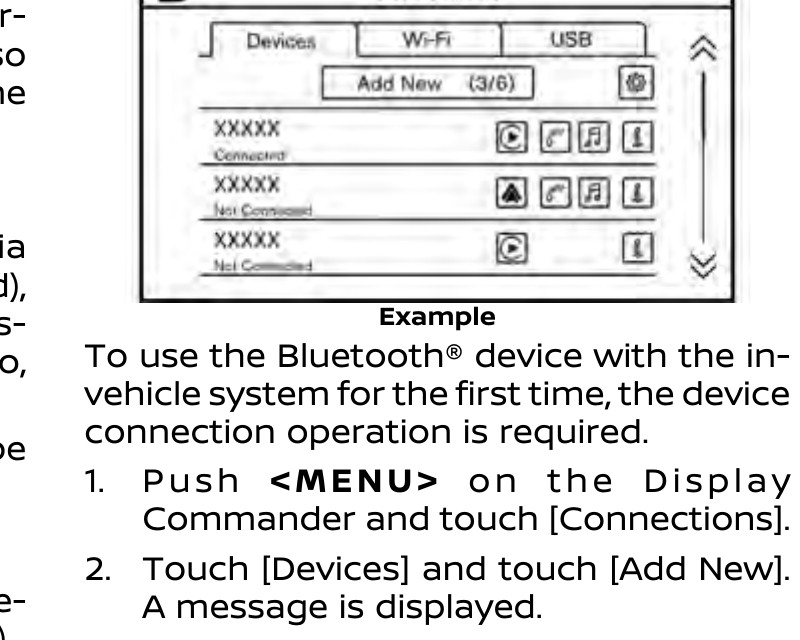
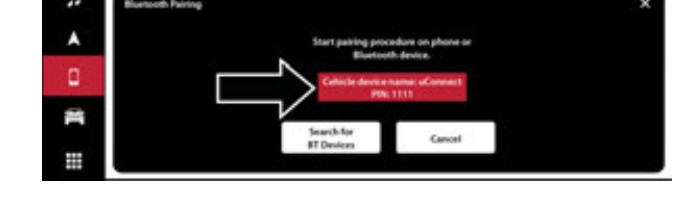
 HBO Max — HBO shows and big movies (with ads).
 Hulu — current TV shows and originals (with ads).
 Disney+ — Disney, Pixar, Marvel, and Star Wars.
 ESPN Unlimited — live sports and ESPN shows.
 Paramount+ Essential — CBS shows, news, and movies.
 Peacock Premium — NBC shows, sports, and movies (with ads).
 YouTube TV — about $83 a month. Over 100 channels, unlimited DVR, and 3 screens at once. The most like cable, and the easiest to use. They also sell cheaper smaller plans now (sports-only, entertainment, and Spanish packages) if you do not need everything.












 Passwords app to view saved passwords. To make sure the phone can fill them in, open Settings → General → AutoFill & Passwords and turn on password AutoFill.





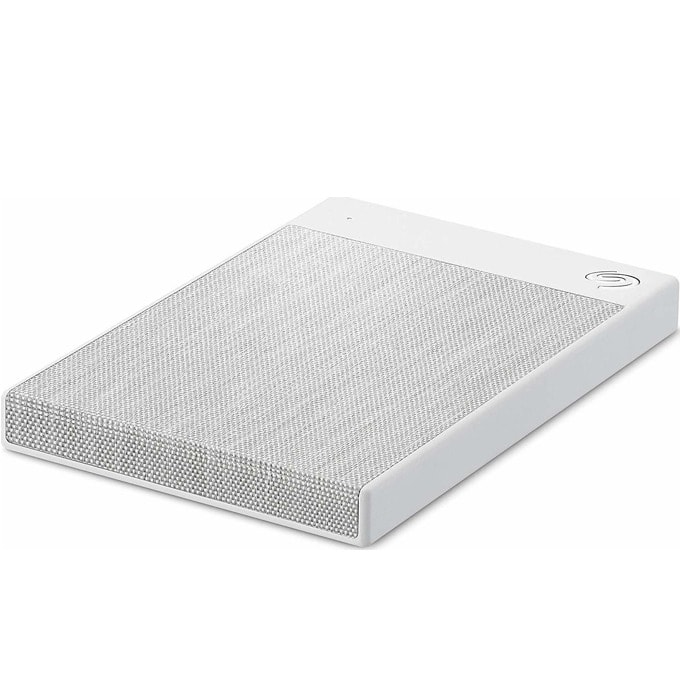
 Wells Fargo. The app shows your balances, lets you deposit checks by taking a photo, pay bills, and send money with Zelle. You can lock or unlock your cards in the app, see your FICO credit score free, and ask Fargo, the built-in helper, everyday questions. Sign in with your fingerprint or face.
 Bank of America. Photo check deposit, Zelle, and bill pay, plus Erica, the built-in assistant that finds transactions and pays bills for you. Touch ID or Face ID sign-in, budgeting and spending tools, and a free FICO score. Investing accounts (Merrill) live in the same app.
 Truist. Mobile check deposit, Zelle, bill pay, and face or fingerprint login. Lock your card with one tap, get spending insights, and real-time alerts. Truist One Checking charges no overdraft fees.
 Chase. QuickDeposit puts checks in your account from a photo, plus Zelle, bill pay, and fingerprint sign-in. The app shows monthly spending insights and budgeting tools to help you save.





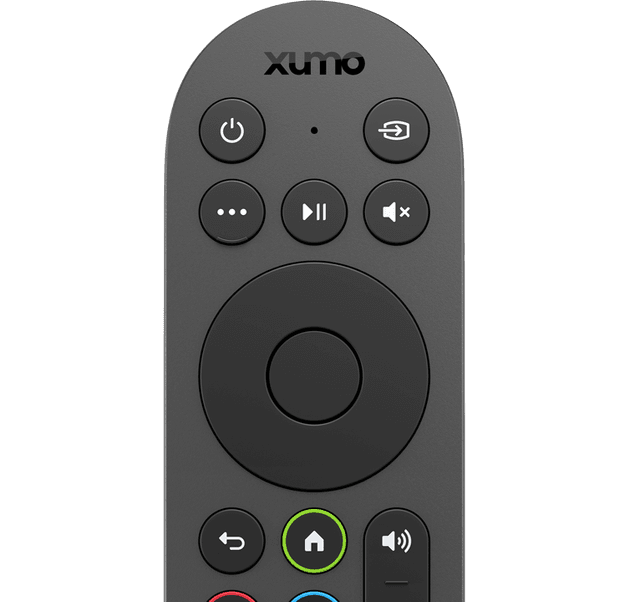








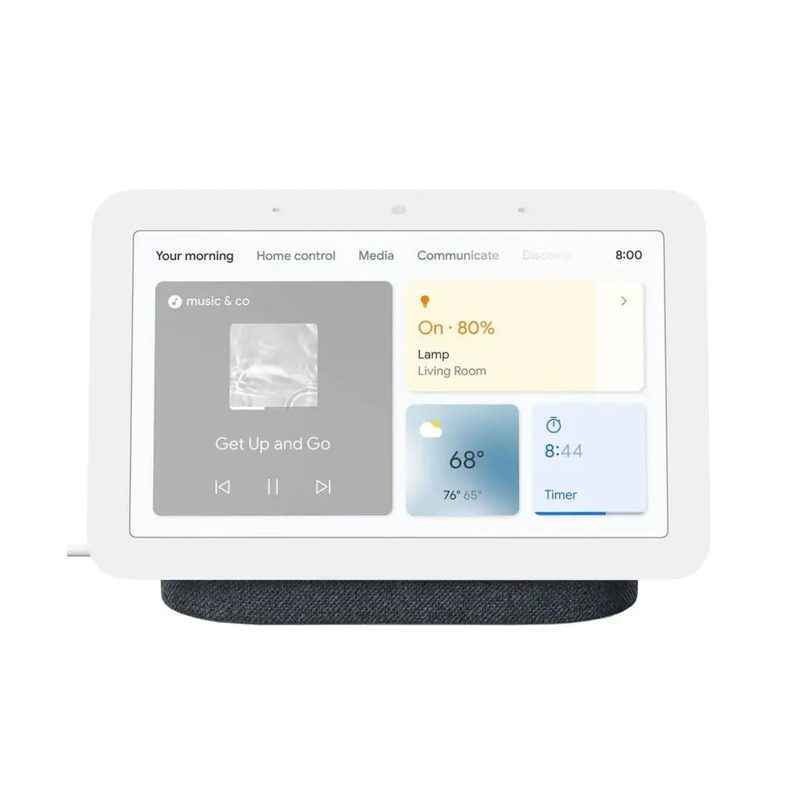





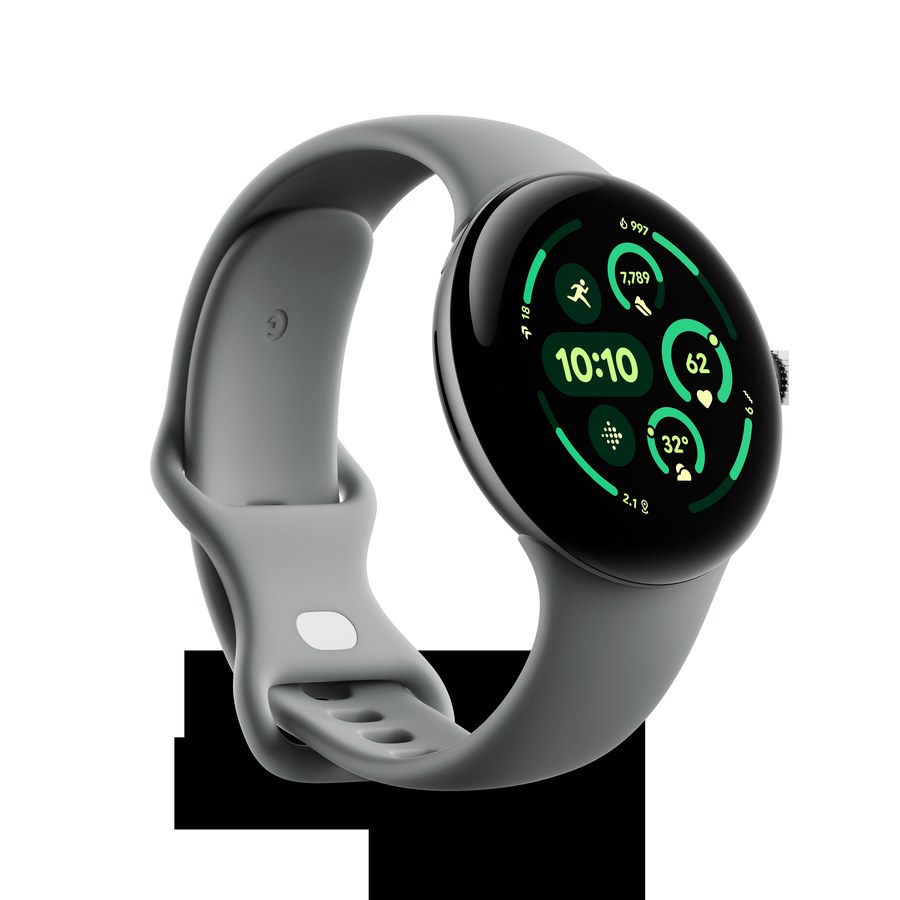
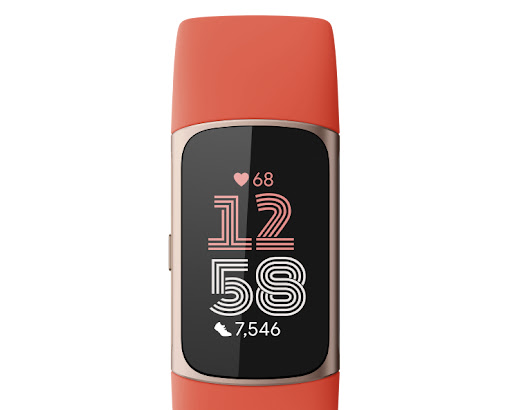






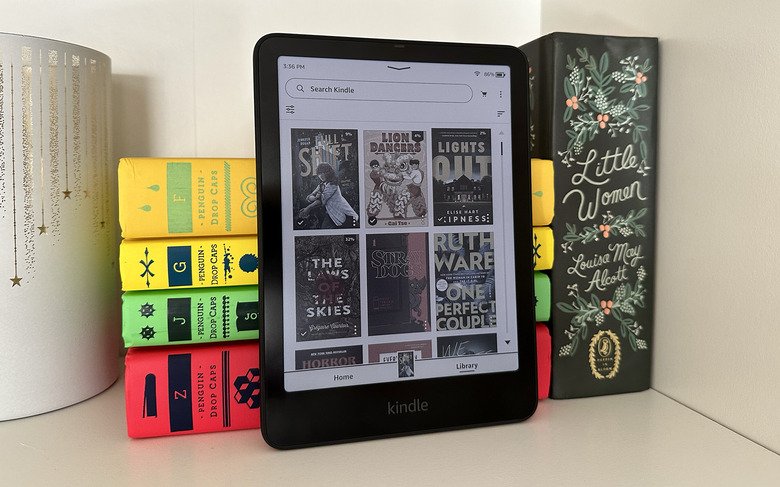
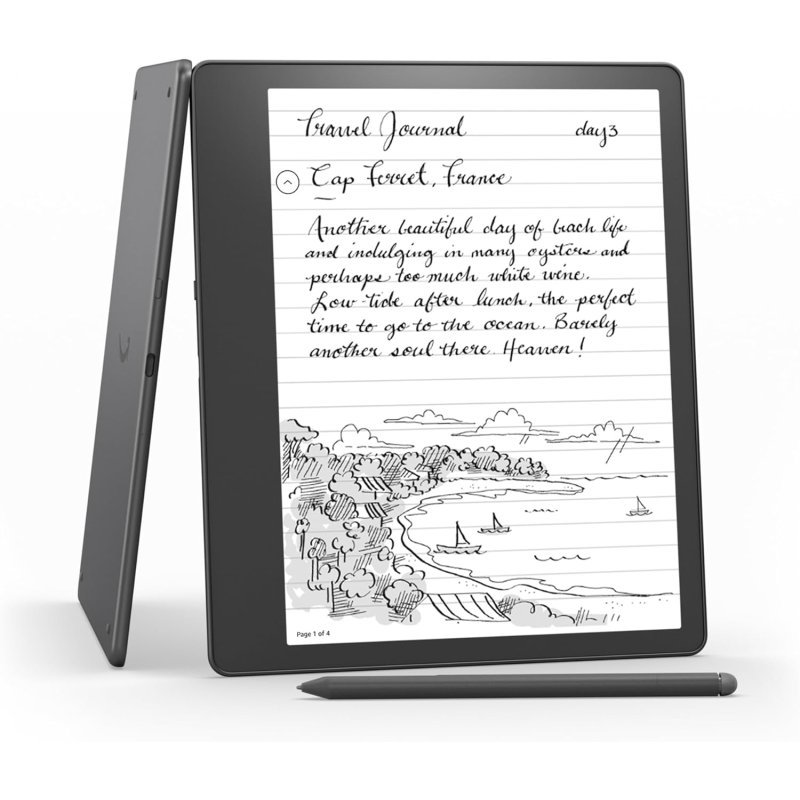
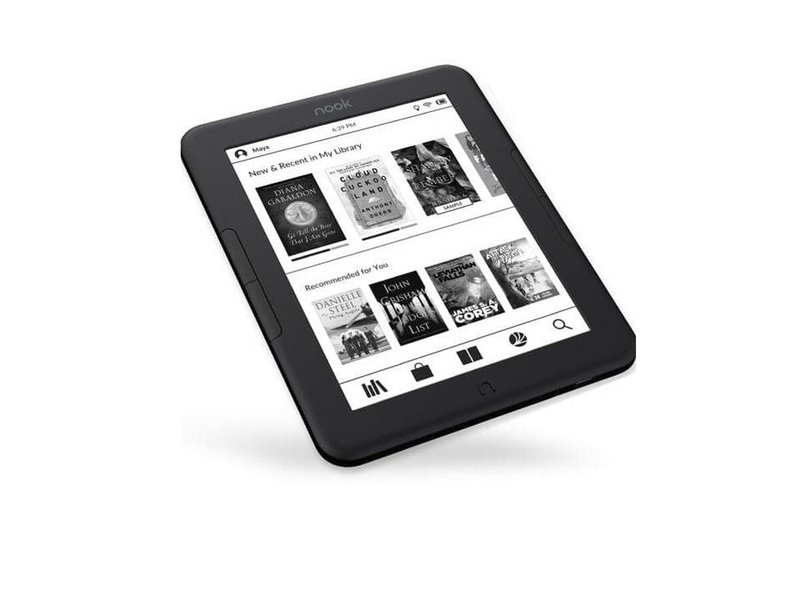
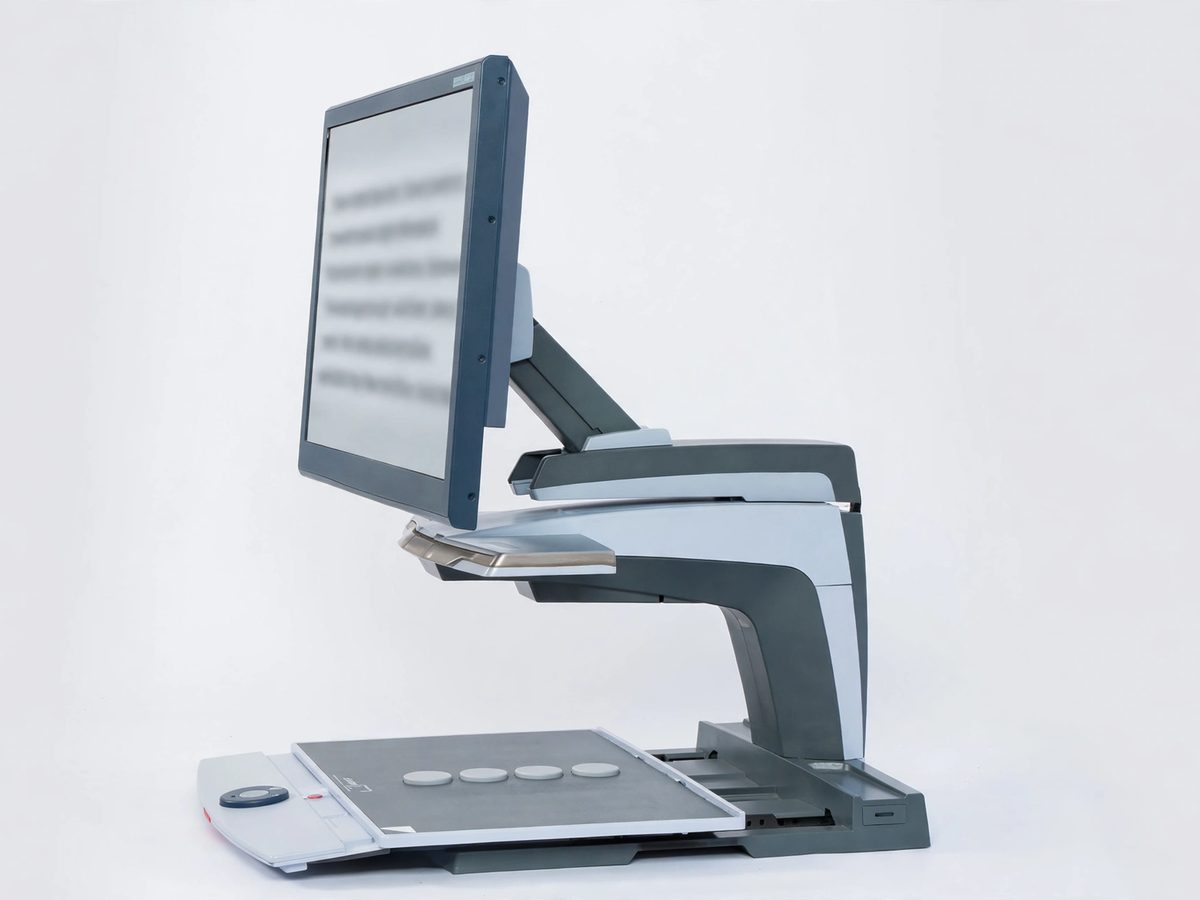
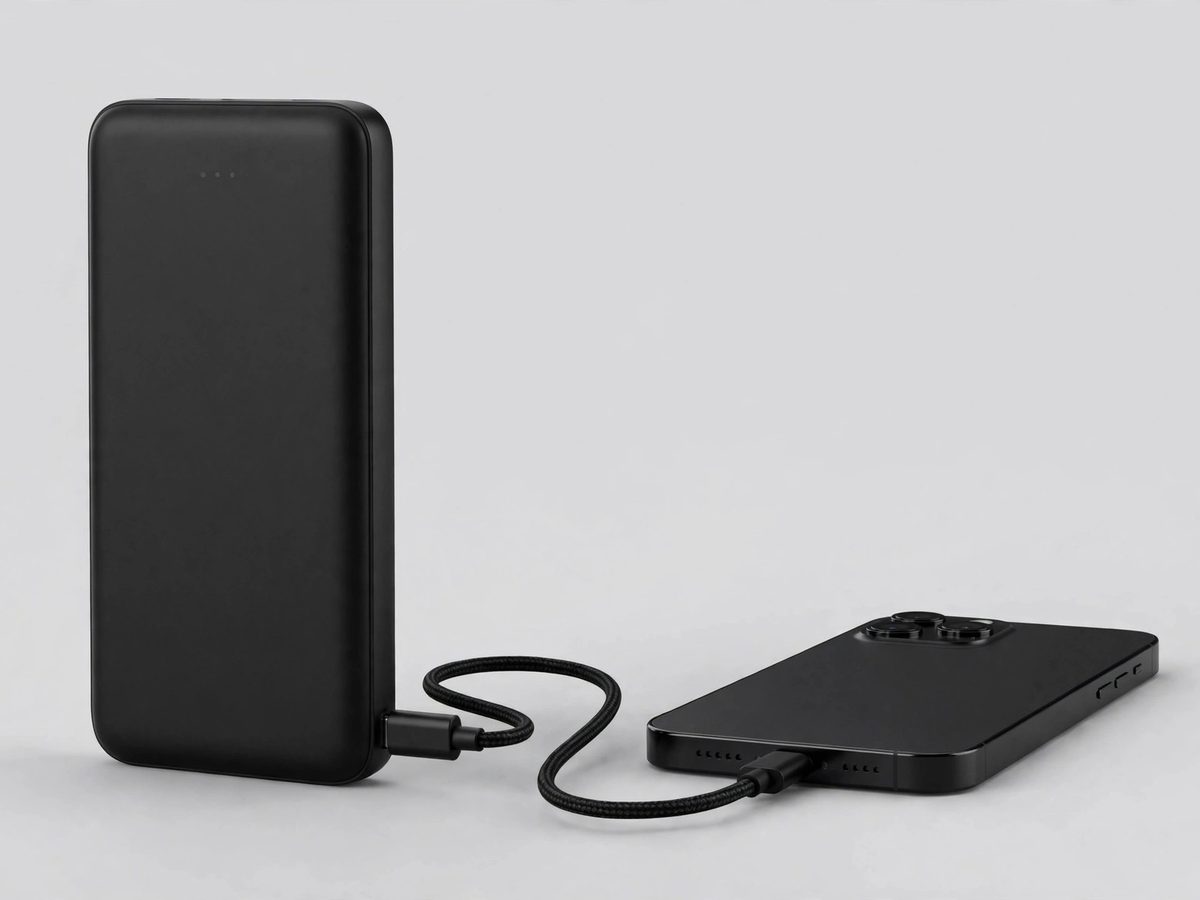
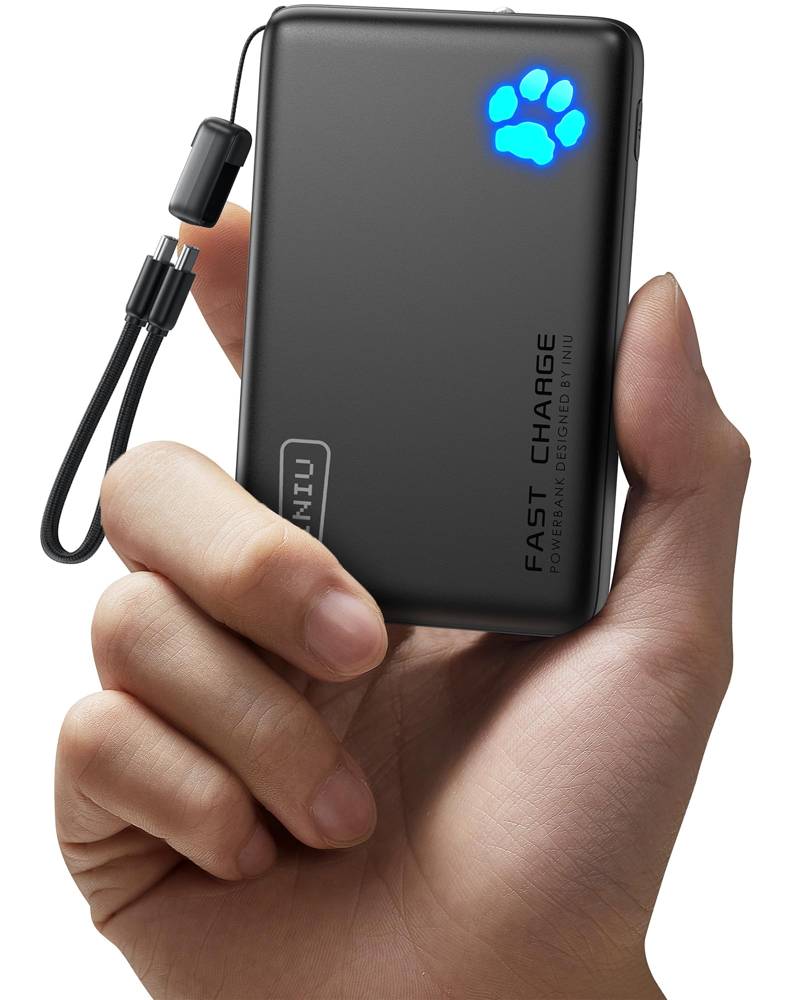






Social media: staying connected
Social media lets you see photos, videos, and updates from family and friends. Each app works a little differently. Pick the ones your family uses — you do not need all of them. Every app below is free to join.
The most popular social network for staying in touch with family and friends. See their photos and updates, share your own, join groups about your interests, and buy and sell safely on Marketplace.
To set up: Install the Facebook app from your app store, tap Create New Account, and follow the steps with your name, birthday, and phone number or email.
Facebook for Seniors User Guide — $2.99 covers everything in depth: Marketplace safety, privacy settings, friends, groups, and stopping scams.
Instagram is all about photos and short videos. Follow family, friends, and topics you enjoy — cooking, gardening, travel, anything. Double-tap a photo to like it.
To set up: Install the Instagram app, tap Sign Up, and create your account with your email or phone number. Pick a username, add a profile photo, and start following people.
Instagram Setup Guide — $2.99 walks you through installing the app and creating your account step by step. Instagram for Seniors: The Thorough Edition — $2.99 covers everything else in depth: settings, followers, privacy, stories, and messages.
Watch free videos on almost any topic — how-to guides, music, news, hobbies, and more. You can watch without an account, but signing in lets you subscribe to channels and save favorites.
To set up: Install the YouTube app and sign in with your Google account. Tap Subscribe on any channel you enjoy to see their new videos.
YouTube User Guide — $2.99 covers subscriptions, playlists, settings, and finding what you love.
Short, fun videos — usually under a minute. Swipe up for the next one. Many grandparents enjoy watching cooking tips, funny animals, and family moments here.
To set up: Install the TikTok app, tap Sign Up, and create your account. You can watch right away; following accounts tailors what you see.
TikTok User Guide — coming soon. It will cover settings, privacy, following and unfollowing, and managing what appears in your feed.
A visual idea board — save recipes, decorating ideas, gardening tips, and crafts to boards you create. Think of it as a digital scrapbook of things you want to try.
To set up: Install the Pinterest app, tap Sign Up with your email, and pick a few interests. Tap Save on any idea to pin it to a board.
Pinterest User Guide — coming soon. It will cover boards, settings, privacy, and organizing your saved ideas.
The professional network — for work connections, job searching, and industry news. Less about family photos, more about careers and business.
To set up: Install the LinkedIn app or visit linkedin.com, tap Join Now, and build your profile with your work history and skills.
LinkedIn User Guide — coming soon. It will cover profiles, connections, privacy settings, and job searching.
Reddit is a collection of communities (called subreddits) about every topic you can imagine — gardening, cooking, health, hobbies, news. People post questions, share advice, and discuss. You can read everything for free; joining lets you ask your own questions.
To set up: Visit reddit.com or install the Reddit app, tap Sign Up, and pick a username. Then search for topics you enjoy — try r/gardening, r/cooking, or r/AskOldPeople for friendly advice.
Tip: Every community has its own rules at the top of the page. Read them before posting. Be kind — moderators remove rude comments.
Staying safe on social media
A few simple rules keep you safe on every social app: never share your password, be careful about friend requests from strangers, and remember that scammers create fake profiles. Our Staying Safe section covers this in detail.